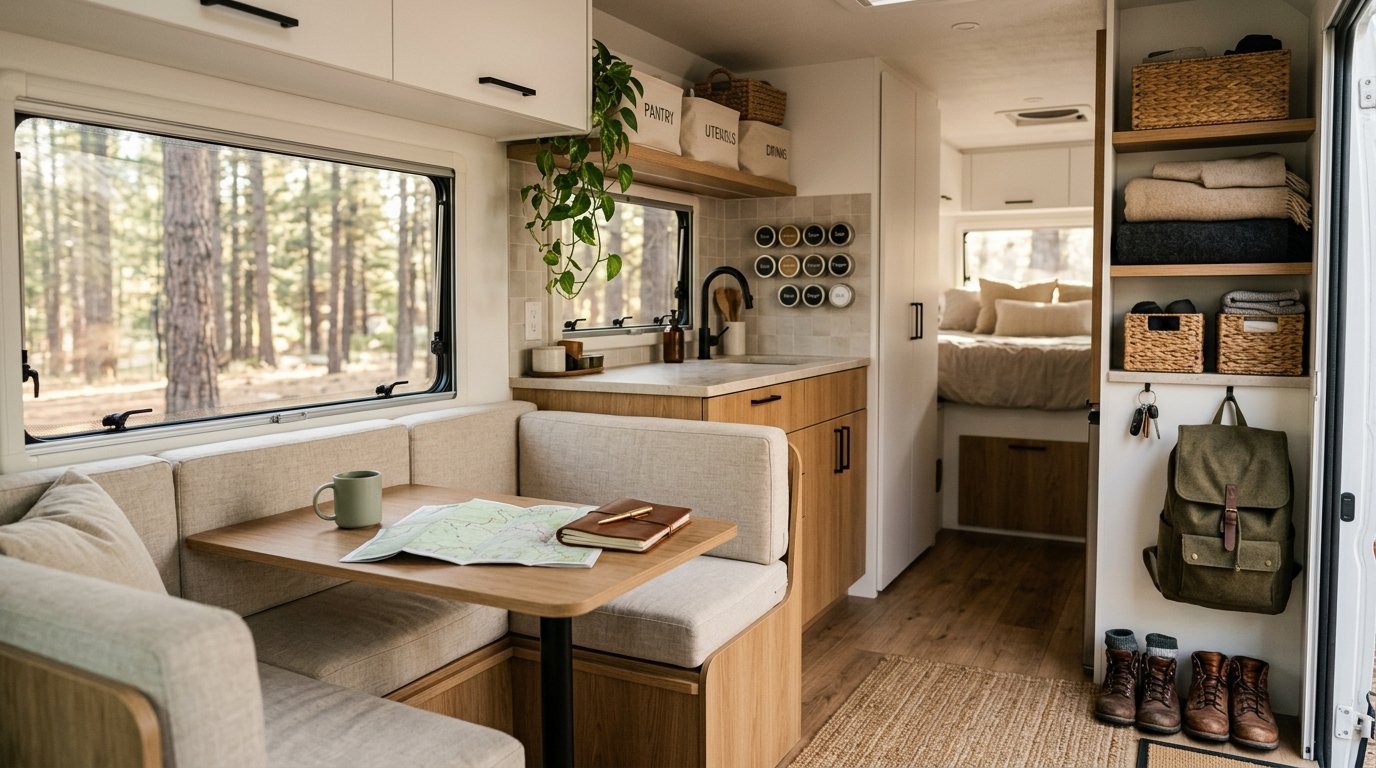
15 Camper Organization Ideas to Maximize Every Inch
A camper gives you freedom and approximately 200 square feet to contain your entire life which sounds romantic until you’re digging through a pile of sleeping bags to find your coffee maker at 6 AM. Disorganized campers don’t just feel frustrating; they actively make trips worse. A 2019 study by the RV Industry Association found that campers who reported storage and organization problems were significantly less likely to take repeat trips in the same season. These 15 ideas solve the specific storage problems every camper faces — kitchen chaos, wet gear, dead counter space, and the eternal mystery of where the charging cables went.
1. Install a Magnetic Spice Strip on the Kitchen Wall
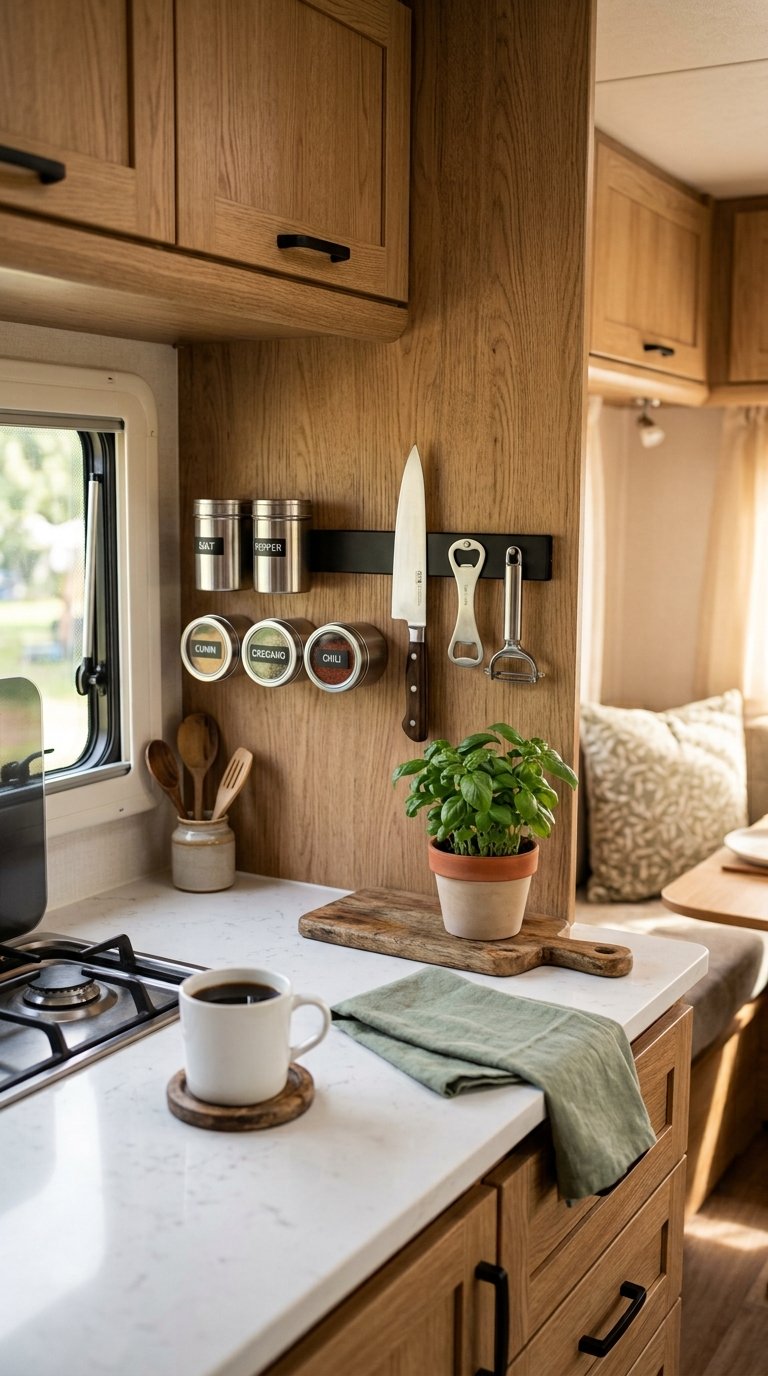
A magnetic spice strip mounted on the camper’s kitchen wall holds small metal tins of spices, a magnetic knife, and a bottle opener without using a single inch of counter or cabinet space. IKEA’s GRUNDTAL magnetic strip costs $12 and mounts with two screws into any wall surface in a camper, use self-tapping screws into the wall studs for a hold that survives highway vibration. The magnetic hold is strong enough to keep tins in place at highway speeds if you position the strip horizontally and choose tins with wide bases rather than tall narrow jars that develop leverage against the magnet.
Decant your spices into identical small magnetic tins before your first trip rather than bringing the original bottles. Standard spice bottles are bulky, fall over constantly, and take up three times the space of flat magnetic tins a swap that costs $8 for a 20-tin set and saves a full cabinet shelf.
2. Use an Over-the-Door Shoe Organizer for Supplies
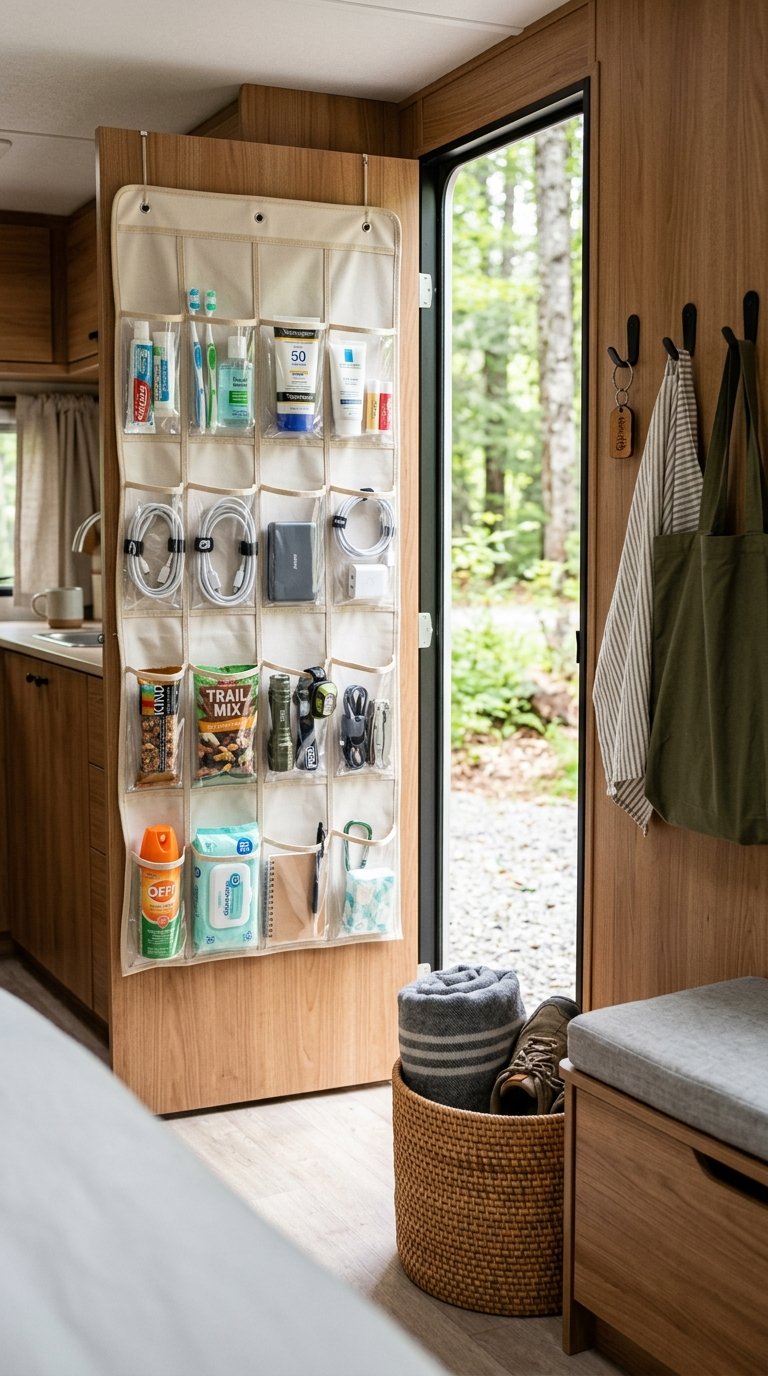
An over-the-door clear pocket organizer hung on the back of the camper’s bathroom door or entry door holds toiletries, cleaning supplies, snacks, charging cables, sunscreen, and small tools in individual visible pockets eliminating the pile of loose objects that accumulates on every flat surface within 24 hours of arrival. These organizers cost $8 to $14 at Target or Walmart and hang without hardware on any standard door. The clear pockets mean you see every item without opening anything, which saves the specific frustration of unpacking three bags to find the item at the bottom of the last one.
Use the lower pockets for heavy items like sunscreen bottles and the upper pockets for lightweight items like lip balm and charging cables. Reversing this distribution puts weight high on the door, which causes the organizer to swing forward and pull off the door hook during driving a physics problem that solves itself once you think about it once.
3. Mount a Folding Dish Rack Above the Sink
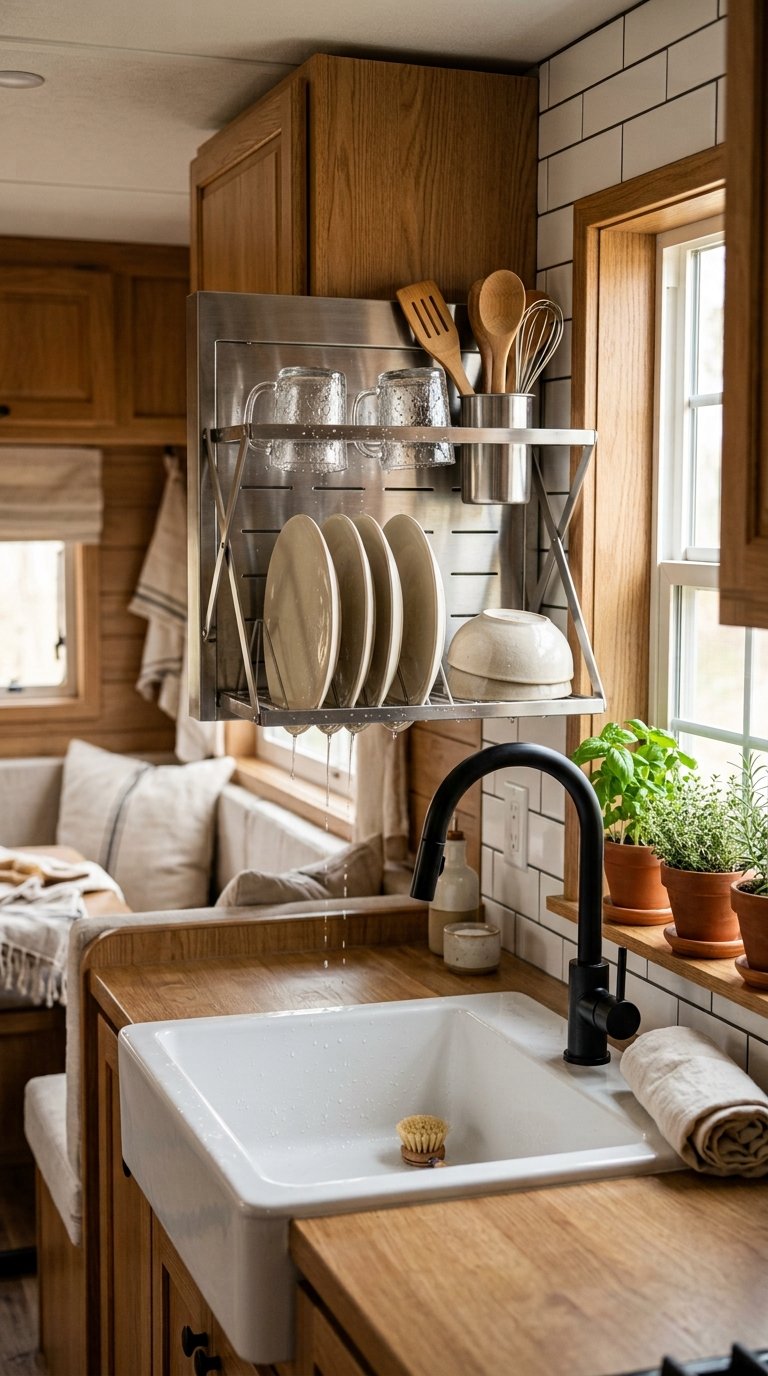
A wall-mounted folding dish rack that folds flat against the wall when not in use gives you a drying surface that appears only when you need it and disappears when you don’t solving the camper kitchen’s core problem of surfaces that serve multiple purposes at different times. Stainless steel folding wall racks mount with four screws and hold up to 15 pounds when open, cost $18 to $28 on Amazon, and fold to under two inches of wall depth when closed. In a camper kitchen where the counter might span three feet total, reclaiming that counter space for food prep the moment dishes are drying makes the workspace feel significantly larger.
Mount it directly above the sink so dishes drip into the sink basin rather than onto the counter below. This eliminates the need for a drip tray entirely and keeps the counter dry two problems solved by one installation decision.
4. Use Tension Rods to Create Cabinet Shelf Dividers
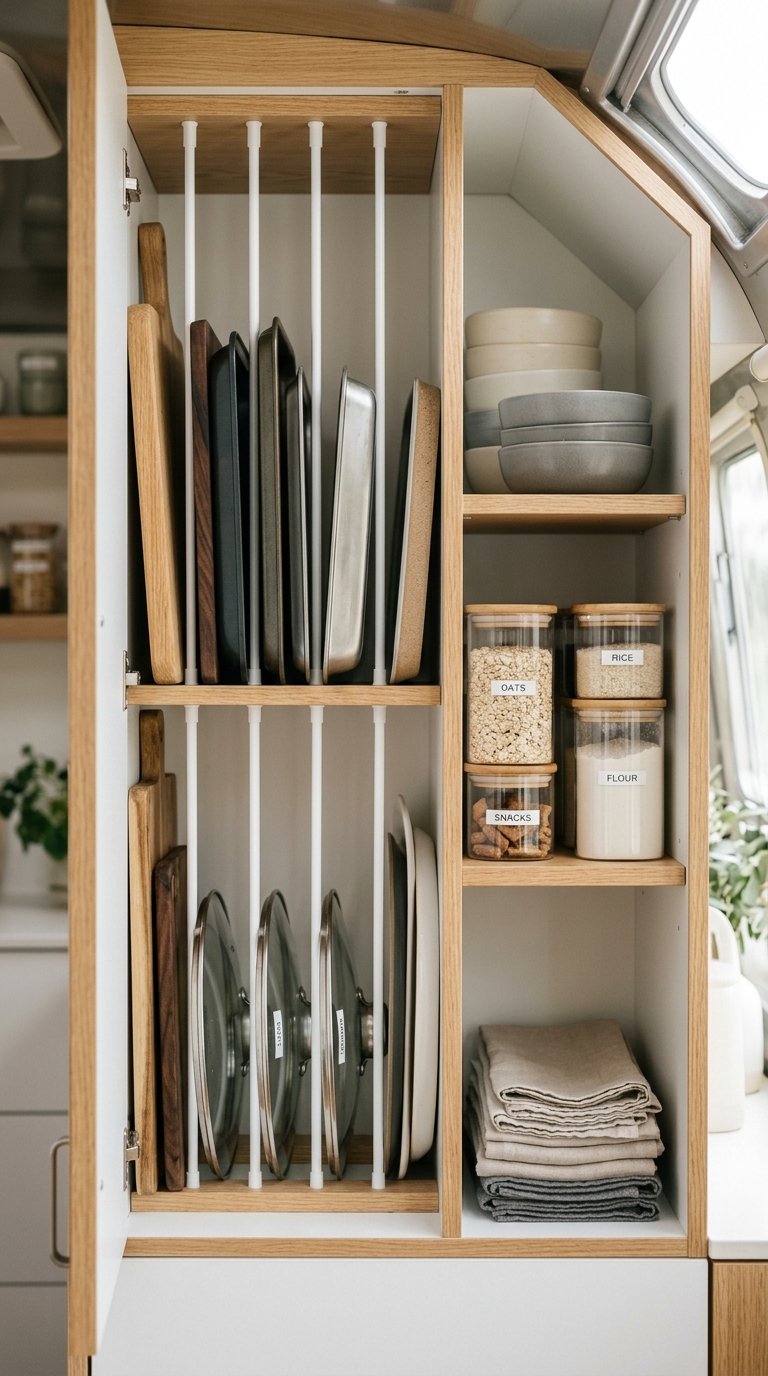
Tension rods installed vertically inside cabinets create divided sections that hold cutting boards, baking sheets, pot lids, and flat items upright and separated preventing the avalanche of sliding items that happens every time you open a cabinet door on a bumpy road. A pack of six adjustable tension rods costs $6 at any dollar store or home goods retailer, installs without tools in under two minutes per rod, and removes without any wall damage when you want to reconfigure. This works in any cabinet regardless of existing shelf height because the rods extend vertically between the shelf floor and the shelf above.
Space the rods two to three inches apart for cutting boards and pot lids, four to six inches apart for larger items. Wider spacing defeats the dividing function and lets items fall sideways between rods the exact problem you installed them to prevent.
5. Add a Bed Skirt With Storage Pockets
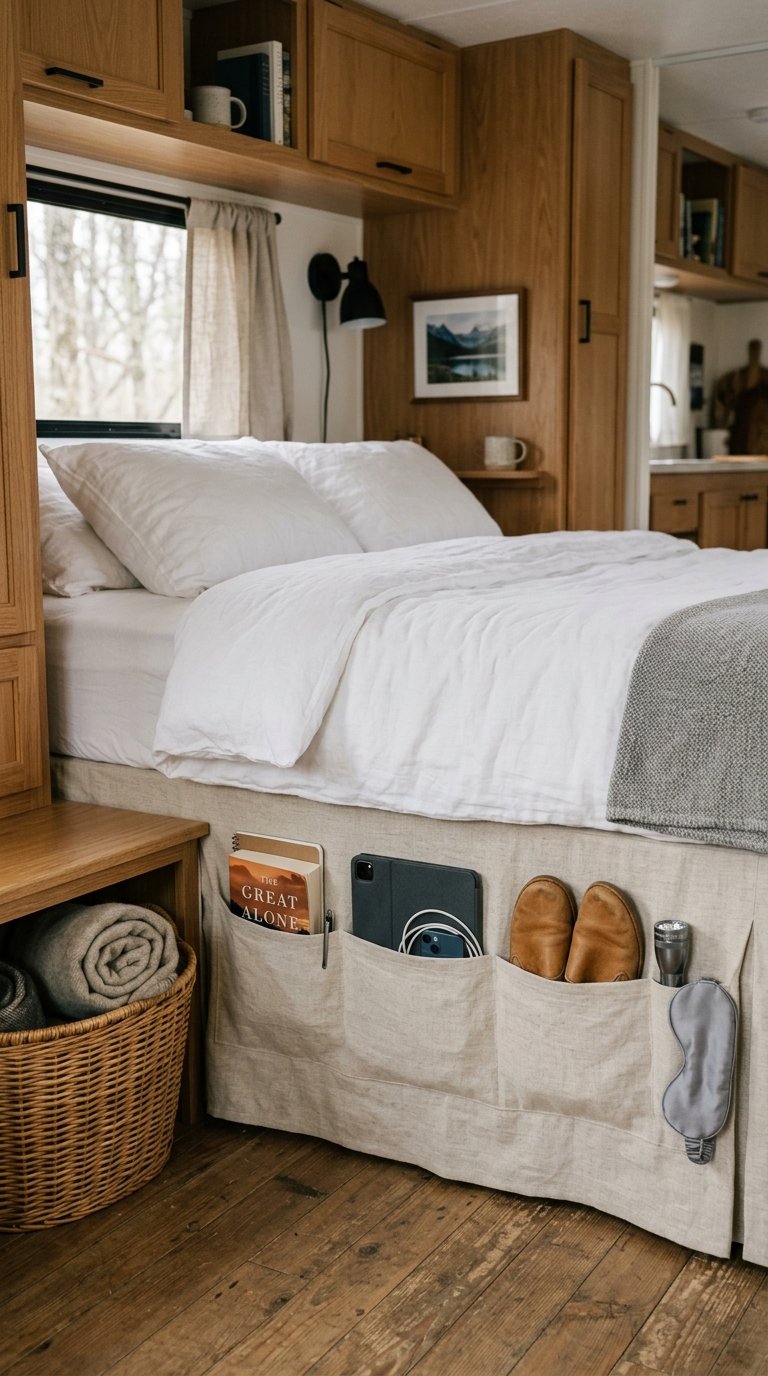
A bed skirt with built-in storage pockets on the outside panel adds hidden storage along the entire bed perimeter without consuming any floor space, overhead space, or cabinet space. These run $25 to $40 on Amazon for queen and full sizes and hold shoes, folded clothes, books, and flat items in individual pockets accessible from the bed’s side. In a camper where under-bed storage is either inaccessible or already packed with gear, side-panel pocket storage adds accessible storage at the exact height and location where you need it most bedside, at arm’s reach.
Fill the pockets with items you access nightly: phone charger, book, lip balm, eye mask, earplugs. Treating the pockets as a bedside table replacement rather than a general storage dump keeps them functional rather than becoming a second pile of miscellaneous objects.
6. Install a Pegboard in the Kitchen or Garage Area
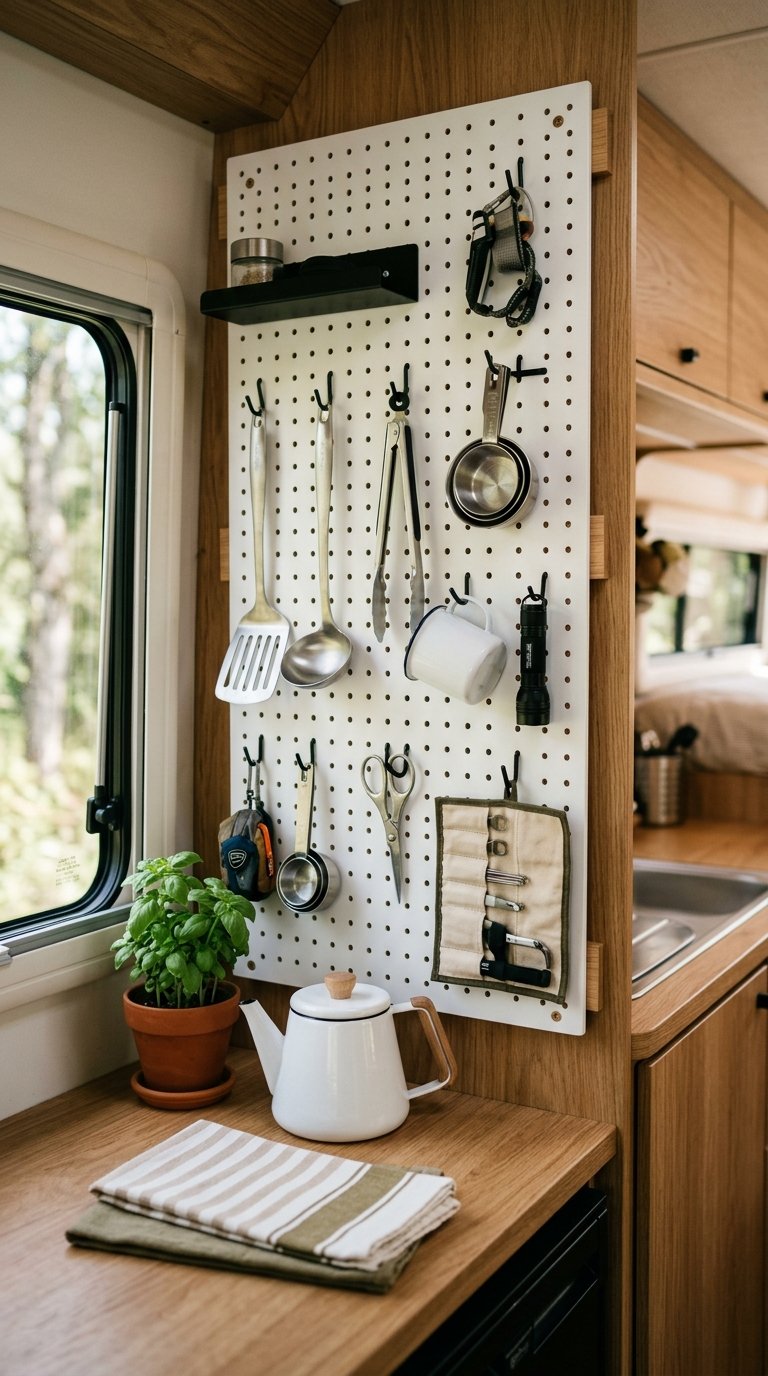
A pegboard panel mounted in the camper’s kitchen or garage bay holds tools, utensils, pots, and gear on adjustable hooks in a fully visible, fully accessible wall system that beats any cabinet for items you reach for daily. A 24×48 inch pegboard sheet costs $12 to $18 at hardware stores, and a set of pegboard hooks in assorted sizes adds $10 more. Mount it with 1-inch spacer standoffs between the board and the wall so the hooks have clearance to insert without standoffs the hooks have no depth to engage and the whole system fails immediately. FYI, this is the single most common pegboard installation mistake and it costs you the entire project if you skip the standoffs.
Paint the pegboard white or a color that matches your camper interior before mounting raw pegboard looks like a workshop wall, while a painted board with organized hooks reads as a designed storage system. That distinction matters in a small space where everything you see affects how the space feels.
7. Use Stackable Bins With Labels in Every Cabinet
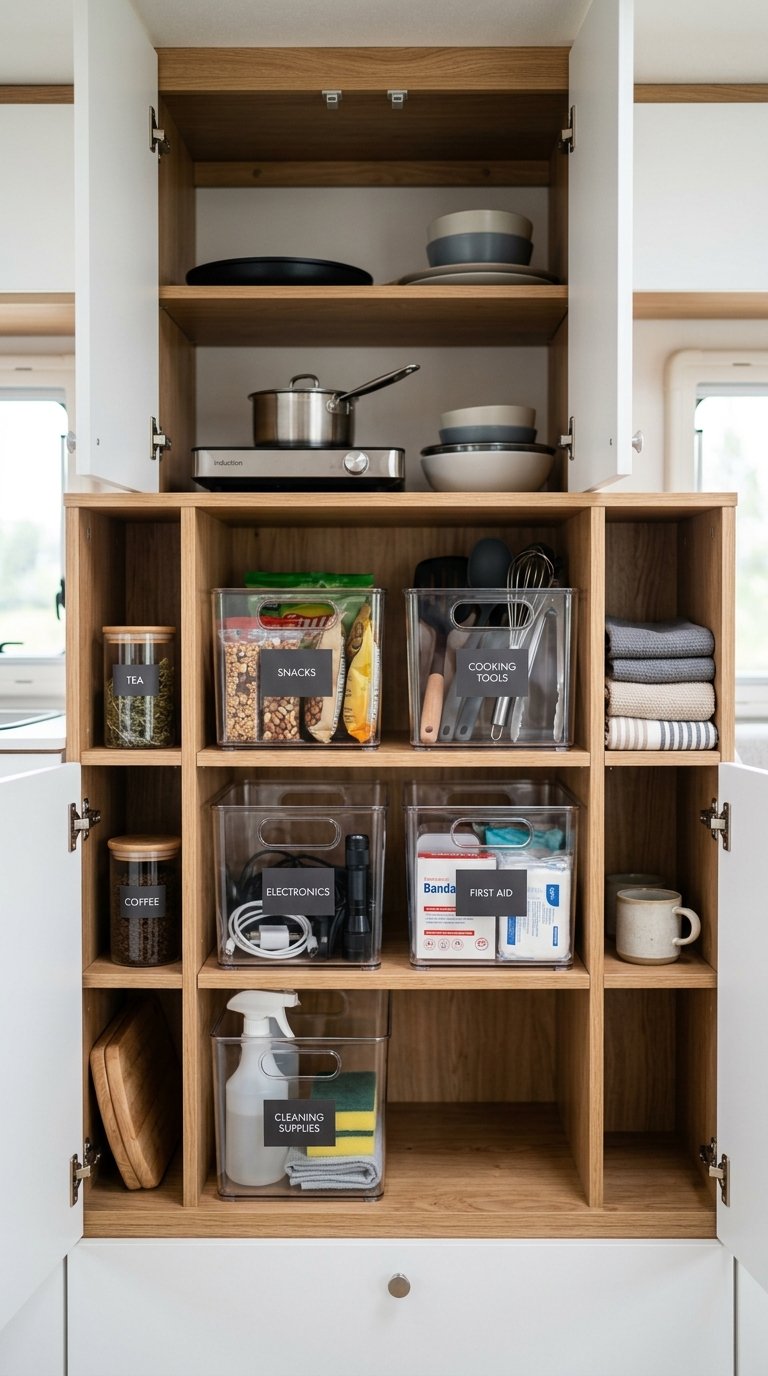
Stackable clear bins with printed labels inside every cabinet create a system where every item has a designated container and every container has a designated location eliminating the loose-item chaos that makes camper cabinets feel bottomless and disorganized within 48 hours of any trip. The Container Store and Amazon both stock sets of clear stackable bins in camper-appropriate sizes for $15 to $30 per set. Label the front face of each bin with a label maker or printed labels in a legible font rather than handwriting printed labels read faster in low light and look more intentional, which matters in a small space where visual order directly affects how relaxed you feel.
Assign one bin per category: snacks, cooking tools, first aid, electronics, cleaning. When a category’s bin is full, you stop adding to it the bin itself becomes the space limit that prevents accumulation, which is the discipline problem most camper organization systems fail to build in.
8. Hang a Collapsible Hanging Organizer in the Closet
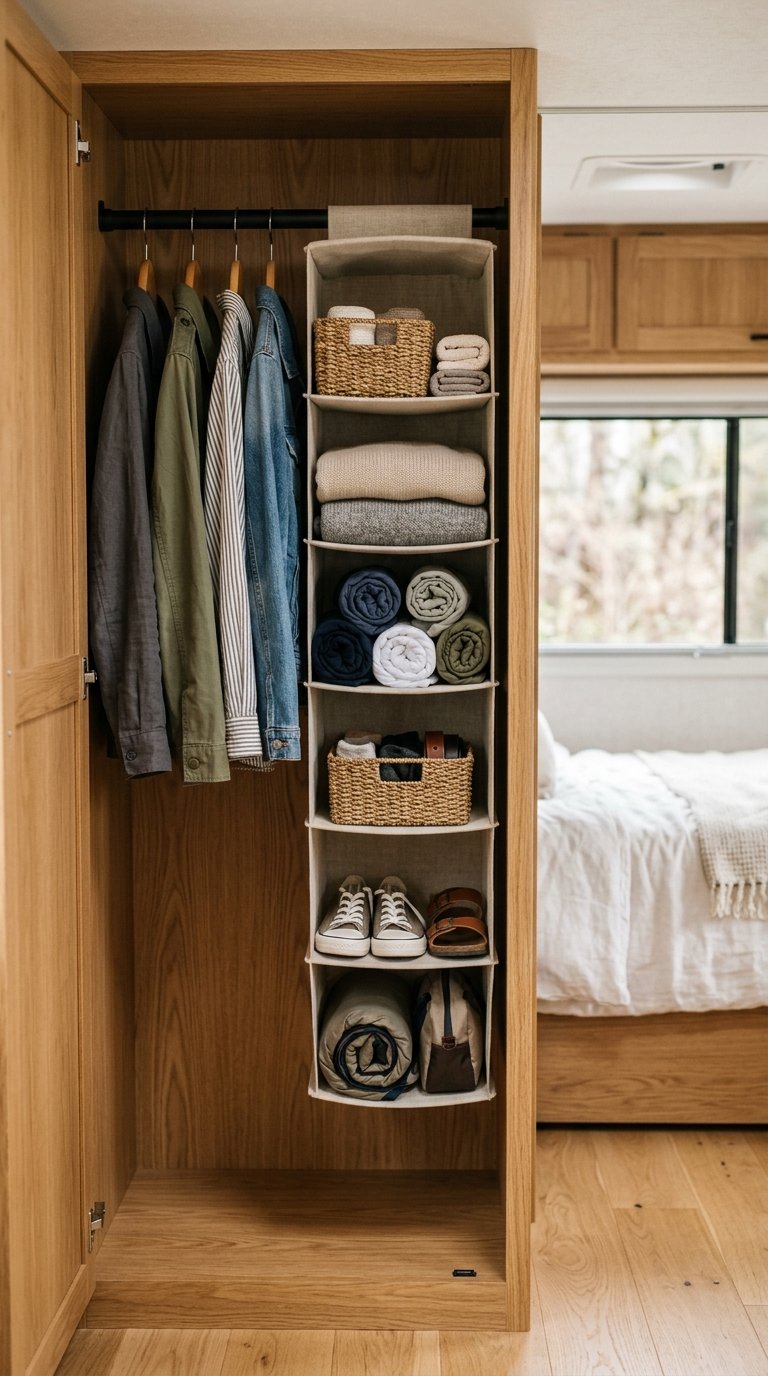
A collapsible hanging fabric organizer with six to eight shelves takes a standard hanging rod and turns the vertical space below it into a stacked shelving system for folded clothes, shoes, and accessories maximizing the one dimension most camper closets completely waste. These organizers run $10 to $18 on Amazon, hang on any standard closet rod without hardware, and fold completely flat for storage when the camper is not in use. In a camper closet that might have 36 inches of hanging height below a rod, a six-shelf organizer at six inches per shelf gives you 36 inches of usable folded storage that previously held nothing but dead air. :/
Roll clothes rather than folding them flat before placing them in the organizer shelves. Rolled clothes compress to roughly half the volume of flat-folded clothes and stay separated by outfit rather than collapsing into a mixed pile when you pull one item from the middle.
9. Mount a Paper Towel Holder Under a Cabinet
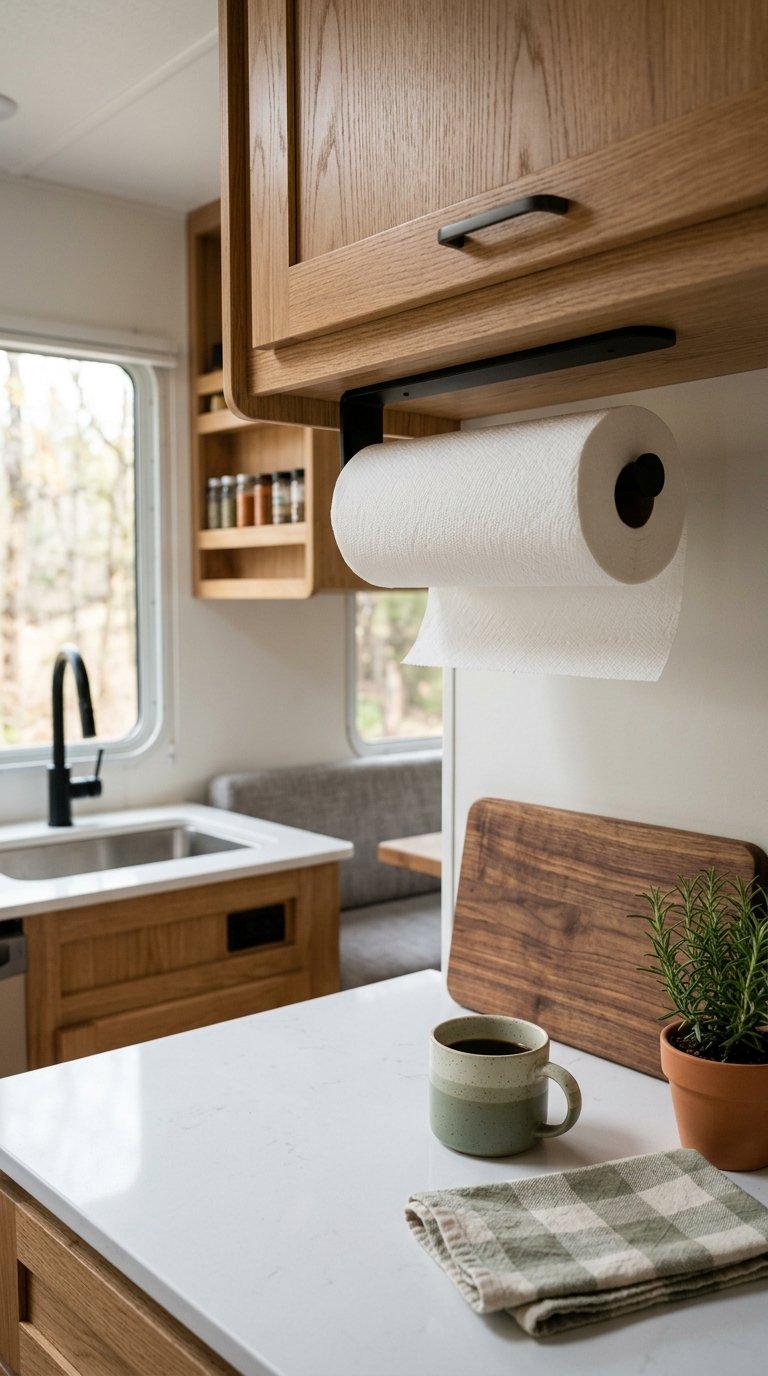
A paper towel holder mounted to the underside of an upper cabinet keeps paper towels accessible, off the counter, and out of a drawer reclaiming surface space while putting the paper towels exactly where you need them, at counter height with one-handed tear access. Under-cabinet paper towel holders cost $8 to $15 at most kitchen stores and mount with two screws into the cabinet bottom. In a camper kitchen where counter space is a genuine scarce resource, removing a paper towel roll from the counter frees up the footprint of a coffee mug — small on paper, significant when your total counter spans three feet.
Choose a holder with a spring-loaded arm rather than a simple bar. The spring arm holds the roll in place during highway travel and prevents the roll from spinning loose and unspooling itself across your kitchen floor, which speaking from experience is exactly as annoying as it sounds.
10. Create a Charging Station in One Fixed Location
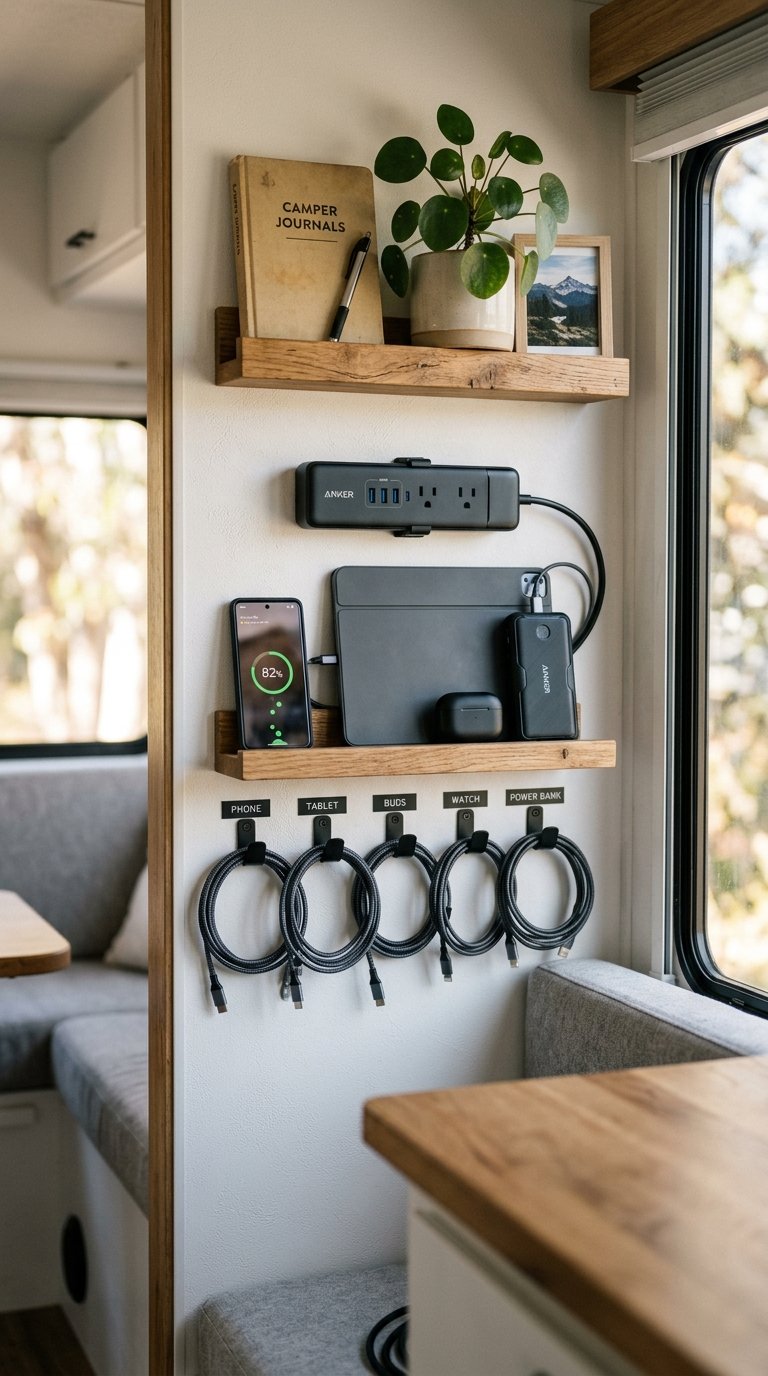
A dedicated charging station one power strip with USB ports zip-tied to a fixed location, with labeled cable hooks for every device eliminates the camper’s universal problem of charging cables living in a different location every day depending on who plugged in what where. A 6-outlet power strip with four USB ports costs $18 to $25 and provides enough ports for a full family’s devices simultaneously. Mount it with velcro command strips to a fixed wall location near the dinette or bedside area and add a small labeled hook for each device’s cable so the cables return to the same spot after every charge.
The labeled cable hook detail is what separates a charging station from a power strip with cables piled around it. Hooks cost $3 for a pack of 10, take two minutes to label, and create a system where every cable has a home which means no one spends 10 minutes looking for the right cable in the dark when their phone dies at midnight.
11. Use a Shower Caddy for Bathroom Counter Organization
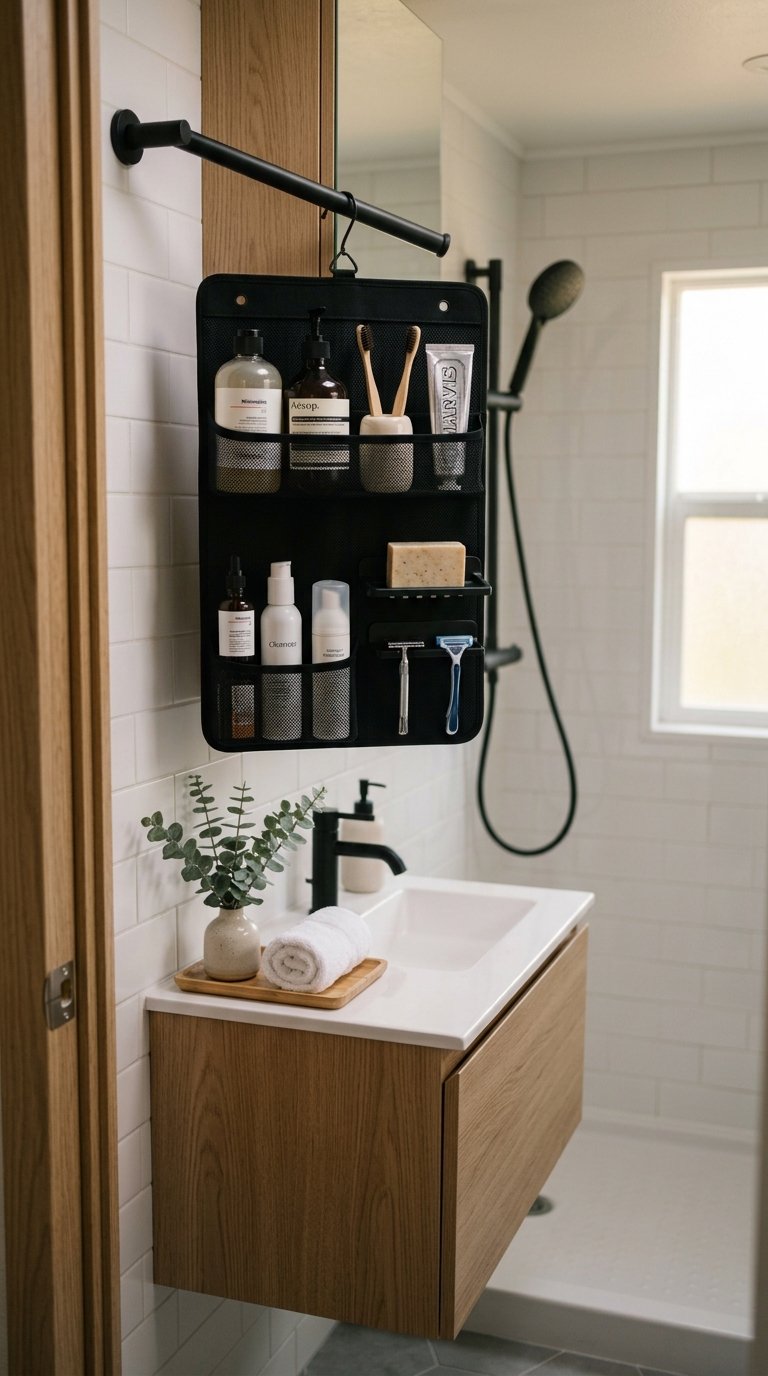
A hanging shower caddy with multiple compartments suspended from the bathroom’s towel bar holds every toiletry off the counter, off the floor, and out of the tiny bathroom cabinet leaving the counter completely clear and the cabinet available for items that don’t fit in the caddy. Rust-resistant aluminum or plastic caddies sized for camper bathrooms run $12 to $22 at Target and Walmart, and the hanging design means the caddy travels in place rather than requiring repacking between trips. Every item stays in its assigned compartment, which means your toiletry organization requires zero effort to maintain beyond putting each item back in its spot after use.
Buy a caddy with a separate section for each person if you camp with a partner or family. Shared compartments create the same daily rummaging problem you had before the caddy individual compartments end the negotiation over where things go and who moved whose toothpaste.
12. Install Bungee Cord Nets in the Garage Bay
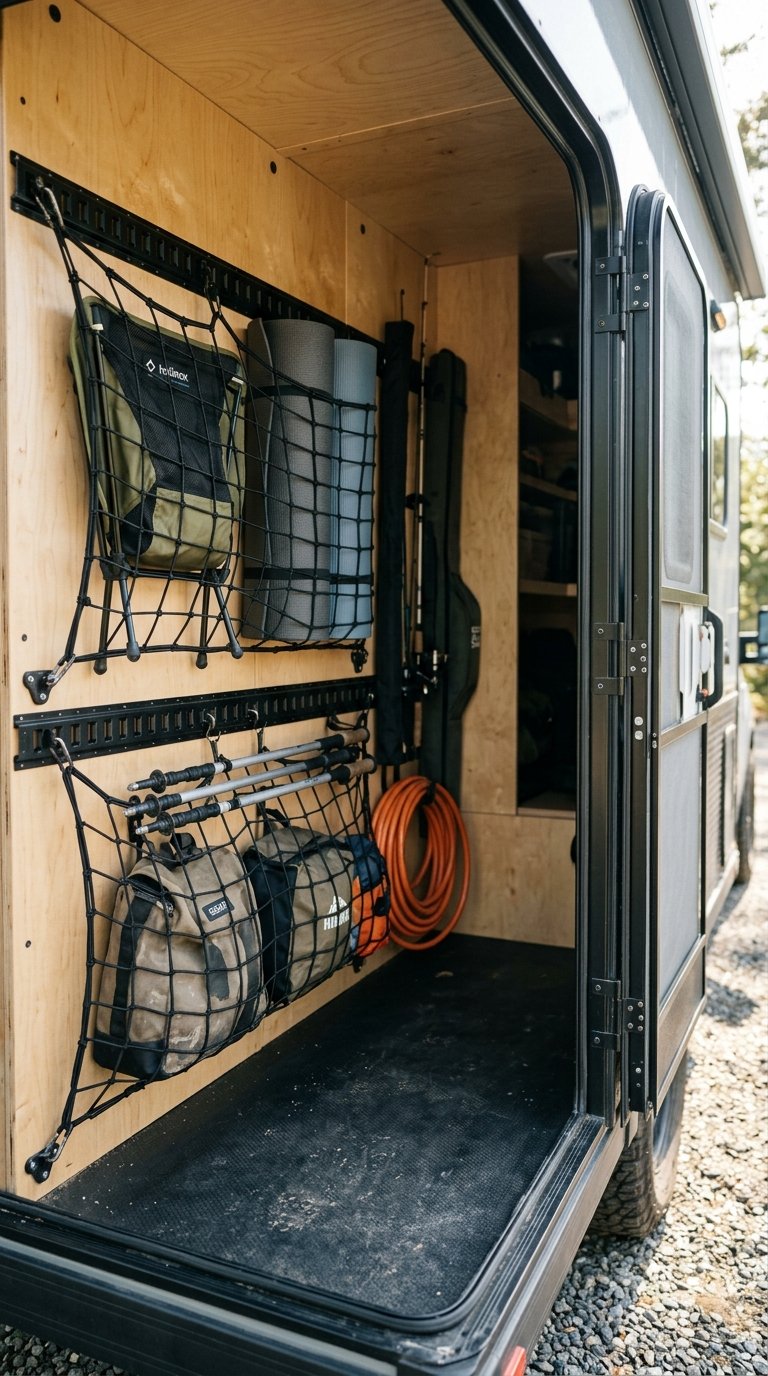
Bungee cord cargo nets stretched across the walls of a camper’s exterior garage bay hold irregularly shaped outdoor gear folded chairs, fishing rods, yoga mats, boot bags against the wall and off the floor, leaving the center of the bay accessible for loading and unloading. Cargo nets sized for camper garage bays run $15 to $25 on Amazon with mounting hardware included, and they attach to four anchor points on the wall using screws or existing tie-down rings. Items that don’t fit in bins or bags but take up enormous floor space when left loose a folded camp chair, a rolled sleeping pad stay secured against the wall during transit and release immediately when you pull the net aside at the campsite.
Use one net per category of gear rather than loading everything behind a single net. Multiple nets let you access hiking gear without moving fishing gear to get to it the layering problem that makes a single-net garage bay nearly as frustrating as no net at all.
13. Add a Folding Step Stool That Doubles as a Seat
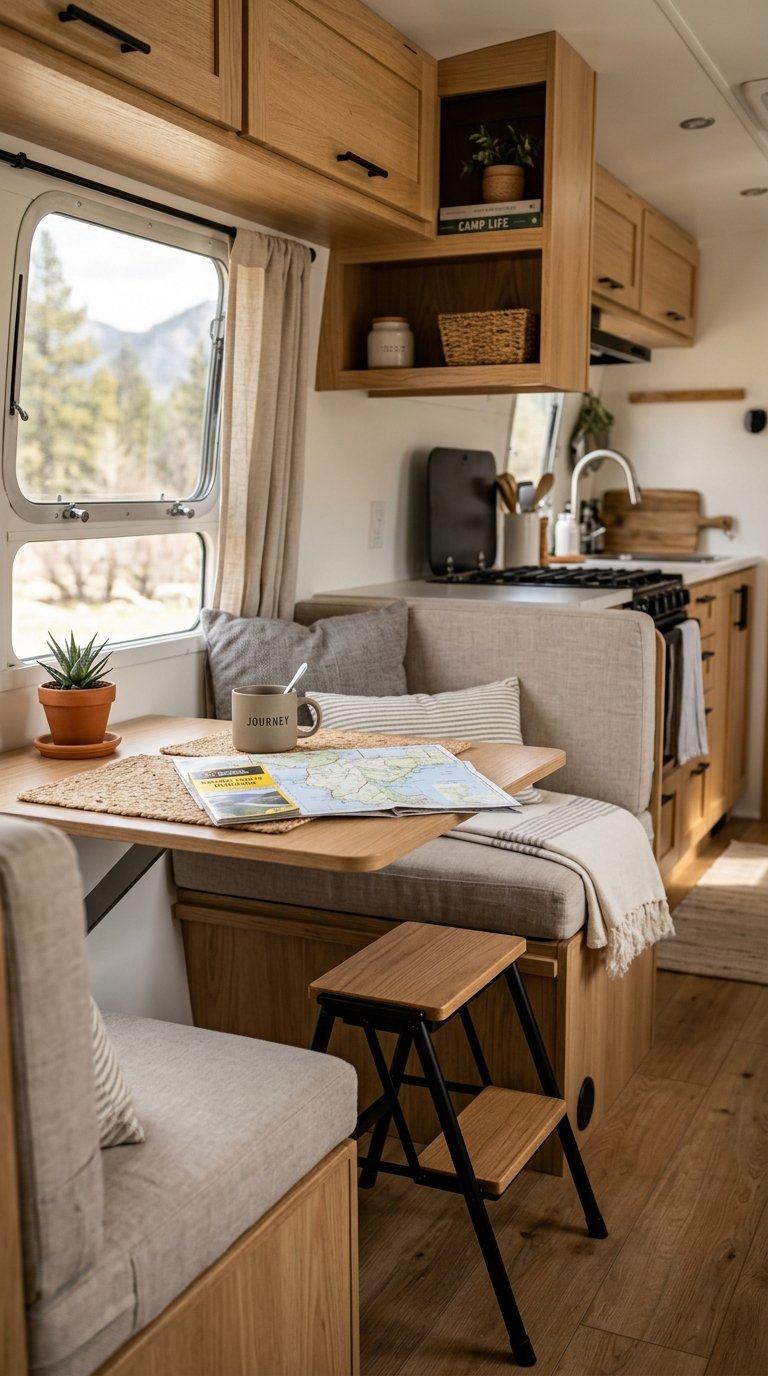
A folding step stool stored under the dinette or bed doubles as extra seating, a step to reach upper cabinets, and an outdoor footrest three functions from one object that folds to two inches thick for storage. Rubbermaid and Cosco make folding step stools rated at 300 pounds for $18 to $30 that open and close with one hand. In a camper where single-function items waste their weight and storage allocation, a three-function object earning its two-inch storage footprint is exactly the kind of decision that separates a comfortable camper from one where you’re constantly working around your own stuff.
Store the step stool in the same spot after every use. IMO, the discipline of one designated spot per object is the actual organization system bins and hooks and caddies are just the infrastructure that makes the discipline possible and automatic.
14. Use a Hanging Fruit Basket for Produce Storage
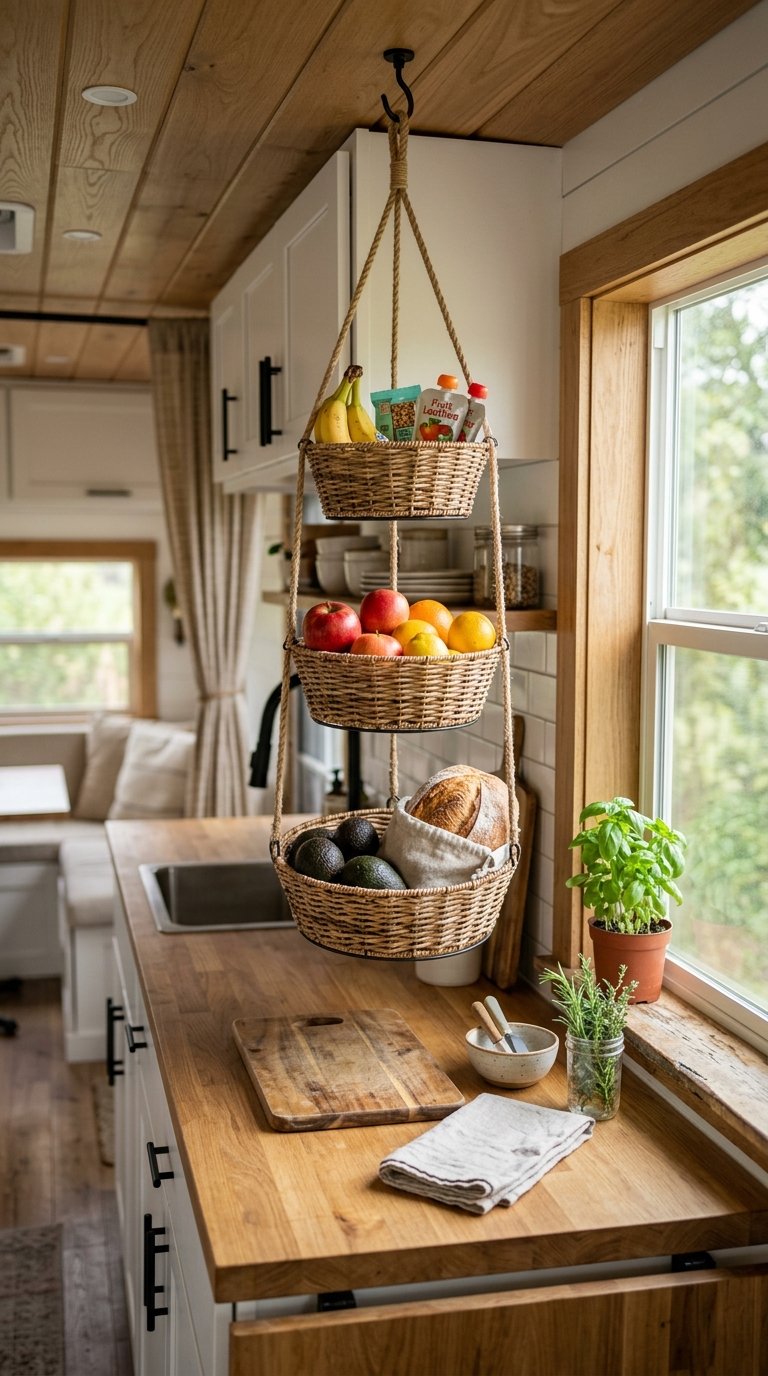
A three-tier hanging fruit basket suspended from the camper’s kitchen ceiling hook or a ceiling-mounted cup hook holds produce, bread, snacks, and small items without consuming any counter or cabinet space using the one dimension of camper kitchens that almost no one organizes: vertical ceiling space. These baskets run $12 to $20 at kitchen stores and online, and the three tiers provide enough capacity for a week’s worth of produce for two people. Hanging storage also improves air circulation around produce, which extends the life of fruit and vegetables by two to three days compared to produce stored in sealed containers a real advantage on trips longer than a weekend.
Mount the ceiling hook into a stud or use a toggle bolt rated at 15 pounds minimum a hanging basket full of produce weighs six to eight pounds with regular loading, and an under-spec hook pulls out of the ceiling on the first bumpy road. Test the hook by hanging dead weight from it before relying on it for an entire trip’s worth of produce.
15. Create a Dedicated Wet Gear Zone at the Entry
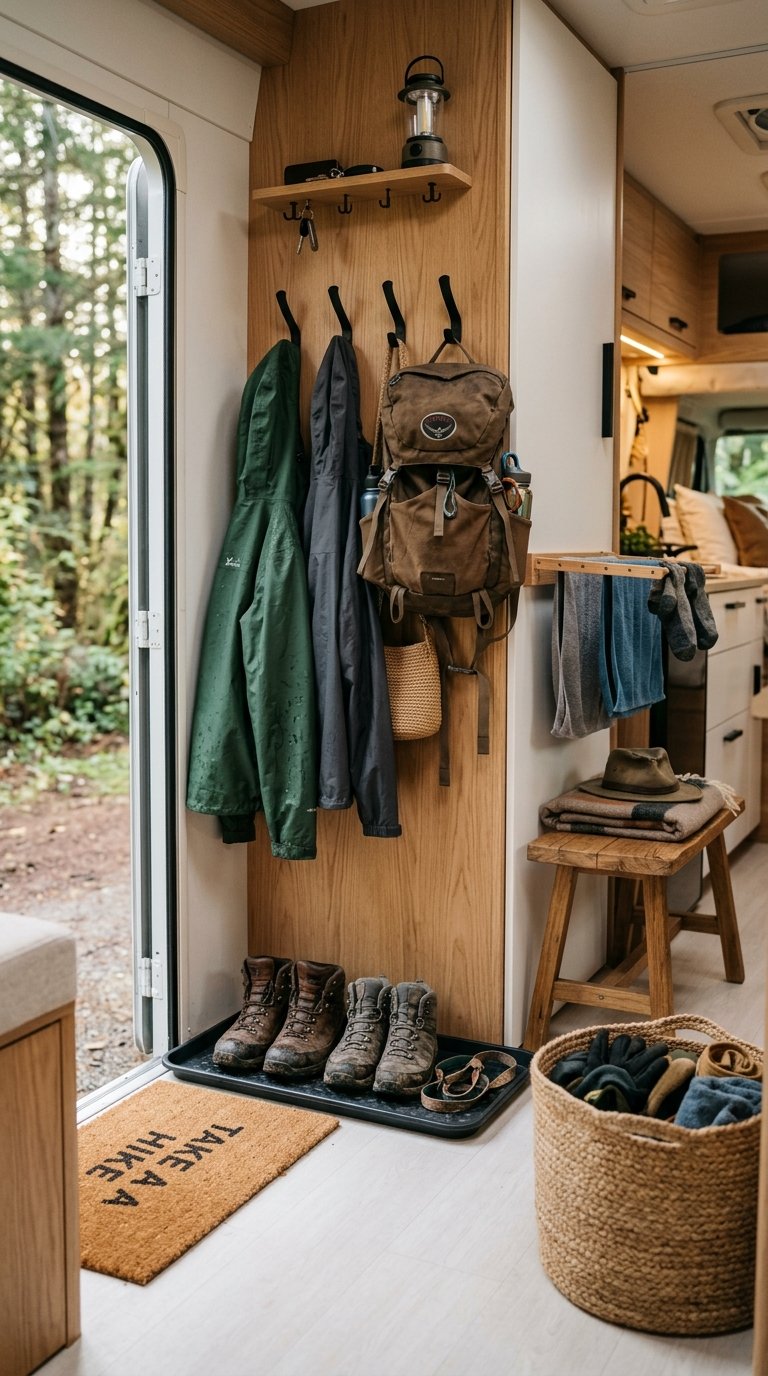
A defined wet gear zone directly at the camper entry door a small rubber mat, two wall hooks, and a folding drying rack gives muddy boots, wet rain jackets, and damp towels a designated place that keeps moisture out of the sleeping and eating areas. The combination costs under $25: a rubber boot tray for $8, two heavy-duty wall hooks for $6, and a folding rack that leans against the entry wall for $10. Without a defined wet zone, wet gear migrates throughout the camper within an hour of a rainy hike, dampening everything it touches and creating the specific damp-camper smell that takes three days to leave. 🙂
The rubber boot tray is the most important element it contains the tracked-in mud and water at the point of entry rather than letting it spread to the floor throughout the camper. Replace it between trips with a quick rinse rather than cleaning your entire floor, which makes the system self-maintaining rather than requiring effort you won’t give it after a long day outside.
Final Thoughts
Start with the three ideas that match your biggest current frustration wet gear chaos gets the entry zone system, kitchen clutter gets the magnetic spice strip and under-cabinet paper towel holder, dead cabinet space gets the tension rod dividers. None of these require special skills, a big budget, or a full weekend to install. The whole point of camper organization is making the space work automatically so you stop managing the camper and start enjoying the trip. Pick your three, install them before your next trip, and your future self will thank you from a camp chair with a coffee in hand actually relaxed for once.