21 Outdoor BBQ Area Ideas for the Perfect Backyard Setup
A good backyard barbecue setup does two things: it makes cooking easier and it makes the whole experience worth staying for. Most outdoor grilling setups fail on both counts because they treat the grill as a standalone appliance rather than the anchor of an outdoor cooking and gathering zone. These 21 outdoor BBQ area ideas solve that problem with specific, budget-aware solutions that work in real backyards.
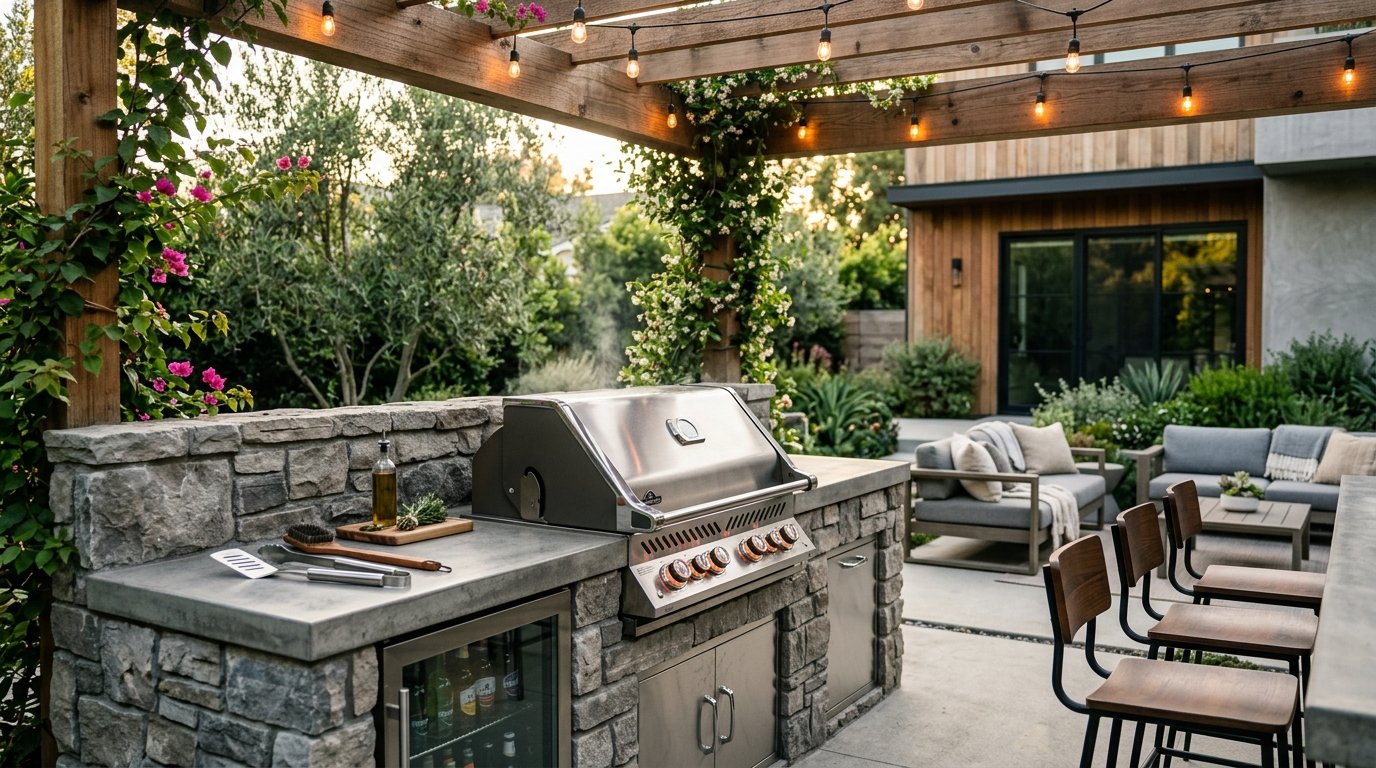
1. Build a Built-In Grill Station With a Stone Surround
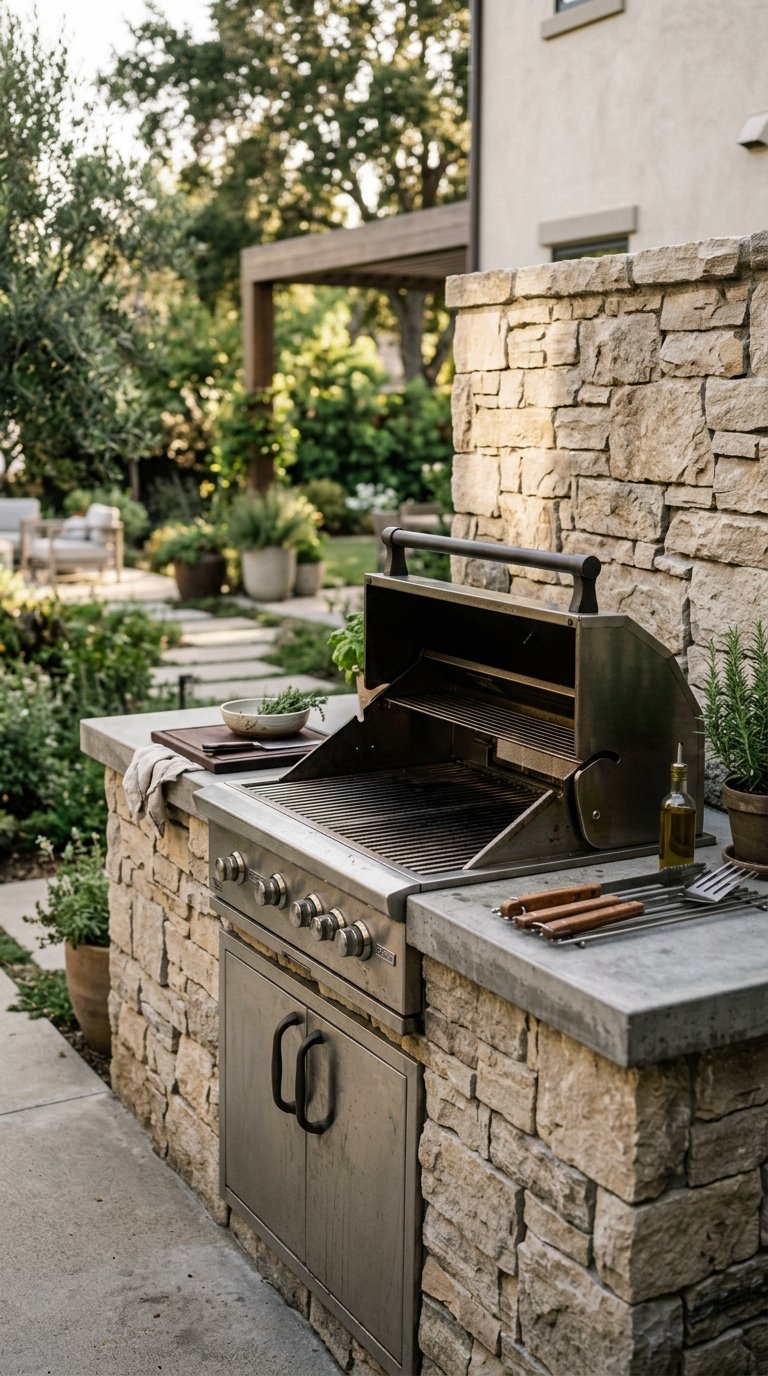
A built-in grill station with a natural stone or concrete block surround transforms a freestanding grill into a permanent outdoor kitchen anchor. The surround adds counter space on both sides of the grill, which solves the single most frustrating problem of outdoor cooking: nowhere to put anything.
A DIY concrete block grill surrounded with a stone veneer exterior costs $400 to $900 in materials depending on size. Hire a mason for the stonework at $50 to $80 per hour if you want a professional finish, or use stacked concrete blocks with a cap stone for a clean DIY result in one weekend. Either option adds genuine resale value and makes your BBQ area look permanent rather than temporary.
2. Add a Dedicated Prep Counter Beside Your Grill
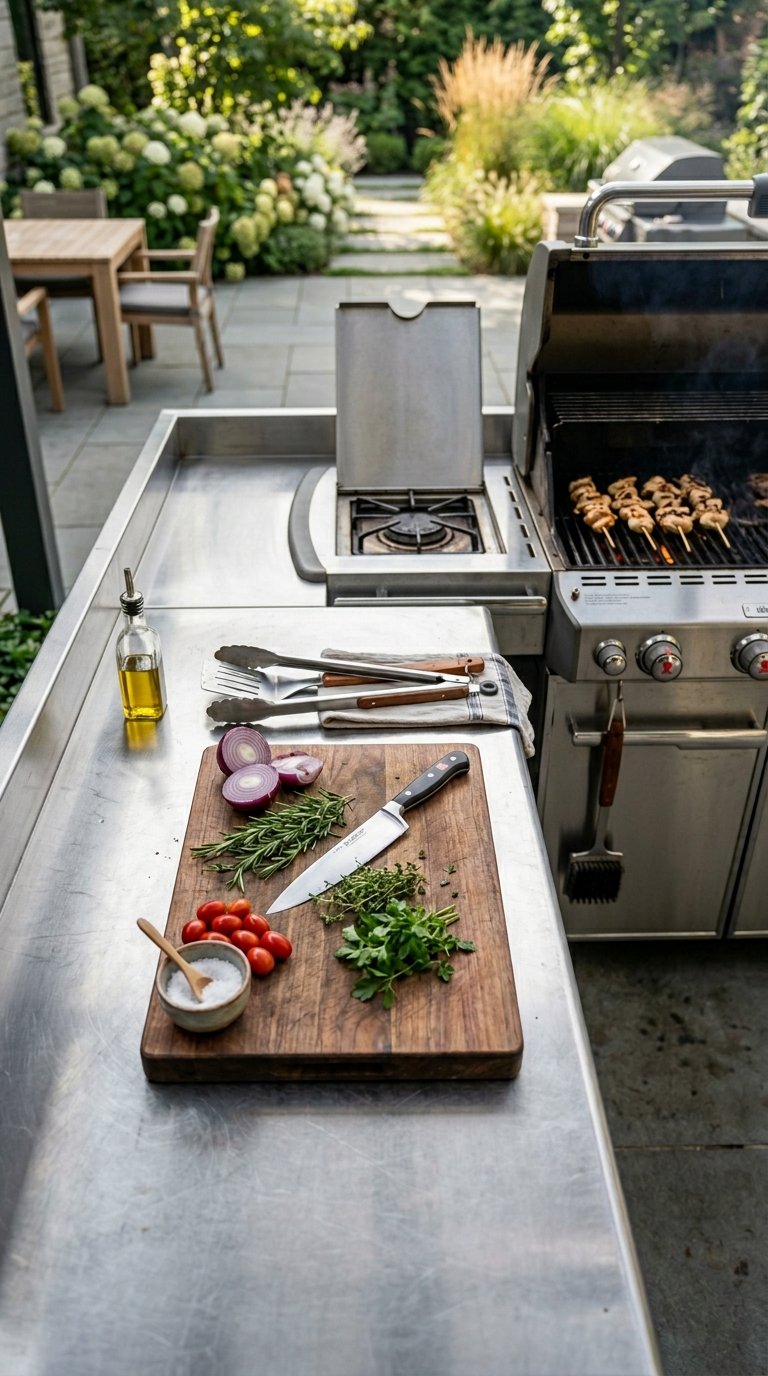
Every grillmaster needs a prep surface within arm’s reach of the grill. Walking back and forth to an indoor kitchen during a cookout breaks your focus, your timing, and honestly your patience. A dedicated outdoor prep counter beside the grill solves all three problems simultaneously.
A stainless steel outdoor prep table costs $80 to $200 and requires zero installation. A built-in countertop in granite, concrete, or porcelain tile costs $300 to $700 installed and handles heat, moisture, and outdoor conditions permanently. Stainless outperforms granite for bacteria resistance and ease of cleaning after a raw meat session, which is the practical comparison most people skip.
3. Install a Pergola Over Your BBQ Area for Shade and Structure
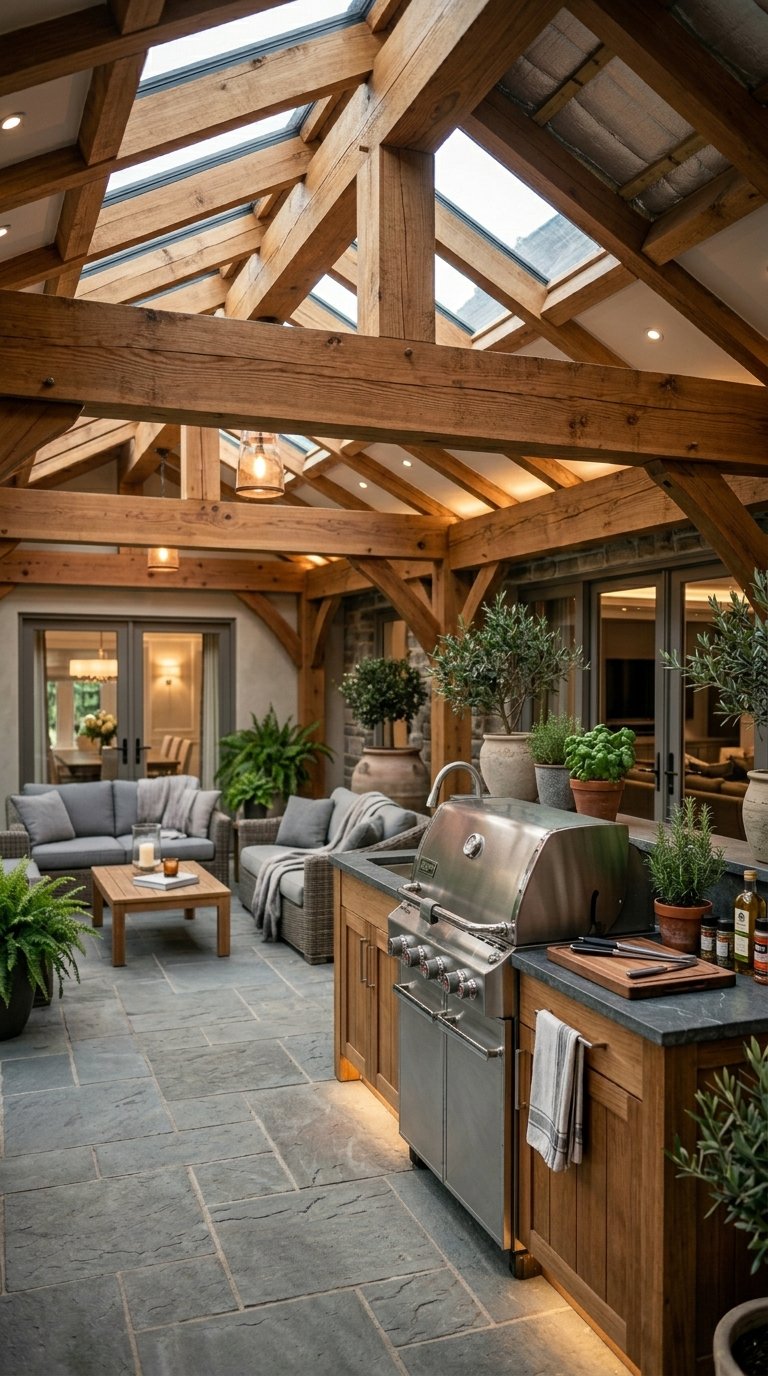
Grilling in direct afternoon sun is uncomfortable enough to make you cook less often than you want to. A pergola over your BBQ area solves the sun problem, adds architectural structure to the zone, and gives you a framework for string lights, hanging planters, and a ceiling fan if you wire one in.
A freestanding 10×12-foot cedar pergola kit runs $900 to $2,000 and installs over a weekend. Position it so the prevailing wind carries smoke away from the seating area beneath rather than into it. This wind direction awareness is the detail most pergola installations miss, and it’s the difference between a functional outdoor kitchen and a smoke-filled conversation killer.
4. Create a Seating Zone Directly Adjacent to the Grill
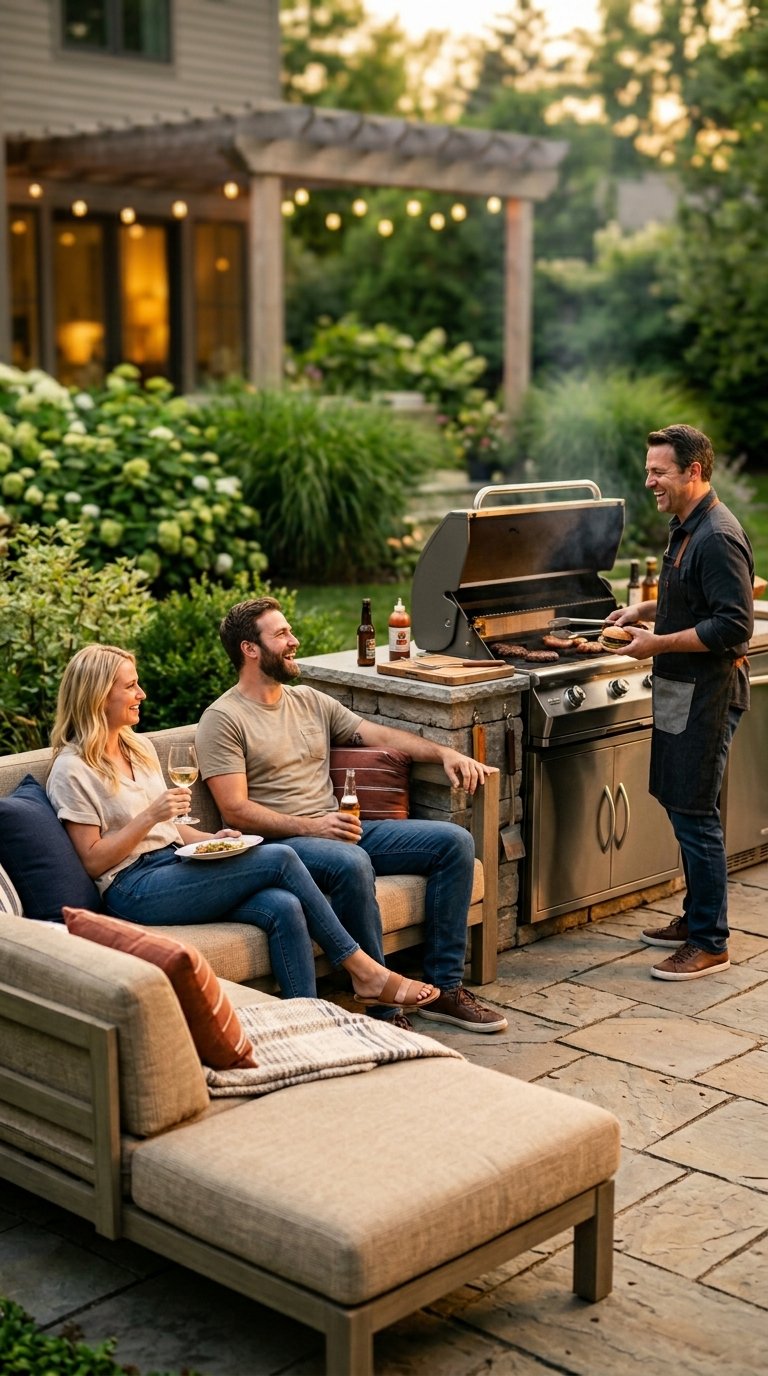
A BBQ area without seating beside the grill isolates the cook from the gathering. Position a seating zone within 8 to 10 feet of your grill so the person cooking stays part of the conversation rather than performing a solo act 20 feet away from everyone else.
An L-shaped outdoor sectional on a defined paver or deck surface beside the grill creates a natural social hub. Guests gather around the cook, the cook stays engaged, and the whole dynamic shifts from “cookout where someone disappears to grill” to “outdoor kitchen experience.” A weather-resistant sectional runs $400 to $1,200 at Costco or Wayfair.
5. Use a Concrete Paver Base to Define the BBQ Zone
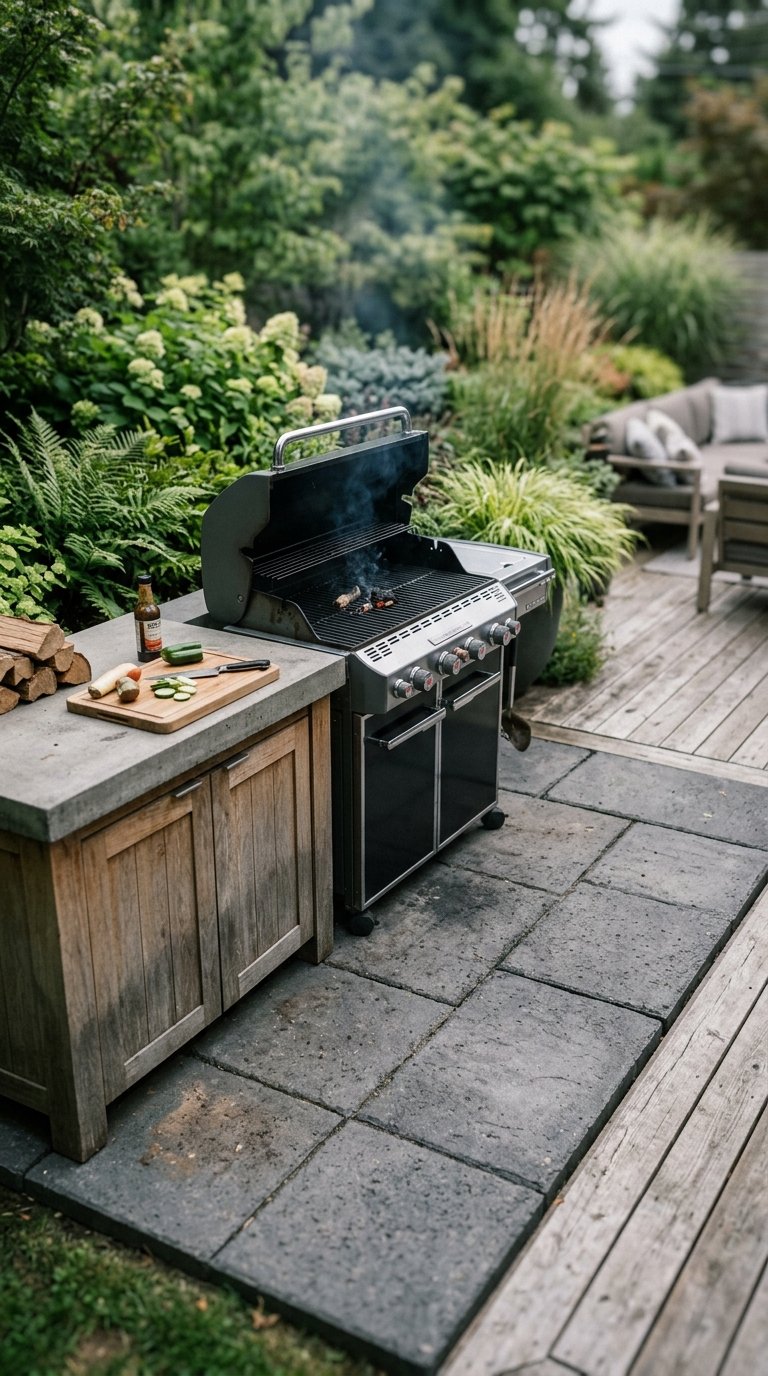
A loose gravel or bare grass surface under a BBQ area looks unfinished and creates a drainage and stability problem for heavy grill equipment. A concrete paver base defines the zone visually, drains properly, and gives your grill and prep station a level, stable surface that grass never delivers.
Concrete pavers at $1.50 to $3.50 per square foot in materials create a 12×14-foot BBQ zone for $250 to $600 in materials, plus $200 to $400 for a professional installation if you skip the DIY route. Lay them over a 4-inch compacted gravel base to prevent settling. A paver base also protects your lawn from grease drips that kill grass in irregular, ugly patterns.
6. Add a Side Burner for Complete Outdoor Cooking
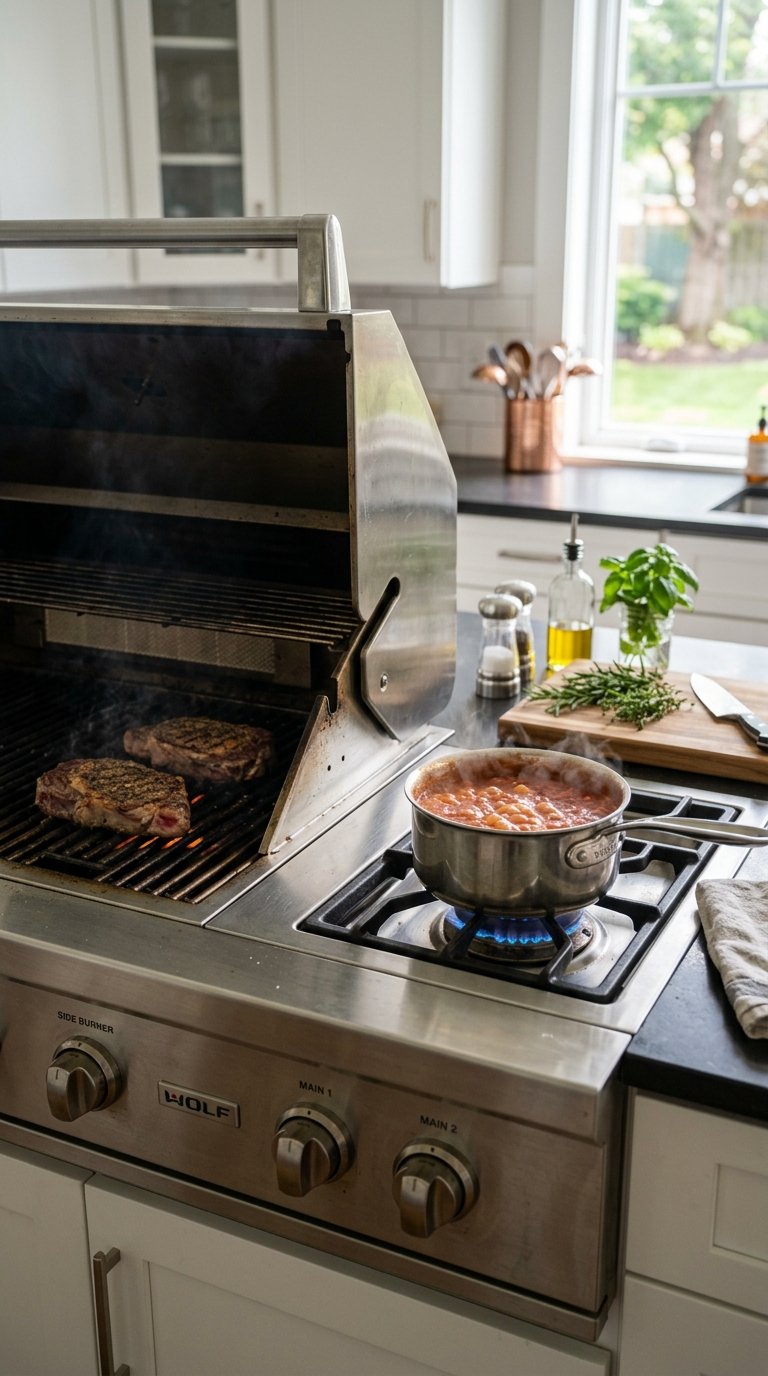
A side burner beside your main grill turns your BBQ area into a complete outdoor kitchen that handles every cooking task without sending anyone indoors. Sauces, corn, baked beans, and side dishes all cook outside simultaneously while the grill handles the main protein.
Most built-in grill stations accommodate a two-burner side unit in a cut-out beside the main grill. A standalone side burner on a cart runs $80 to $200. A built-in side burner runs $150 to $400 for the unit alone. IMO, a single high-BTU side burner handles 90% of outdoor cooking side dish needs and earns its counter space back on the first cookout you run without running inside for every sauce step.
7. Install Outdoor Lighting for Evening BBQ Sessions
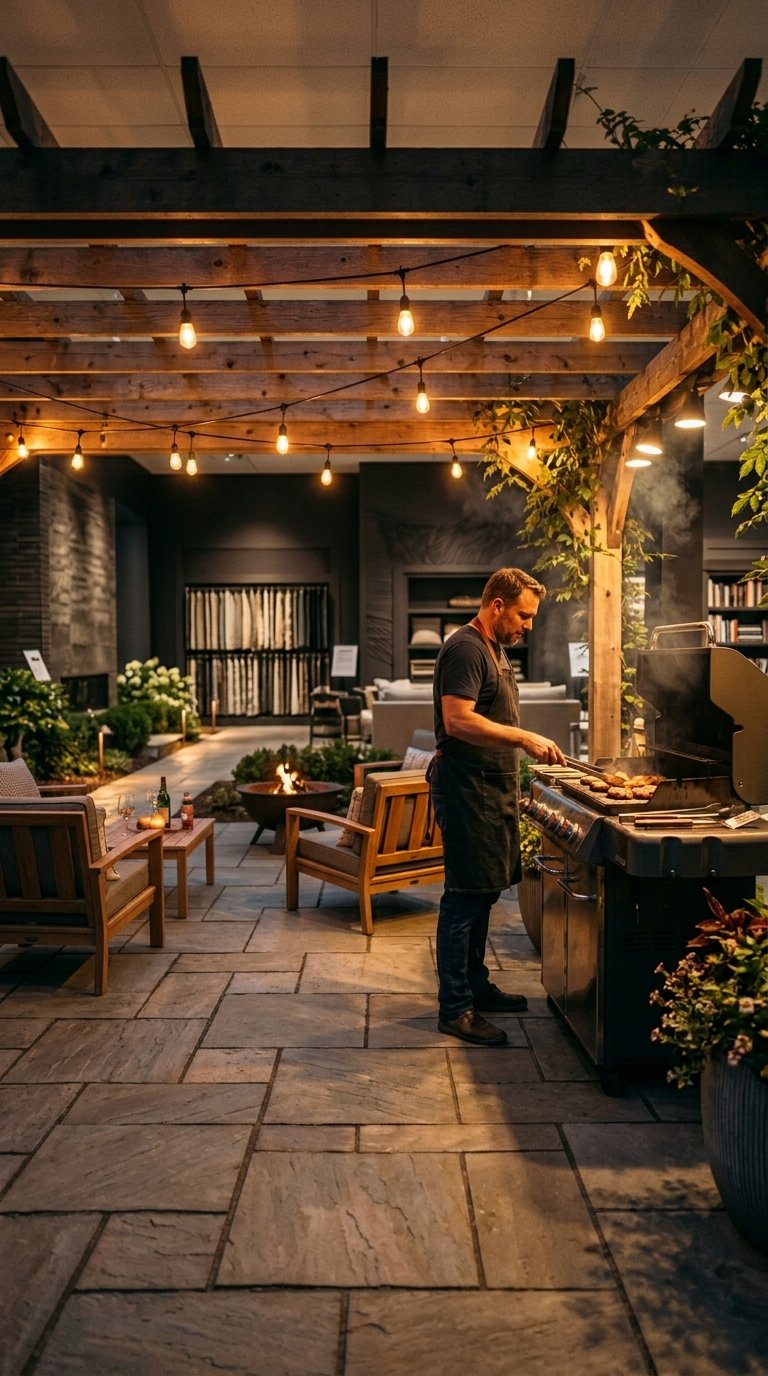
A BBQ area that goes dark at sunset cuts your cookout season short by two to three hours every evening. Proper outdoor lighting extends every gathering and, more practically, lets you see what you’re actually cooking after 7 PM, which your guests will appreciate.
Layer your BBQ area lighting in three types:
- Task lighting directly above the grill surface: a 40-watt equivalent outdoor LED fixture mounted to the pergola or a grill light clipped to the hood
- Ambient lighting via Edison string lights hung above the seating zone
- Path lighting along the walkway from the house to the BBQ area for safe navigation after dark
A complete three-layer lighting setup runs $80 to $200 in materials and transforms your BBQ area into an evening venue rather than a daytime-only operation.
8. Build a Beverage Station With a Built-In Outdoor Fridge
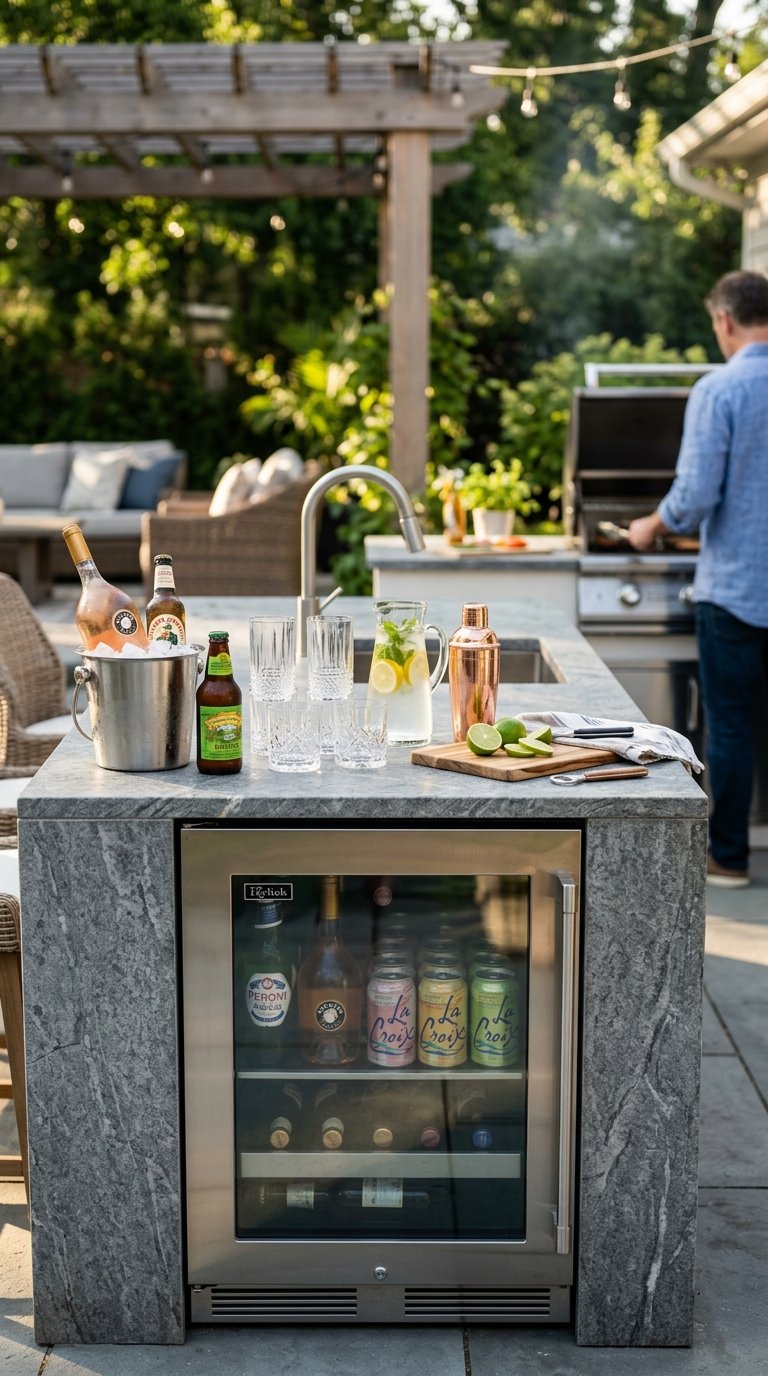
A beverage station with a built-in outdoor refrigerator beside your grill eliminates the constant indoor trips for cold drinks that interrupt outdoor gatherings more reliably than anything else. An outdoor-rated refrigerator keeps beverages, marinades, and condiments at hand throughout the entire cookout.
Outdoor-rated stainless refrigerators run $400 to $900 for a 5.3-cubic-foot undercounter unit. Build a countertop above it with matching stone or concrete to create a beverage bar. Add a bottle opener mounted to the side and a small trash receptacle below and you have a self-contained drink station that keeps every guest served without interrupting the cook.
9. Add a Pizza Oven Beside Your Grill
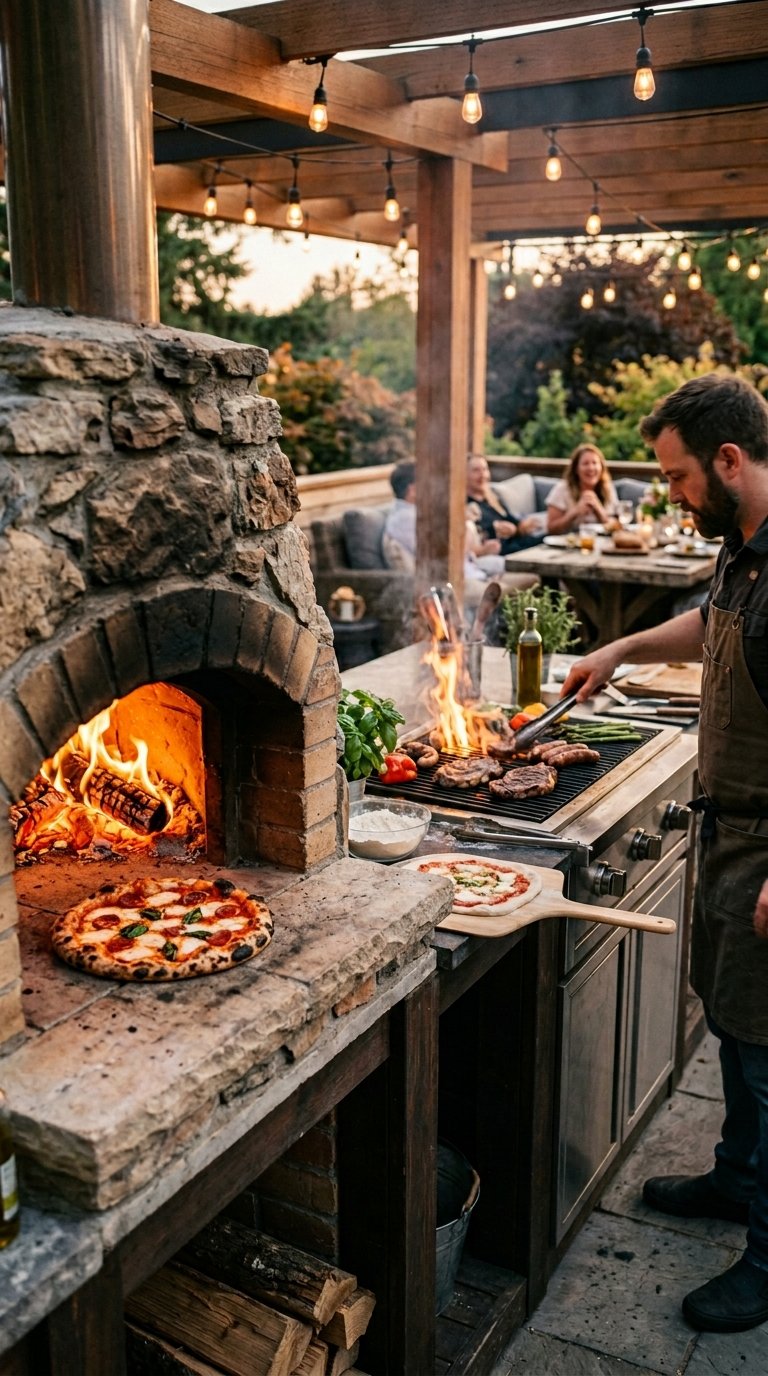
A wood-fired or gas pizza oven beside your main grill expands your outdoor BBQ area into a full outdoor cooking destination. Pizza ovens cook at 700 to 900 degrees Fahrenheit and produce a crust quality that no indoor oven at 500 degrees replicates. Guests gather around a pizza oven the way they gather around a fire pit: with genuine interest and zero prompting.
Ooni brand portable pizza ovens run $300 to $800 and sit on any stable counter surface without permanent installation. A built-in wood-fired pizza oven in brick or refractory concrete costs $2,000 to $5,000 installed. The Ooni option wins for most homeowners on flexibility, cost, and the fact that you store it when not in use rather than looking at an $80 brick dome all winter.
10. Use a Kamado Grill as Your BBQ Area Centerpiece
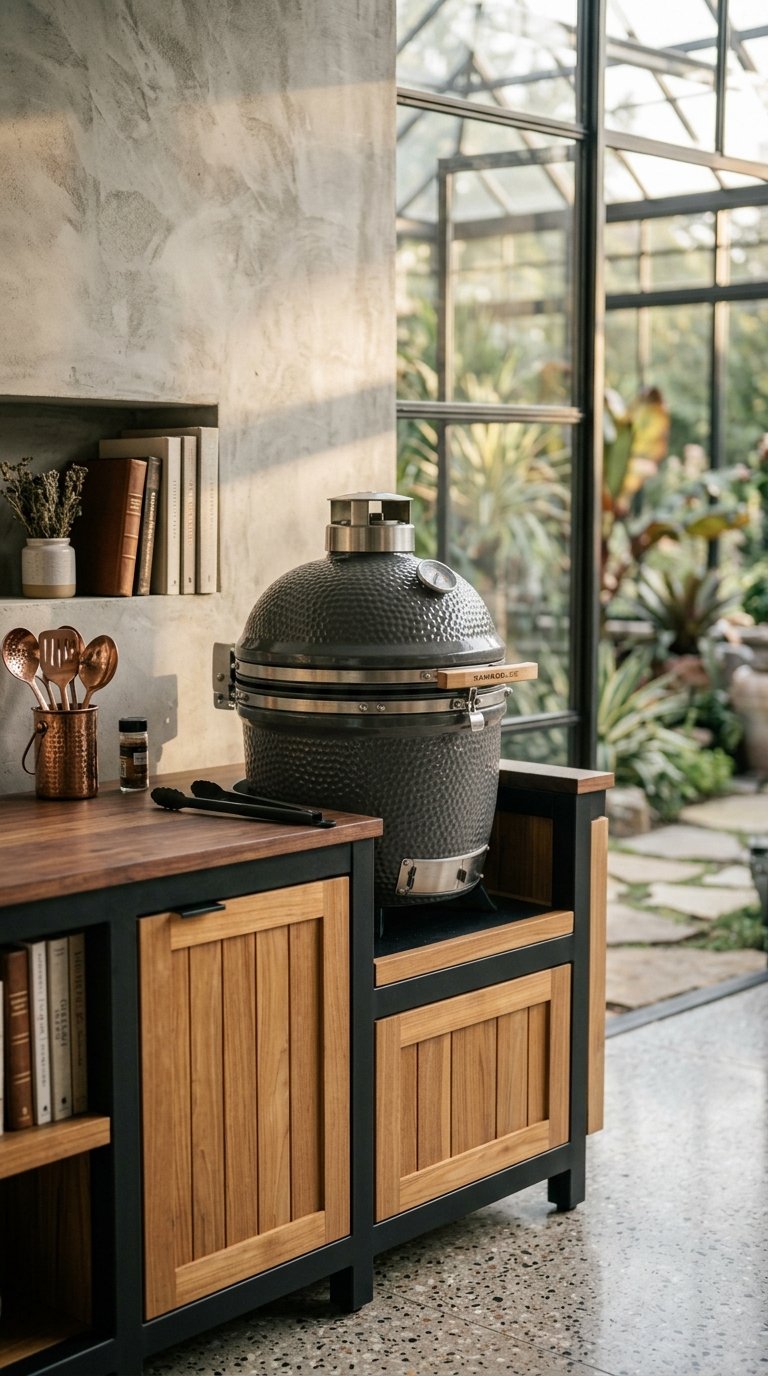
A kamado ceramic grill functions as a smoker, a grill, and an oven in one unit and delivers results that separate it clearly from standard kettle or gas grills. Kamado grills retain heat more efficiently than any other grill type because the ceramic walls insulate at both high and low temperatures simultaneously.
A large Big Green Egg or Kamado Joe Classic runs $900 to $1,800 and lasts 20 to 30 years with basic care. A comparable gas grill at the same price point lasts 8 to 12 years. Over a 20-year period, the kamado costs significantly less per year of use. It also produces better smoked meat, better seared steak, and better wood-fired pizza than a gas grill at any price point. FYI, the Big Green Egg has a dedicated accessory ecosystem that turns it into a complete outdoor cooking platform beyond grilling alone.
11. Create a Herb Garden Within Arm’s Reach of the Grill
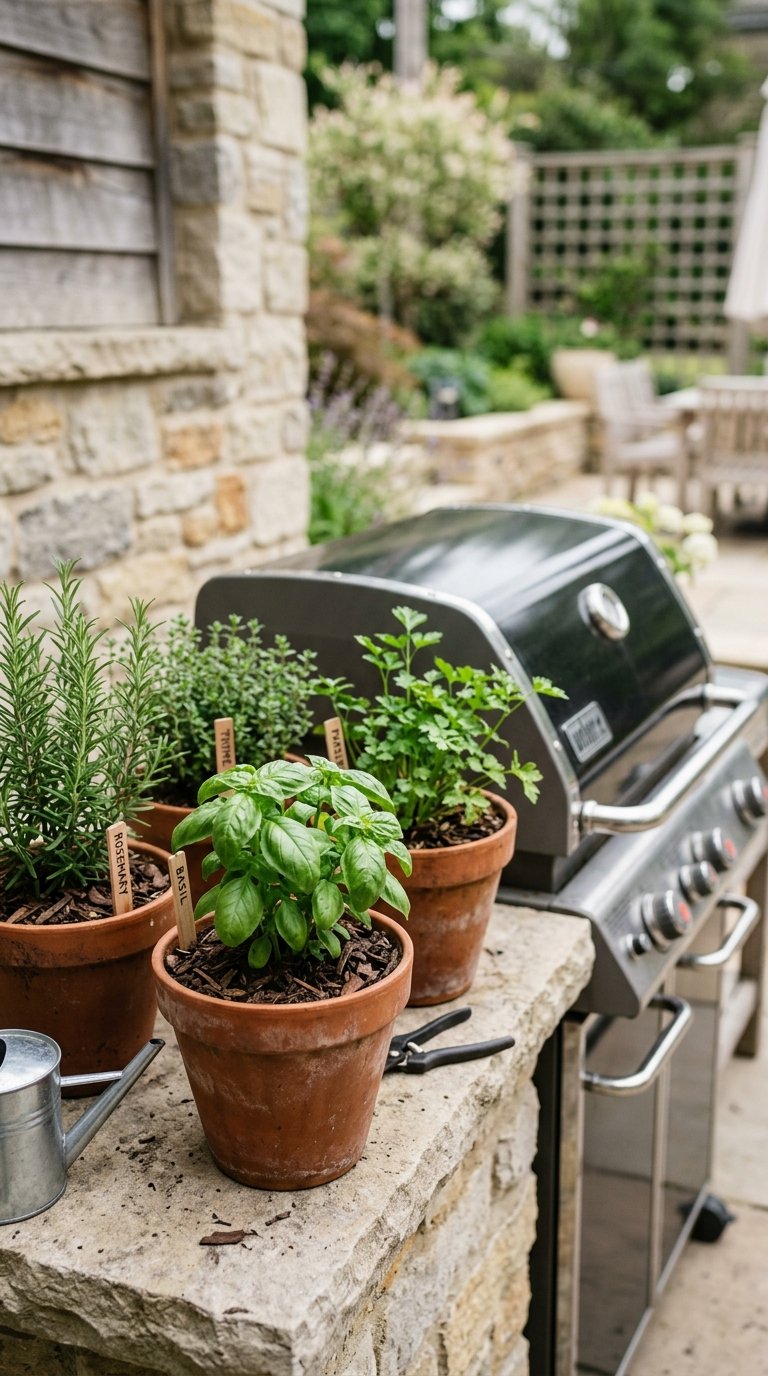
Fresh herbs used directly from the plant at the moment of cooking produce a flavor result that pre-cut or dried herbs never match. A small herb garden planted in a raised bed or container cluster within two steps of your grill changes how you season food outdoors in a way that costs almost nothing to set up.
Four 12-inch terracotta pots planted with rosemary, thyme, basil, and flat-leaf parsley sit on a low shelf beside the grill or on the paver surface at the prep station edge. Total setup cost: $30 to $50 including pots and plants. Fresh rosemary thrown directly onto charcoal creates an aromatic smoke effect that every guest notices and no bottled seasoning replicates.
12. Install a Sink in Your Outdoor BBQ Kitchen
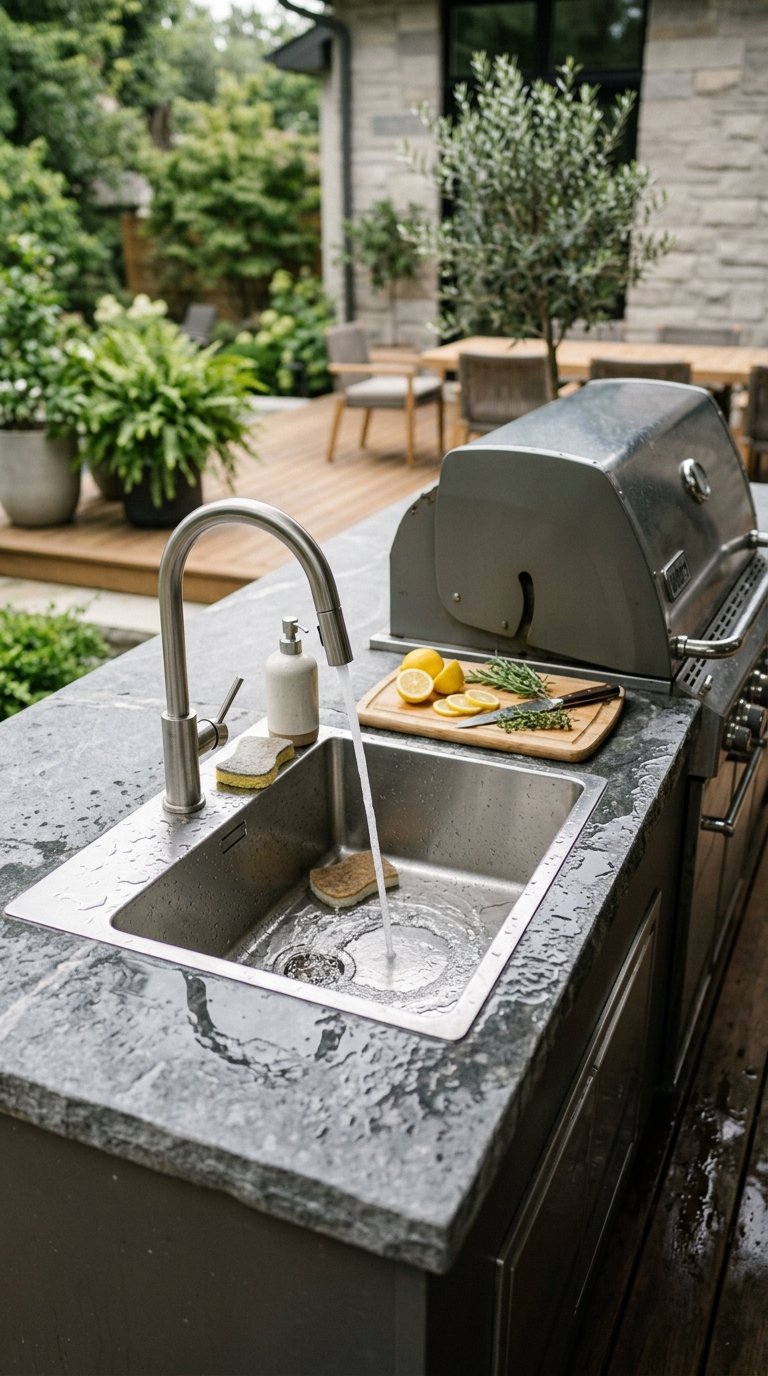
An outdoor sink in a BBQ kitchen area eliminates the need to walk inside to wash hands, rinse vegetables, or clean prep tools mid-cook. Every grillmaster who has ever installed an outdoor sink says the same thing: they should have done it years earlier.
A simple outdoor sink connected to your home’s water supply runs $300 to $800 installed, depending on how far the plumbing run extends from the house. Use a stainless steel undermount sink in a stone or concrete countertop for maximum durability. If plumbing a permanent connection is outside your budget, a portable outdoor sink with a gravity-fed freshwater tank and a gray water catch bucket costs $80 to $150 and delivers the same practical convenience without any plumbing work.
13. Use String Lights and Lanterns for BBQ Area Ambiance
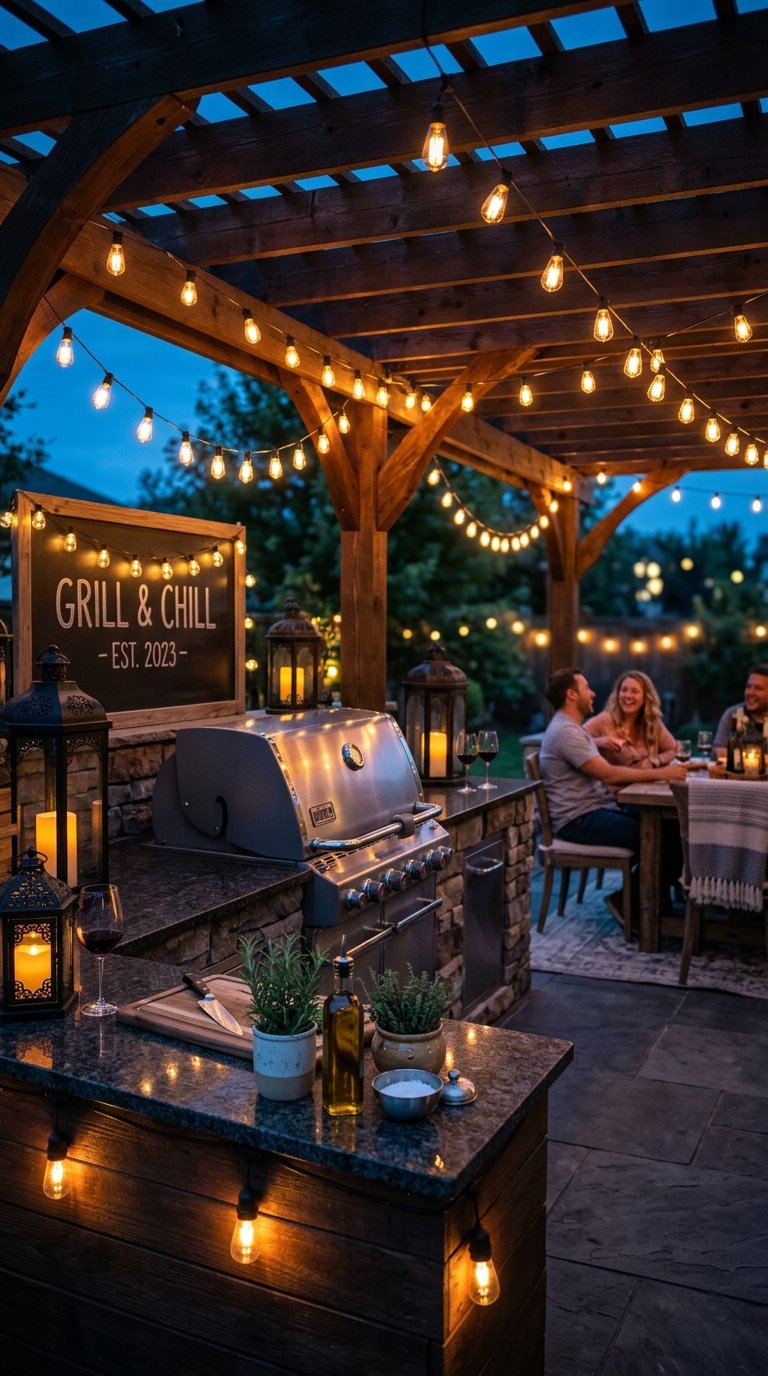
A BBQ area styled only for function looks like a work zone. String lights and lanterns shift the atmosphere from industrial to inviting and give your outdoor cooking space the ambiance that keeps guests at the table long after the food disappears.
Hang 48-foot Edison string light strands from your pergola beams in parallel runs, positioned 18 inches apart. Place two large black metal lanterns with LED candles on the prep counter ends. The string lights handle ambient coverage and the lanterns add eye-level warmth. Total cost: $50 to $80 for a complete evening lighting transformation that works every night of the season.
14. Build a Smoker Station Separate From Your Main Grill
A dedicated smoker station beside your main grill creates a two-station outdoor BBQ area that handles both quick-fire grilling and long, slow smoke sessions simultaneously. Combining both functions in one grill forces compromise. Separating them lets each appliance do what it does best.
An offset barrel smoker runs $200 to $600 for a mid-range unit that handles brisket, ribs, and pork shoulder reliably. A pellet smoker from Traeger or Weber runs $500 to $1,200 and manages temperature automatically, making it the better choice for anyone who wants smoked results without monitoring a fire for eight hours. The pellet smoker wins on convenience. The offset wins on purist smoke flavor. Choose based on how much time you genuinely want to spend tending a fire.
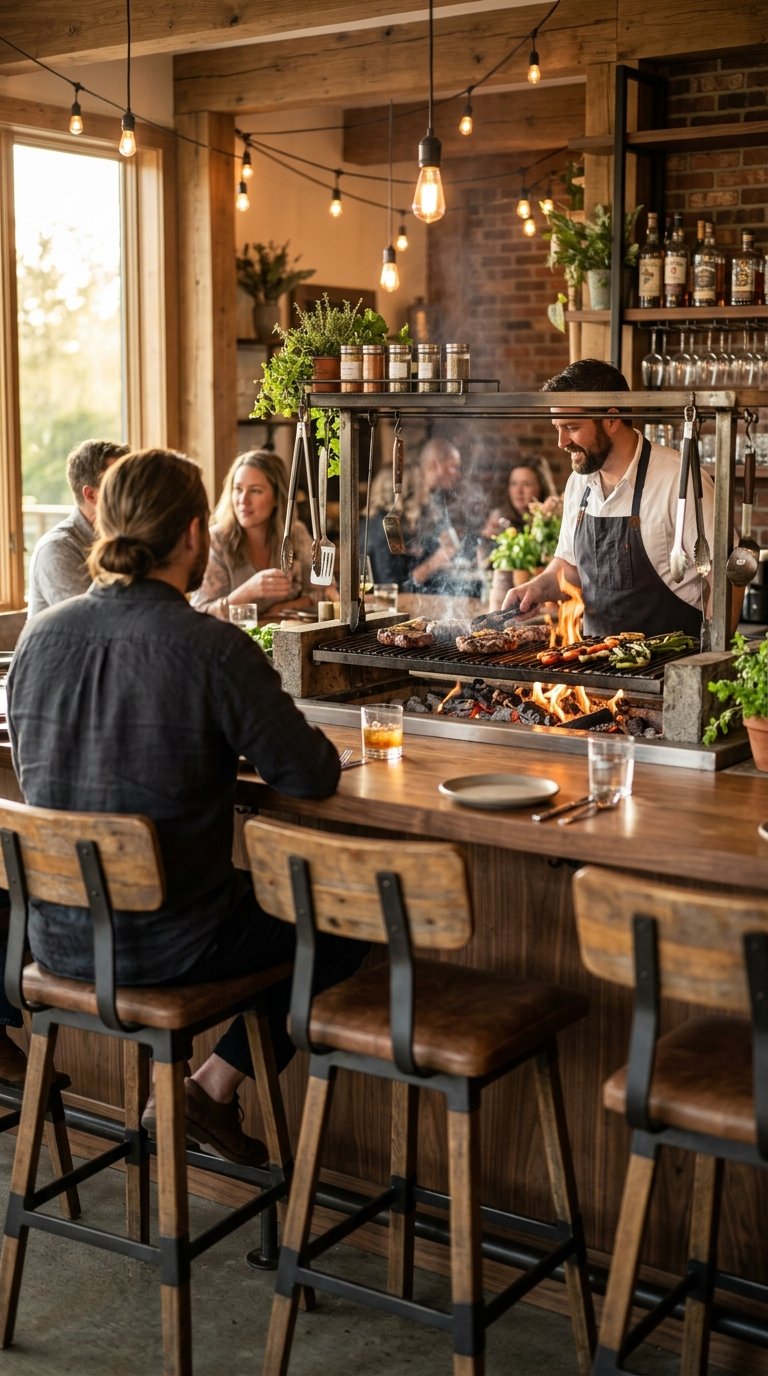
15. Add a Bar Counter With Stools Facing the Grill

A bar counter with stools positioned so guests face the grill turns your cook into a performance and your BBQ area into a social experience. Guests stay engaged, they watch the process, they ask questions, and the gathering builds around the food rather than the food arriving at a table after everyone has already stopped paying attention.
A 36-inch-high bar counter with two or three bar stools beside your grill costs $300 to $700 in materials for a built-in version in concrete or stone. A freestanding outdoor bar table with stools runs $150 to $400. Either option creates the chef’s counter dynamic that turns a backyard cookout into an experience guests talk about afterward.
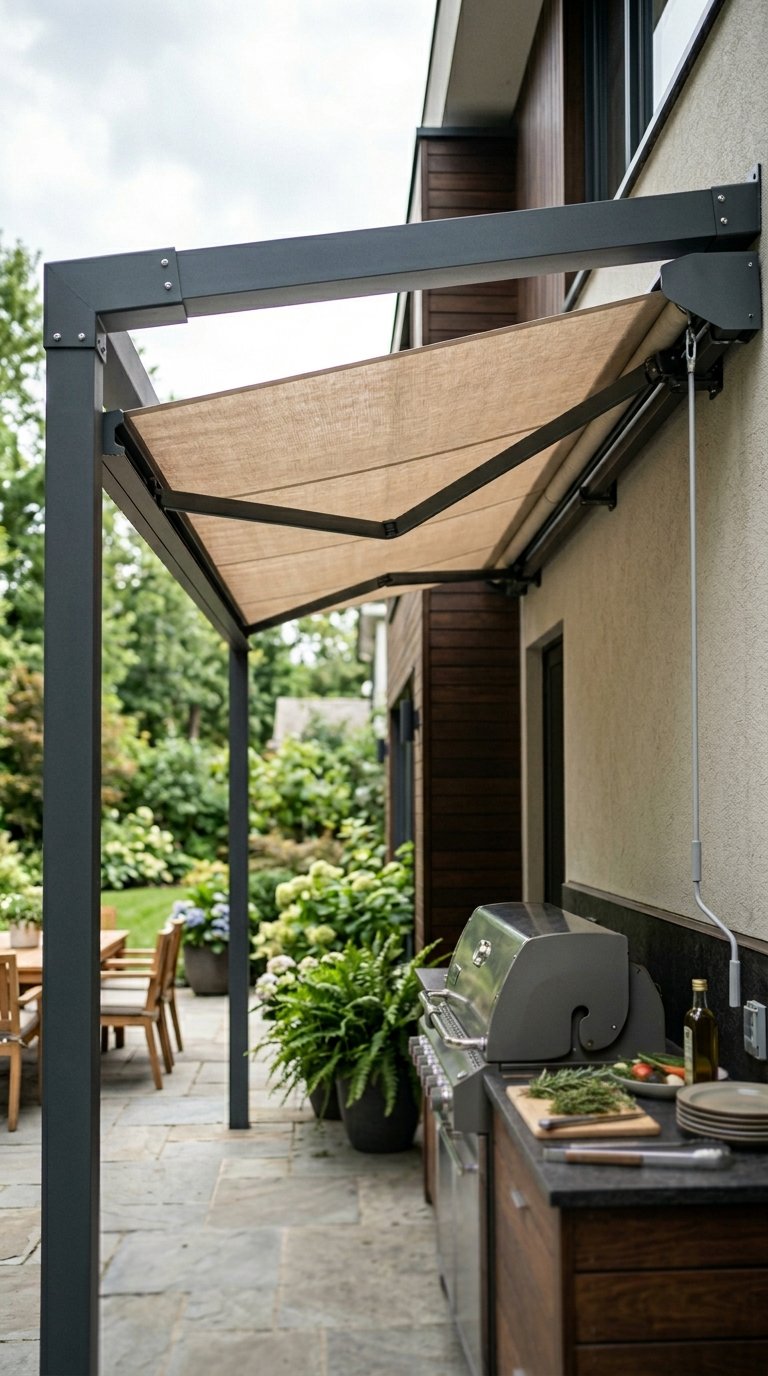
16. Install a Retractable Awning for Flexible Weather Coverage
A retractable awning over your BBQ area gives you shade on demand and weather protection without the permanent commitment of a pergola or roof structure. It extends outward when you need coverage and retracts fully when you want open sky, which makes it the most flexible overhead coverage option available.
A motorized retractable awning in a 10×12-foot size runs $900 to $2,500 installed, depending on the drive system and fabric quality. A manual crank version costs $400 to $800. Choose a solution-dyed acrylic fabric like Sunbrella for UV resistance and mildew prevention. Sunbrella awning fabric carries a 5-year warranty against fading and outlasts standard polyester awning fabric by three to four years in direct sun exposure.
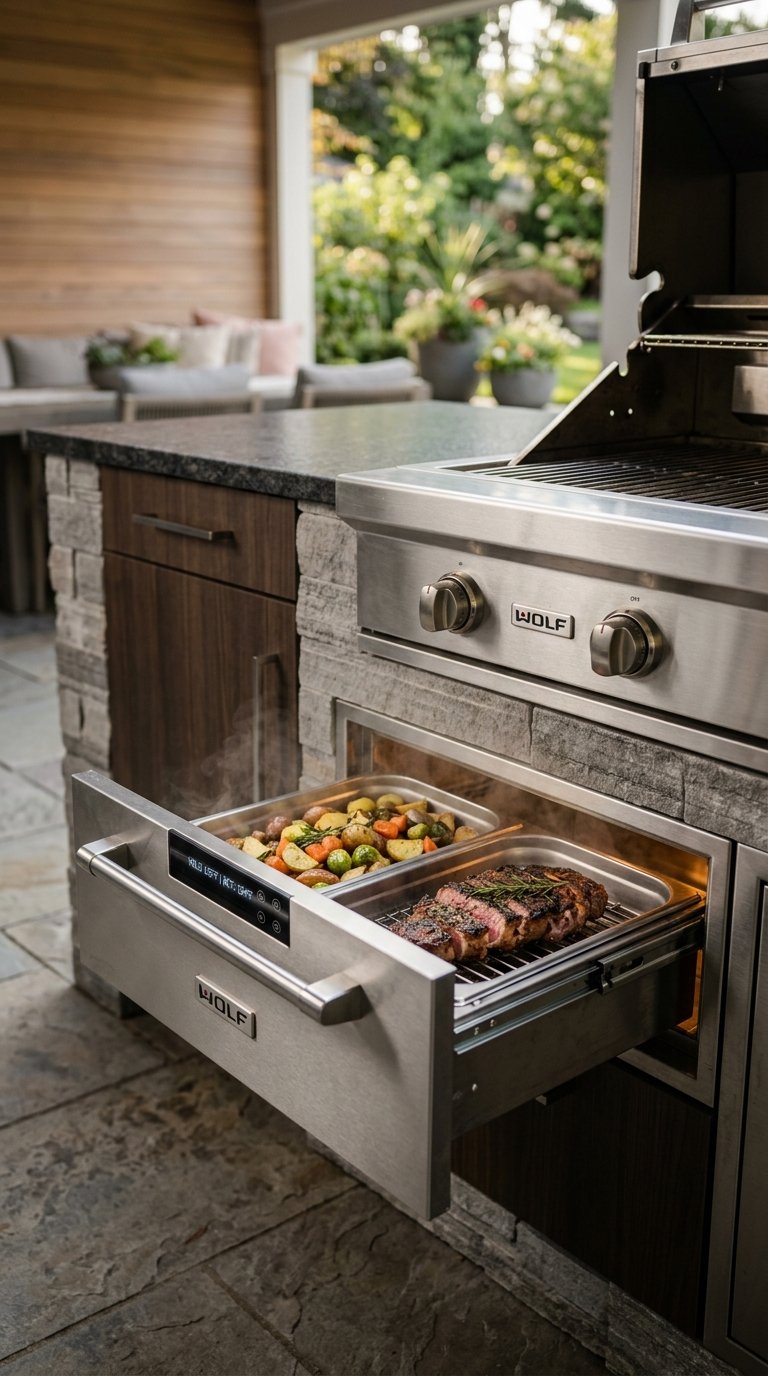
17. Incorporate a Warming Drawer Into Your BBQ Station
A warming drawer built into your outdoor BBQ station holds finished food at serving temperature while you complete the rest of the cook. This solves the specific problem of a perfectly grilled steak cooling down on a platter while you finish the last four pieces for your guests.
Outdoor-rated warming drawers from brands like Lynx or Bull run $400 to $900 for a single drawer unit. They install into a standard 15-inch cut-out in your outdoor kitchen base and connect to a standard 120V outdoor outlet. A warming drawer maintains food at 140 to 170 degrees, which is the food-safe holding temperature for cooked protein. That detail matters more than most people consider until they serve lukewarm steak to a guest who drove 45 minutes to attend.
18. Design a BBQ Area With a Natural Stone Backsplash

A natural stone backsplash behind your grill and prep counter protects the wall surface from heat, grease, and smoke staining while adding a visual quality to your outdoor kitchen that distinguishes it from a basic grill-on-a-patio setup. Stone backsplashes also reflect heat away from combustible surfaces, which is both practical and a building code requirement in many municipalities.
Stacked natural stone panels at $8 to $15 per square foot cover a 4×6-foot backsplash area for $190 to $360 in materials. They install with exterior-rated adhesive over a cement board substrate in a single afternoon. Choose flagstone, slate, or fieldstone for the most authentic outdoor material language. Porcelain tile designed to mimic stone costs less at $4 to $8 per square foot and cleans more easily, making it the practical choice for anyone who cooks frequently.
19. Add a Dedicated Storage Cabinet for Grill Tools and Supplies
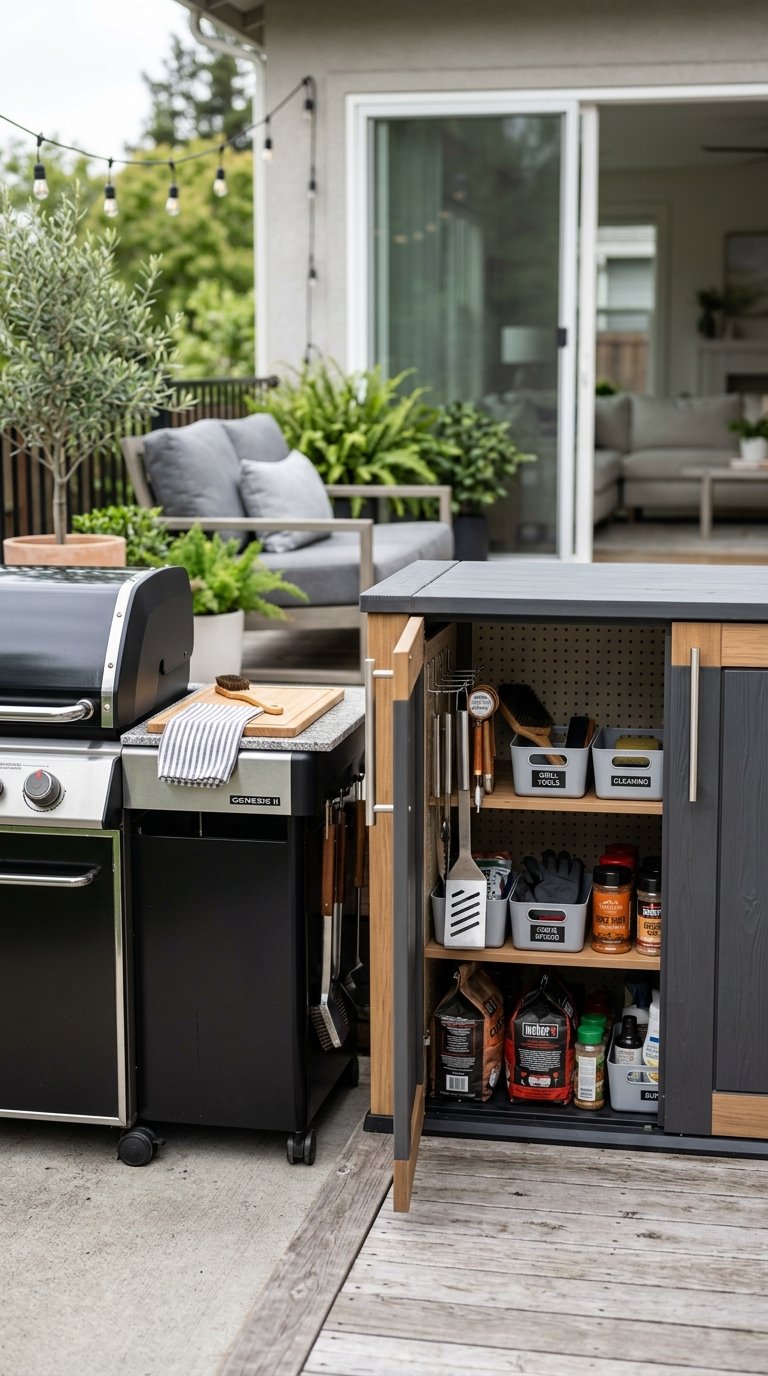
A dedicated outdoor storage cabinet in your BBQ area keeps grill tools, charcoal, lighter fluid, seasonings, and accessories organized and protected from weather. A grill area without storage forces you to carry supplies back and forth from inside every single cookout, which adds friction that makes you cook outside less often than you otherwise would.
Stainless steel outdoor storage cabinets with locking doors run $300 to $600 for a two-door unit sized at 24×24 inches. A weatherproof resin storage cabinet at $80 to $150 handles the same function for a fraction of the cost. The stainless version wins on durability and aesthetics if it matches your grill and prep counter. The resin version wins if budget is the priority and the cabinet sits out of the main sightline.
20. Plant a Privacy Screen Around Your BBQ Area
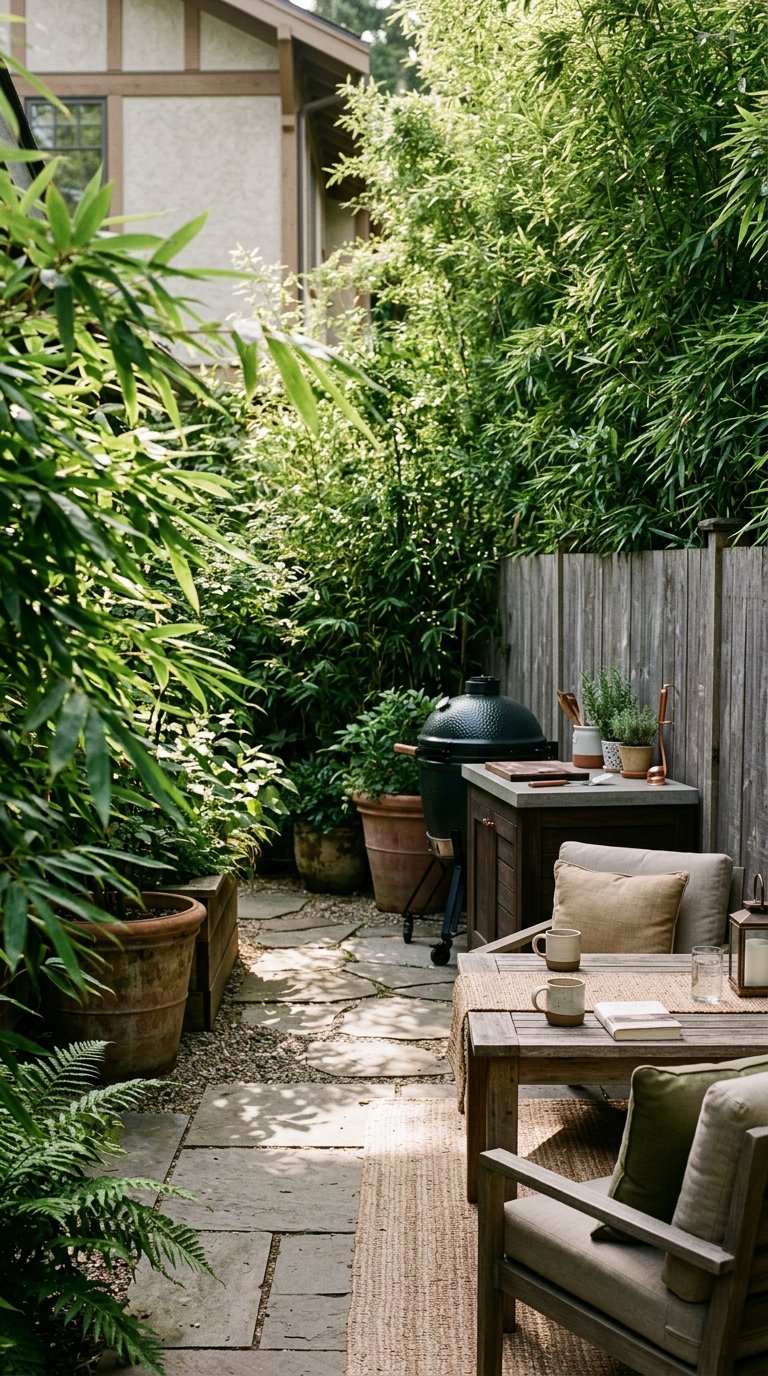
A BBQ area visible to neighbors or a street loses the enclosed, retreat-like quality that makes outdoor cooking genuinely enjoyable. A privacy screen using tall ornamental grasses, a bamboo hedge, or a cedar lattice panel with climbing vines creates a defined, sheltered cooking and dining zone that feels intentional rather than exposed.
Clumping bamboo in large pots at three to five containers per side creates an instant privacy screen at 8 to 12 feet tall without invasive root spread. Each large clumping bamboo container costs $40 to $80 at a garden center. Three containers on each side of your BBQ area cost $240 to $480 and create full visual privacy within one growing season. Use clumping varieties only. Running bamboo takes over everything it touches, including your neighbor’s yard, your fence, and your general relationship with both.
21 . Create a Complete Outdoor Dining Zone Attached to Your BBQ Area
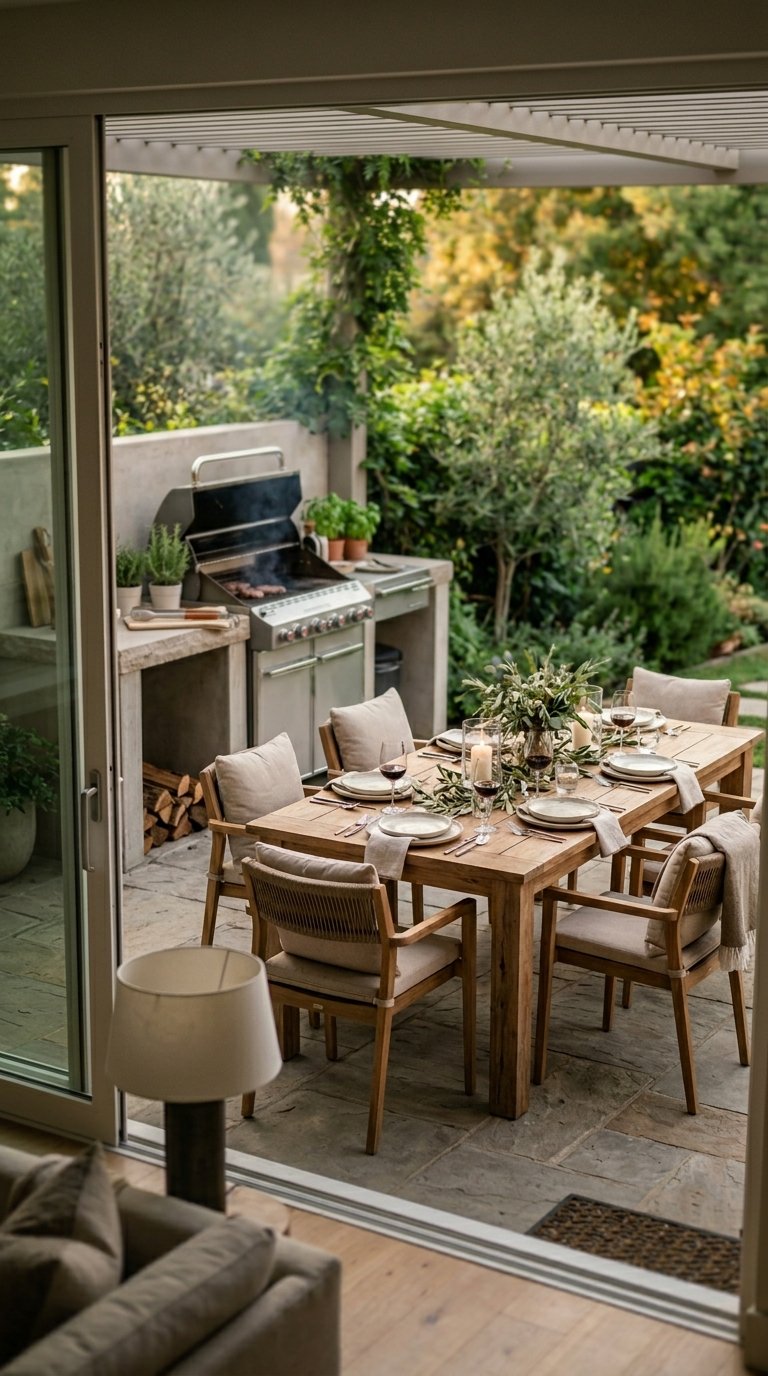
A BBQ area without a dedicated dining zone nearby forces guests to carry plates to wherever they find a surface, which is the fastest way to turn a cookout into an awkward buffet line. An outdoor dining table with full place settings positioned 8 to 12 feet from the grill completes the outdoor kitchen concept and makes every meal feel like an intentional dining experience.
A 72-inch outdoor dining table with six chairs in powder-coated aluminum runs $400 to $900 at most furniture retailers. Style it with woven placemats, a low centerpiece of fresh herbs or seasonal flowers, and outdoor-rated dinnerware. The dining zone should sit close enough to the grill that serving is a five-second walk but far enough that smoke drifts past rather than over the table.
Final Thoughts
A great outdoor BBQ area starts with three elements: a stable, defined surface, proper lighting, and counter space on both sides of the grill. Everything else on this list builds from those three foundations. Start with ideas 1, 5, and 7 for the highest immediate impact on your BBQ experience. Add the pizza oven, the smoker station, and the bar counter as your budget and ambition grow. Your backyard grill setup should make outdoor cooking so enjoyable and convenient that indoor cooking starts feeling like the backup plan. Build it right once and it will serve every cookout for the next decade.