25 Bathroom Interior Ideas That Actually Transform Your Space
Most bathrooms are an afterthought. Four walls, a toilet, a sink, a shower, and whatever tile was on sale when the house was built. Sound familiar?
The bathroom is the one room you use every single day, sometimes multiple times, and yet it gets the least design attention of any room in the home. That ends here.
These 25 bathroom interior ideas cover everything from full renovations to changes you can make this weekend. Pick what works for your budget, your space, and your style. Then actually do it.
1. Install Large Format Floor Tiles
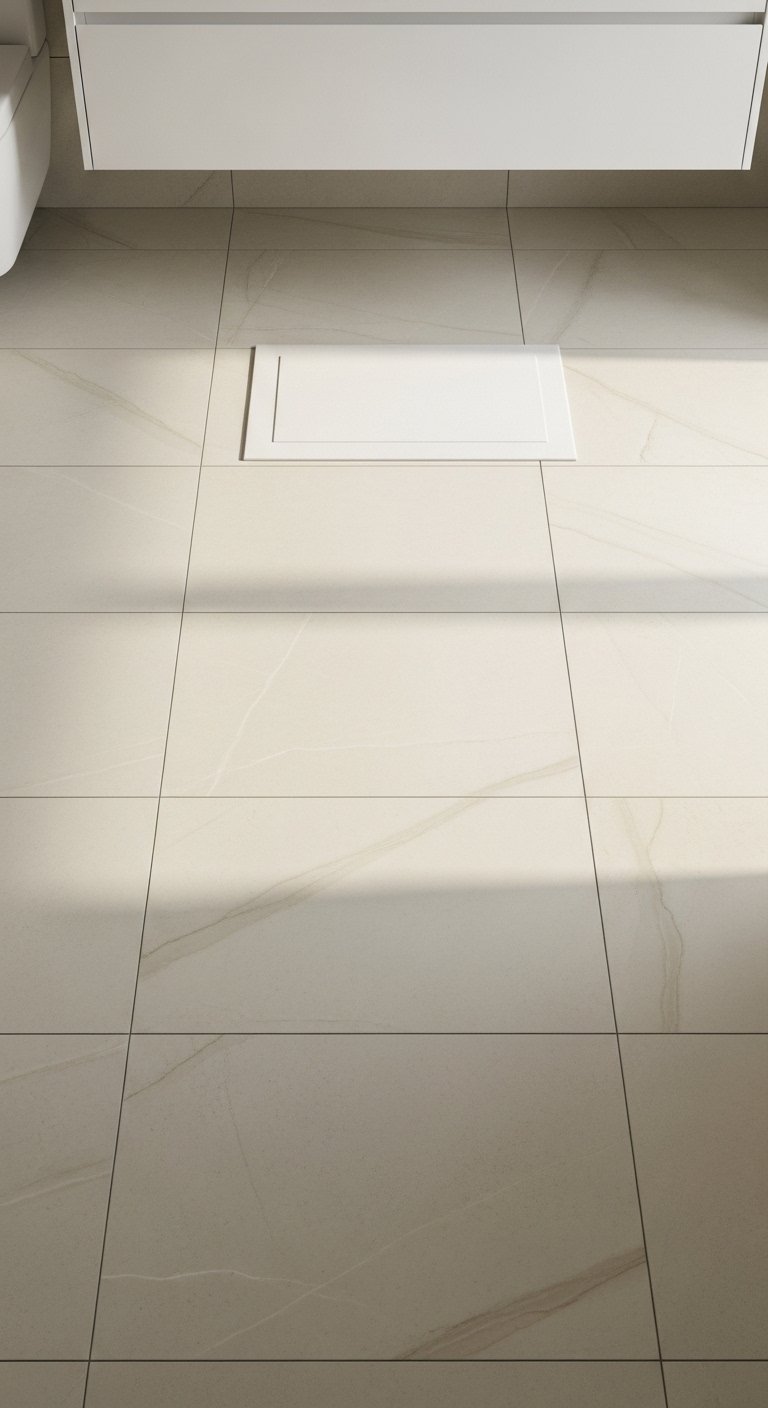
Small tiles with lots of grout lines make a bathroom floor look busy and dated. Large format tiles do the opposite.
Large format floor tiles, anything 60x60cm or bigger, reduce the number of grout lines on your floor and create a cleaner, more expansive surface. The floor reads as one continuous plane rather than a grid of small pieces.
Porcelain large format tiles in a marble or stone look give you the aesthetic of natural stone at a fraction of the cost and with better water resistance.
Matte finish is over polished for bathroom floors. Polished tiles look beautiful until they get wet. Then they become a slip hazard.
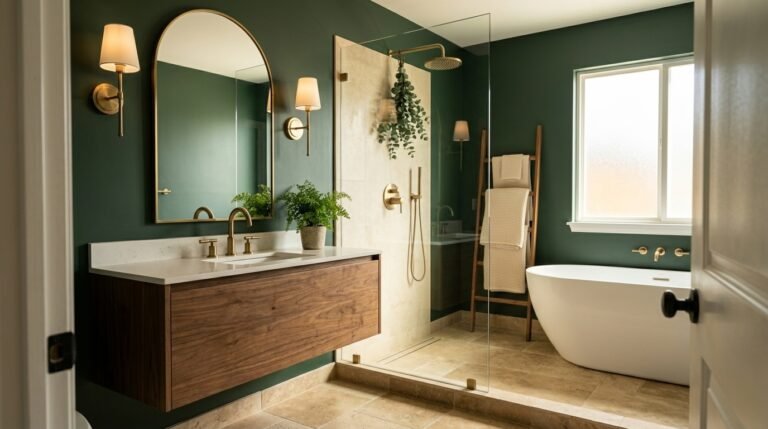
2. Use Zellige Tile on One Wall

Zellige tile has become one of the most requested materials in bathroom design, and it deserves the attention it gets.
Handmade Moroccan zellige tiles have a slightly irregular surface and subtle color variation between tiles that give any wall genuine depth and character. No two tiles are identical. The result looks handcrafted because it is.
Use zellige on one wall only, the shower wall, the wall behind a freestanding bath, or the vanity backsplash. Full-room zellige is overwhelming and expensive. One wall is impactful and manageable.
Colors that work particularly well: sage green, warm terracotta, deep navy, soft white, and dusty rose.
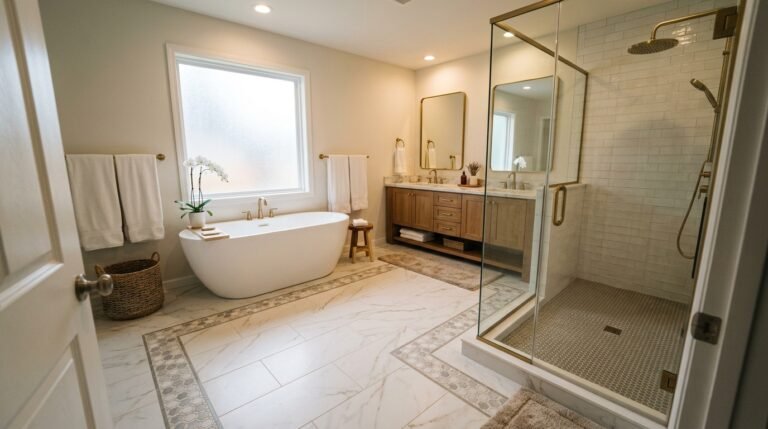
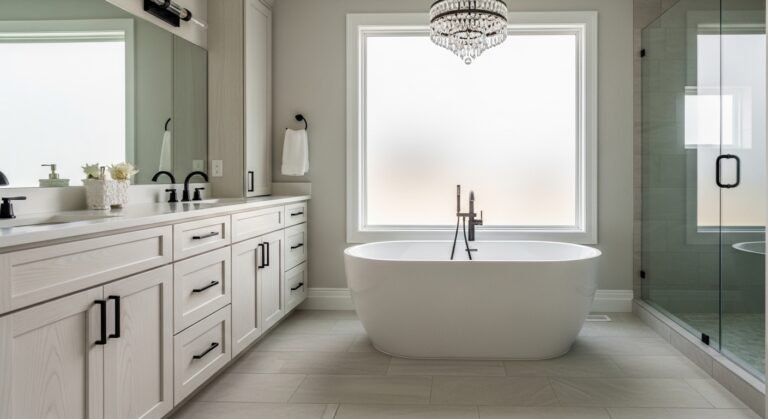
3. Add a Freestanding Bathtub
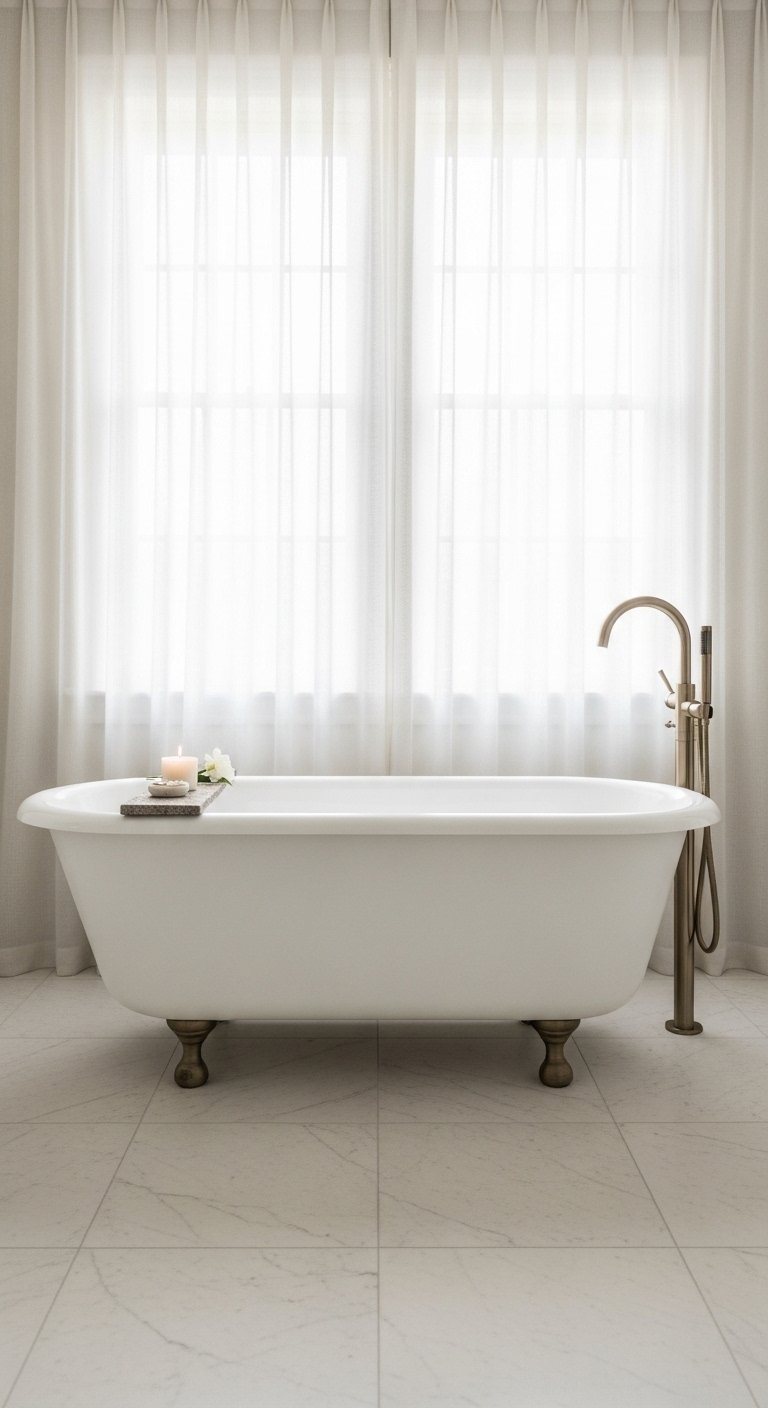
If your bathroom has the floor space, a freestanding bathtub is the single highest-impact design addition you’ll make.
A freestanding bath becomes an instant focal point that elevates the entire room around it. It reads as a luxury feature even in a modestly finished bathroom.
The material matters. Cast iron freestanding baths retain heat better than acrylic. They’re also significantly heavier. Check your floor structure to handle the weight before committing.
Position the bath where it benefits from the best view in the room, whether that’s toward a window, a tiled feature wall, or a garden beyond.
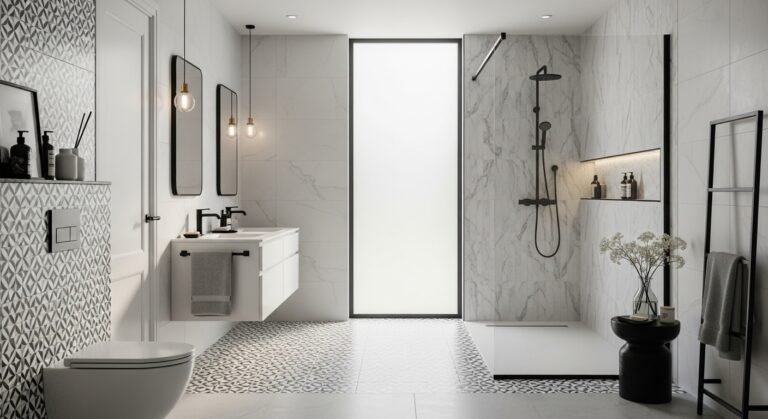
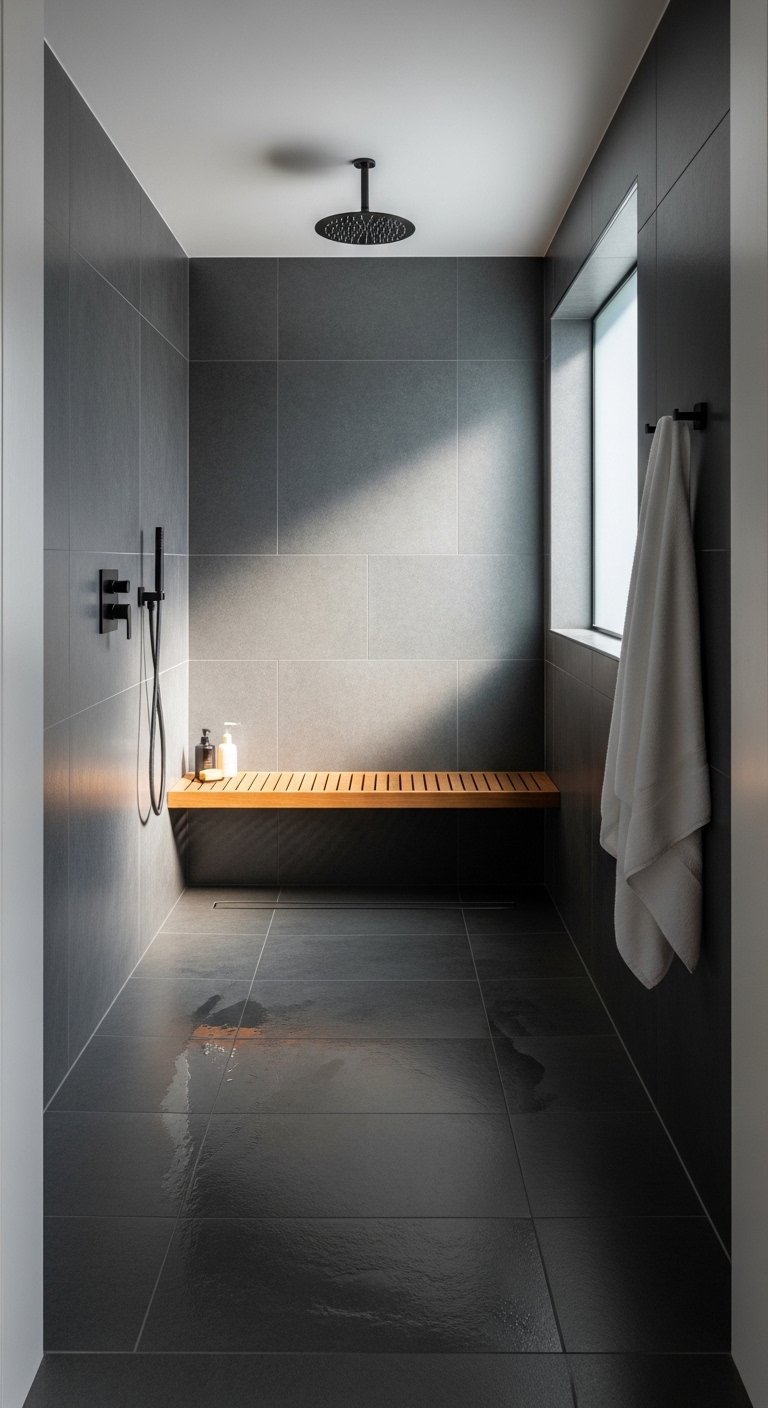
4. Install a Frameless Glass Shower Screen
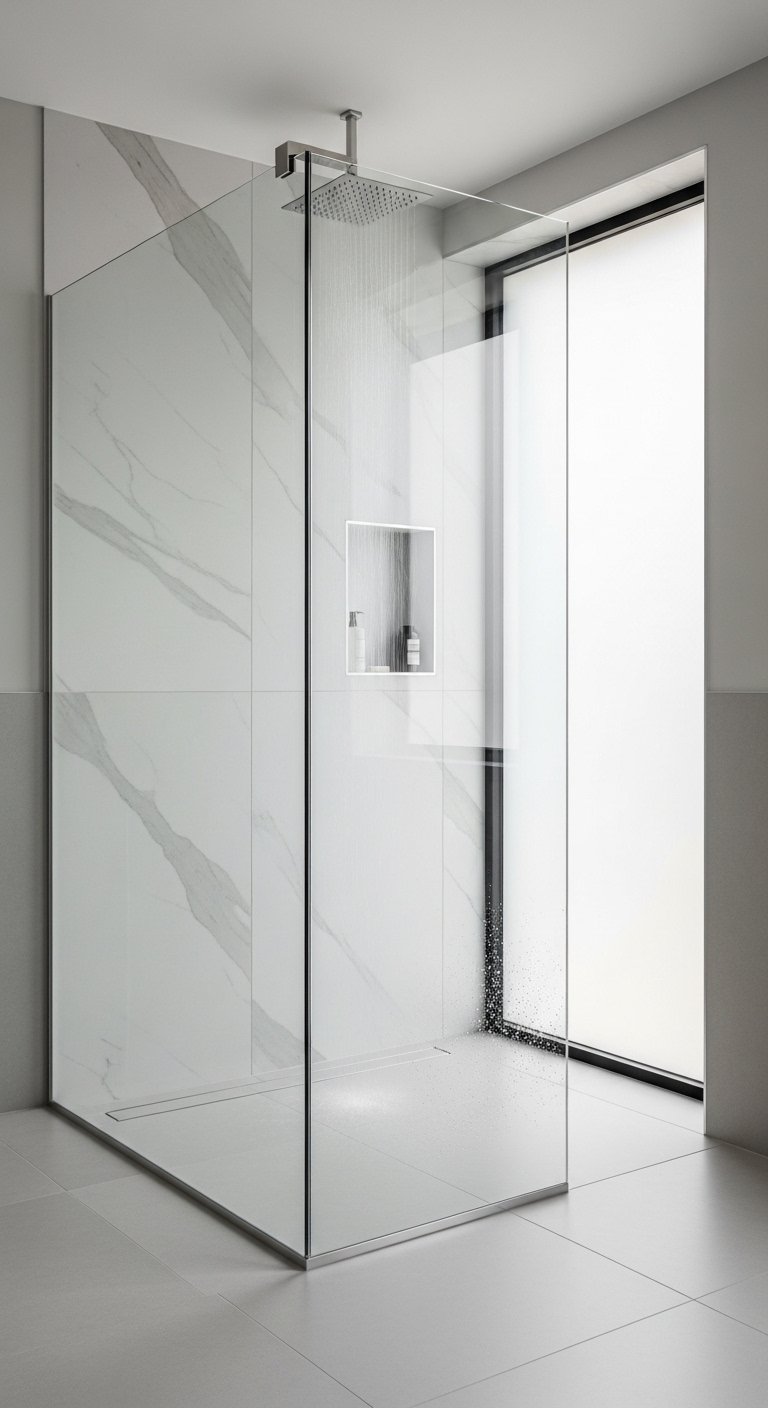
Framed shower screens are functional. Frameless glass shower screens are both functional and invisible.
A frameless glass shower enclosure removes the visual barrier between the shower area and the rest of the bathroom. The room reads as one continuous space rather than two separate zones divided by a metal frame.
This is particularly valuable in smaller bathrooms where every visual trick that increases perceived space matters.
Use a single fixed panel where possible rather than a door if your shower layout allows it. No frame, no hinge, no track. Just glass.
5. Choose Warm Lighting Over Cool White
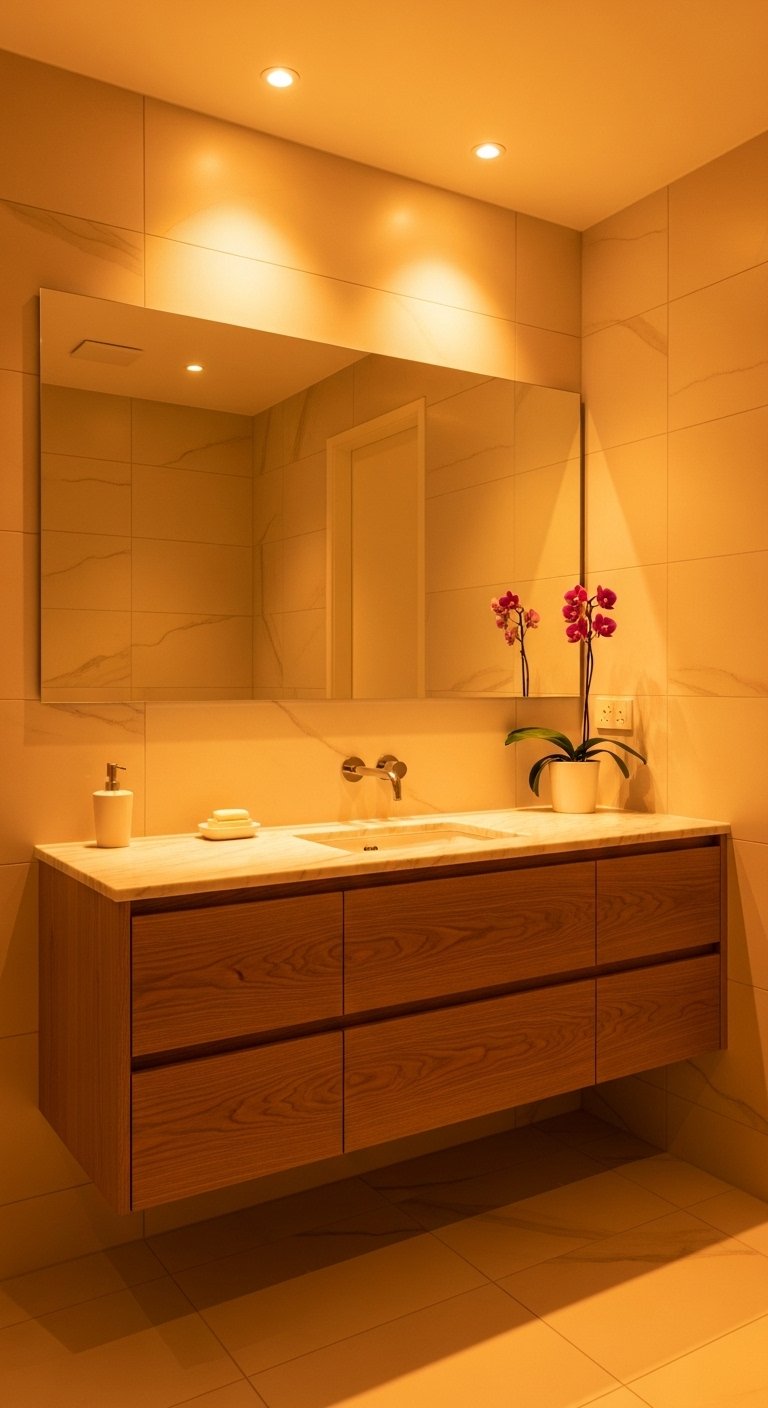
Cool white bathroom lighting is one of the most common and most fixable bathroom design mistakes.
Warm white lighting at 2700K to 3000K makes skin tones look better, makes materials like marble and timber look warmer and richer, and makes the bathroom feel like a room you want to spend time in rather than a clinical white box.
Most bathrooms come fitted with cool white LEDs at 4000K or higher. Replacing the bulbs costs almost nothing. The difference is immediate and significant.
Add a dimmable circuit if your bathroom wiring allows. The ability to dim bathroom lighting transforms it from a functional space to a genuinely relaxing one.
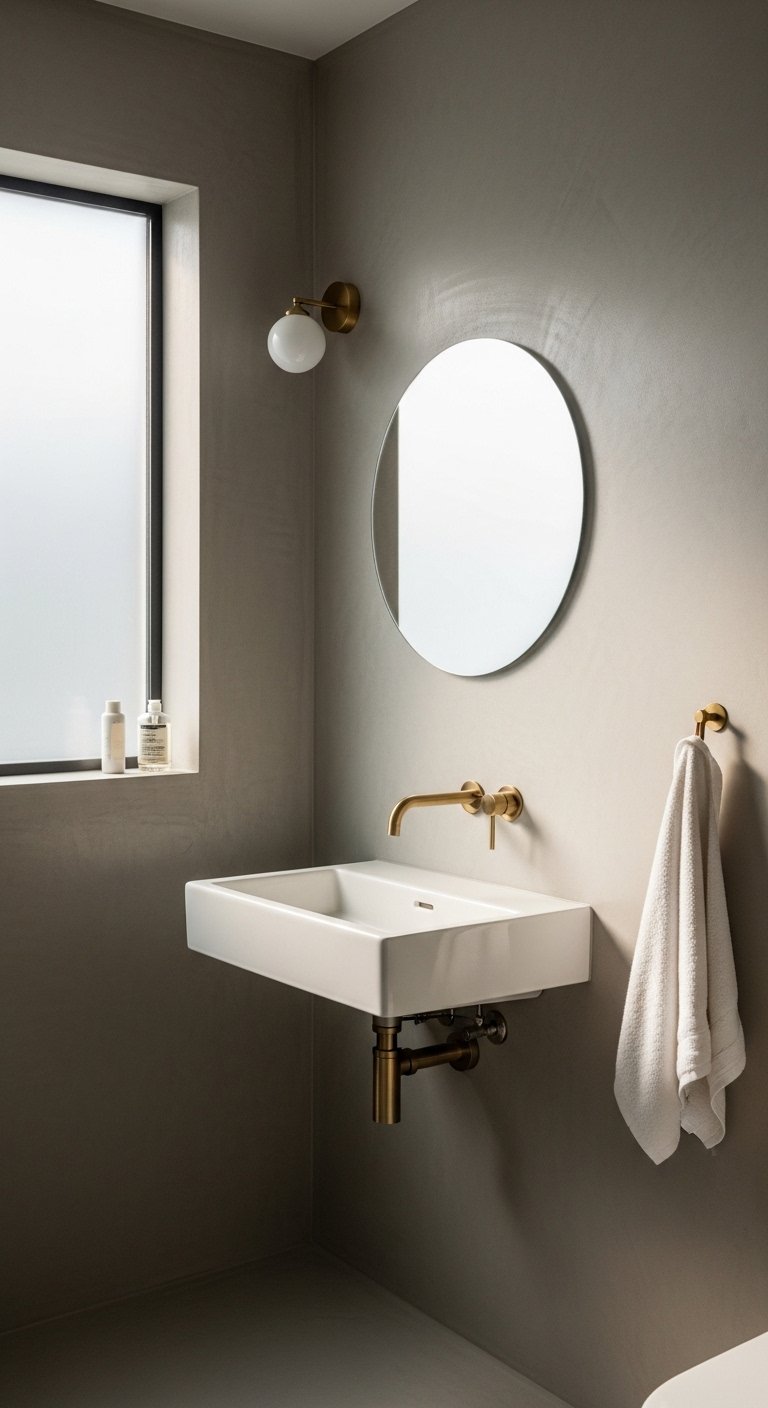
6. Mount Sconce Lights Either Side of the Mirror
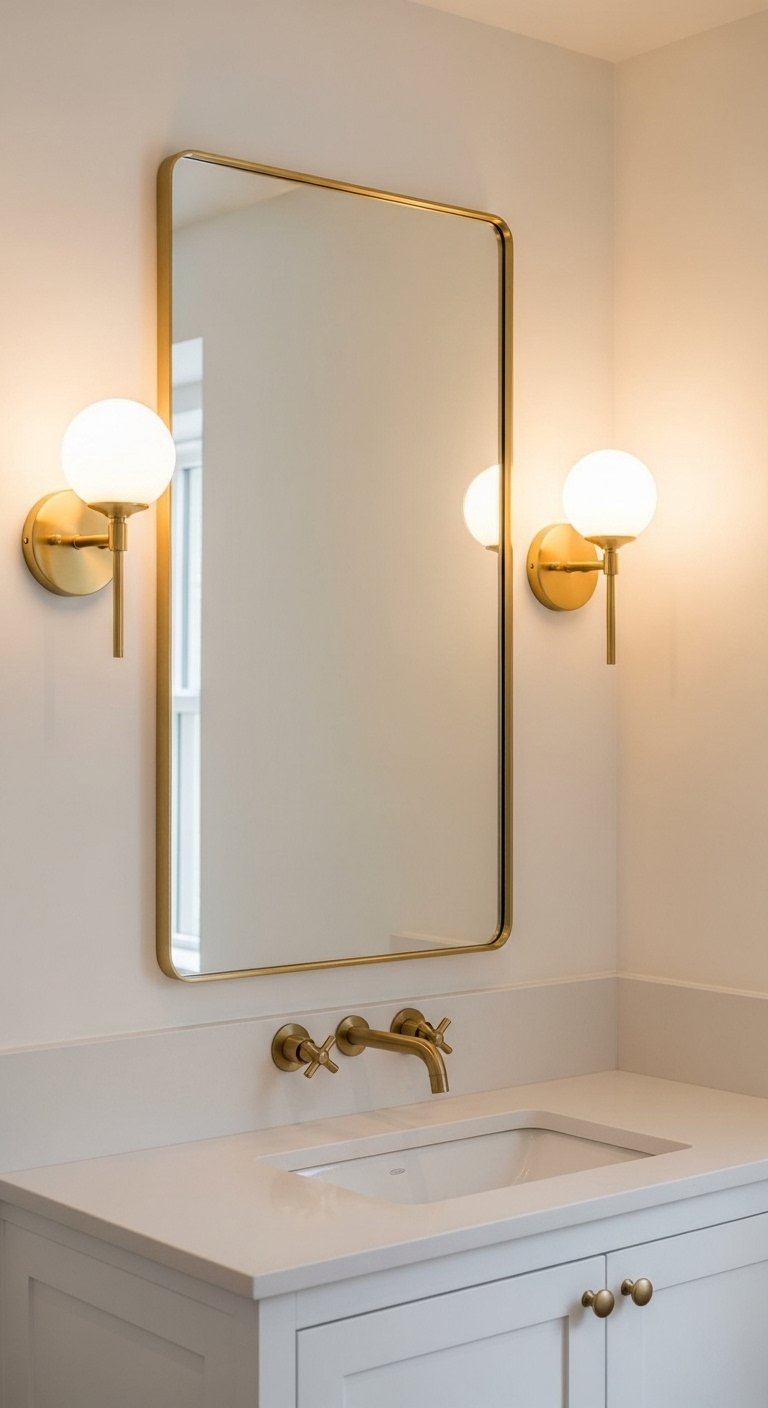
Overhead lighting alone creates shadows on your face when you stand at the mirror. This is why your bathroom lighting never looks like the lighting in a good hotel.
Wall-mounted sconce lights positioned at face height on either side of the mirror eliminate facial shadows by lighting from the sides rather than from above. This is standard practice in professional makeup and grooming spaces for a reason.
The sconces should sit at roughly eye level, between 150cm and 165cm from the floor depending on your height.
Matte black, brushed brass, and brushed nickel all work well. Match the finish to your tap and hardware choice throughout the bathroom.
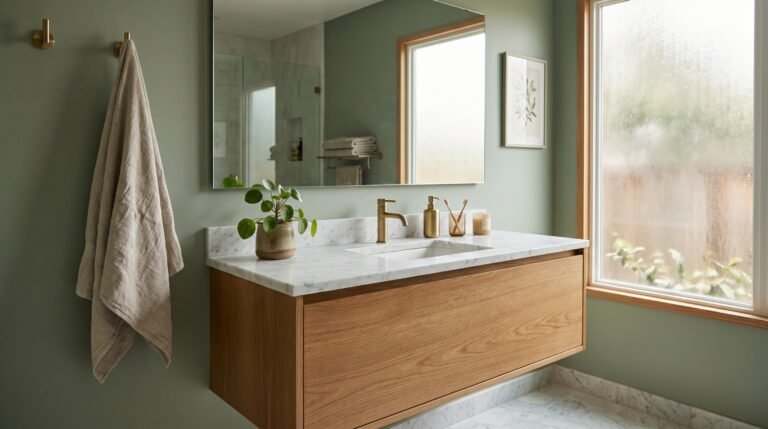
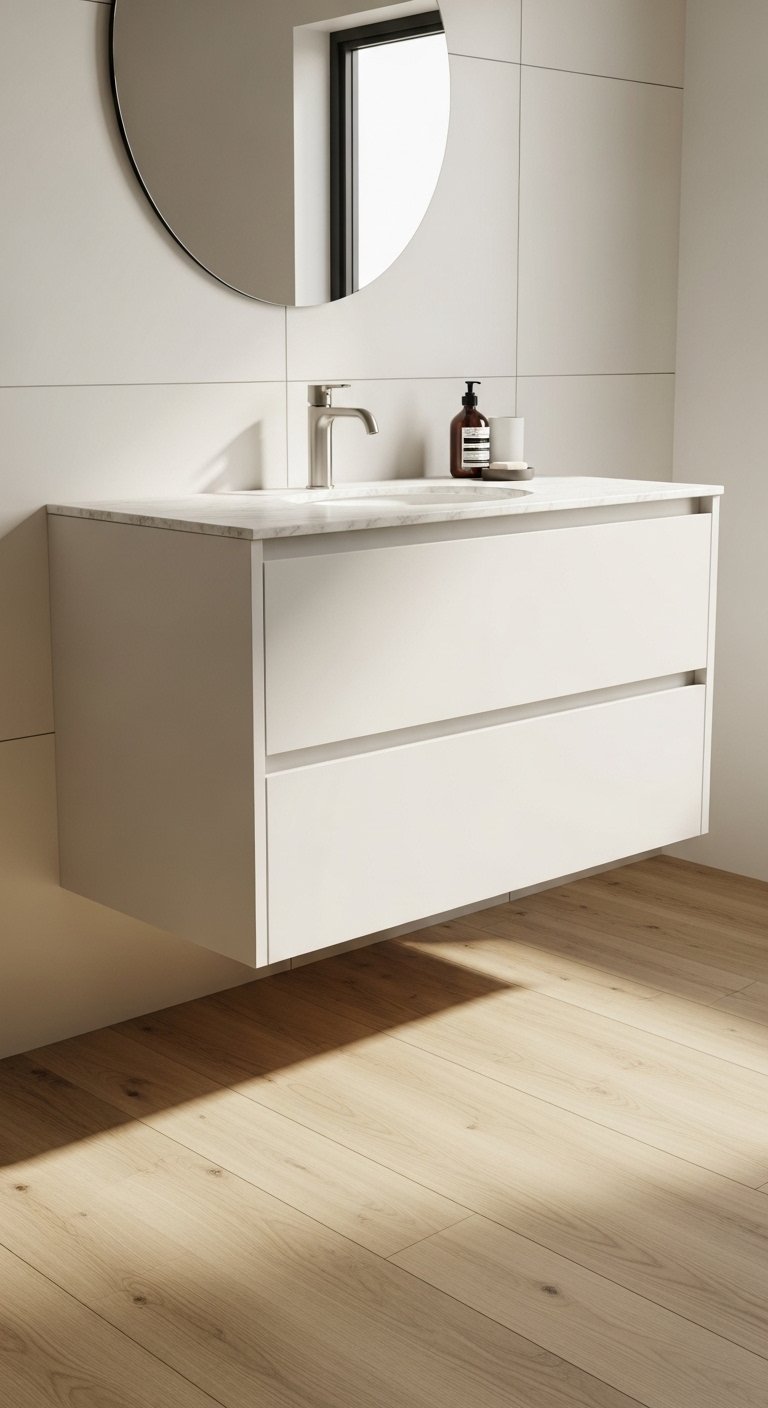
7. Use a Double Vanity
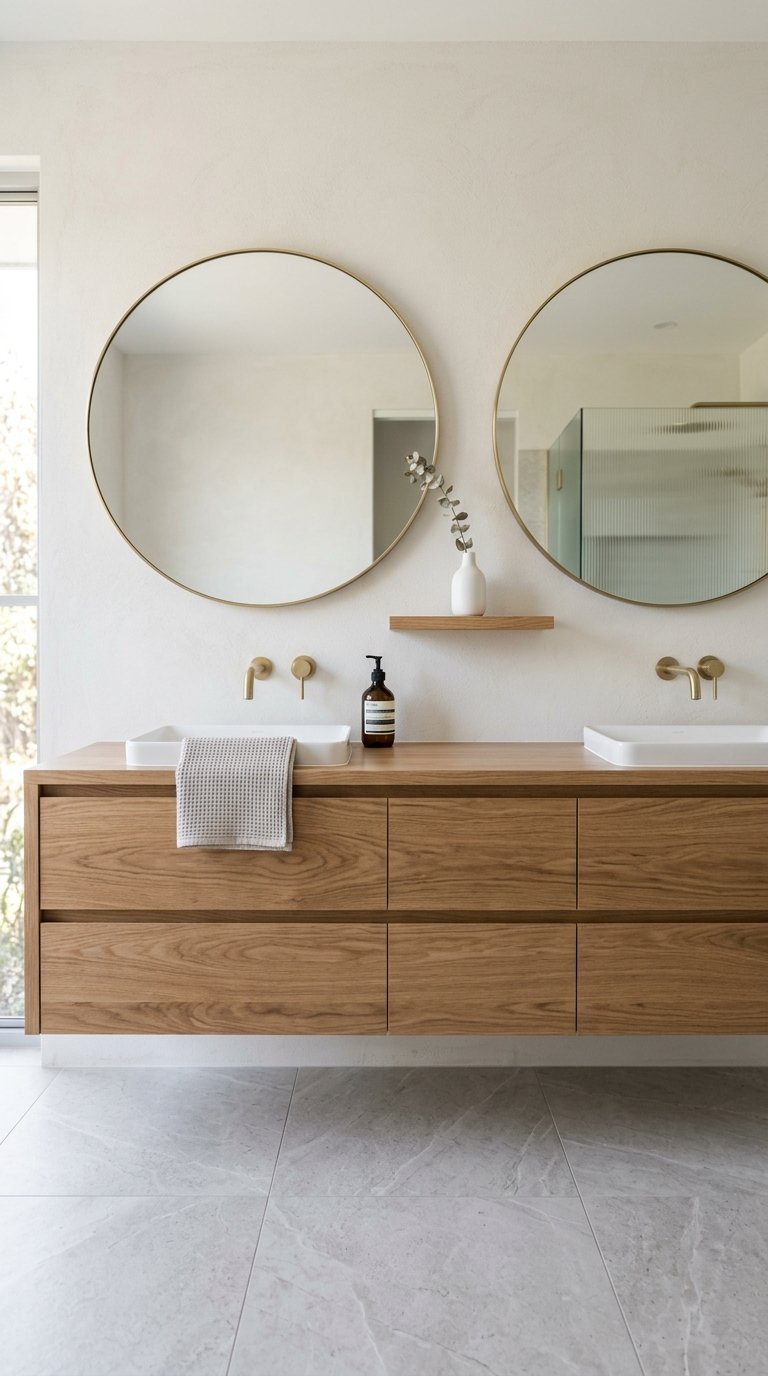
A single sink vanity works for one person. A double vanity works for two. If you share a bathroom, this is not a luxury. It’s a quality of life upgrade.
A double vanity with two sinks, two sets of storage, and ideally two mirrors eliminates the morning queuing system that happens in every shared bathroom without one.
Wall-hung double vanities keep the floor visible beneath, which makes the room feel larger. Floor-standing double vanities offer more storage but visually reduce the floor space.
Choose the vanity depth carefully in smaller bathrooms. A standard vanity is 50cm deep. A slimline vanity at 35-40cm depth gives you function without sacrificing floor space.
8. Install Underfloor Heating
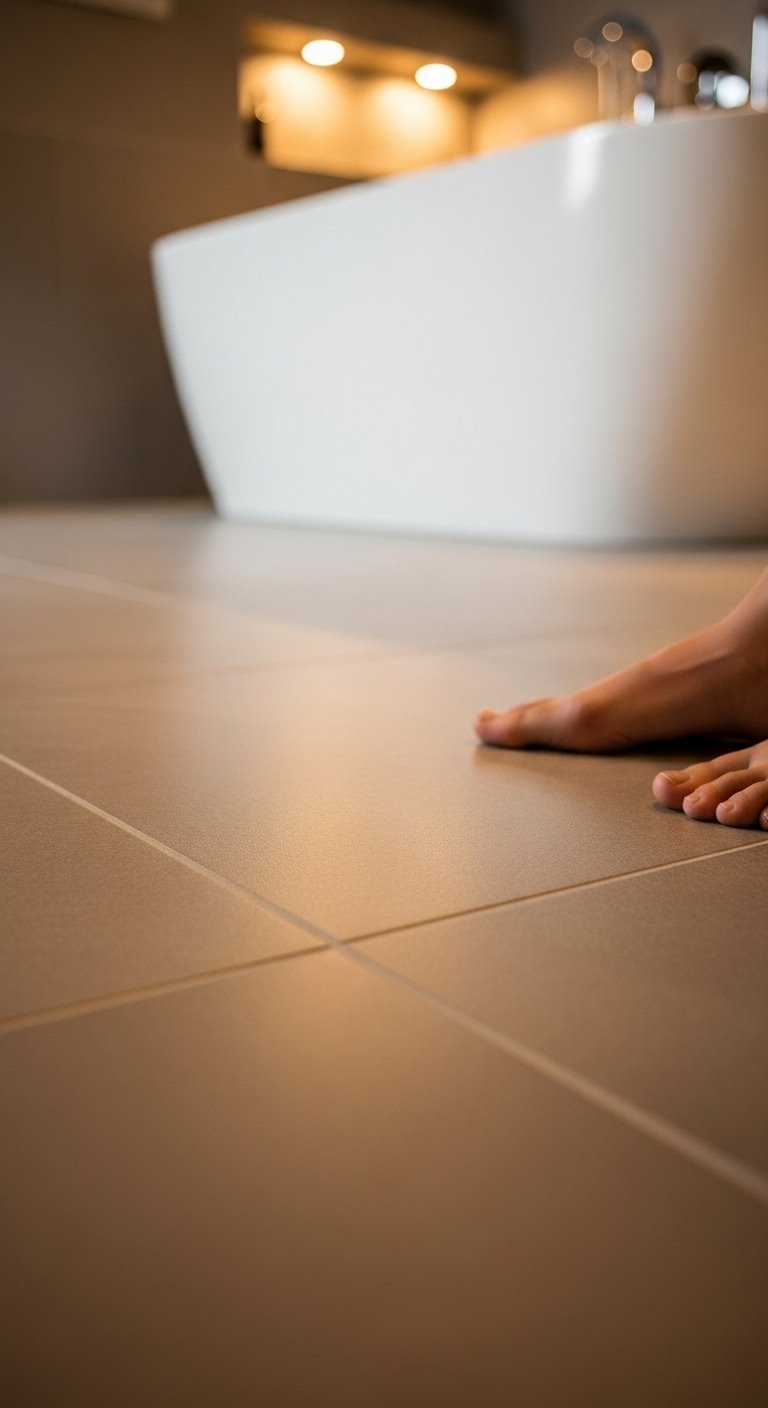
Cold bathroom floors are one of life’s reliable small miseries. Underfloor heating solves this permanently.
Electric underfloor heating mats sit beneath tile or stone floors and warm the surface to a consistent temperature you control via a thermostat. The running cost is lower than most people expect because bathrooms are small rooms that heat quickly.
Install it during a floor renovation when the tiles come up anyway. Retrofitting underfloor heating without disturbing the floor is significantly more expensive.
The comfort difference between a heated bathroom floor and an unheated one is one of those things you only fully appreciate after you’ve experienced it. IMO it’s one of the best bathroom investments you’ll make.
9. Add a Heated Towel Rail

A heated towel rail does two things: dries your towels properly and adds supplementary heat to the bathroom.
A heated towel rail in brushed brass, matte black, or chrome also functions as a design element on whatever wall you mount it. The finish and shape you choose should coordinate with the rest of your bathroom hardware.
Ladder-style heated towel rails give you the most hanging surface area. Horizontal bar rails have a cleaner, more minimal look. Both work equally well in terms of function.
Electric heated towel rails are easier to install than hydronic ones that connect to your central heating. If you’re not doing a full bathroom renovation, electric is the practical choice.
10. Use Fluted Glass or Fluted Panels
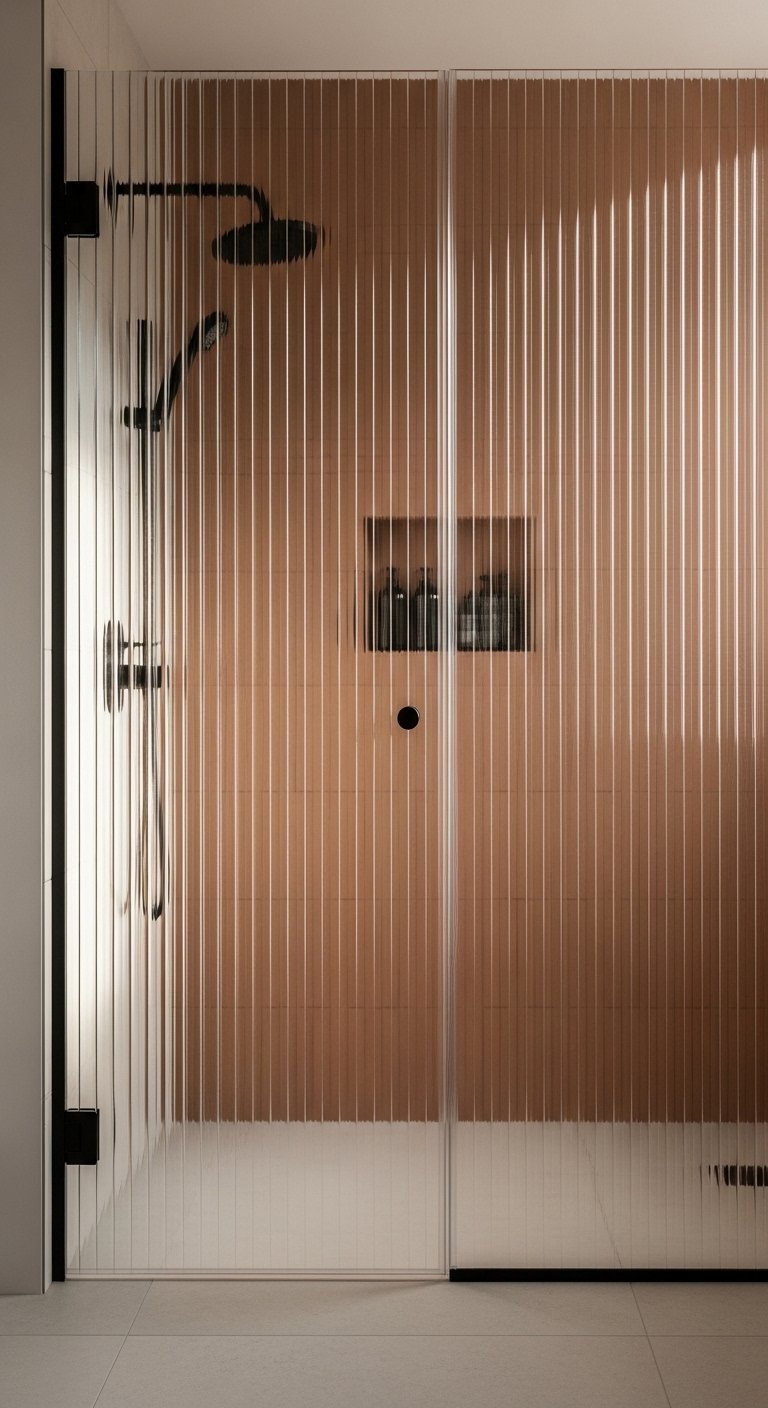
Fluted detail, the repeated vertical groove pattern, has become one of the defining textures in contemporary bathroom design.
Fluted glass shower screens, fluted vanity fronts, and fluted wall panels all add tactile texture and visual interest without introducing pattern or color. The texture does the work.
Fluted glass in particular gives you privacy in a shower screen without the visual heaviness of frosted glass. Light passes through it softly while the interior of the shower remains obscured.
Fluted timber or MDF panels on a vanity front transform a plain cabinet into something that looks considered and crafted.
11. Install a Rainfall Shower Head
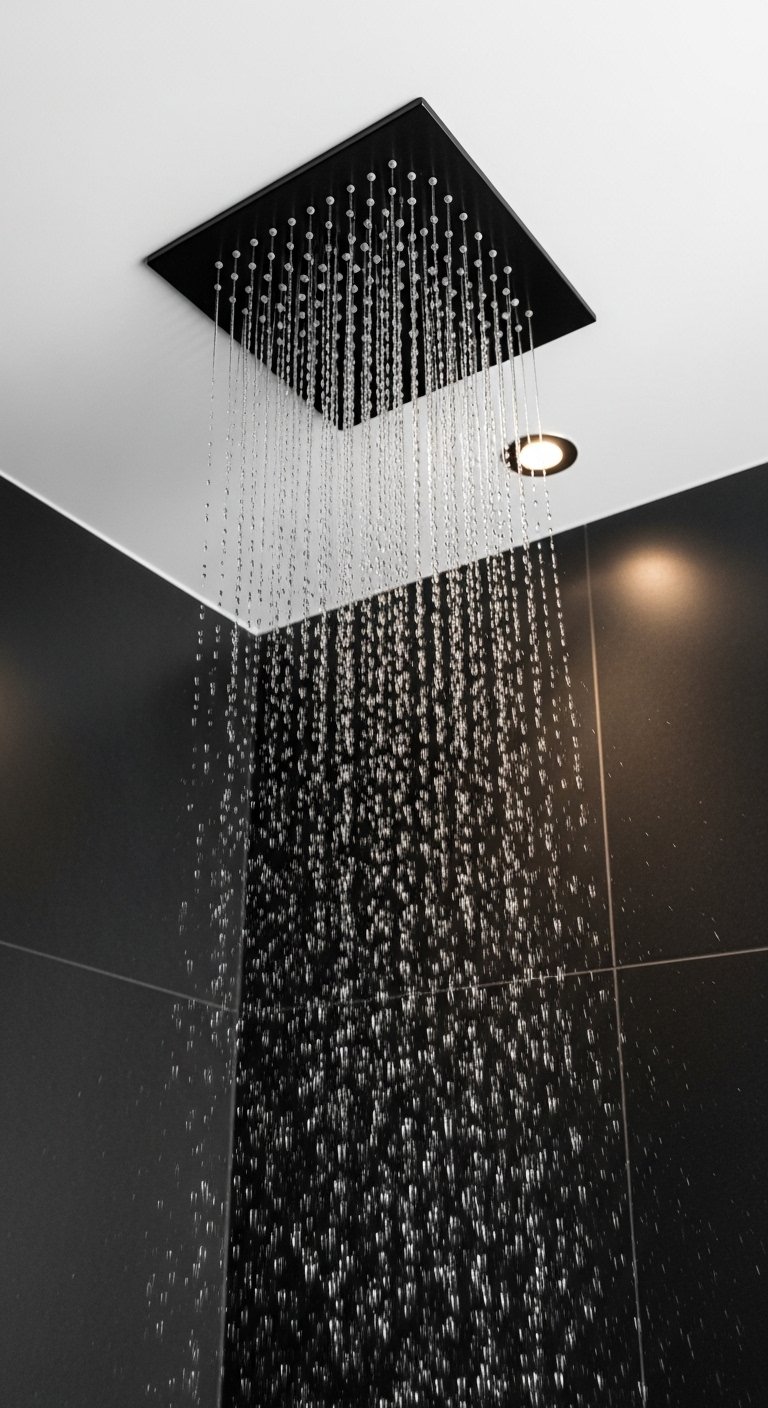
Standard shower heads direct water at your body. A rainfall shower head directs water down onto you from above, replicating the sensation of standing in warm rain.
A ceiling-mounted rainfall shower head in a larger diameter, 200mm to 300mm, creates an immersive shower experience that a standard fixed head can’t match.
The water pressure requirement is higher than a standard head. Check your home’s water pressure before buying. Low pressure systems don’t deliver the rainfall effect properly.
Pair it with a separate handheld shower head on a wall-mounted bar for practical daily use. The rainfall head for the experience; the handheld for actually washing your hair efficiently.
12. Choose a Floating Vanity
A floor-mounted vanity sits on the floor. A floating vanity appears to hover above it. The difference in how a bathroom feels is more significant than you’d expect.
A wall-hung floating vanity exposes the floor beneath it, which makes the room read as more spacious. Cleaning the floor is also significantly easier when you’re not navigating around cabinet feet.
The wall mounting requires the vanity to be fixed to structural wall studs or a reinforced backing board. This is a job for a qualified installer. A poorly mounted floating vanity is a safety risk.
Choose a floating vanity with push-to-open drawer fronts rather than handles if you want the cleanest possible visual. No hardware means no visual interruption across the cabinet face.
13. Add Indoor Plants
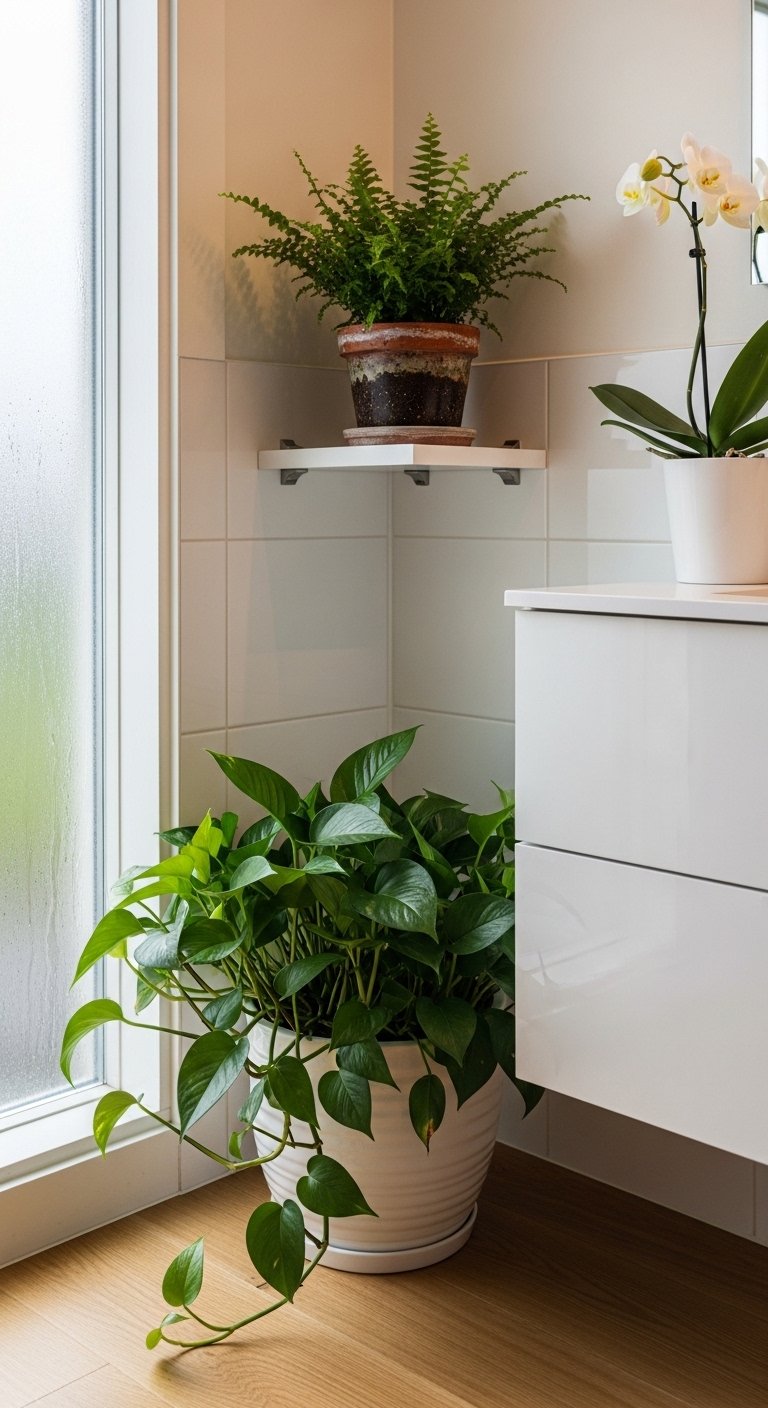
Bathrooms are humid, warm, and have water nearby. For the right plants, this is an ideal environment.
Bathroom-suitable plants including devil’s ivy, peace lilies, spider plants, ferns, and orchids thrive in the humidity a bathroom naturally produces. They add organic color, texture, and life to what is often a hard, cold environment of tile, glass, and stone.
A single large plant in a corner, a small trailing plant on a shelf, or a cluster of small plants on the vanity top all work. Scale the plant size to the available surface.
FYI, avoid plants that need direct strong sunlight in bathrooms with no window or very low natural light. Stick with low-light tolerant species in darker bathrooms.
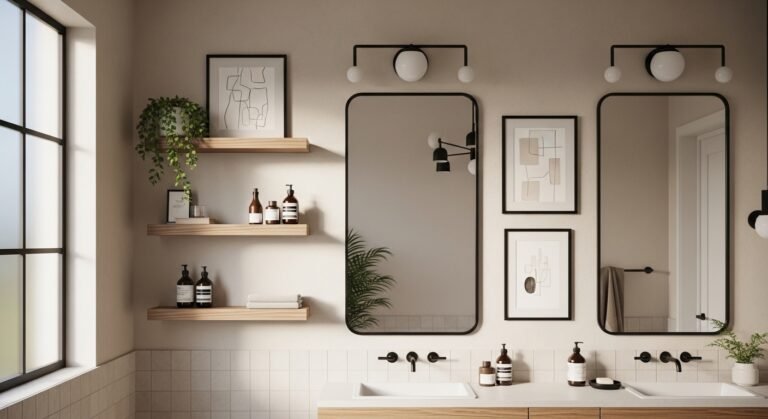
14. Use a Statement Mirror
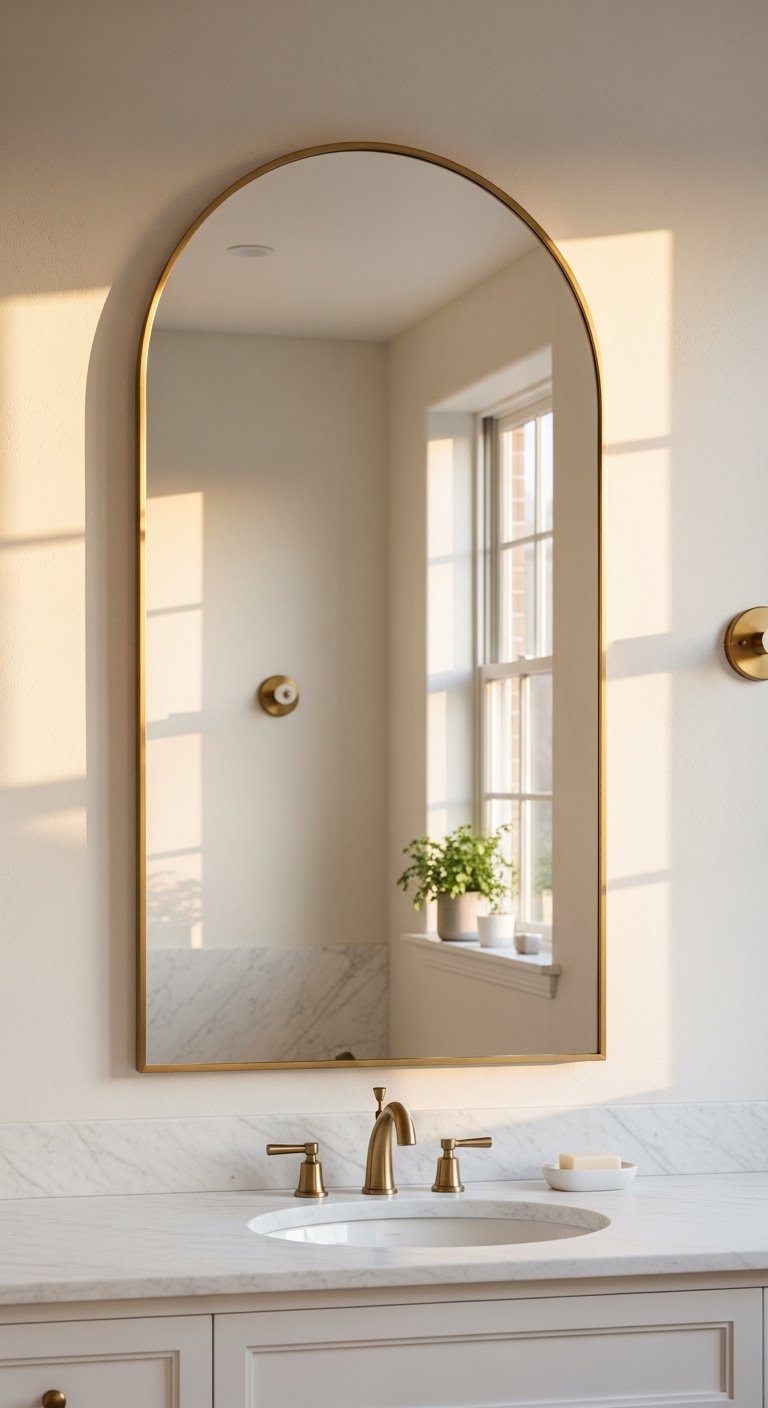
A builder’s basic rectangular mirror above a vanity is functional. A statement mirror is functional and interesting.
An arched mirror, an irregular organic-shaped mirror, an oversized rectangular mirror, or a mirror with a decorative frame transforms the vanity wall from a functional surface into a designed one.
Arched mirrors in particular have dominated bathroom design for several years. They work in almost every bathroom style from minimal to maximalist.
Size up from whatever you think you need. A mirror that’s too small above a vanity looks like an afterthought. The mirror should be at least as wide as the vanity below it, ideally wider.
15. Install Tongue and Groove Panelling
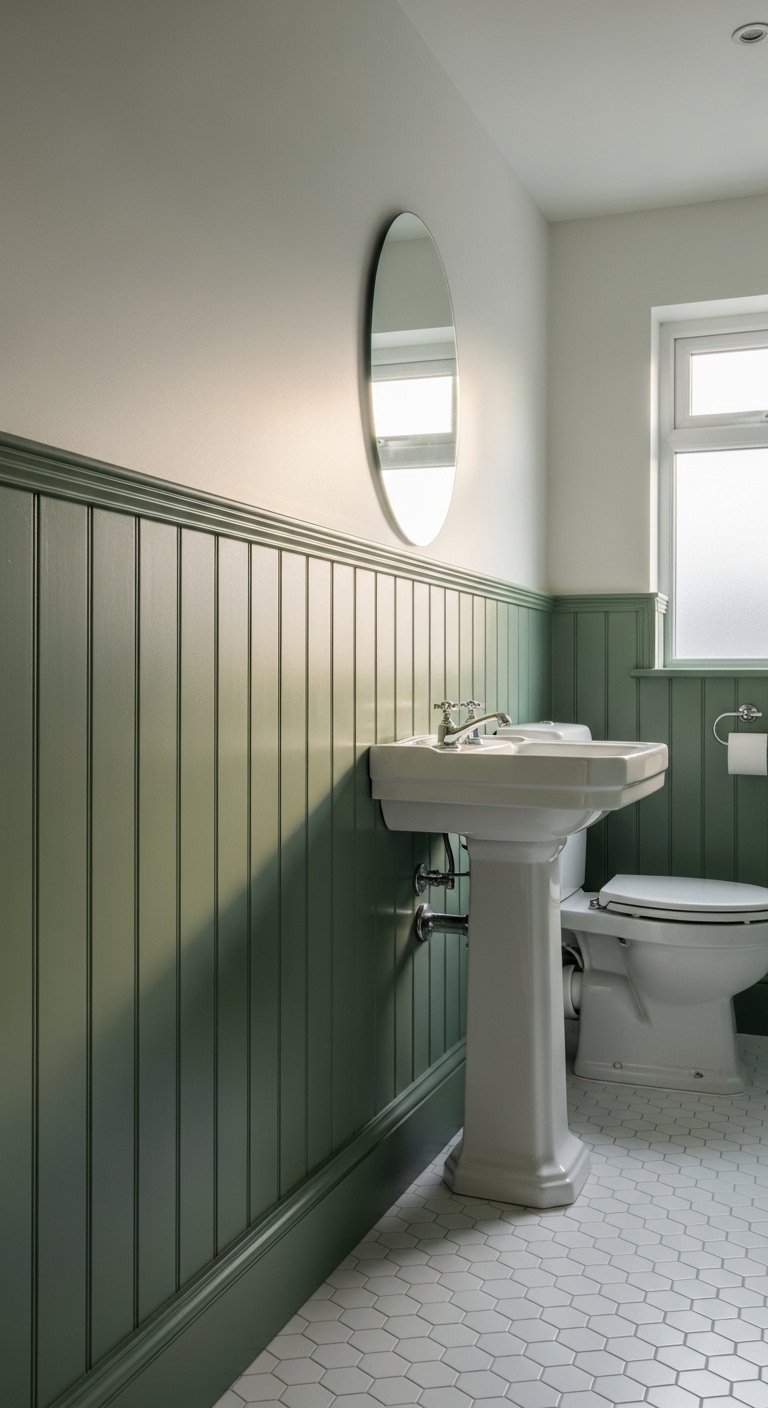
Wall panelling in a bathroom adds architectural detail that tile alone doesn’t provide.
Tongue and groove wall panelling painted in a semi-gloss or satin finish on the lower half of bathroom walls creates a classic, considered look that works in both traditional and contemporary bathrooms.
Use moisture-resistant MDF specifically designed for wet areas. Standard MDF swells and degrades in a humid bathroom environment.
Paint the panelling in a contrasting color to the wall above for maximum definition, or in the same color as the wall for a more subtle, tonal effect.
16. Create a Wet Room
A wet room removes the shower enclosure entirely. The entire bathroom floor becomes the shower floor, with a central or linear drain and fully waterproofed walls and floor throughout.
A wet room design makes a small bathroom feel significantly larger by removing the shower screen that divides the space. The room reads as one open volume rather than a partitioned one.
The waterproofing is the critical element. A properly tanked wet room with correctly installed drainage works flawlessly. A poorly waterproofed wet room causes structural water damage. Do not cut corners on the waterproofing membrane and drain installation.
Heated floors are more important in a wet room than a conventional bathroom because the entire floor surface gets wet during showering.
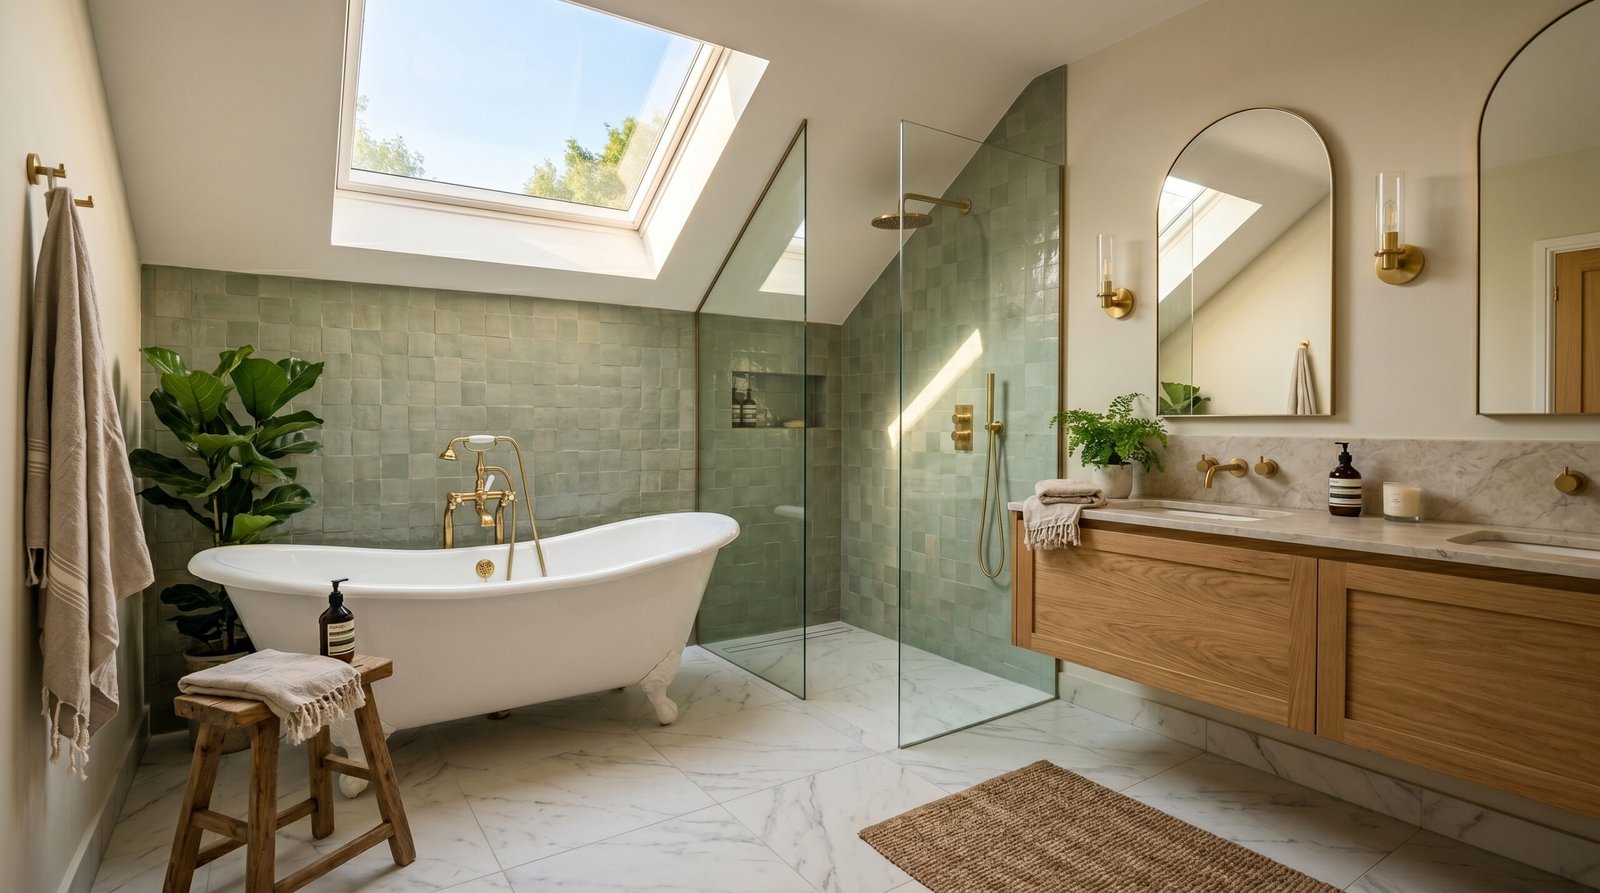
17. Add a Skylight
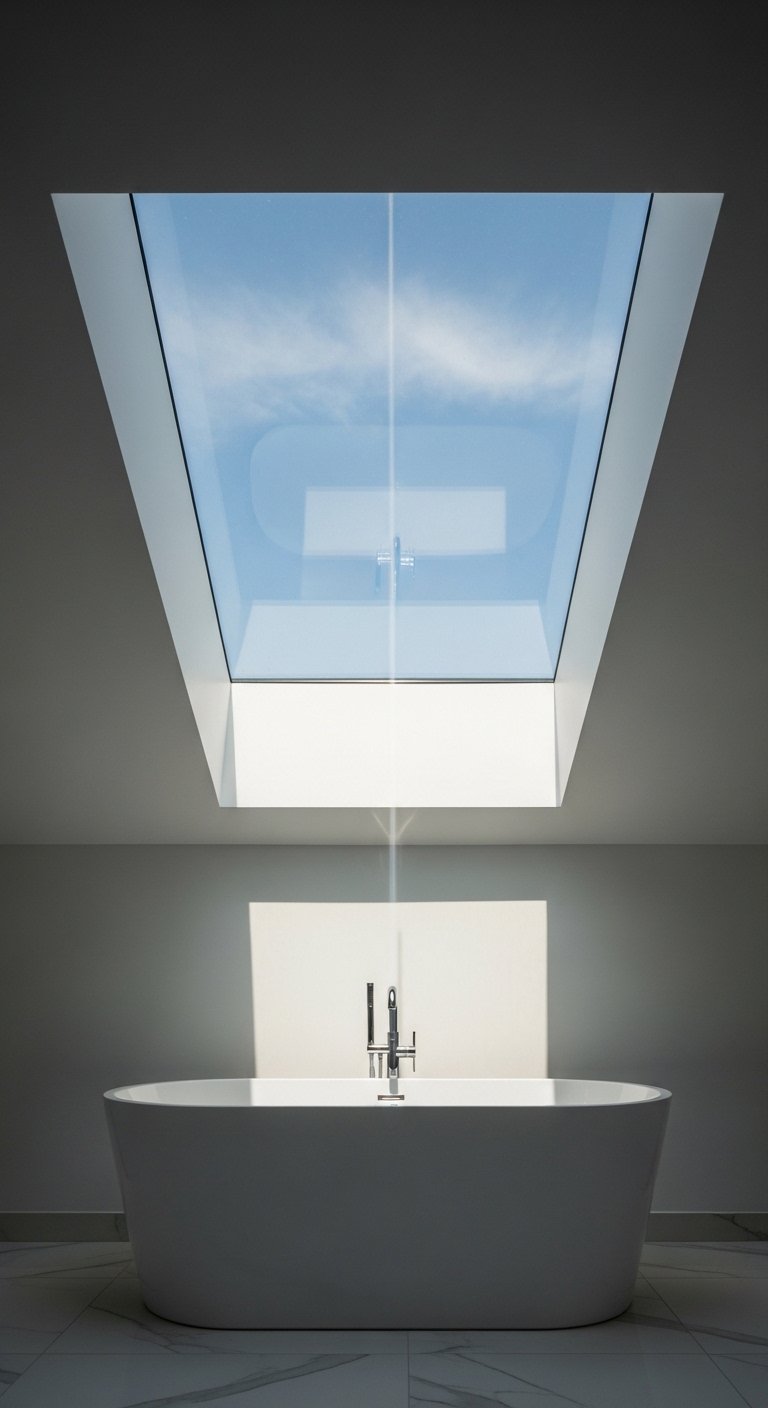
Natural light transforms a bathroom more than any other single addition. A skylight brings it in from above without requiring an external wall.
A roof skylight above a bathroom floods the room with natural daylight while maintaining complete privacy. No curtains, no blinds, no compromise between light and privacy.
Vented skylights also improve bathroom ventilation, which reduces condensation and dampness. This is a practical benefit beyond the aesthetic one.
The installation cost is significant and requires structural work. But a bathroom with a skylight operates in a different light quality than one without it. The investment is visible every single day.
18. Use Terrazzo
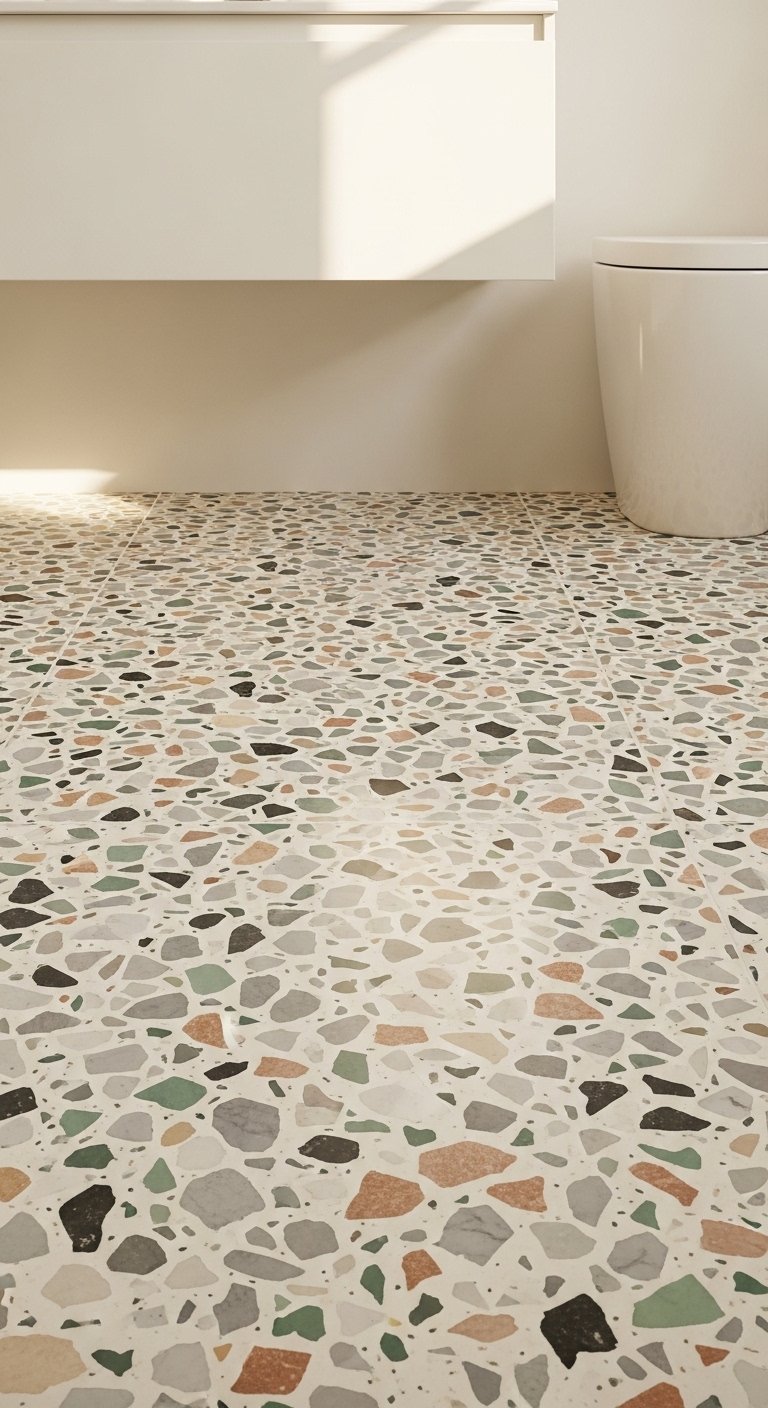
Terrazzo, the composite material of marble chips set in a cement or resin base, has made a strong comeback in bathroom design.
Terrazzo floors, terrazzo walls, terrazzo vanity tops, and terrazzo accessories all bring a playful yet sophisticated pattern to a bathroom that solid materials can’t replicate. The flecked surface has movement and interest at every scale.
Modern terrazzo is available in resin-based formats that are more water-resistant than traditional cement-based versions. Resin terrazzo is the practical choice for bathroom floors and surfaces.
The color of the matrix and the chips determines whether your terrazzo reads as subtle or bold. A neutral matrix with neutral chips is quiet. A coloured matrix with contrasting chips makes a strong statement.
19. Install a Recessed Shelf in the Shower
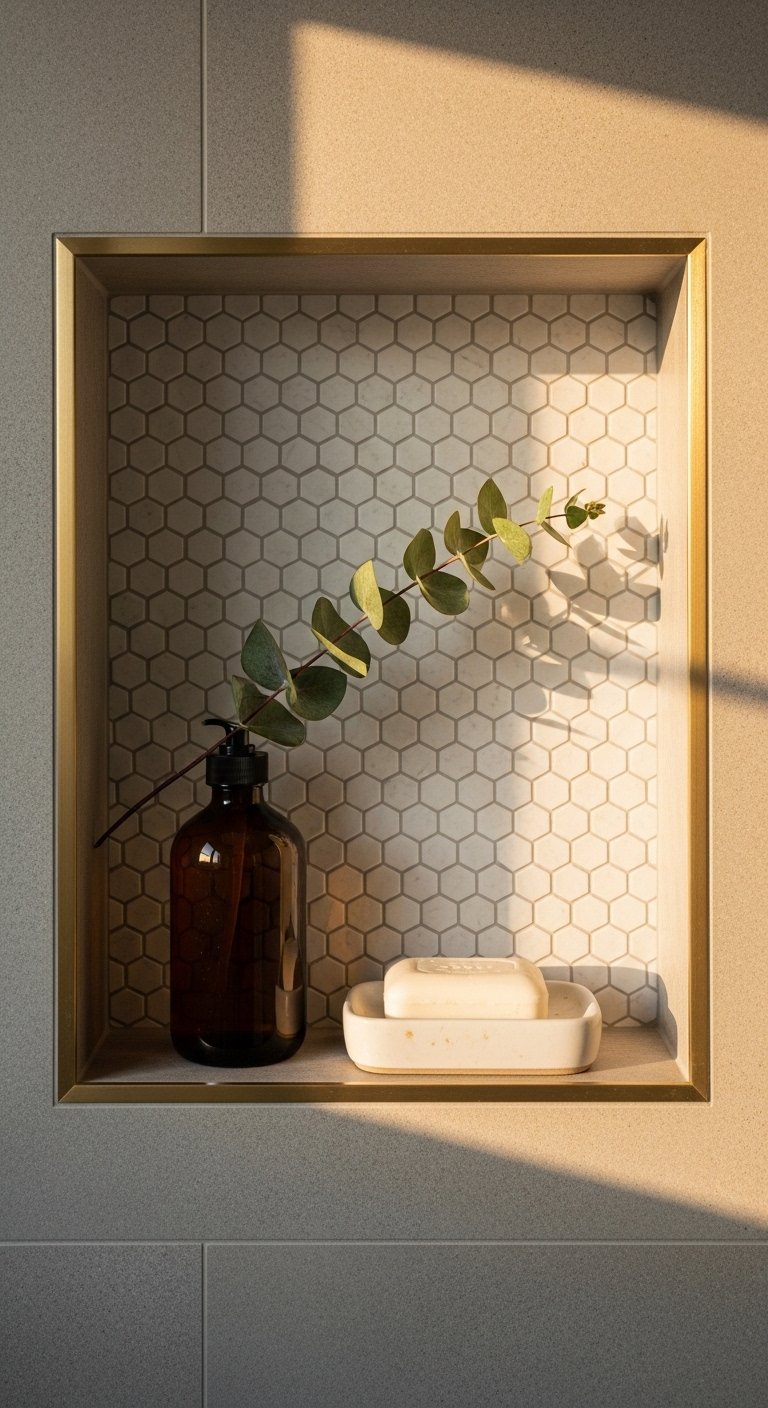
Shower caddies hanging from shower heads are the bathroom equivalent of a plastic bag holder on a door handle. They work, technically. They look terrible.
A recessed niche shelf built into the shower wall sits flush with the tile surface and holds shampoo, conditioner, and soap without protruding into the shower space or looking makeshift.
Plan the niche position before tiling. It must sit between wall studs and be fully waterproofed before tiling over. Adding a niche after tiling means breaking tiles.
Tile the inside of the niche in a contrasting tile to the shower wall for a detail that elevates the entire shower enclosure.
20. Choose Concrete or Microcement Walls
Concrete and microcement wall finishes give a bathroom an industrial, tactile quality that tile doesn’t replicate.
Microcement applied over existing walls creates a seamless, grout-free surface in a range of grey, warm stone, and earthy tones. The absence of grout lines gives the bathroom a completely different character to a tiled room.
Microcement requires professional application and proper sealing to perform well in a wet environment. DIY application in a bathroom is a high-risk approach. Budget for a professional applicator.
The maintenance requirement is higher than glazed tile. Microcement needs periodic resealing to maintain its water resistance. Factor this into your long-term bathroom maintenance plan.
21. Add Open Shelving for Display and Storage
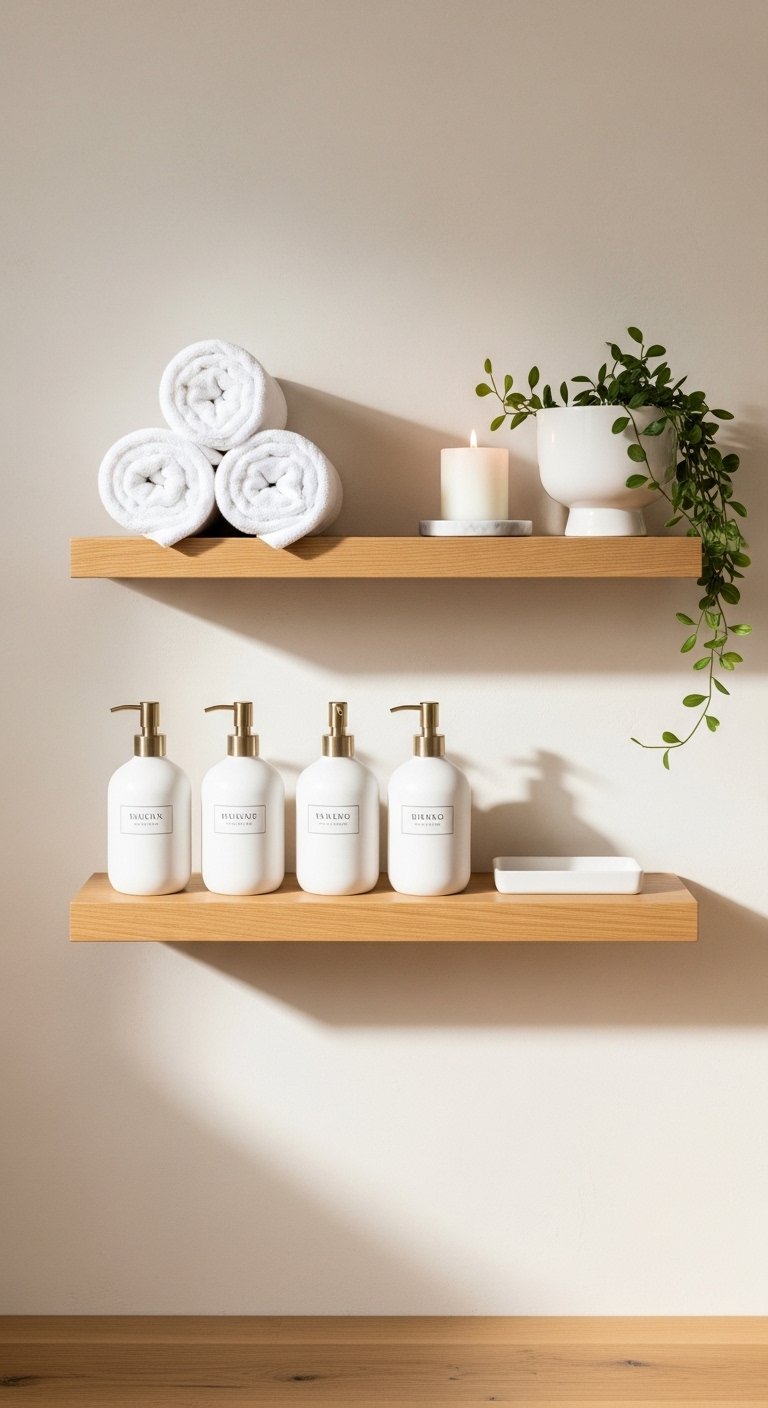
Closed cabinet storage is efficient. Open shelving is efficient and decorative simultaneously.
Open bathroom shelves in natural wood, black metal, or white painted timber give you accessible storage for towels, toiletries, and decorative objects while adding a design layer to the wall they occupy.
Style open shelves with intention. Rolled white towels, a small plant, a candle, and one ceramic object is a shelf that looks designed. Fourteen different shampoo bottles and a razor is a shelf that looks like a chemist stockroom.
Limit the toiletry items on open shelves to decanted versions in matching dispensers. The visual discipline this requires pays off every time you look at the shelf.
22. Use a Bold Wallpaper in a Powder Room
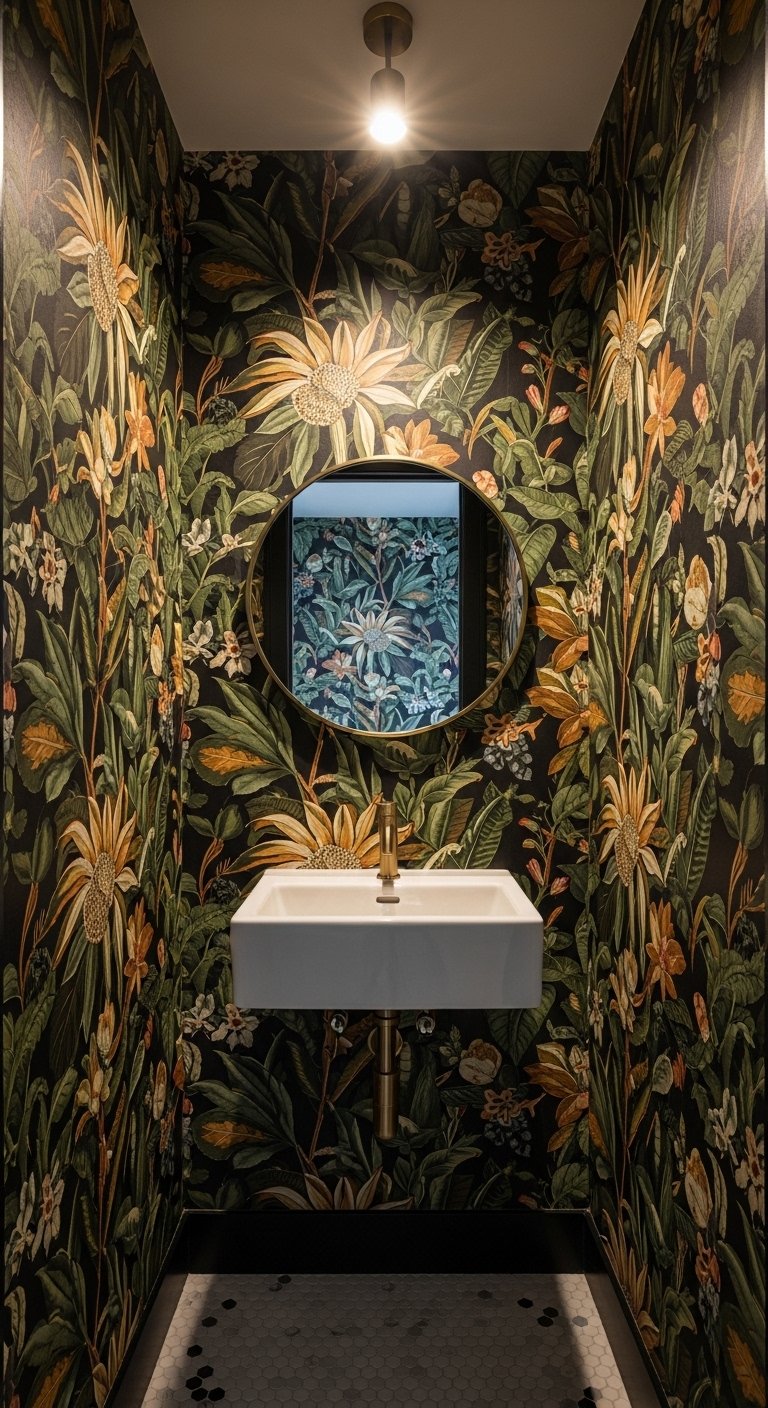
A powder room, the small guest toilet separate from the main bathroom, is the ideal place for a bold design decision you’d never commit to in a larger space.
Dramatic botanical wallpaper, maximalist pattern, bold geometric print, or rich dark color all work in a powder room because the room is small and guests experience it briefly. The intensity of the design becomes a feature rather than an overwhelming environment.
A powder room with bold wallpaper photographs and is talked about in a way that a plain white one never is.
Use a wallpaper paste specifically formulated for bathroom environments. Standard wallpaper paste degrades in humid conditions. Moisture-resistant paste extends the wallpaper’s life significantly.
23. Install a Column Radiator
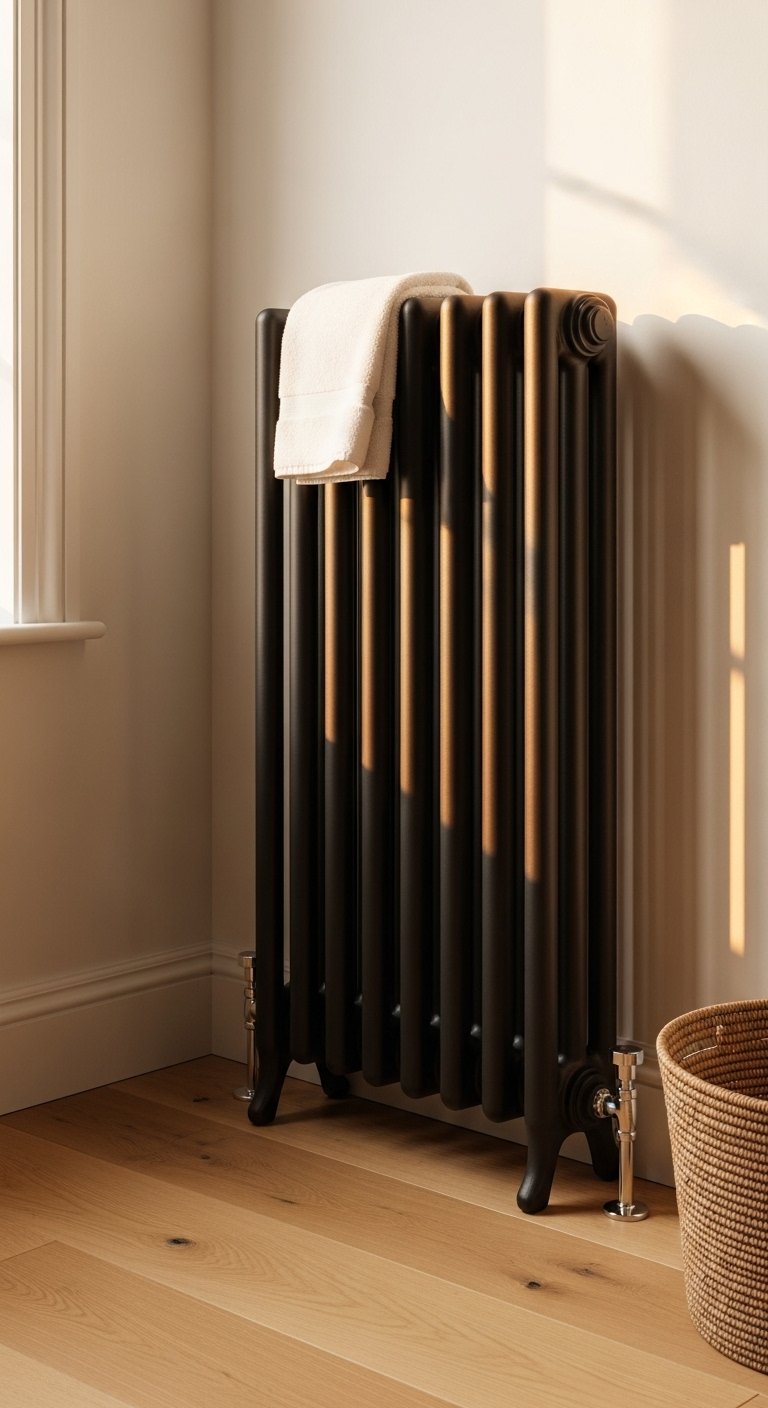
Most bathroom radiators are either towel rails or panel radiators. A column radiator is a third option that brings genuine architectural presence.
A floor-standing column radiator in anthracite, white, or a bold color becomes a piece of functional sculpture in a bathroom corner. The vertical column format adds height to the room and draws the eye upward.
Column radiators connect to your central heating system and require a plumber to install. They deliver significant heat output, making them suitable as the primary heat source in a bathroom.
The design value of a column radiator versus a standard panel radiator is significant. The cost difference is modest. The choice is straightforward.
24. Create a Dark, Moody Bathroom
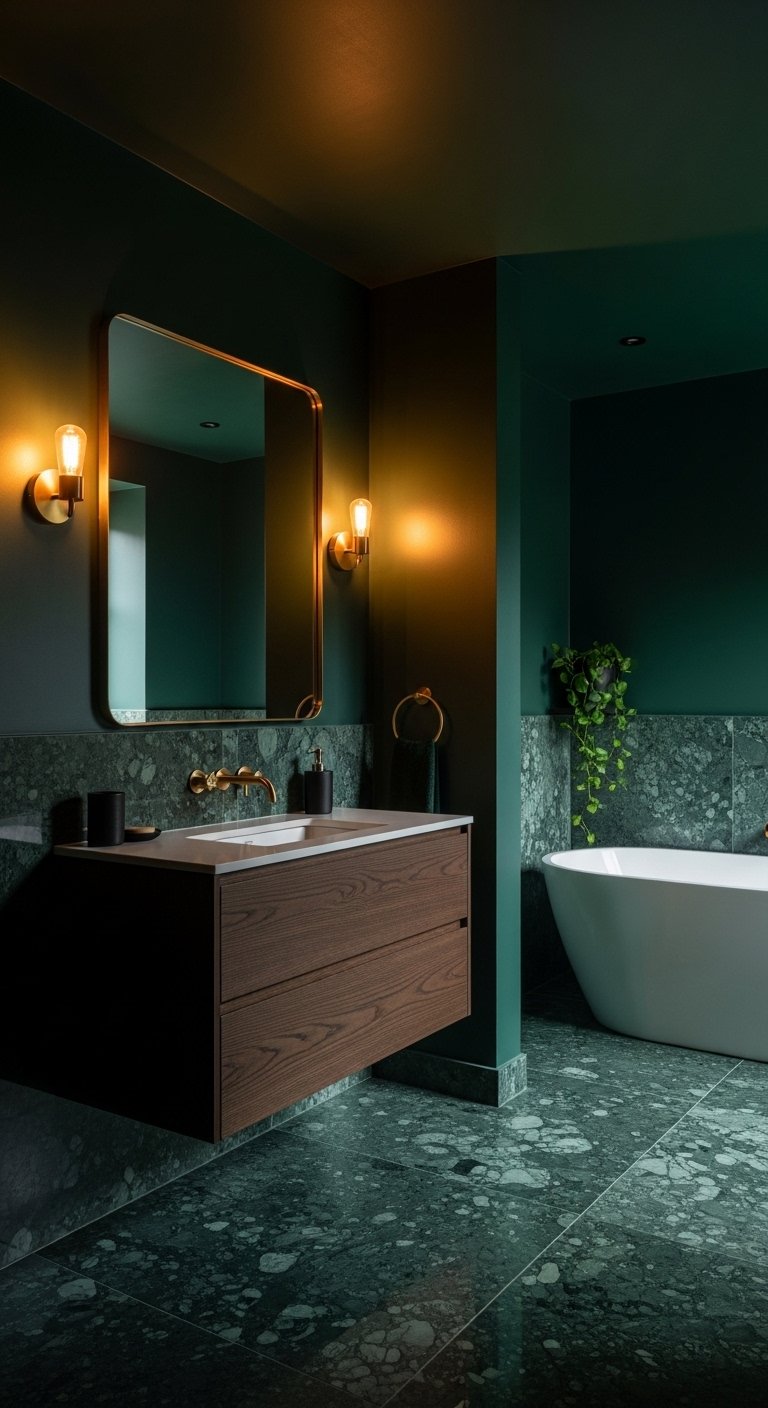
Not every bathroom needs to be light and airy. A dark bathroom done well is one of the most impressive interior design outcomes in any home.
Deep charcoal walls, dark forest green tiles, rich navy paint, or black marble create a bathroom that feels immersive and dramatic rather than clinical and bright.
The key to making a dark bathroom work is lighting. A poorly lit dark bathroom feels oppressive. A well-lit dark bathroom, with warm sconce lights, good ceiling lighting, and candles, feels like a high-end hotel spa.
Balance the dark surfaces with warm metallic accents: brushed brass taps, gold mirror frames, and warm timber elements prevent the room from feeling cold 🙂
25. Upgrade Your Taps and Hardware
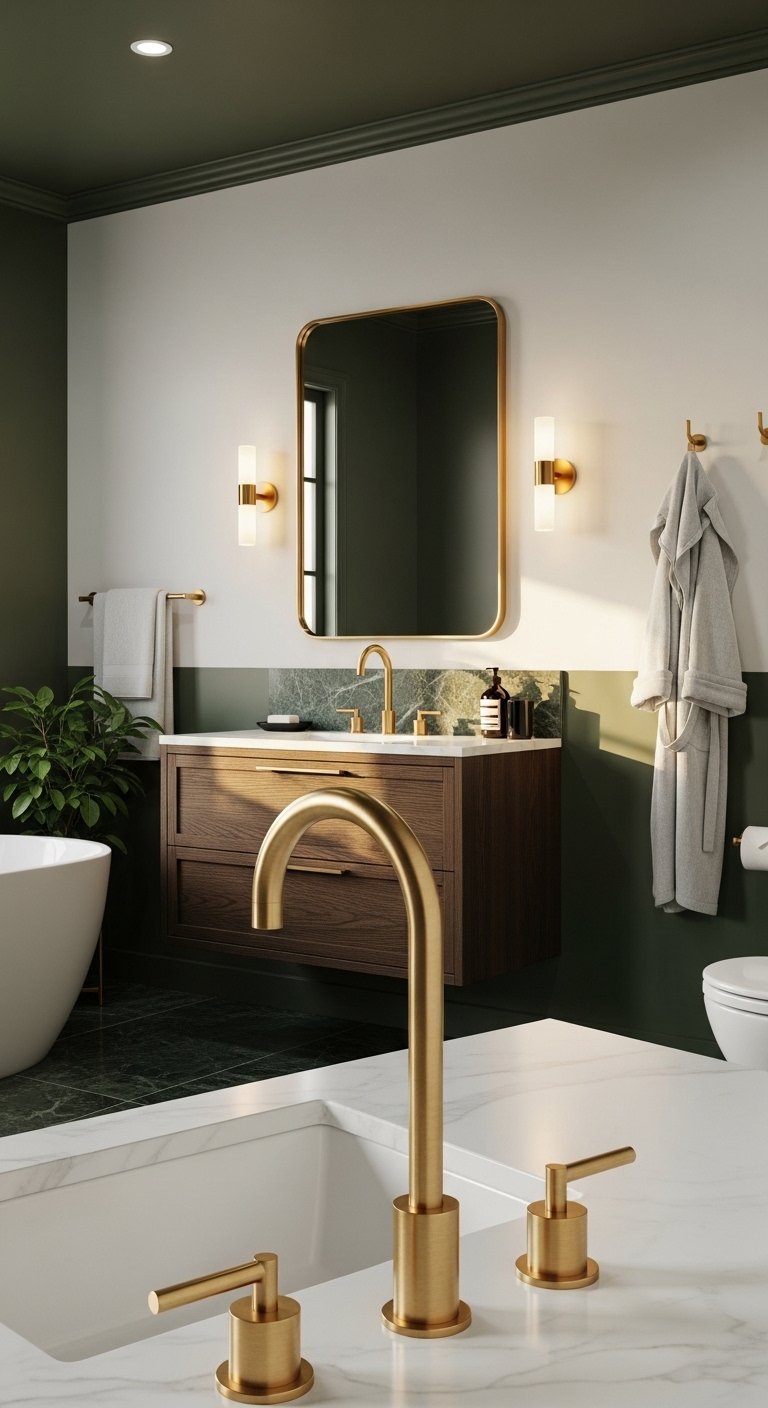
Everything else on this list involves significant investment. This one doesn’t.
Replacing taps, towel bars, toilet roll holders, and door handles with a cohesive set in one finish is one of the highest return-on-investment changes in bathroom design.
Mismatched chrome, gold, and nickel hardware throughout a bathroom creates visual noise that makes the room feel unfinished. A single consistent finish throughout, whether brushed brass, matte black, or brushed nickel, creates immediate cohesion.
This is the change that ties a bathroom together after every other decision has been made. Budget for it last after you’ve committed to your tiles, vanity, and fixtures, then select hardware that coordinates with everything already chosen.
Final Thoughts
A bathroom that works well and looks good is not about budget alone. It’s about making deliberate decisions on every surface, every fixture, and every detail.
Start with the decisions that are hardest and most expensive to change: floor tiles, shower enclosure, vanity, and lighting positions. Get these right and every subsequent decision becomes easier.
Work outward from the fixed elements: wall tiles, mirrors, hardware, and accessories. Each layer should reinforce the decisions made in the layer before it.
The bathrooms that impress are not always the most expensive ones. They’re the most considered ones. Pick your five most impactful ideas from this list, execute them with intention, and your bathroom will look better than most.