21 Living Room Remodel Ideas to Transform Your Space Now
A living room remodel feels overwhelming until you break it into decisions. Then it becomes manageable. Then it becomes exciting.
I’ve watched people spend significant money on living room renovations that produced disappointing results because they started without a clear plan. I’ve also watched people spend modest amounts and produce rooms that look genuinely transformed. The difference is always in the quality of the decisions, not the size of the budget.
These 21 living room remodel ideas cover structural changes, surface updates, and finishing details. Start with what your room needs most and work from there.
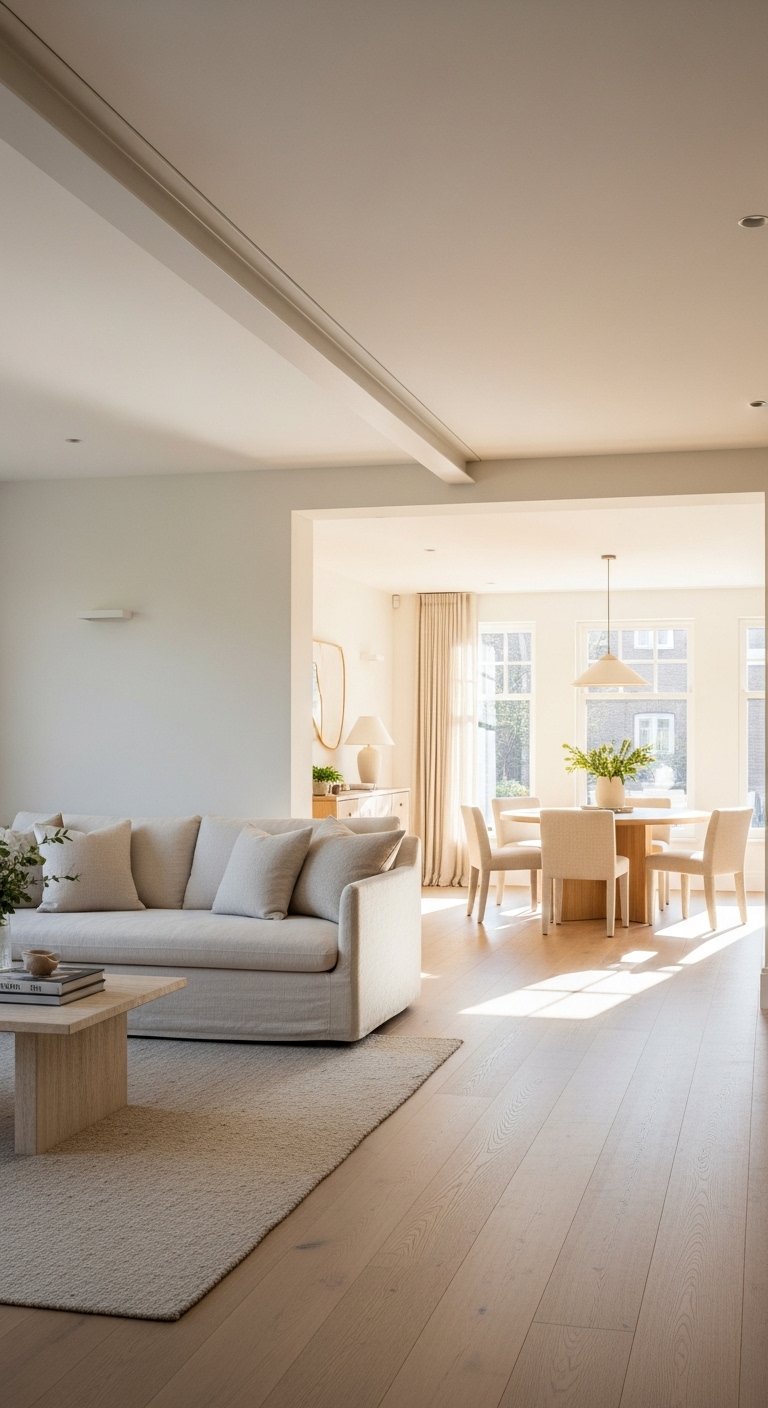
1. Open Up the Floor Plan
The single most impactful structural change in a living room remodel: removing a wall.
Removing a non-load-bearing wall between a living room and dining room, hallway, or kitchen transforms two average rooms into one genuinely impressive open-plan space. Light travels further. The room breathes differently. The entire home feels larger.
Get a structural engineer’s assessment before removing any wall. Load-bearing walls require a steel beam installation to redistribute the load. This adds cost but does not make the project impossible.
The open-plan living room is the standard expectation in modern home design. A living room separated from its adjacent spaces by unnecessary walls feels dated and confined by comparison.
2. Replace Your Flooring

Flooring is the surface that connects every other element in the room. Old, tired flooring undermines everything above it.
Wide-plank hardwood, engineered oak, large-format porcelain tile, or polished concrete all represent significant upgrades from standard strip flooring, carpet, or laminate. The floor sets the material register for the entire room.
Engineered hardwood is the practical alternative to solid hardwood in living rooms with underfloor heating or in homes with environmental humidity fluctuation. It looks identical to solid hardwood and performs more consistently.
Remove existing flooring completely before installing new material. Installing new flooring over old flooring raises the floor level, creates problems at thresholds, and often produces a hollow sound underfoot that signals cost-cutting.
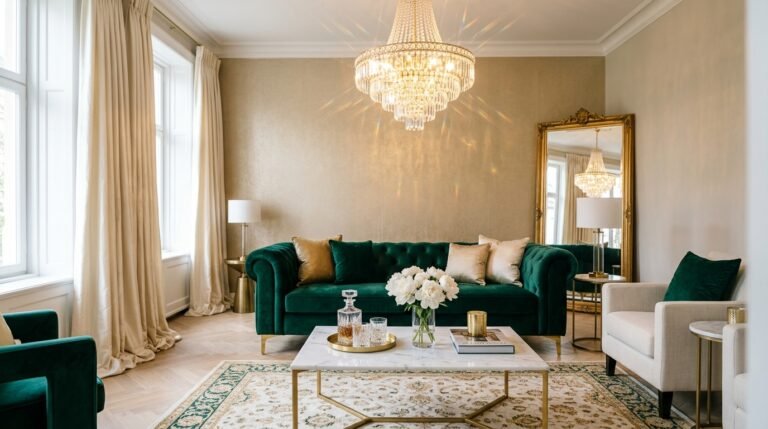
3. Install a Feature Fireplace

A living room without a focal point is a room that doesn’t know what it’s about. A fireplace solves this immediately.
A new fireplace installation, whether a real wood-burning stove, a gas insert, a bioethanol fire, or an electric fire with a custom surround, gives the living room an architectural anchor around which everything else can be arranged.
A wood-burning stove requires a flue. A gas fire requires a gas supply. A bioethanol fire requires neither and installs into any custom-built surround. An electric fire requires only a power point.
The surround matters as much as the fire itself. A marble surround reads as formal and luxurious. A plastered chimney breast reads as clean and architectural. A raw concrete or stone surround reads as industrial and organic. Match the surrounding material to the room’s overall direction.
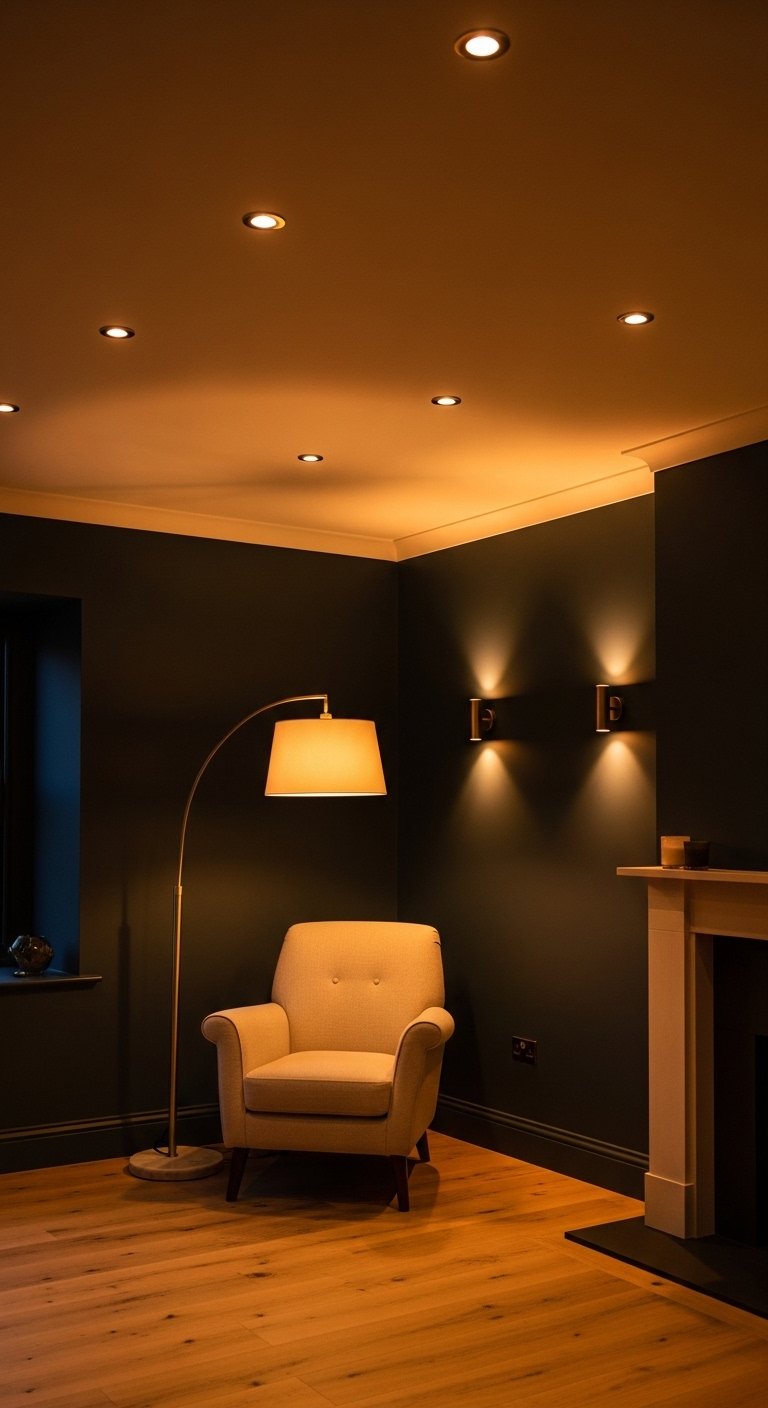
4. Rewire for Better Lighting
Most living rooms are wired for one ceiling light and a handful of sockets. This is almost never enough.
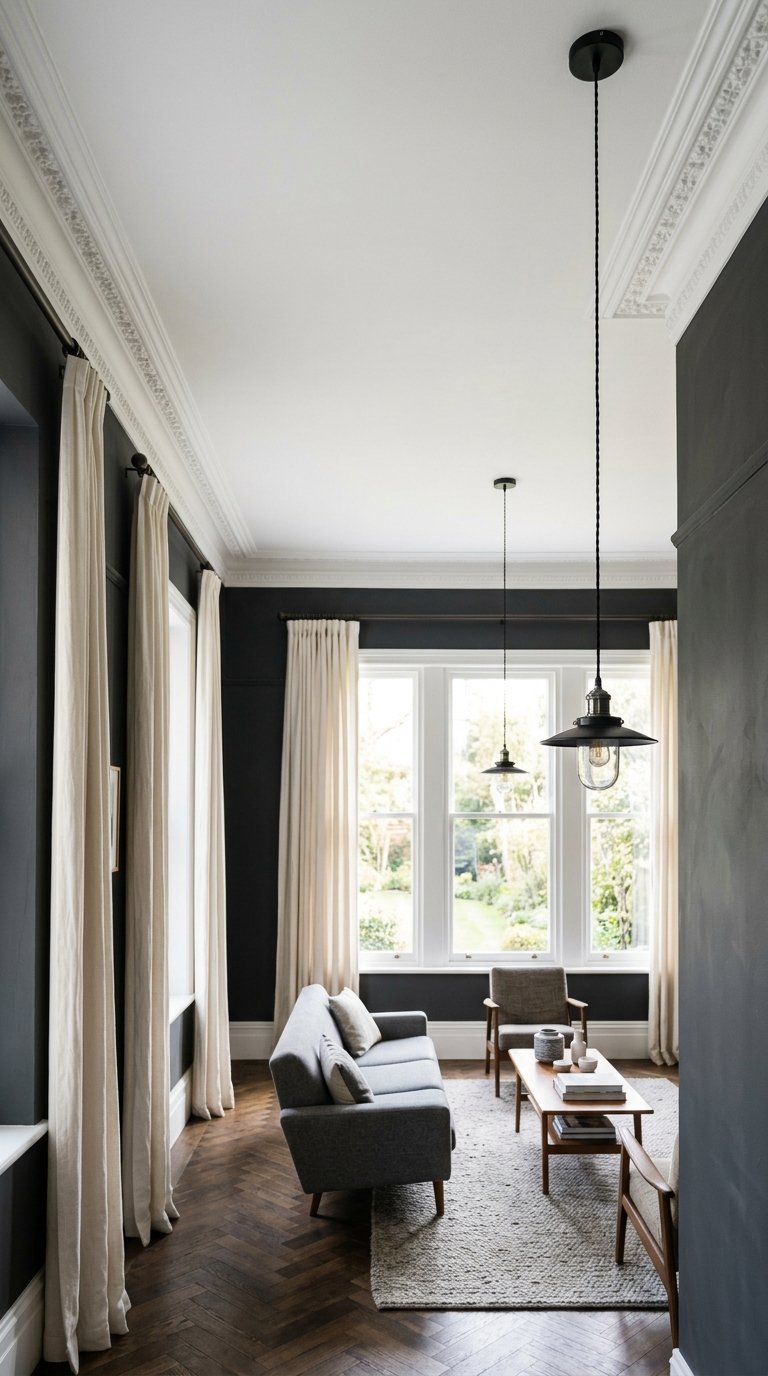
Rewiring a living room to include multiple lighting circuits, recessed ceiling lights on dimmers, dedicated floor lamp socket positions, wall light points, and a dedicated circuit for the television and media equipment transforms what the room can do atmospherically.
Do this during a remodel when walls and ceilings are open. Adding lighting circuits after a room is finished means channeling into plaster, repairing, and repainting. The cost doubles for the same result.
Recessed ceiling lights on a dimmer circuit combined with wall lights and floor lamp positions give you complete control over the room’s atmosphere at any time of day or evening.
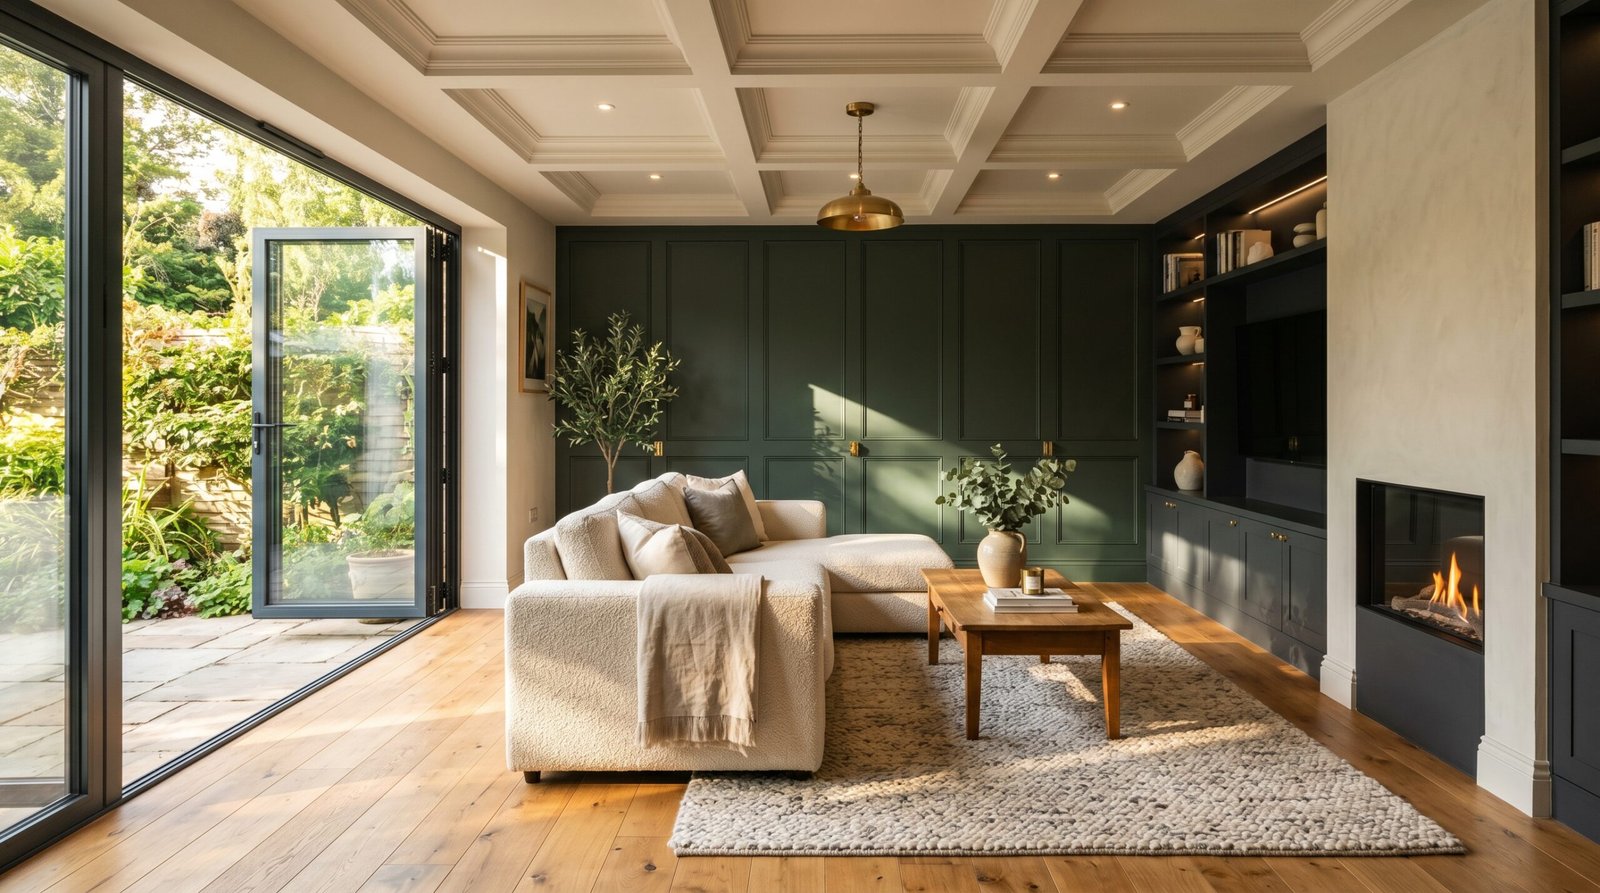
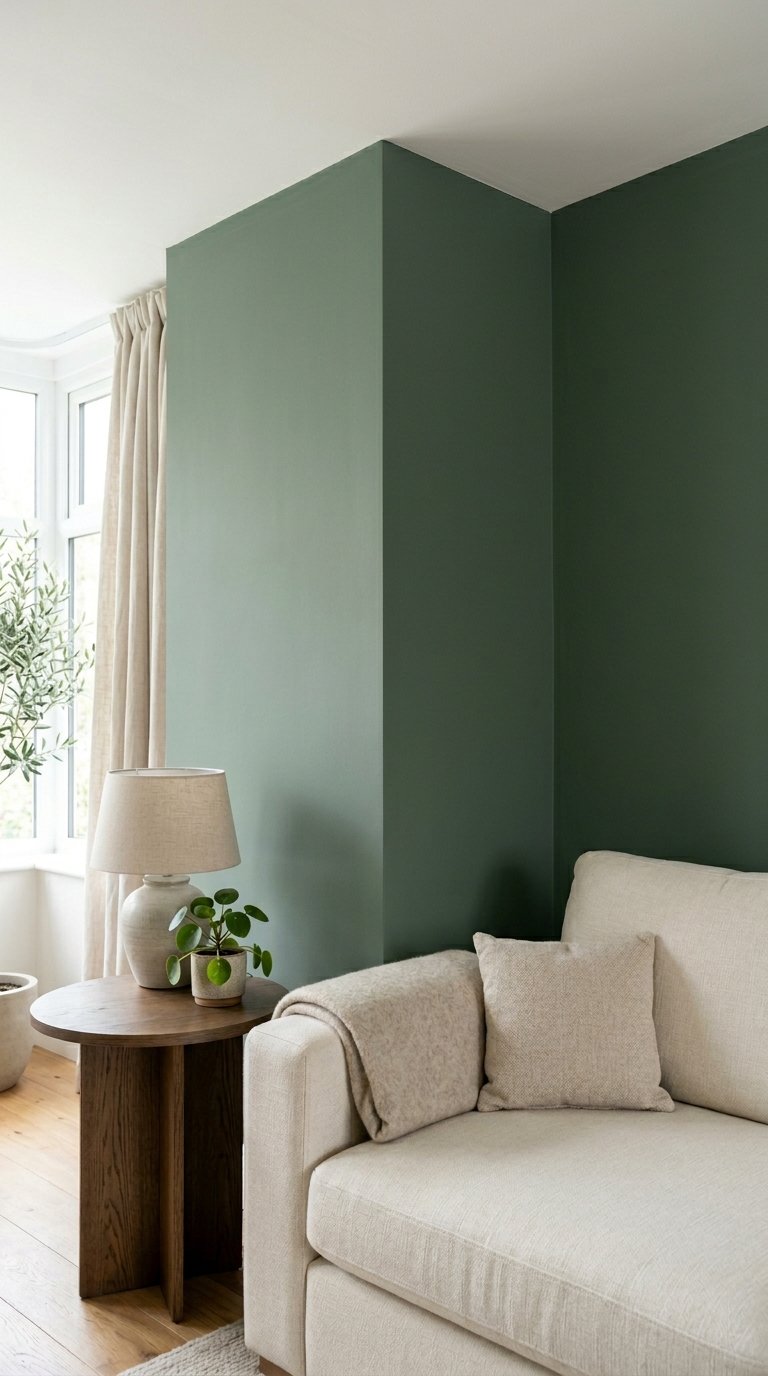
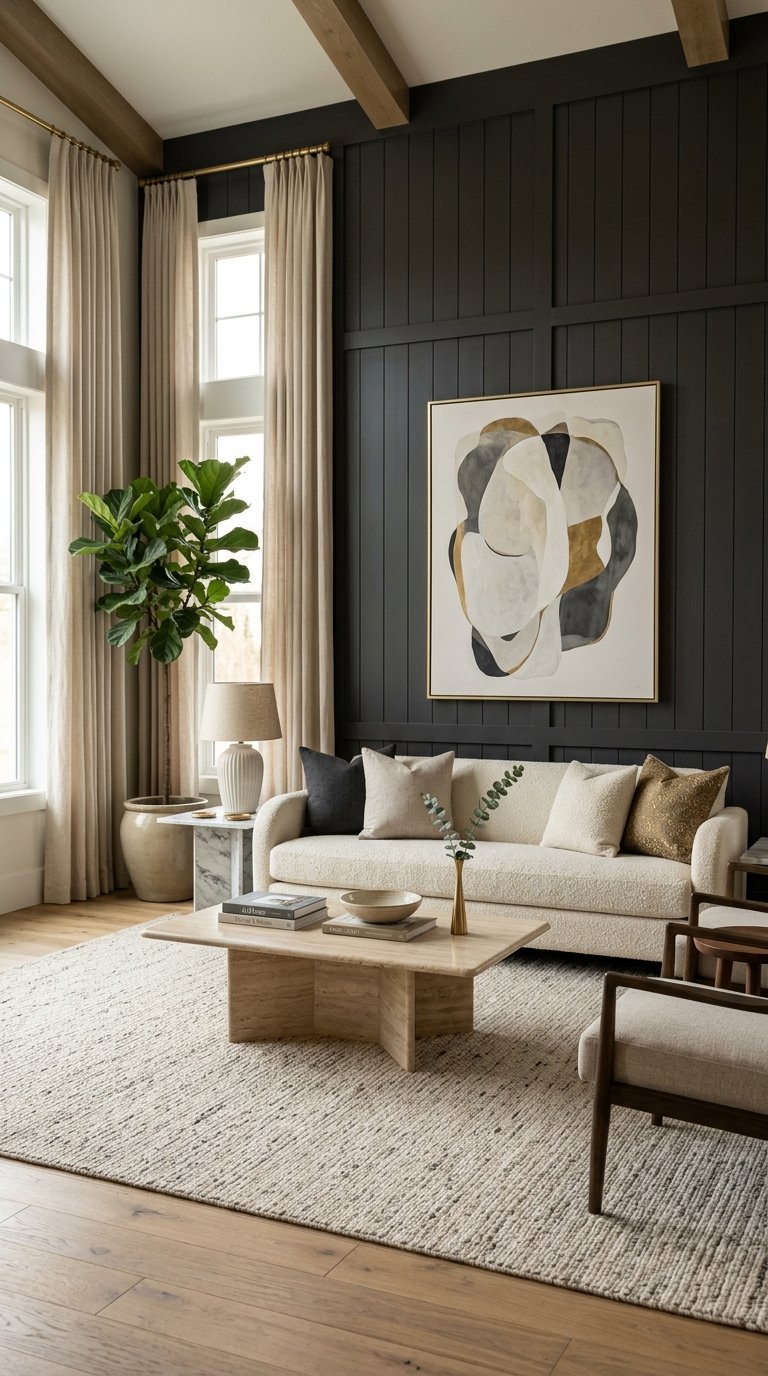
5. Add Architectural Wall Moulding or Panelling
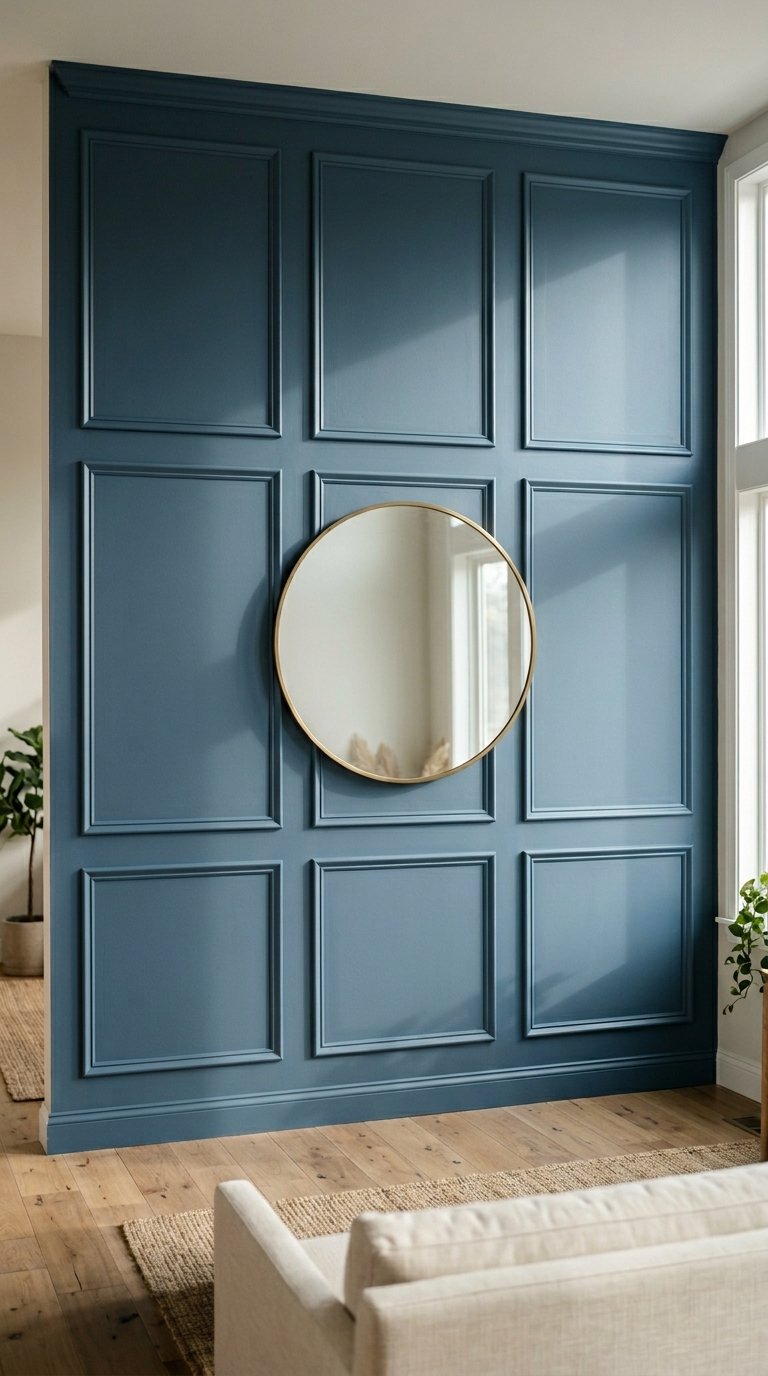
Bare walls are the starting point, not the finished product, in a living room remodel.
Panel moulding, board and batten, full-height fluted panels, or tongue and groove wall cladding applied to living room walls adds dimensional character that transforms the room’s architectural quality.
The most versatile approach: apply panel moulding in a grid pattern to the main living room wall and paint the entire surface, moulding and wall, in a single deep color. The shadow lines within the panels create the visual interest. No contrast color needed.
This is a relatively low-cost intervention with a disproportionately high visual return. MDF moulding materials are inexpensive. The labor of application and painting is the primary cost.
6. Replace Windows With Larger Ones
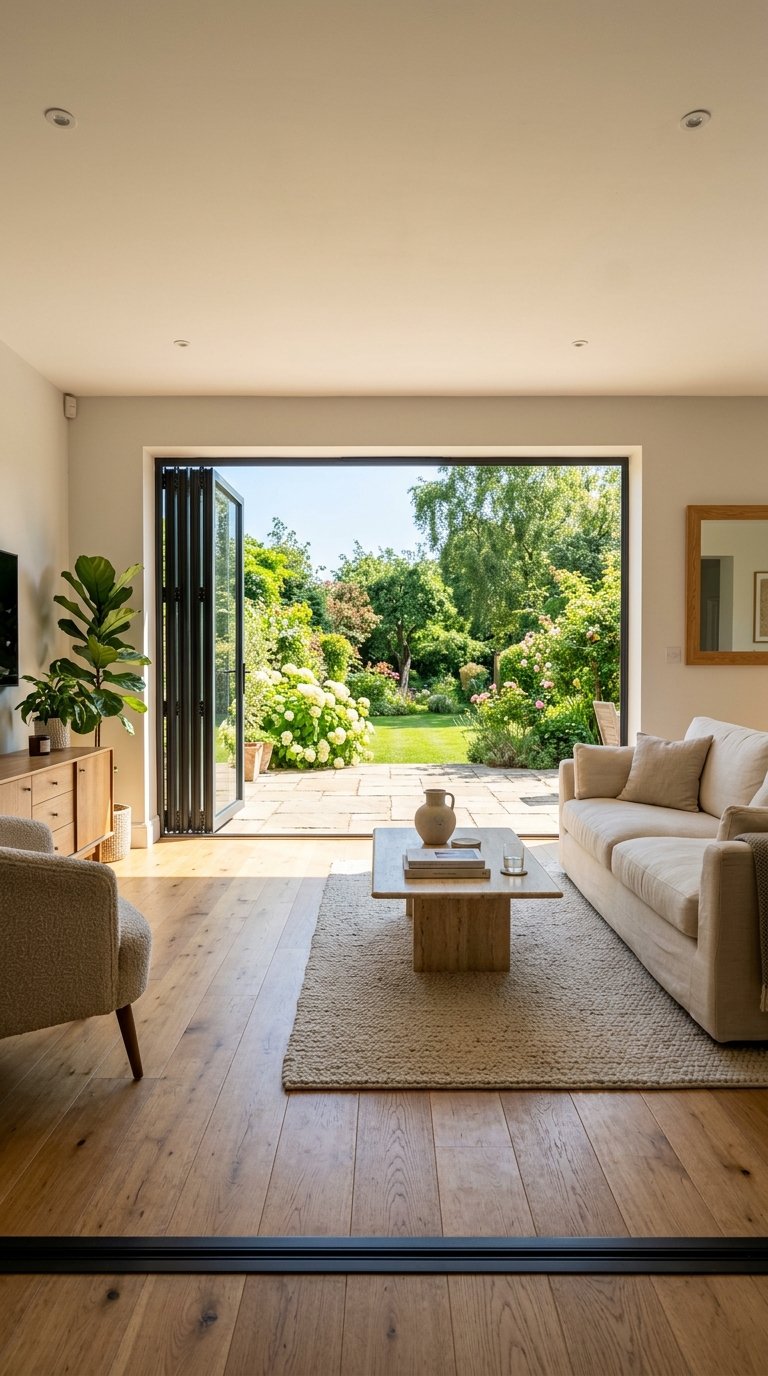
Natural light is the most valuable commodity in a living room. If your windows are undersized, fix them.
Replacing standard windows with larger casement windows, adding a second window where only one exists, or installing bifold or sliding doors onto a garden fundamentally changes how the room feels at every hour of the day.
A living room that receives strong morning or afternoon light through generous windows operates in a different quality of environment than one lit by small windows. This difference affects mood, perceived room size, and the quality of every photograph you take in the space.
Bifold or sliding doors that open the living room fully to a garden or outdoor area are one of the most transformative structural changes available in a living room remodel. The indoor-outdoor connection they create is genuinely life-improving.
7. Build a Custom Media Wall
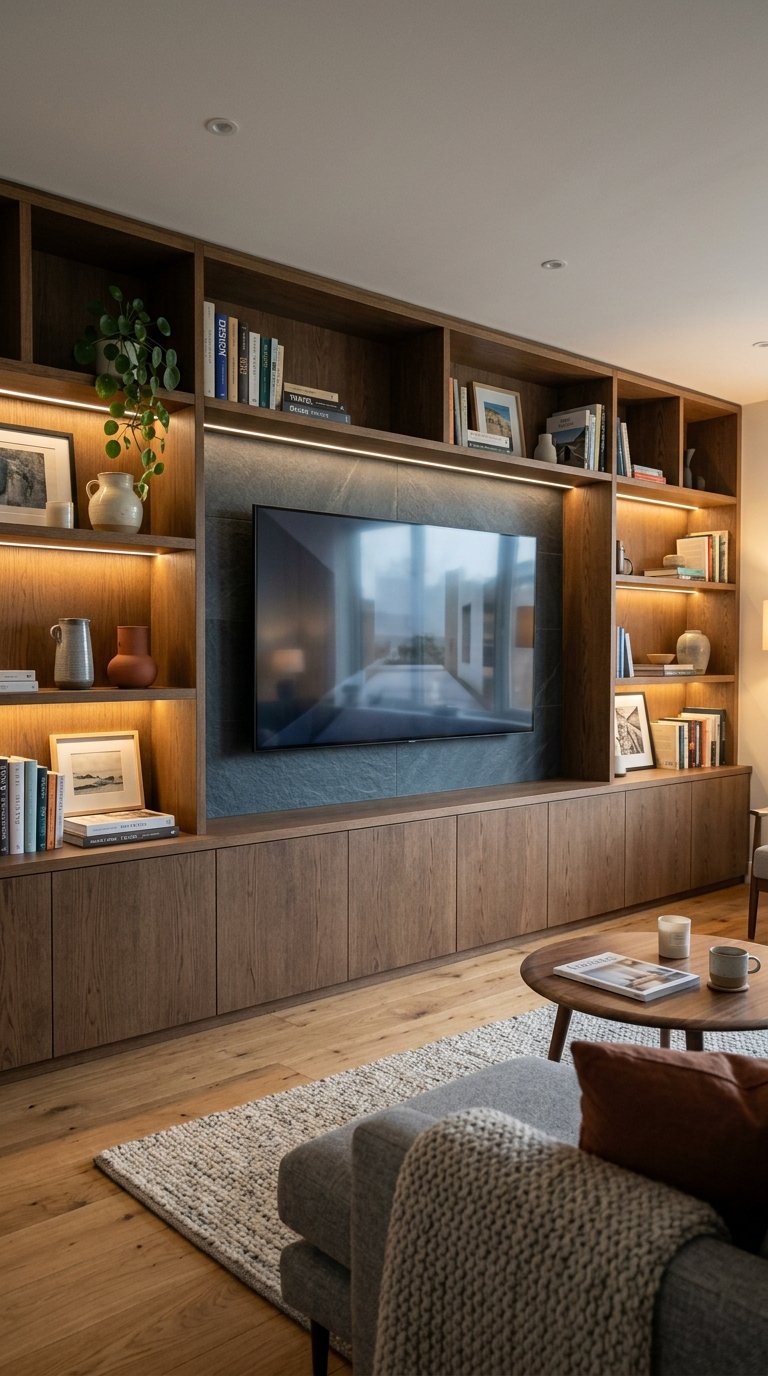
The television wall in most living rooms is an afterthought: a flat screen on a bracket, wires trailing down the wall, a generic media unit below. A remodel fixes this properly.
A custom-designed media wall with integrated storage, concealed cable management, integrated lighting, and the television built into a designed surround transforms the room’s most-used wall from its worst feature into its best one.
The media wall can incorporate:
- Closed cabinet storage for gaming equipment and cables
- Open shelving for books and decorative objects
- Integrated LED strip lighting behind the television
- A contrasting material or color behind the television screen
- Speaker integration if you use a surround sound system
This is a joinery project requiring a skilled carpenter or a bespoke furniture maker. Budget accordingly and treat it as a long-term installation rather than a temporary fix.
8. Install Coved or Coffered Ceilings
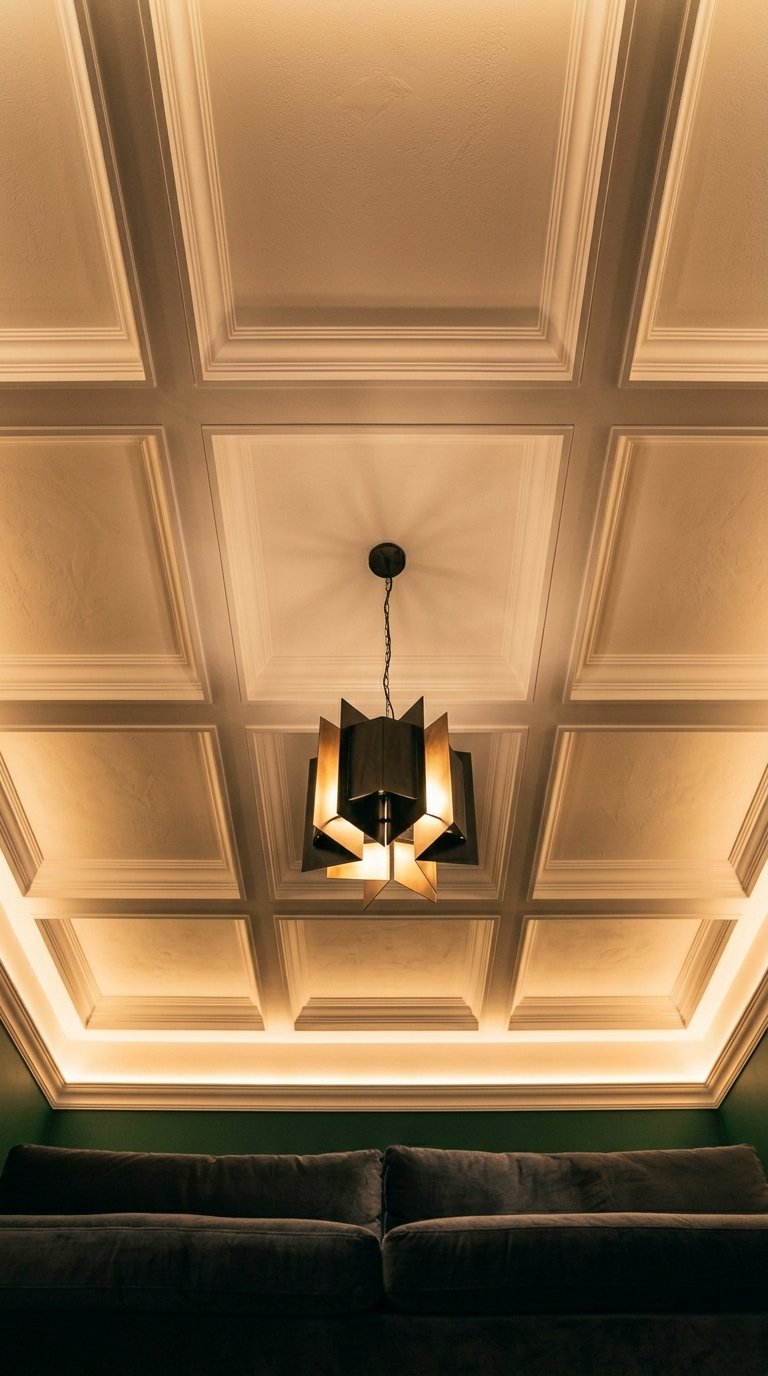
The ceiling in most living rooms is the most ignored surface in the room. In a remodel, it deserves attention.
A plastered cove at the ceiling-to-wall junction, a coffered ceiling grid, or decorative ceiling moulding adds architectural character to a room that flat ceilings with no detail lack.
A cove at ceiling height also creates the opportunity for concealed cove lighting: warm LED strip lighting hidden behind the cove profile that washes the ceiling in indirect light. The effect is sophisticated and impossible to achieve without the cove installation.
Coffered ceilings work best in living rooms with ceiling heights of 2.7 meters or above. In lower-ceiling rooms, the coffering can feel oppressive. Know your ceiling height before committing.
9. Knock Through to Create a Bay Window
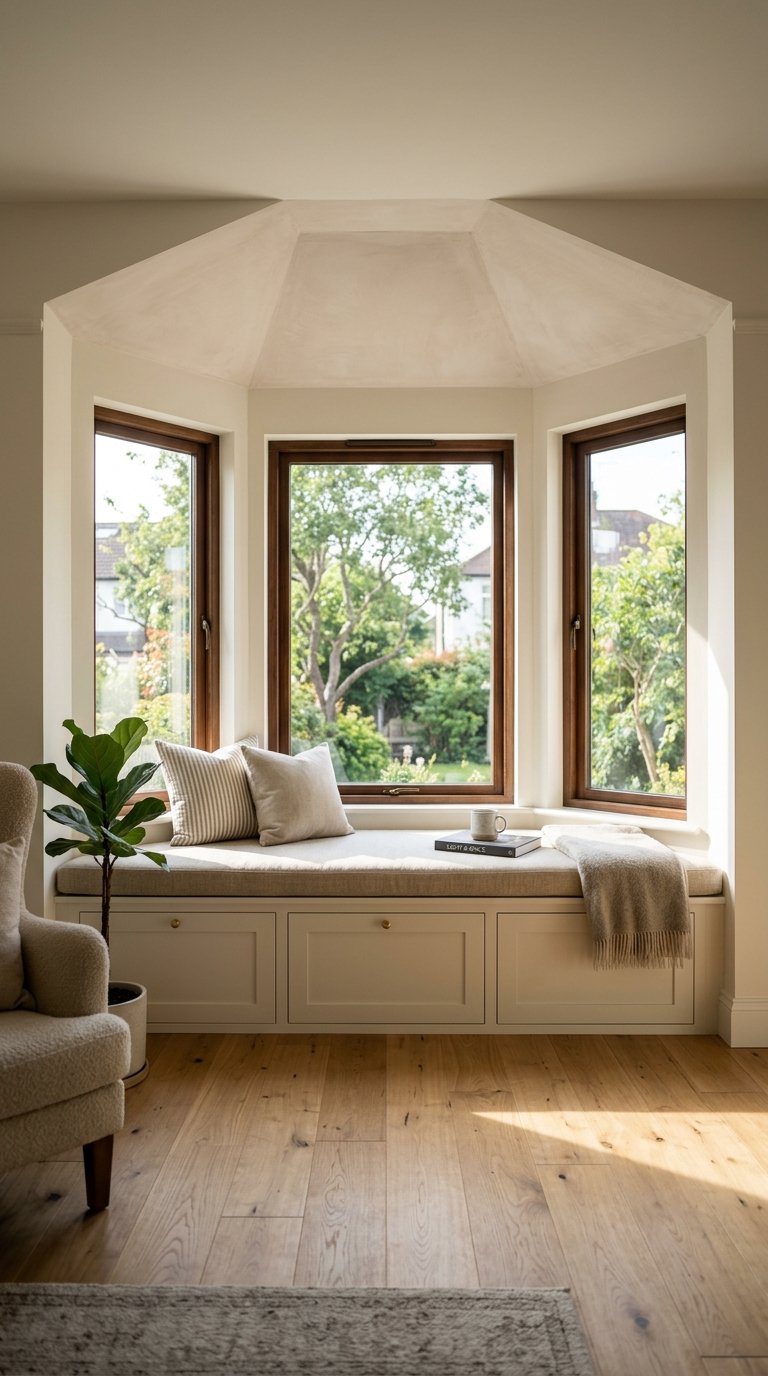
If your living room faces a garden or street and has a flat front wall, a bay window conversion adds both space and light.
A bay window projection adds approximately one square meter of floor space to a room while significantly increasing the window area and creating an architectural feature visible from both inside and outside the property.
A bay window also creates a natural window seat opportunity. A built-in window seat with storage underneath turns the new bay into the most desirable spot in the room.
This is a structural project involving external wall work, roof or ceiling extension over the bay, and new foundations beneath it. The budget for a full structural project and the payoff is significant both in liveability and property value.
10. Upgrade to Solid Internal Doors
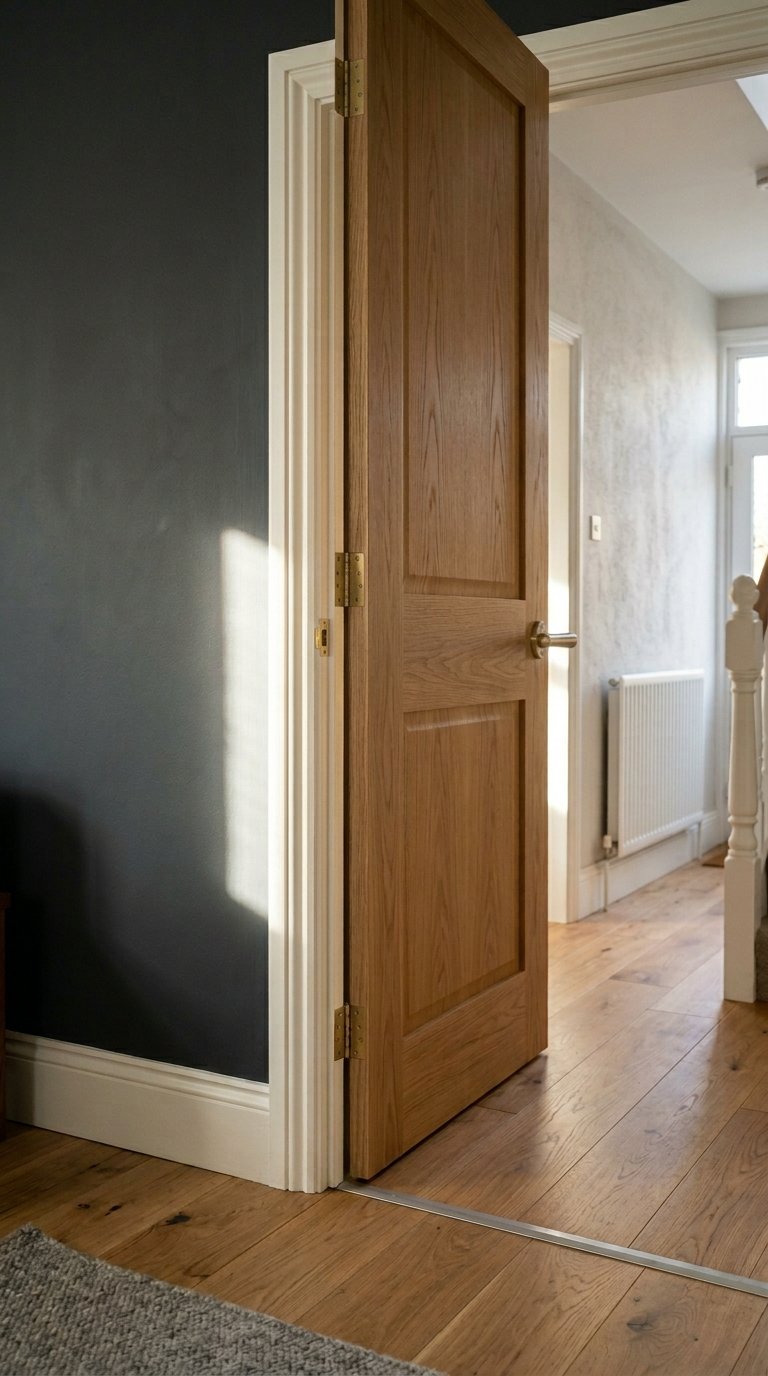
Internal doors are the most overlooked remodel element. Most homes have hollow-core doors that feel cheap when opened and closed.
Solid core or solid timber internal doors in the living room, between the living room and hallway, and between adjacent rooms feel fundamentally different from hollow doors. They close with weight. They reduce sound transfer. They look better.
Door hardware makes the same door feel either cheap or expensive. Replace standard builder’s-grade handles with quality lever handles in brushed brass, aged bronze, or matte black and the door’s entire register changes.
Tall doors, 2.4 meters rather than standard 2.1 meters, make ceiling height feel greater and rooms feel more significant. If your ceiling height allows for taller door frames, install them.
11. Skim Coat and Repaint All Surfaces
Before any decorative work begins, the surfaces need to be right. This is the step most renovation projects skip in the interest of saving money. It shows.
Skim coating walls and ceilings before painting removes the bumps, cracks, filler marks, and texture variations that become dramatically visible under fresh paint in a newly lit room.
A freshly skim-coated and painted living room feels like a different room. The light behaves differently on smooth plaster than on patchy, repaired walls. The color reads correctly and evenly rather than patching over irregularities.
FYI this is genuinely the least glamorous part of a living room remodel and genuinely one of the most important. Do not skip it to save money. The saving is false.
12. Install Built-In Storage Solutions
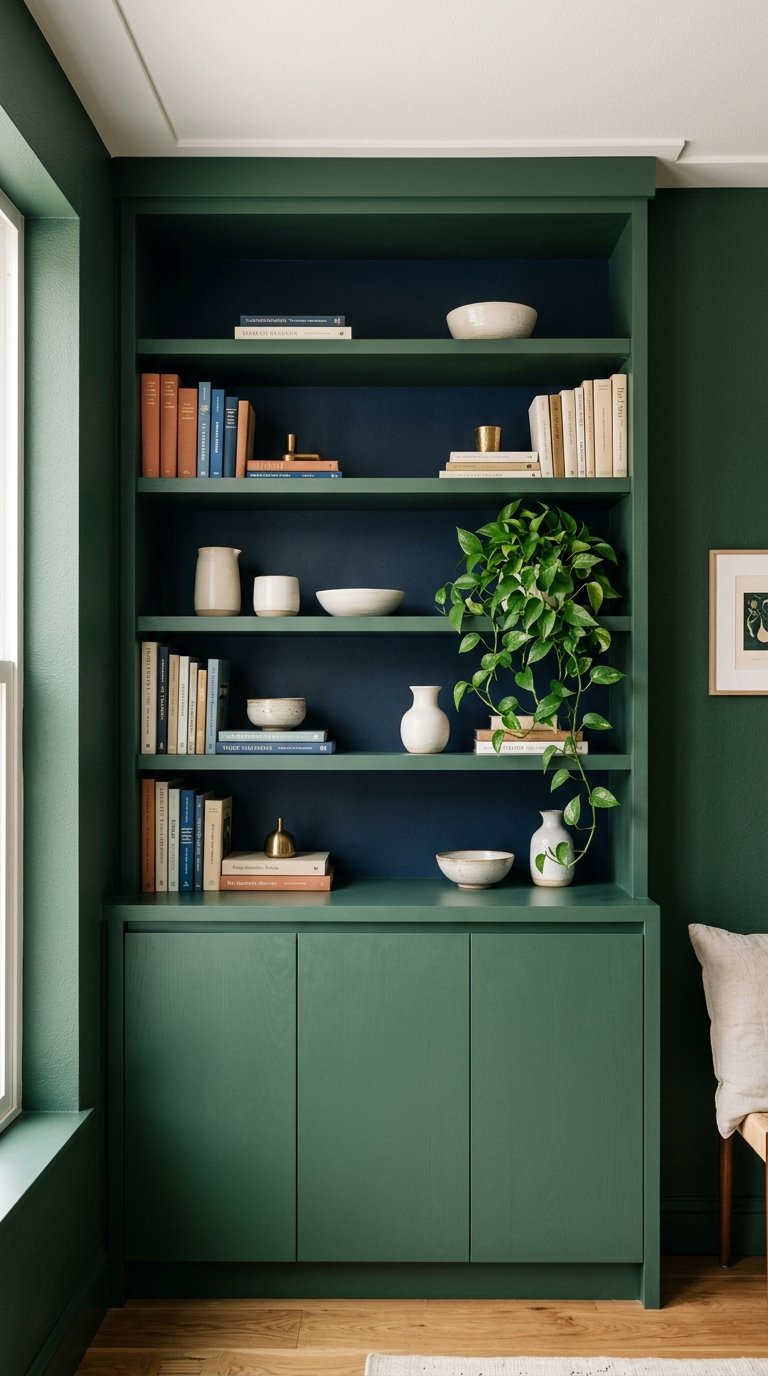
Living rooms accumulate stuff. Without proper storage built into the room’s design, stuff wins.
Built-in storage, whether flanking a fireplace, running along an entire wall, or built into an alcove, keeps the living room functional without adding freestanding furniture that breaks up floor space.
Alcove built-ins are the most cost-effective custom storage option in a living room. Most living rooms have at least one alcove beside a chimney breast. A carpenter can fit a combination of open shelving and closed cabinets into an alcove for a relatively modest cost.
The investment in built-in storage pays back in daily functionality and in property value. A living room with well-designed built-in storage is easier to sell than one without it.
13. Replace the Skirting Boards and Architraves
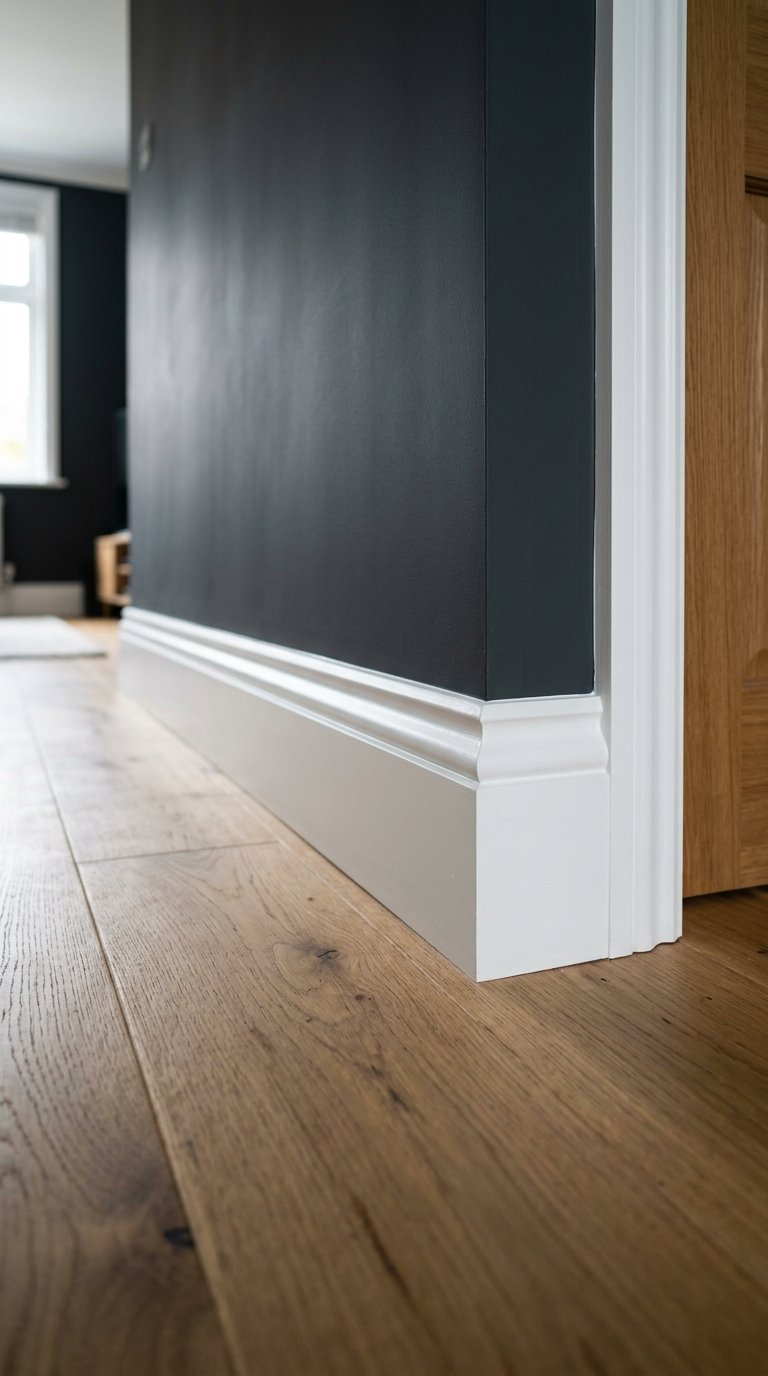
Skirting boards and architraves are the finishing detail that ties every surface together. In older homes, they’re often damaged, painted over multiple times, or too narrow for the room’s scale.
New deep skirting boards, 150mm or taller in a room with high ceilings, give a living room a finished, considered quality that standard 70mm skirtings don’t. The depth of the skirting is proportional to the ceiling height. Match them accordingly.
Paint skirting boards and architraves in the same color as the wall for a seamless, contemporary finish. Paint them in bright white against a colored wall for a traditional, contrasting finish. Both work. Decide based on the room’s overall direction.
Replace damaged or mismatched architraves around door frames at the same time. Consistency between all the timber elements in a room, doors, skirting, window reveals, and architraves, creates a quality that inconsistency destroys.
14. Create an Open-Tread Staircase Visibility
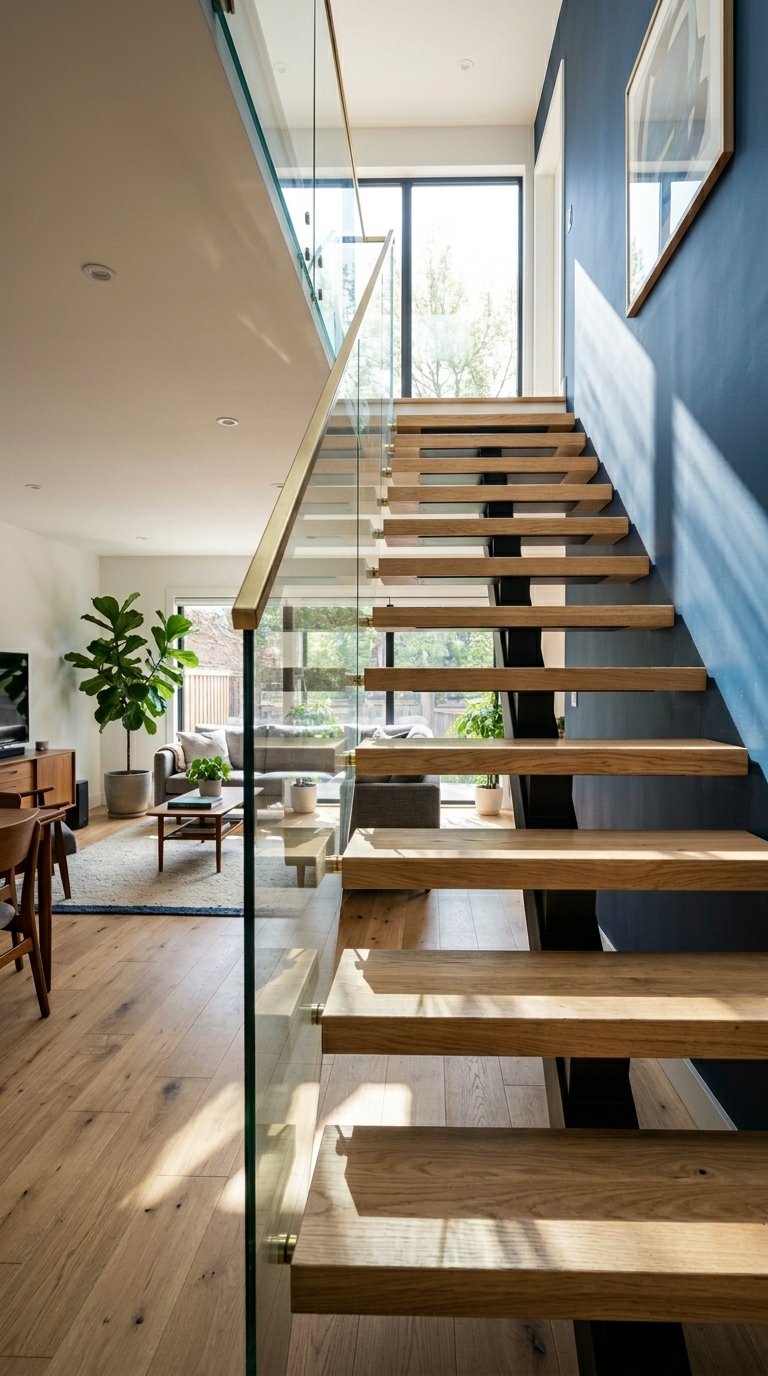
If your living room is open to or adjacent to a staircase, the staircase design affects the living room’s quality significantly.
Converting a closed-riser staircase to an open-tread design with glass or steel balustrades opens up a significant amount of visual space between the living area and the floor above. Light passes through. The room feels connected to the full height of the home.
This is a structural project that requires careful engineering to ensure the treads are properly supported without the risers. Glass balustrades add significant cost but the visual result is worth it in an open-plan living space.
A staircase visible from the living room is either an asset or a liability. If it’s currently a liability, a remodel is the right time to address it.
15. Install Underfloor Heating
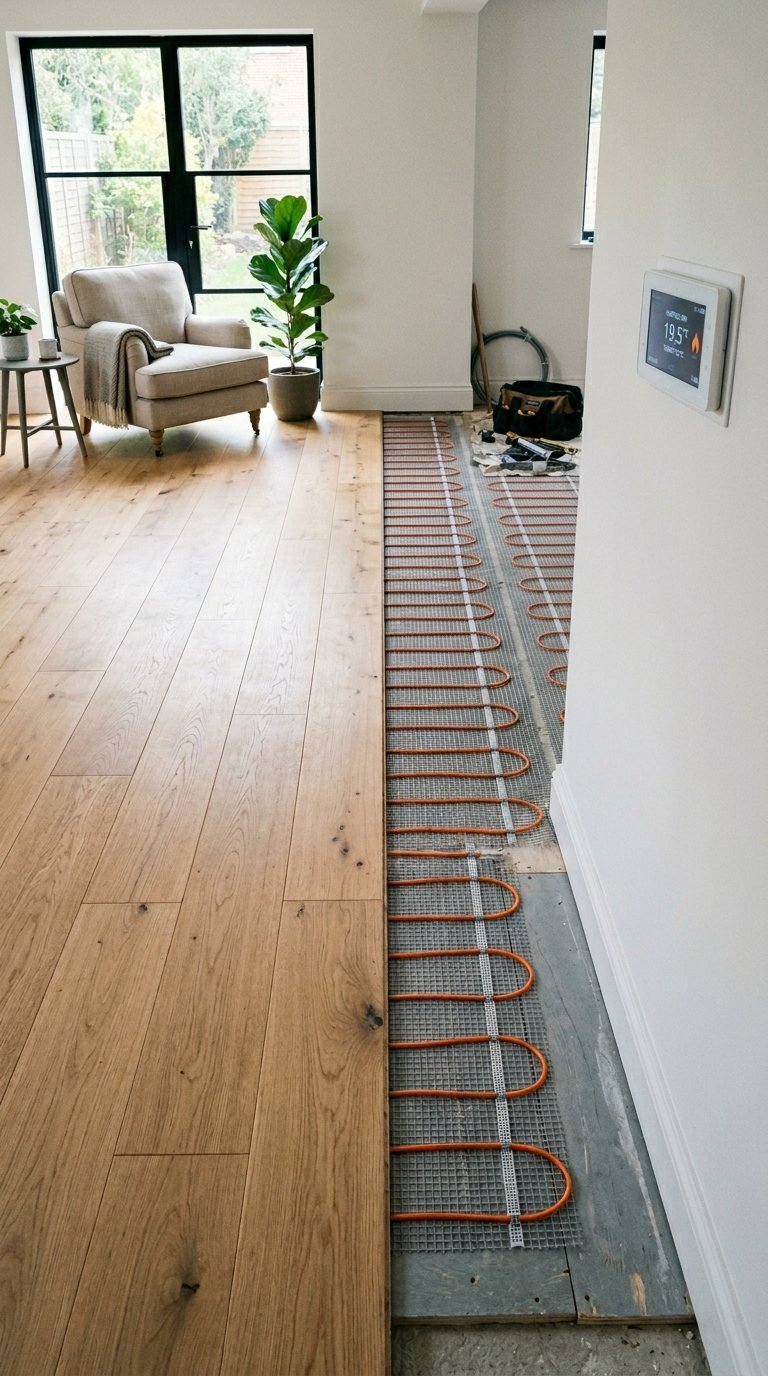
Radiators on living room walls interrupt the wall surface, limit furniture placement, and produce an uneven heat distribution that leaves some areas warm and others cool.
Underfloor heating removes radiators from the walls entirely, freeing every wall surface for furniture, art, and architectural features. The heat distribution is even across the full floor area. The room feels warmer at lower thermostat settings.
Electric underfloor heating is simpler to install but more expensive to run than hydronic systems. Hydronic underfloor heating connects to your existing boiler and is more cost-effective for long-term running but more complex to install.
Install underfloor heating when new flooring goes down. The installation cost is primarily in the labor of the floor installation itself. Adding the heating mat beneath the new floor adds relatively modest additional cost to a project already disturbing the floor.
16. Add a Dedicated Reading or Sitting Alcove
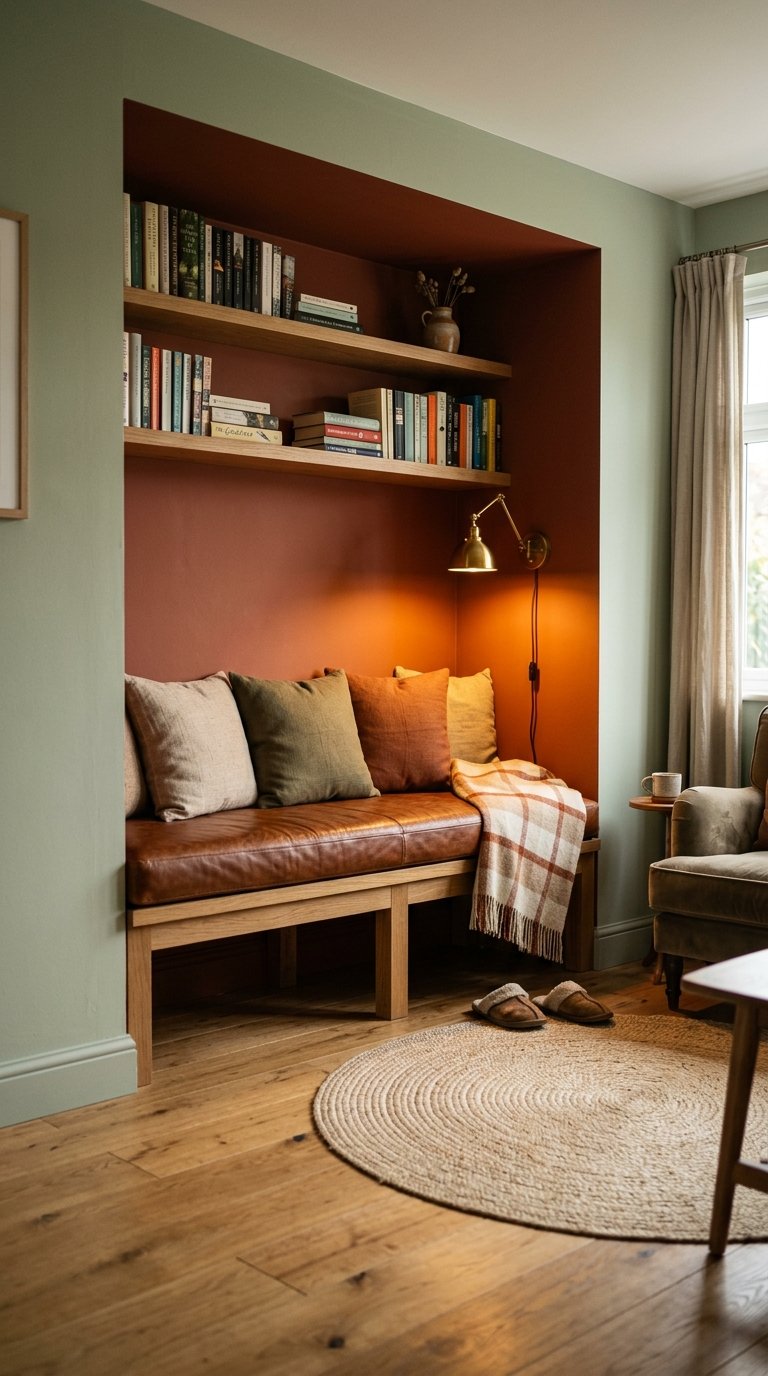
A living room that serves only one function is a missed opportunity. A remodel gives you the chance to create defined zones within the space.
A reading alcove with a built-in bench seat, cushioned upholstery, shelving above, and a dedicated wall light creates a destination within the living room that the main seating area cannot replicate.
The alcove can be created from an existing architectural recess, from a redundant chimney breast space, or by building a shallow projection into the room structure. Even a shallow 40cm depth creates enough space for a comfortable built-in seat.
This feature photographs extremely well and adds significant perceived value to a property. It also gets used every day, which is the more important metric.
17. Upgrade the Ceiling Height
Standard ceiling heights of 2.4 meters feel low in a living room. If your home’s structure allows for it, raising the ceiling changes the room’s entire spatial quality.
Removing a suspended ceiling to reveal the original ceiling height above, or vaulting a ceiling into the roof space in a single-story extension, adds volume that no amount of decoration can replicate.
Many homes have suspended ceilings installed in the 1970s and 1980s that hide original ceiling heights of 2.7 meters or more above them. Removing the suspended ceiling is often straightforward and restores proportions the room was originally designed for.
A living room with a ceiling height of 3 meters feels categorically different from the same room with a ceiling at 2.4 meters. The air volume alone changes the acoustic and atmospheric quality of the space.
18. Rethink the Room’s Layout Entirely
Most people remodel within the existing furniture layout. The existing furniture layout is often the problem.
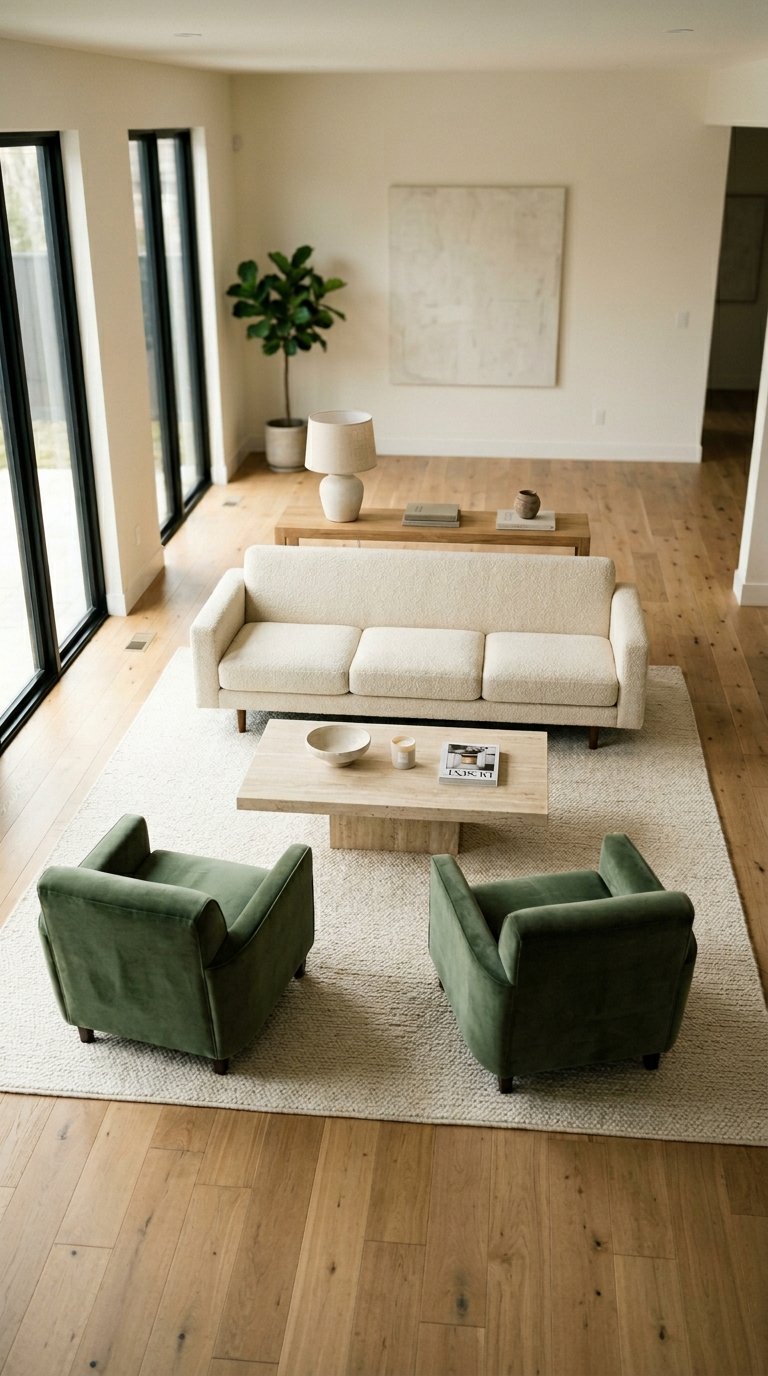
Repositioning the primary sofa away from the wall, creating a floating furniture arrangement centered on a rug, and thinking about traffic flow through the room rather than around its edges transforms how the space functions and feels.
Sofas pushed against walls waste the center of the room. A sofa floating 45cm from the wall with a console table or low shelf behind it uses the room’s full depth and creates a more considered arrangement.
Draw the room to scale before you spend on furniture. Test different layouts on paper before committing to a purchase. The best layout for your specific room is not always obvious from looking at it 🙂
19. Install New Internal Glazing
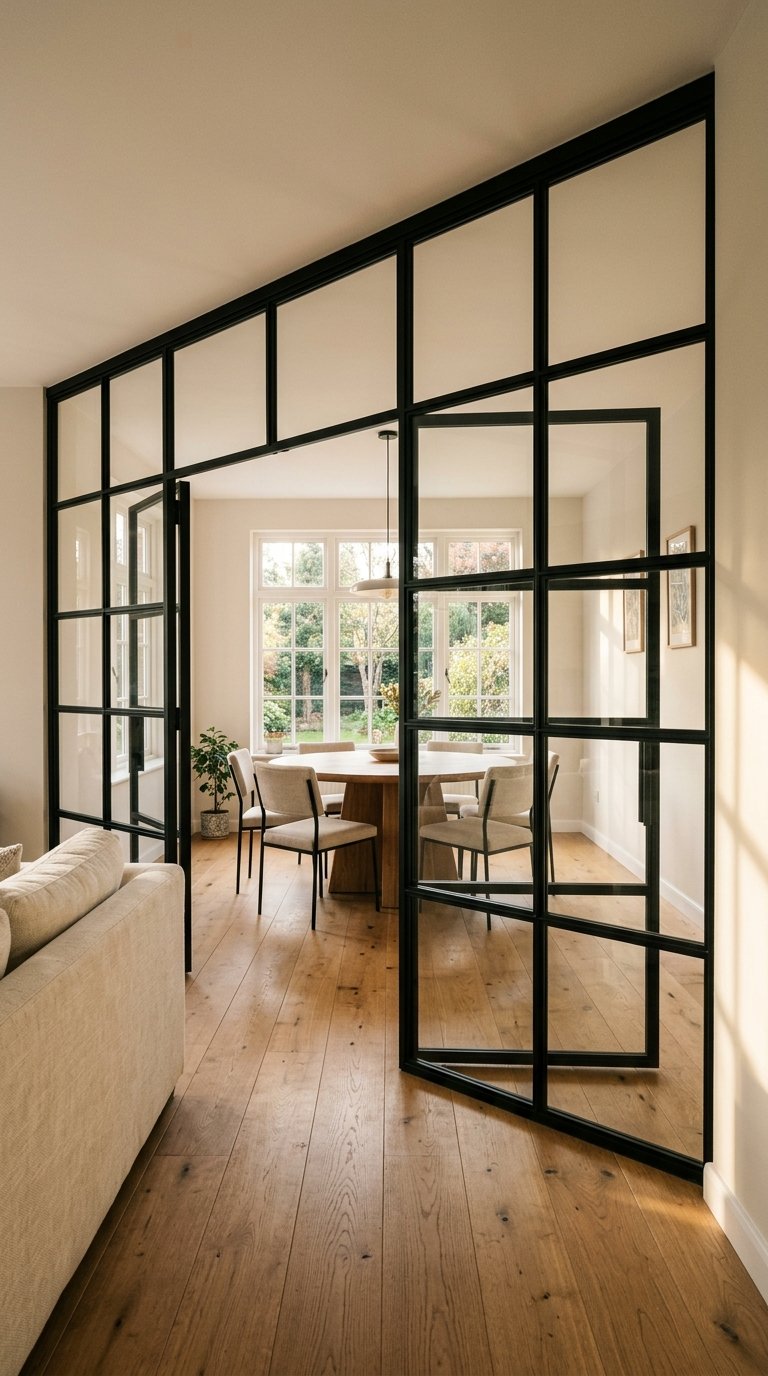
Opening a wall between a living room and an adjacent space doesn’t have to mean removing the wall entirely. Internal glazing gives you visual connection while maintaining some separation.
Crittall-style black steel internal windows or glazed doors between a living room and a dining room, hallway, or study create a visual connection that allows light to pass between spaces while maintaining acoustic separation.
The black steel frame creates a graphic architectural element that adds character to both rooms it connects. In period properties, internal glazing with steel frames suits the architecture. In contemporary homes, it adds an industrial-modern edge.
Internal glazing is significantly less disruptive and less expensive than full wall removal while delivering much of the same light and visual connection benefit.
20. Address Acoustics Deliberately
Hard surfaces in a living room, timber floors, plaster walls, glass windows, produce an echo-prone environment that makes conversation and television viewing less comfortable than most people realize until they fix it.
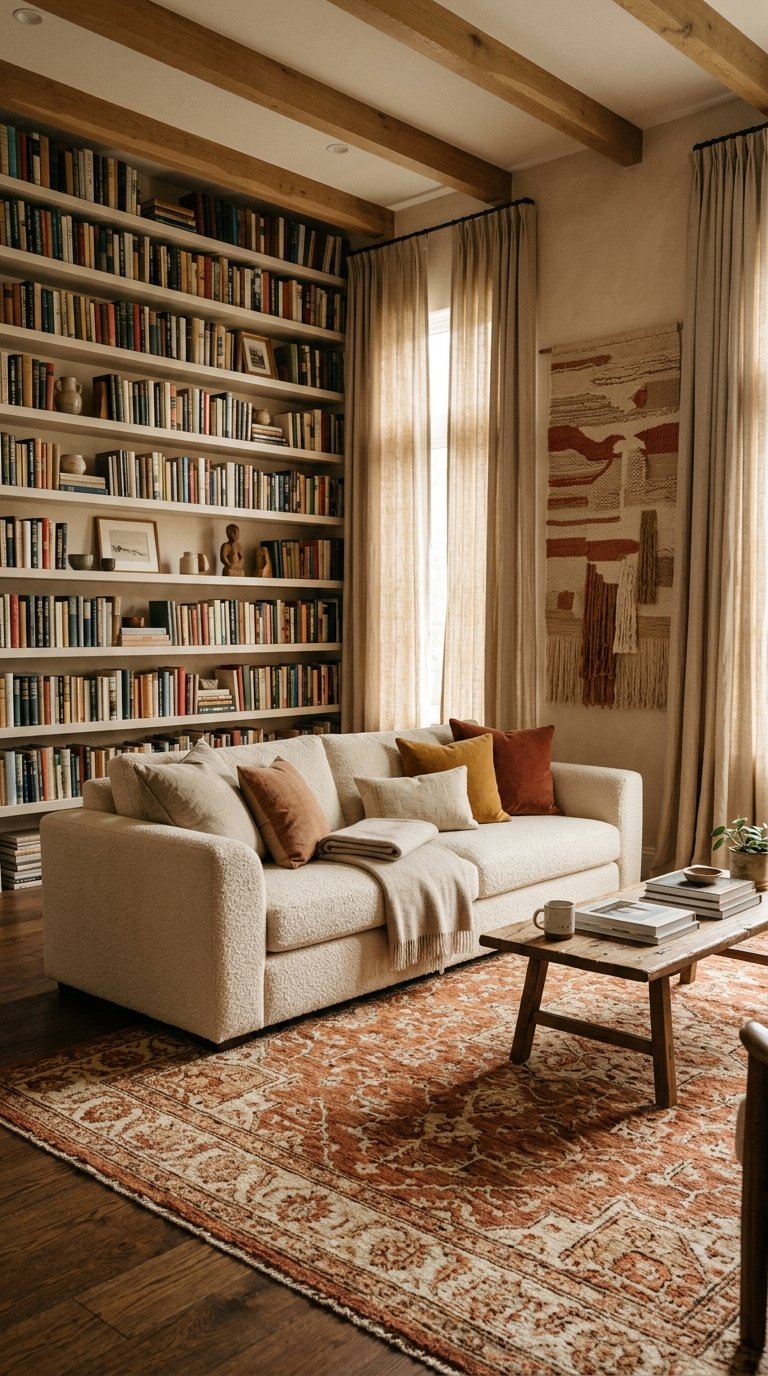
Adding acoustic mass through upholstered furniture, heavy curtains, a large area rug, bookshelves filled with books, and textile wall hangings reduces room resonance and makes the space feel warmer and more comfortable acoustically.
This is not a specialist acoustic treatment. Standard interior furnishing choices made with acoustic awareness produce rooms that sound better without appearing to have been acoustically treated.
The difference between a living room with bare floors, no curtains, and minimal furniture and one with a large rug, full curtains, a full bookshelf, and upholstered seating is significant in acoustic quality. Both rooms look different and sound different.
21. Finish With Professional Styling
The remodel work is done. Now the styling has to match the quality of the renovation.
Professional interior styling or a deliberate self-styling process that addresses every surface, every shelf, every tabletop, and every wall in the finished room elevates the remodel’s result from good to genuinely impressive.
This means:
- Editing furniture and accessories down to what the room actually needs
- Choosing soft furnishings, cushions, throws, and rugs that work as a cohesive palette
- Sizing and positioning art correctly on each wall
- Adding plants at the right scale for the room
- Getting the lighting combination right for day and evening
IMO the styling stage is where most remodeled rooms lose 20% of their potential. The renovation is done correctly but the room is then filled back up with the same furniture and accessories that made it look tired before the remodel began. Start the styling with fresh eyes and ruthless editing.
Final Thoughts
A living room remodel works when you treat it as a system of connected decisions rather than a list of independent changes.
Start with structure: floor plan, flooring, ceiling, windows, and lighting infrastructure. Get these right before choosing a paint color or buying a sofa.
Move to surfaces: walls, doors, skirting, and architectural detail. These define the room’s character before any furniture enters it.
Finish with furnishing and styling. This is where most people start. It’s the last thing you should address, not the first.
The living room you want is achievable. It requires a plan, a sequence of decisions, and the discipline to execute each stage properly before moving to the next. Start with the structure. The rest follows.