21 Outdoor Dining Area Ideas You Need to Try This Year
There’s something about eating outside that makes food taste better. I don’t make the rules, but I fully support them. My first outdoor dining setup was a wobbly plastic table and two mismatched chairs on a concrete slab. It was objectively terrible, but I ate out there every chance I got because the fresh air and open sky made even reheated leftovers feel like an event. Now imagine what a properly designed outdoor dining area does for a weekend dinner party. These 21 ideas solve every outdoor dining problem from no shade to no space to no budget.
1. Anchor the Space With a Large Dining Table
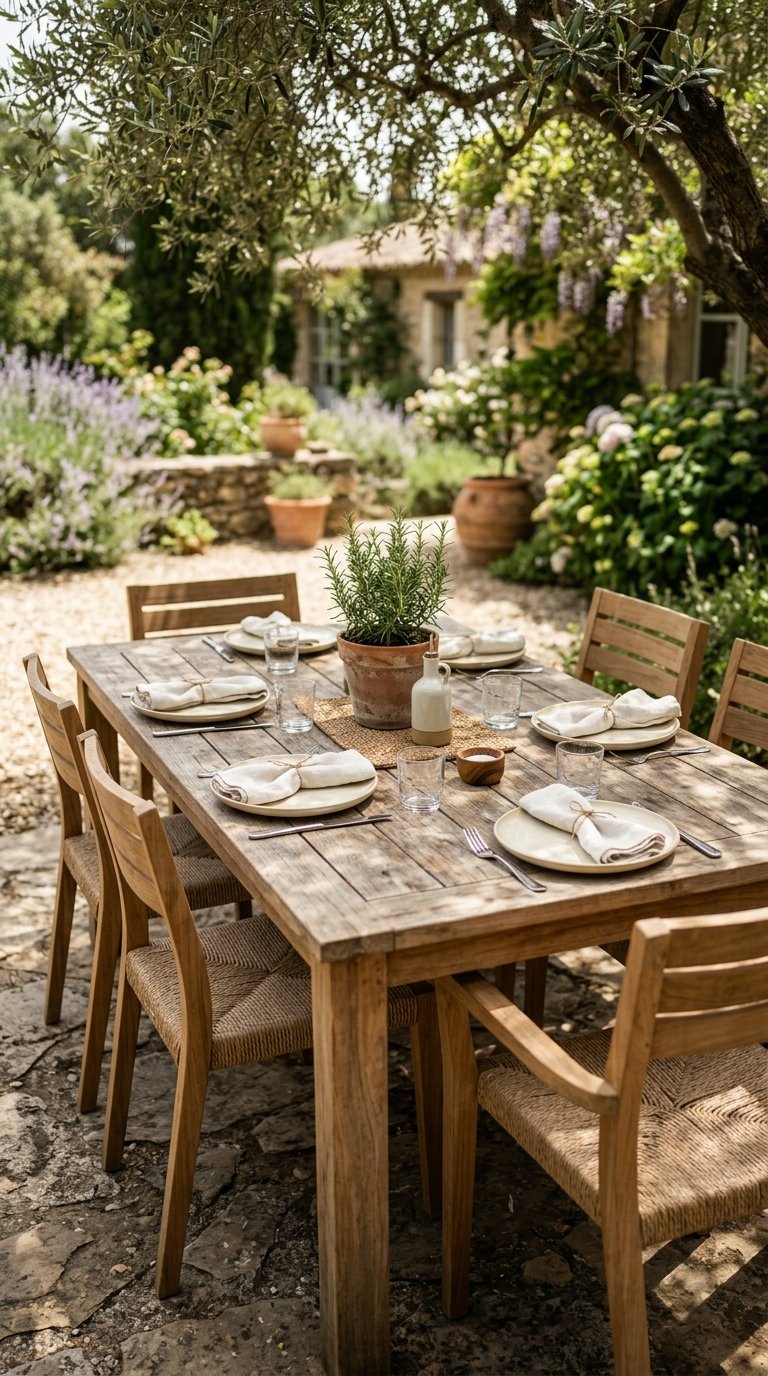
Everything in an outdoor dining area revolves around the table. Choose a table that seats two more people than your typical guest count so you never scramble for extra seating when friends show up unannounced. A table that feels slightly generous in scale anchors the space and makes the whole setup feel considered rather than improvised.
Best Materials for Outdoor Dining Tables
- Teak: naturally weather-resistant, develops a silver patina if left untreated, lasts decades
- Powder-coated aluminum: lightweight, rust-proof, modern aesthetic, budget-friendly
- Concrete: extremely durable, industrial look, stays cool in direct sun
- Acacia wood: affordable teak alternative, requires annual oiling to maintain
A 72-inch rectangular teak table seats six comfortably and costs $400 to $900. It outlasts three generations of cheaper alternatives and looks better every year.
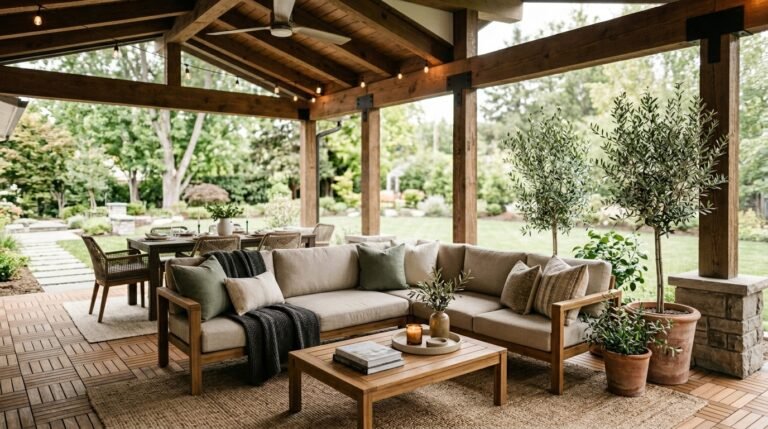
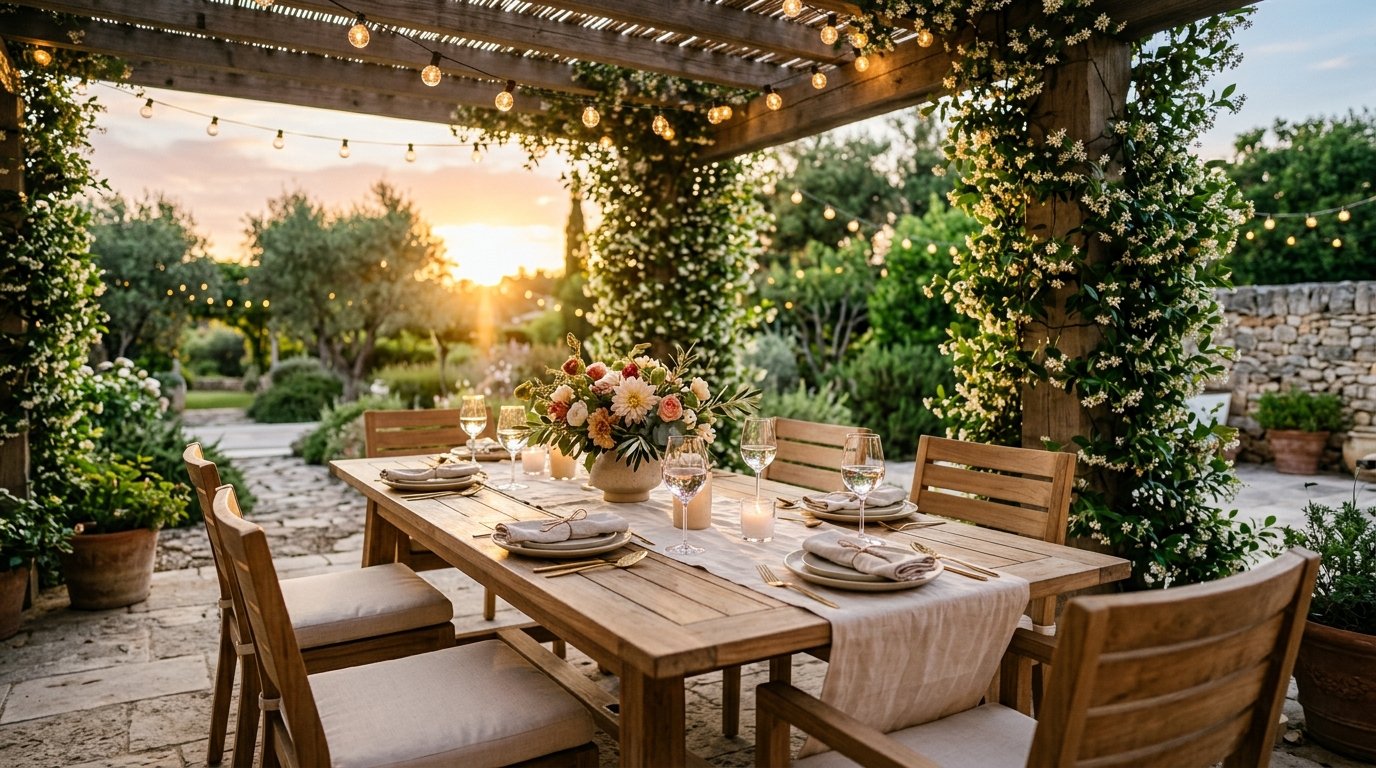
2. Add a Pergola for Overhead Structure
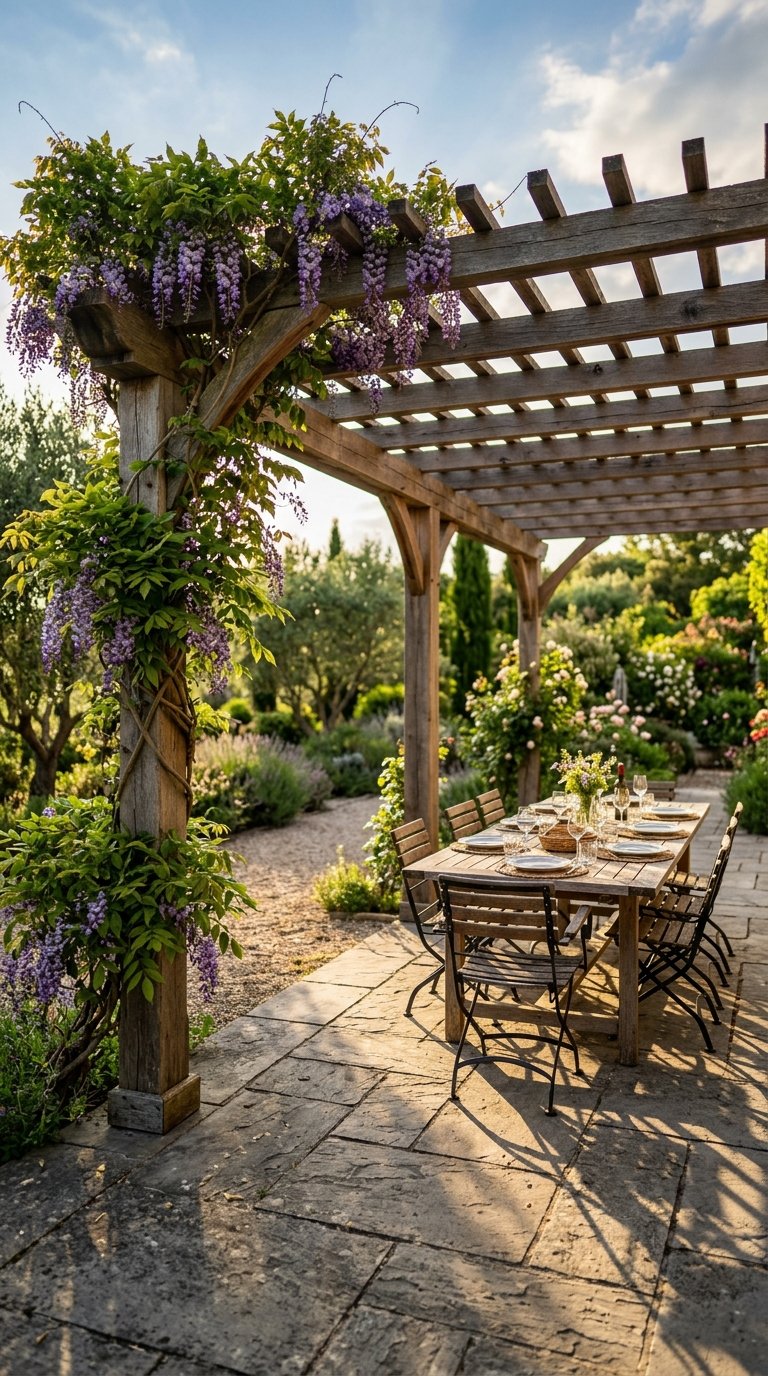
An outdoor dining area without overhead structure feels exposed and unfinished. A pergola defines the dining space, supports string lights and climbing plants, and provides partial shade without blocking airflow the way a solid roof does.
Pergola Options by Budget
- DIY cedar pergola kit: $600 to $1,200, assembles in a weekend
- Aluminum pergola with adjustable louvered roof: $1,500 to $4,000
- Attached pergola bolted to the house: most stable option, requires permit in some areas
A 10×12 pergola fits a six-person dining set with comfortable clearance on all sides. Once it’s up, every other element of your outdoor dining area looks intentional underneath it.
3. Hang String Lights for Evening Ambiance
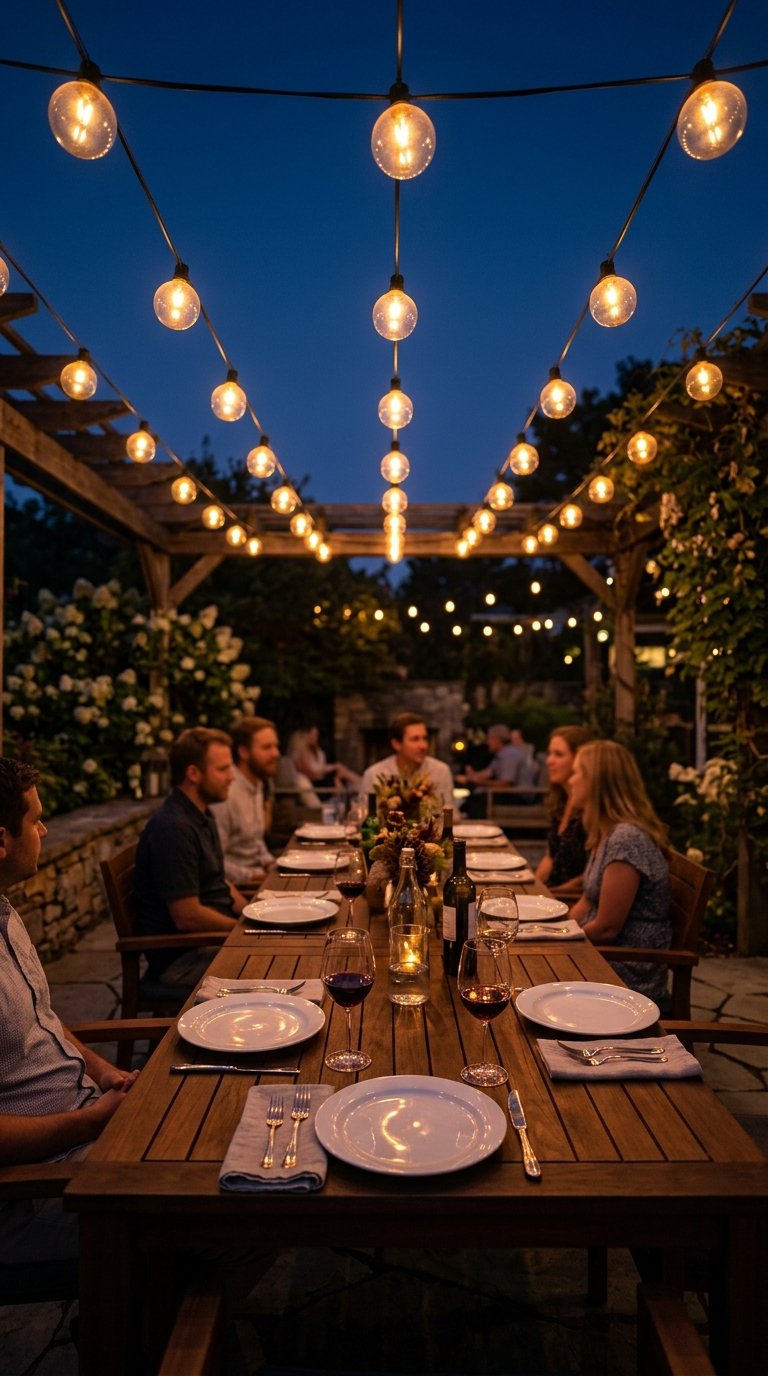
You finish dinner and the sun goes down. Without lighting, everyone moves inside. String lights in a canopy formation above the dining table extend your outdoor dining hours well into the evening and create a warm atmosphere that no overhead fixture replicates.
G40 globe lights hung 8 to 9 feet above the table surface provide enough brightness to see your food clearly while keeping the mood relaxed and warm. A 50-foot connectable strand covers a standard pergola or canopy formation for under $40. Pair it with a smart plug timer and the lights come on automatically at sunset every night.
4. Use an Outdoor Rug to Define the Dining Zone
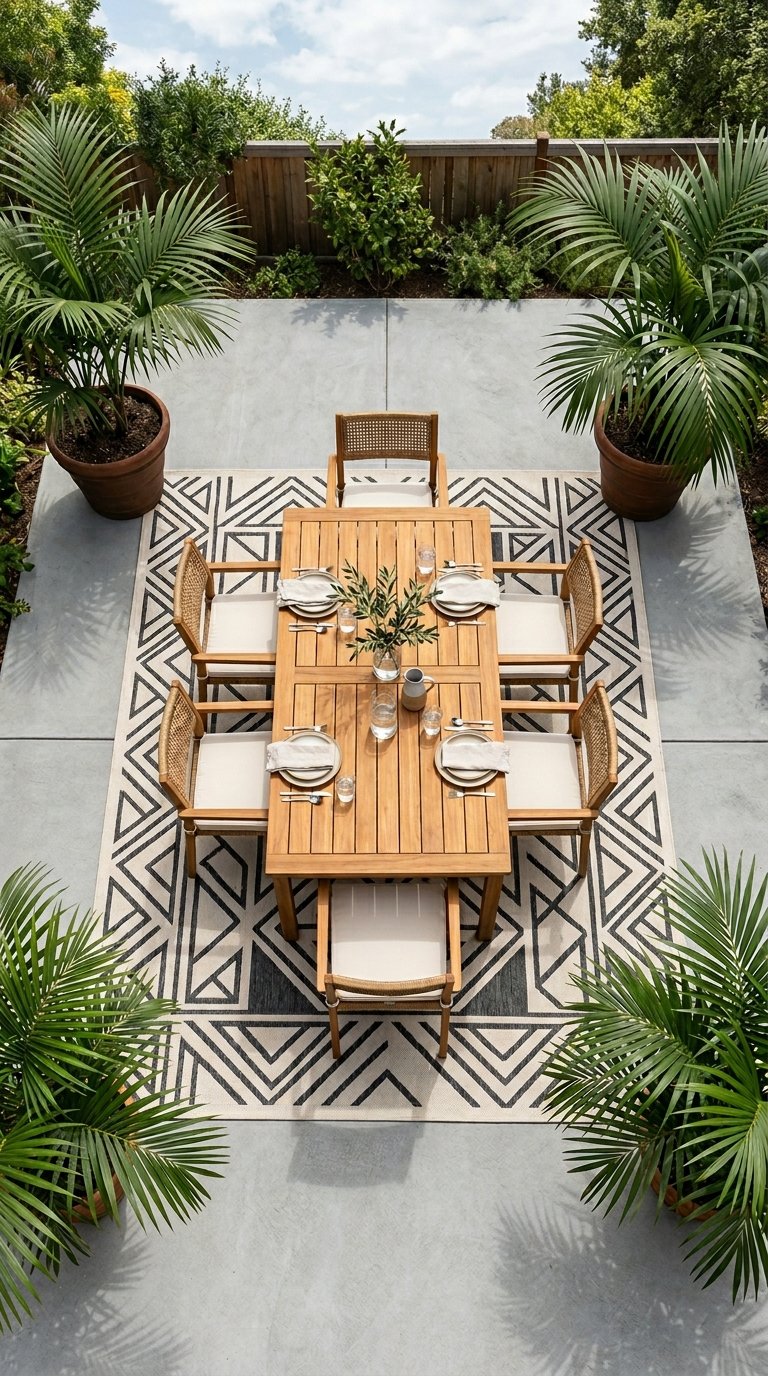
Without a rug, outdoor dining furniture floats in undefined space. A large outdoor rug placed under the dining table and chairs creates a visual room boundary that makes the dining area feel like a proper destination rather than furniture sitting on a patio.
Size matters here. The rug needs to extend at least 24 inches beyond the table edge on all sides so chairs remain on the rug when pulled out. For a standard 72-inch dining table, an 8×10 rug is the minimum. Polypropylene outdoor rugs resist moisture, mold, and UV fade and cost $60 to $150 at most home stores.
5. Install a Shade Sail for Afternoon Sun Protection
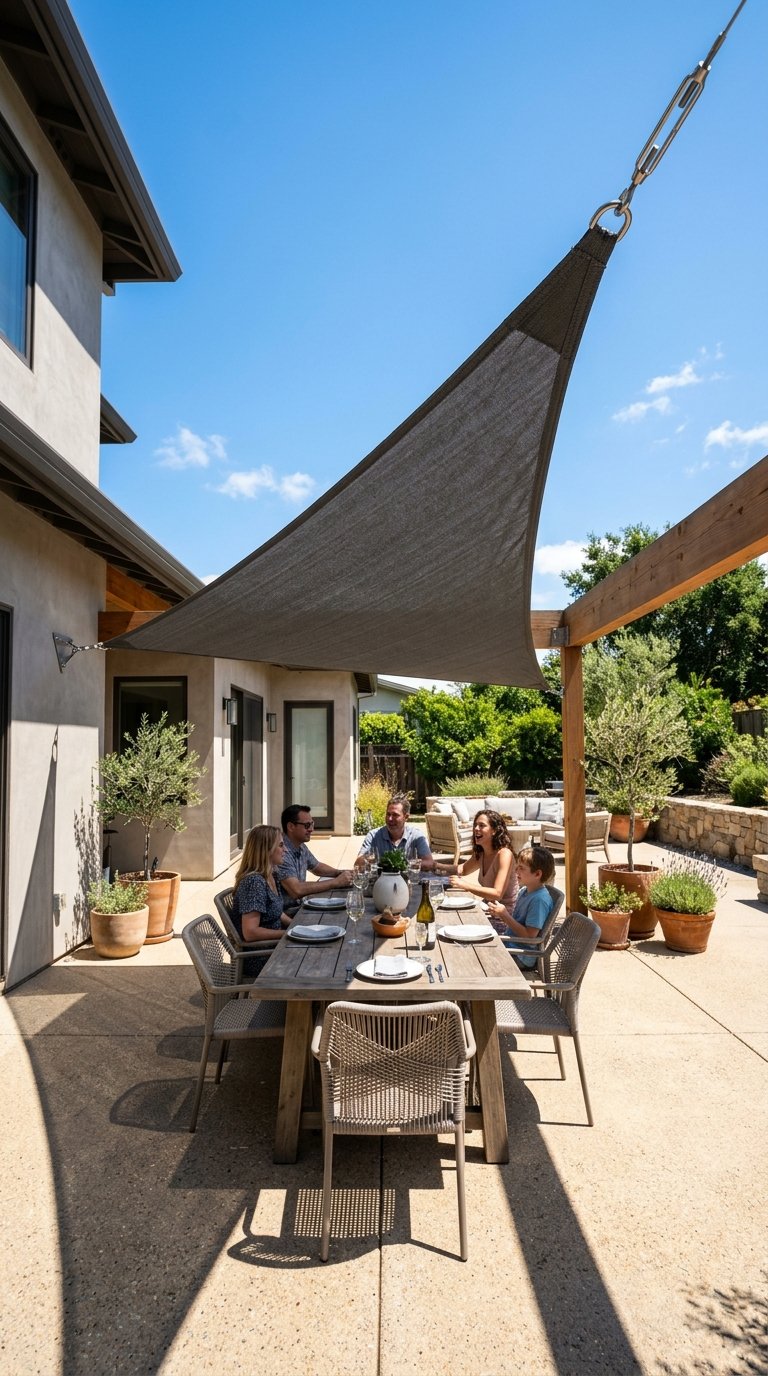
Direct afternoon sun makes outdoor dining uncomfortable and drives people inside during peak dining hours. A sail shade blocks 90 to 95 percent of UV rays and covers your entire dining area for a fraction of what a permanent awning costs.
Sail Shade Installation Tips
- Mount on three or four anchor points using heavy-duty eye bolts
- Angle the shade slightly so rainwater runs off instead of pooling
- Choose HDPE fabric with UV stabilization, not polyester
- Position the low point away from the dining table to maximize headroom
A 12×14 foot rectangular sail shade covers a six-person dining setup completely and costs $50 to $100. It installs in the afternoon and makes midday outdoor dining genuinely comfortable.
6. Build a Dedicated Outdoor Kitchen Nearby
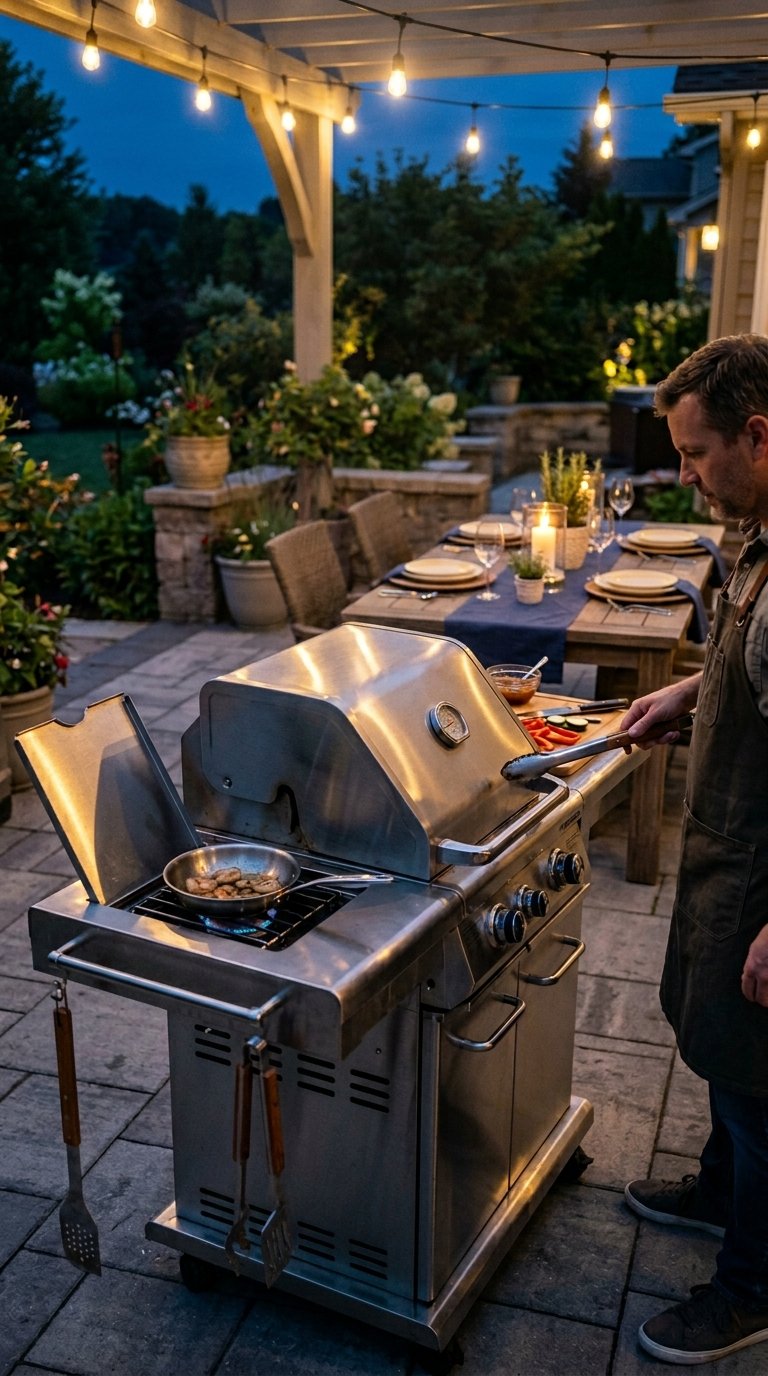
An outdoor dining area paired with an outdoor kitchen eliminates the back-and-forth trip through the house that kills outdoor meal momentum. Position the grill station or outdoor kitchen within 10 feet of the dining table so food moves directly from the cooking surface to the table without a relay race through your living room.
Even a basic setup works. A $300 stainless steel grill cart with side burner, a prep counter, and a mini fridge on a nearby surface functions as a complete outdoor kitchen. You don’t need a $20,000 built-in stone installation to enjoy cooking and dining in the same outdoor space.
7. Choose All-Weather Cushions for Real Comfort
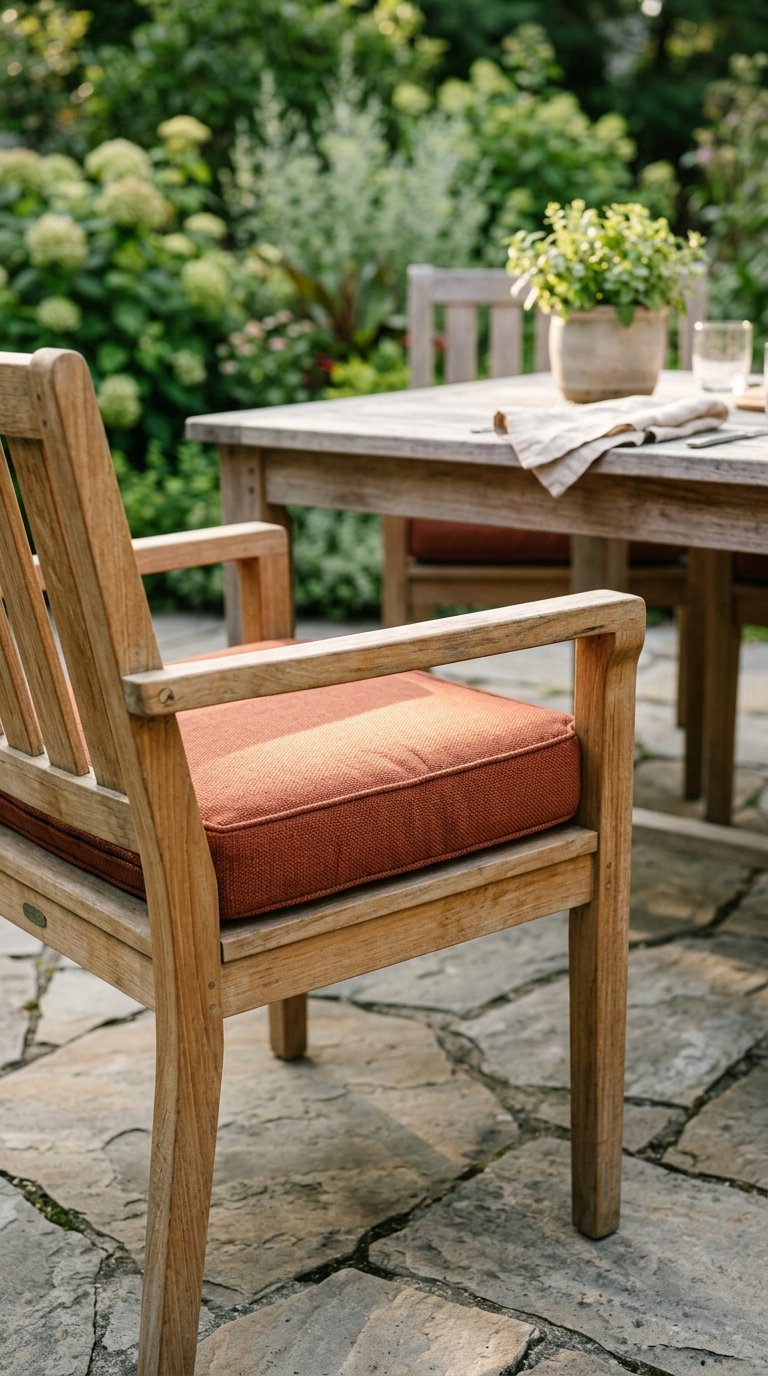
Hard chairs without cushions empty an outdoor dining area faster than rain does. Solution-dyed acrylic fabric cushions (Sunbrella is the gold standard) resist fading, moisture, and mildew while providing the seat comfort that keeps guests at the table long after dessert.
Sunbrella cushions cost $40 to $80 per chair and last 5 to 7 years in direct outdoor exposure. Cheap polyester cushions fade in one season and absorb moisture, which creates mold problems within months. The price difference is real but so is the lifespan gap. IMO, this is one area where the upgrade pays for itself every single season.
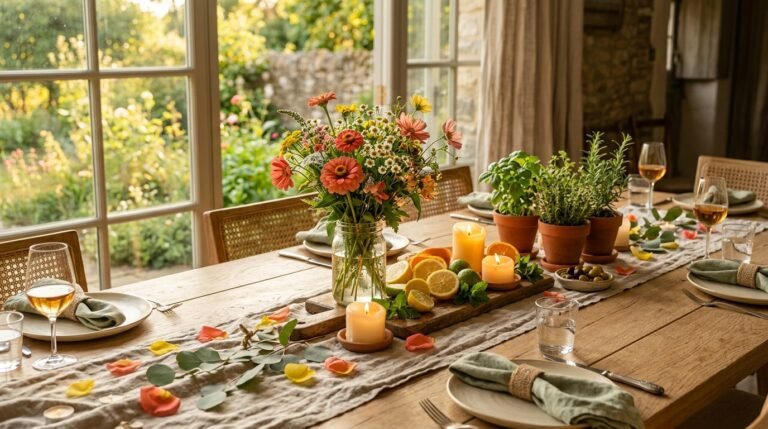
8. Add a Centerpiece That Works Hard
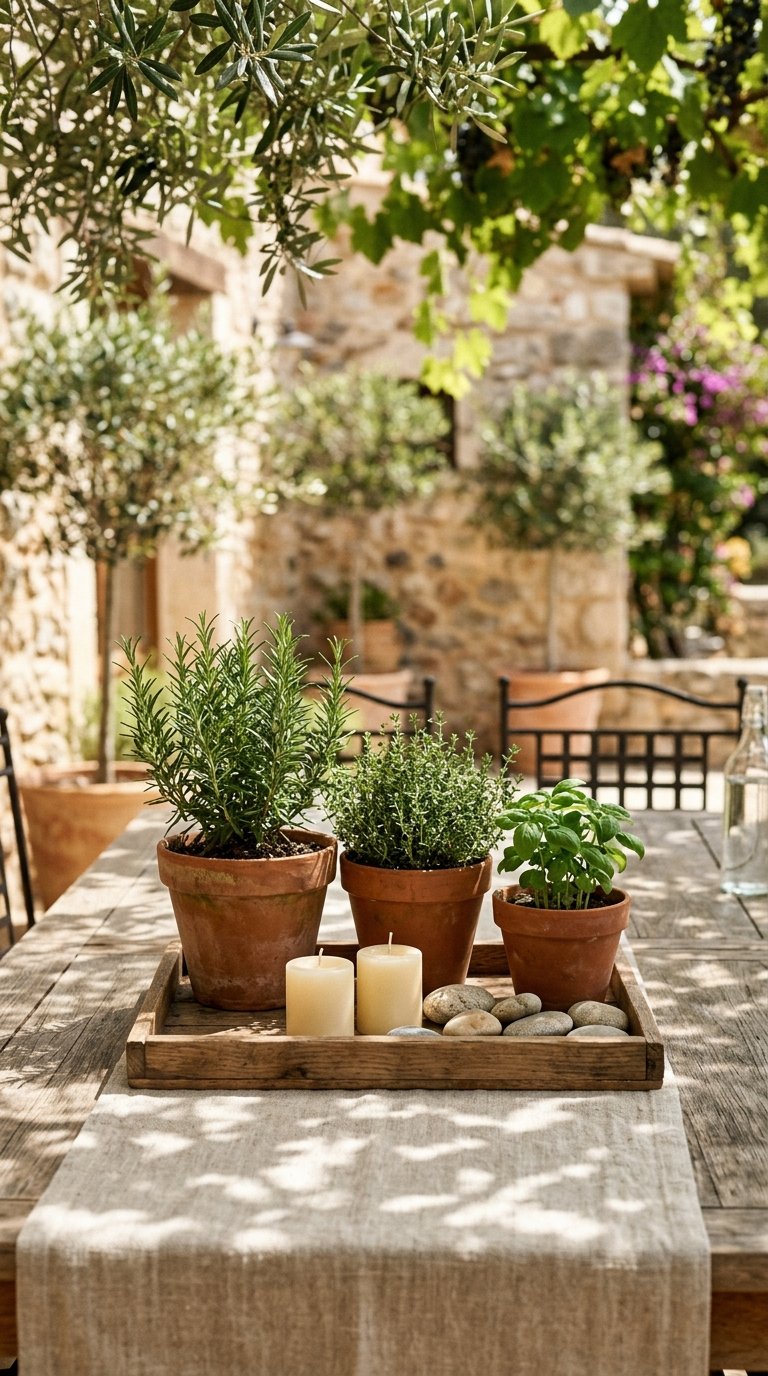
A bare table surface misses a simple opportunity to make the dining area feel styled and welcoming. A centerpiece that combines height, texture, and function earns its place on an outdoor dining table rather than just sitting there looking decorative.
Outdoor Centerpiece Ideas That Work
- Lanterns with pillar candles: warmth, light, and visual height in one piece
- Potted herbs (rosemary, basil, thyme): functional, fragrant, and always fresh
- A low wooden tray with succulents and river stones: zero maintenance, year-round appeal
- Mason jars with wildflowers: seasonal, inexpensive, replaced weekly
Keep the centerpiece under 12 inches tall so it doesn’t block sightlines across the table. Conversation flows better when guests see each other clearly.
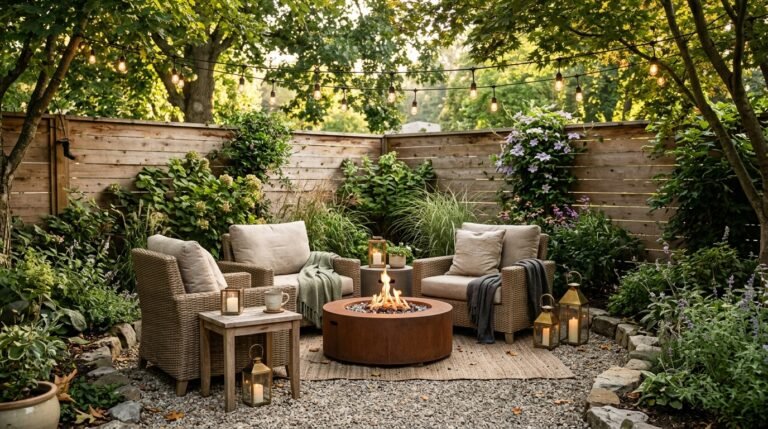
9. Build Privacy With a Living Fence or Screen
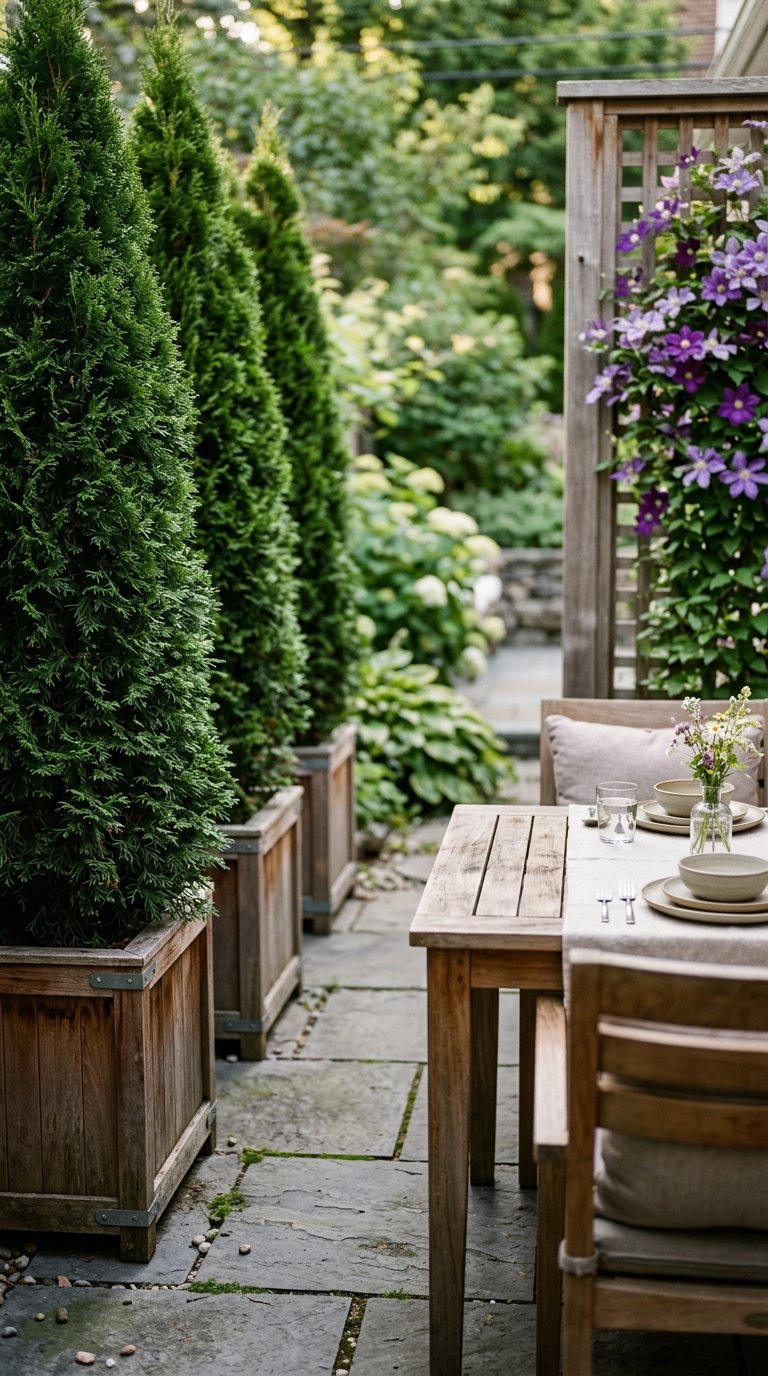
Dining in full view of neighbors or a busy street kills the relaxed atmosphere an outdoor dining area needs. Tall potted plants, a trellis with climbing greenery, or a cedar privacy screen on one or two sides creates a sense of enclosure without building a full fence.
Three arborvitae in large planters on the most exposed side of your dining area block sightlines within one growing season. Combine them with a 6-foot cedar trellis panel on a second side and you have an enclosed outdoor dining room that feels completely private without a single permit or contractor.
10. Create a Separate Bar or Drinks Station
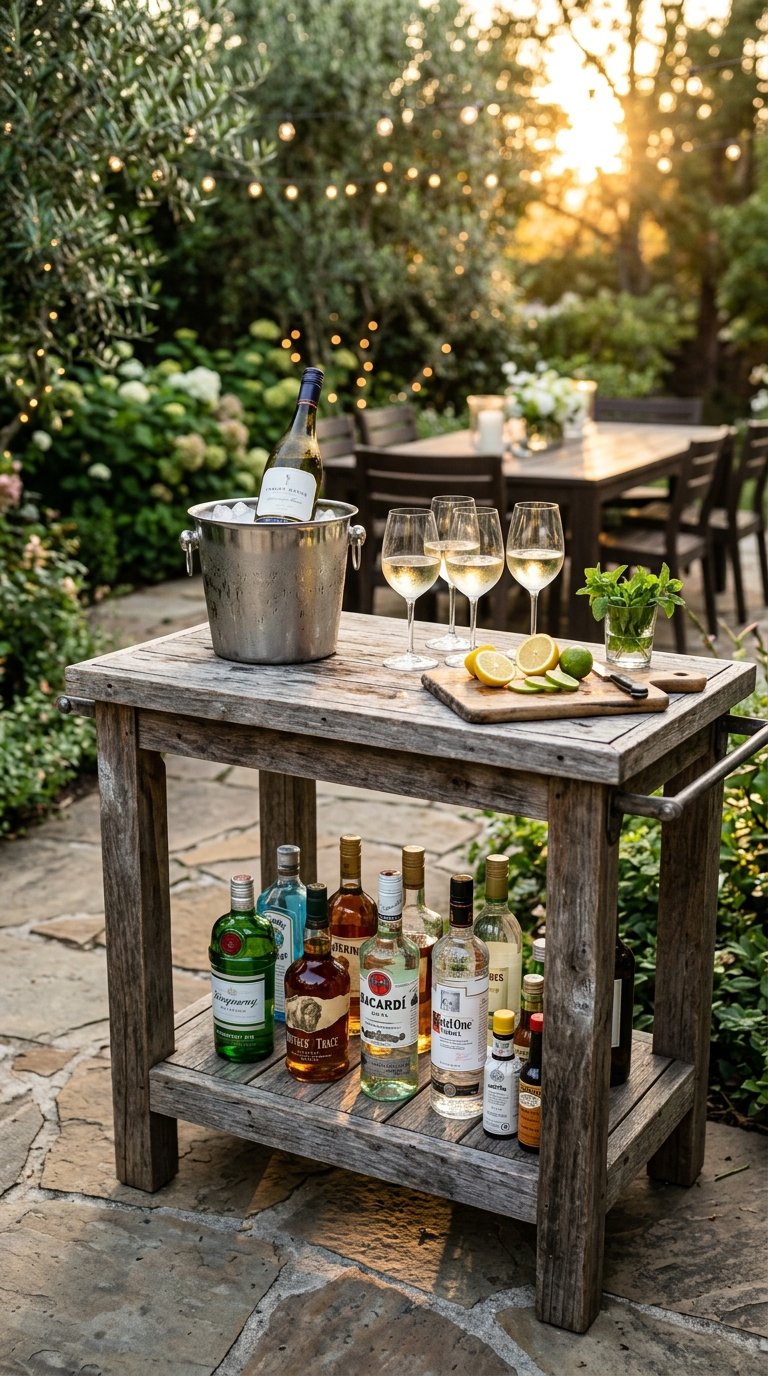
Guests who want a drink shouldn’t interrupt the person hosting the table. A dedicated outdoor bar cart or drinks station positioned 5 to 8 feet from the dining table keeps beverages accessible without crowding the dining surface.
A weathered wood bar cart with a lower shelf holds a wine bucket, glasses, a small cutting board, and a bottle collection. It costs $80 to $200 and completely removes the “can I get anyone a drink?” interruption from the host’s responsibilities. Guests serve themselves and everyone stays at the table longer.
11. Use Bench Seating on One Side of the Table

Standard dining chairs take up significant floor space when pushed out. Replacing one side of the dining table with a built-in or freestanding bench eliminates that clearance problem while adding a relaxed, communal seating dynamic that guests genuinely enjoy.
A bench also fits more people per linear foot than individual chairs. A 72-inch bench seats four adults comfortably compared to three chairs in the same space. Built-in benches with storage underneath double the functionality without adding square footage.
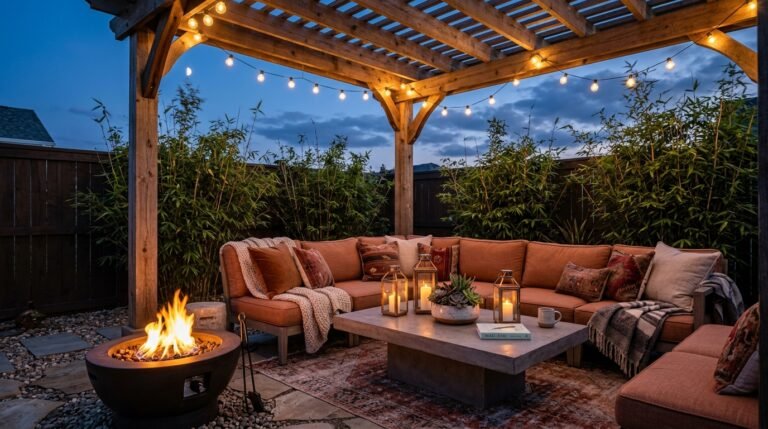
12. Incorporate a Fire Pit or Tabletop Fireplace
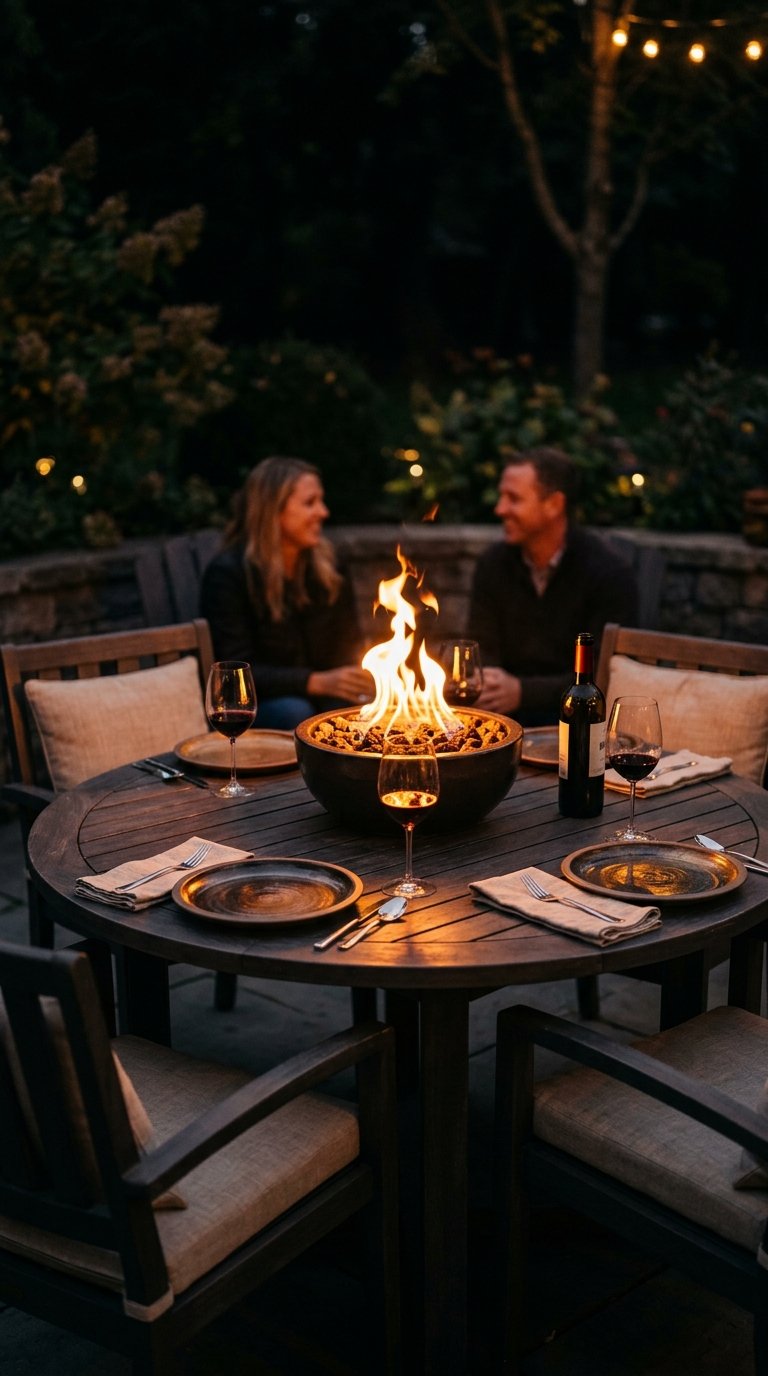
An outdoor dining area with a fire element extends usability deep into autumn and early spring. A tabletop propane fireplace in the center of the table provides warmth for everyone seated without the size, smoke, and clearance requirements of a freestanding fire pit.
Tabletop Fire Feature Comparison
- Propane tabletop fire bowl: clean burn, adjustable flame, $80 to $200
- Ethanol tabletop fireplace: no gas line needed, smokeless, $100 to $300
- Wood-burning chiminea nearby: traditional aesthetic, requires more clearance, more maintenance
A 12-inch propane tabletop fire bowl sits safely in the center of most outdoor dining tables and adds two to three hours of comfortable outdoor dining time on cool evenings.
13. Hang an Outdoor Chandelier or Pendant Light
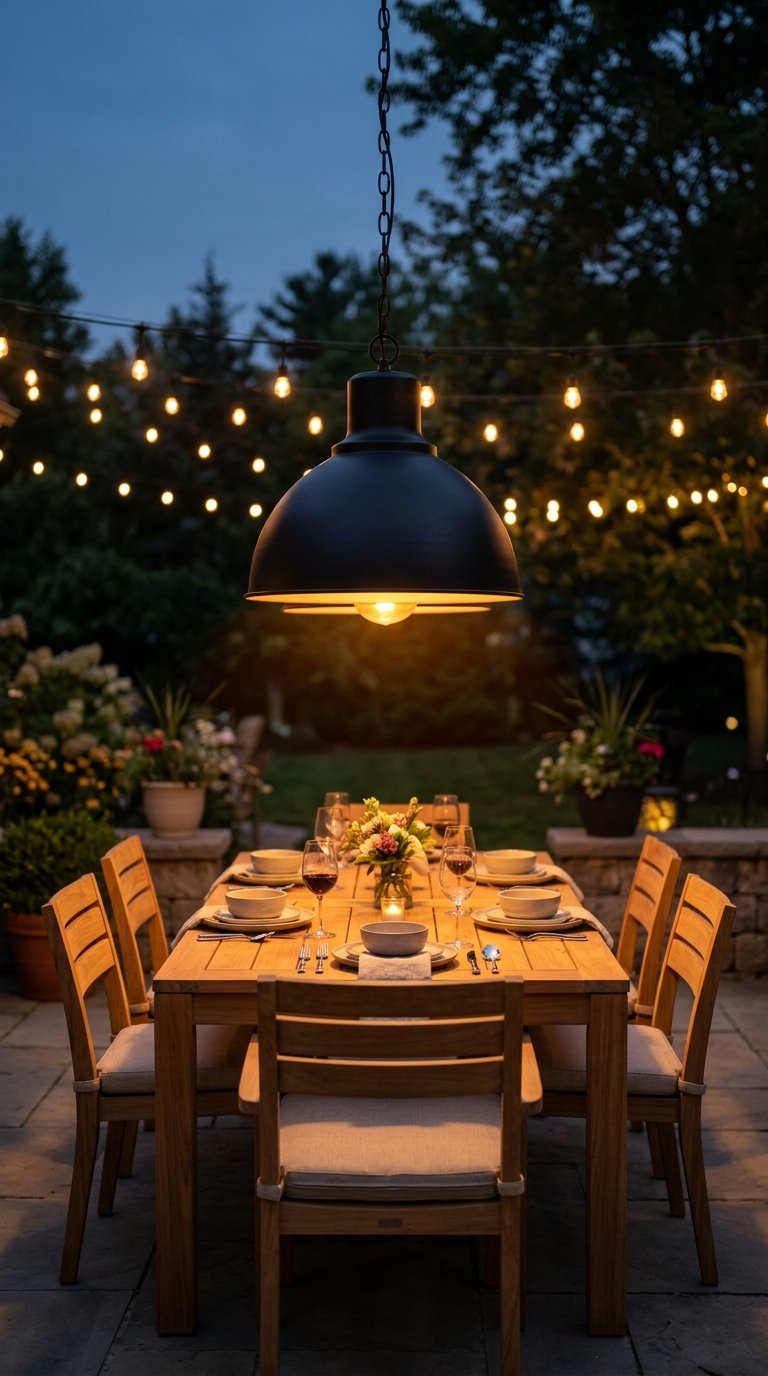
String lights are excellent. An outdoor chandelier or oversized pendant light takes the dining area aesthetic to a completely different level. A hardwired or plug-in outdoor pendant light hung directly above the table center creates the same visual anchor that an indoor dining room chandelier provides.
Weather-rated outdoor pendant lights from brands like Progress Lighting and Kichler cost $80 to $300. They mount to a pergola beam or overhead hook and focus light exactly where you need it over the table surface. Combined with perimeter string lights, this two-layer lighting approach makes your outdoor dining area look professionally designed.
14. Lay Porcelain or Natural Stone Pavers
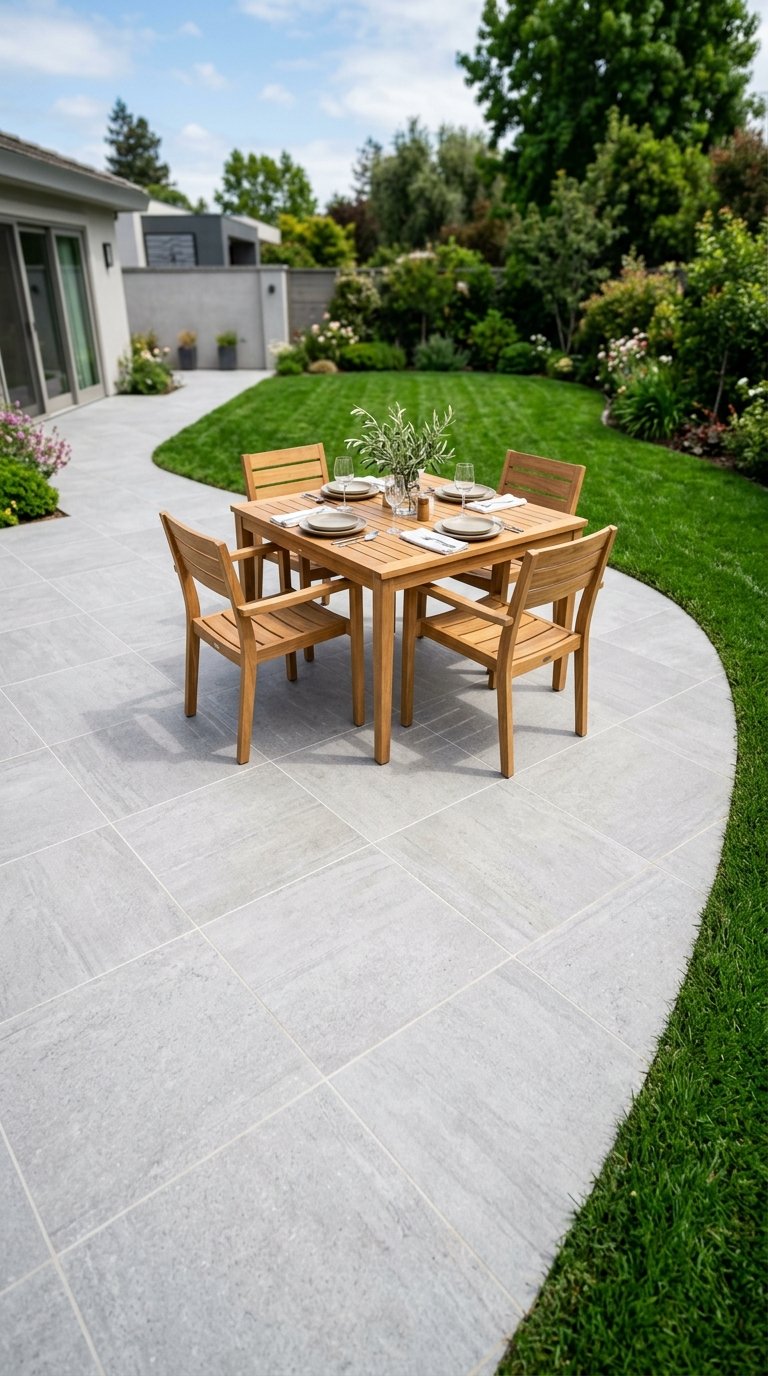
Grass under a dining table creates an uneven surface and damages in high-traffic areas quickly. A defined paving surface of porcelain or natural stone pavers gives your outdoor dining area a stable, level floor that handles chair movement, foot traffic, and furniture weight without deteriorating.
Porcelain pavers cost $3 to $8 per square foot and install over compacted gravel without mortar for a DIY-friendly project. A 12×14 foot paved dining area costs $500 to $1,500 in materials and lasts indefinitely with zero maintenance beyond occasional sweeping.
15. Add Ambient Lighting With Lanterns and Candles

Overhead lighting handles general illumination. Lanterns and candles at table level add the warm, flickering light layer that makes outdoor dining feel genuinely atmospheric rather than brightly functional.
Group three lanterns of varying heights at one end of the table or along a nearby low wall. Use LED flameless candles inside for wind resistance or standard pillar candles for authentic flame. The combination of overhead string lights and table-level lanterns creates the layered lighting approach that every high-end outdoor restaurant uses.
16. Build a Wraparound Deck for Maximum Dining Space
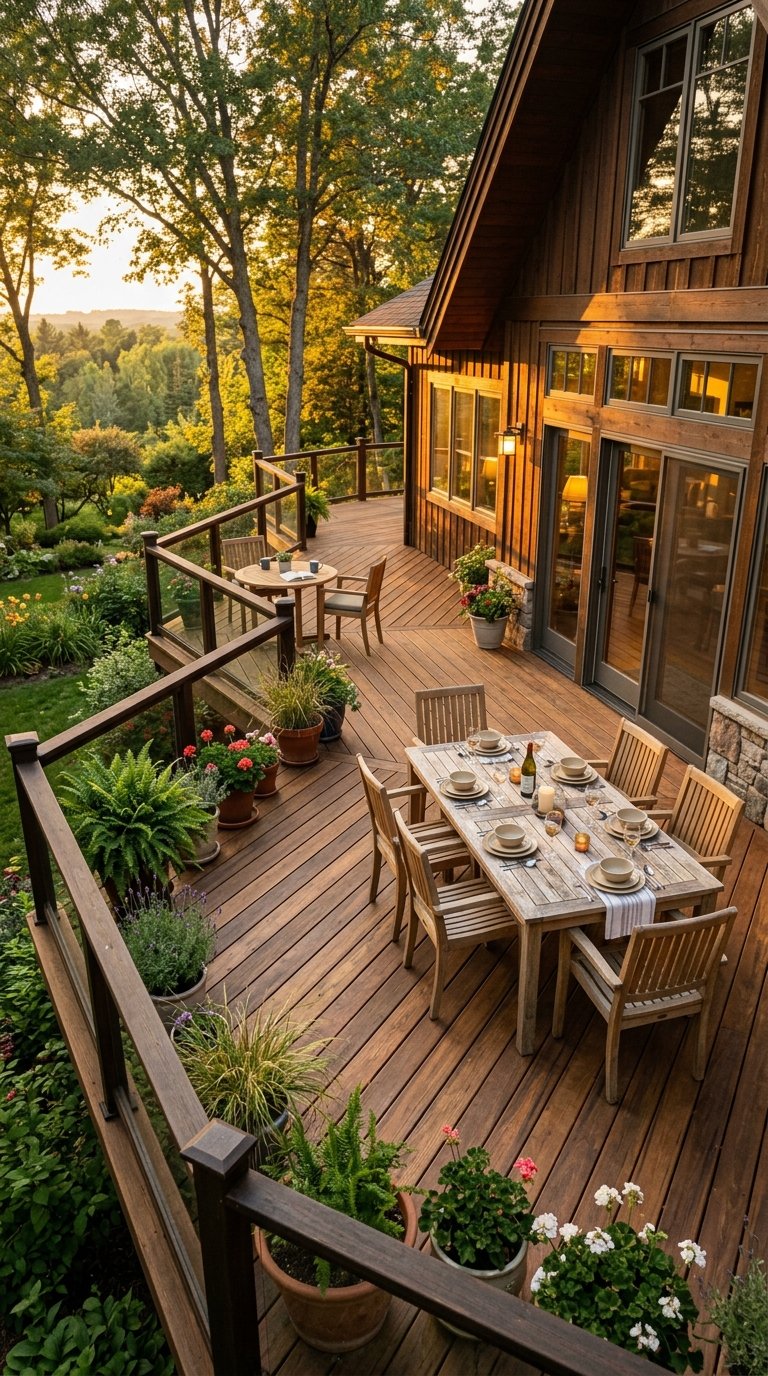
A flat concrete patio limits your dining footprint to what fits on the slab. A wraparound deck expands the outdoor dining area around two or three sides of the house, creating multiple dining zones at different scales for different occasions.
One section handles the main six-person dining setup. A smaller section accommodates a two-person breakfast spot. A third section holds the bar cart and drinks station. The wraparound format gives a single outdoor space multiple personalities without building separate areas.
17. Install a Retractable Awning for Flexible Shade
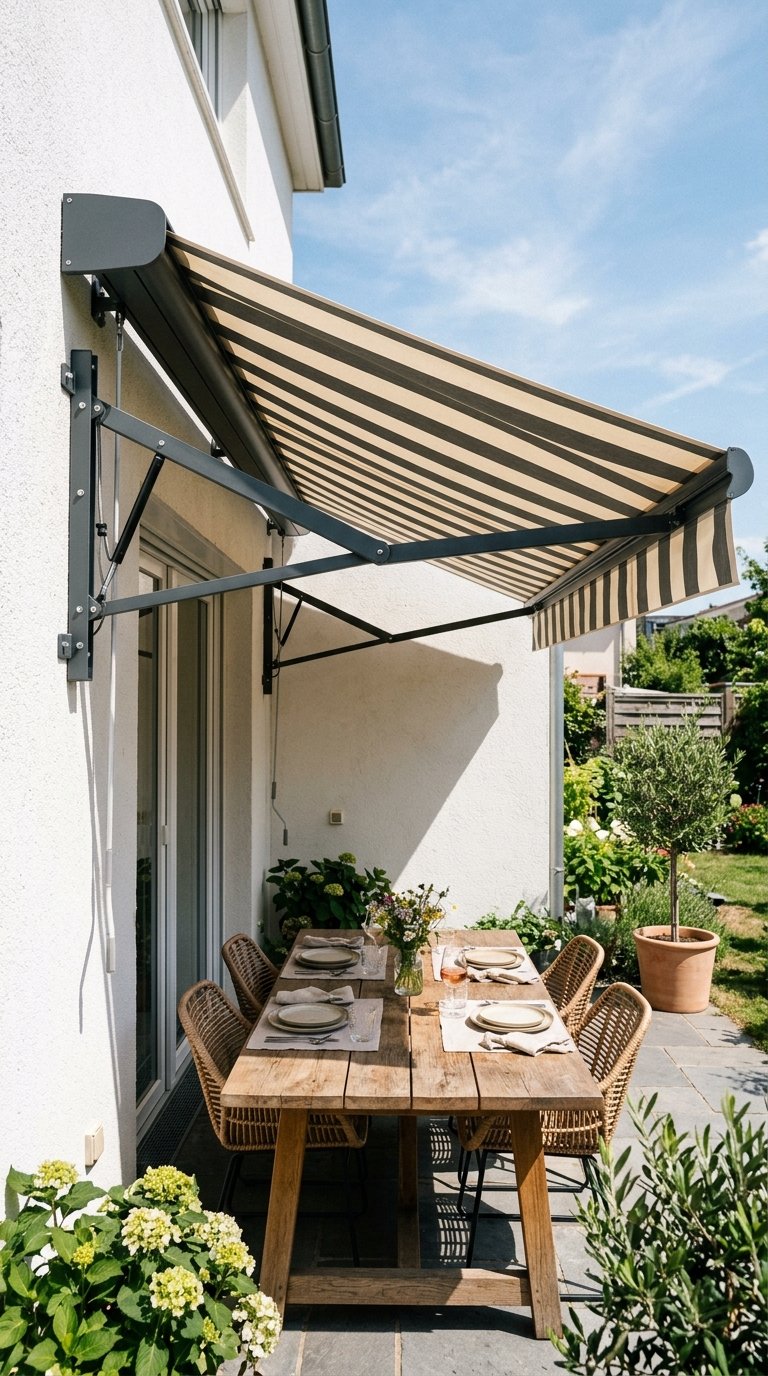
A sail shade offers fixed coverage. A retractable awning gives you sun when you want it and shade when you need it. Motorized retractable awnings extend at the push of a button and retract fully to protect the fabric during storms or strong winds.
Motorized retractable awnings from brands like Sunsetter and Advaning cost $500 to $2,000 to install and cover 10 to 20 feet of outdoor dining space. They attach to the exterior wall above a door or window and require no posts or freestanding structure. The flexibility alone justifies the cost difference over a fixed shade solution.
18. Style the Table With Outdoor Tableware
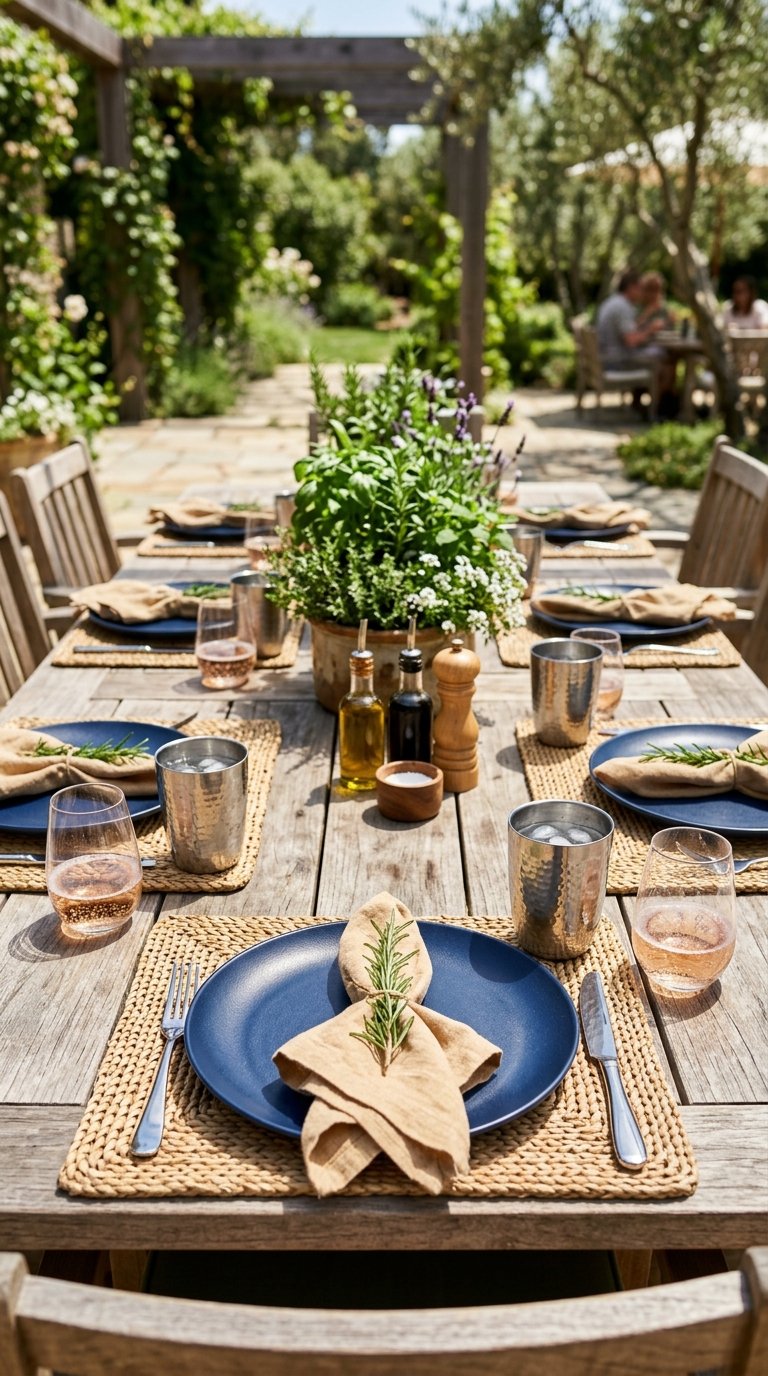
Generic plastic plates and paper cups undermine an otherwise well-designed outdoor dining area. Melamine dinnerware, stainless tumblers, and linen-blend napkins deliver the look of a properly set table while handling outdoor conditions without breakage.
Outdoor Tableware Worth Buying
- Melamine plates: dishwasher-safe, shatterproof, wide color and pattern range, $20 to $50 per set of four
- Stainless double-wall tumblers: keep drinks cold, no condensation, $15 to $30 per set
- Acrylic wine glasses: stem or stemless options, nearly indistinguishable from glass at a glance
- Linen-blend napkins: wash well, dry fast, look far better than paper
A fully set outdoor table with proper tableware tells guests they’re eating somewhere special, not grabbing a quick meal before going back inside.
19. Plant an Herb Garden Within Arm’s Reach
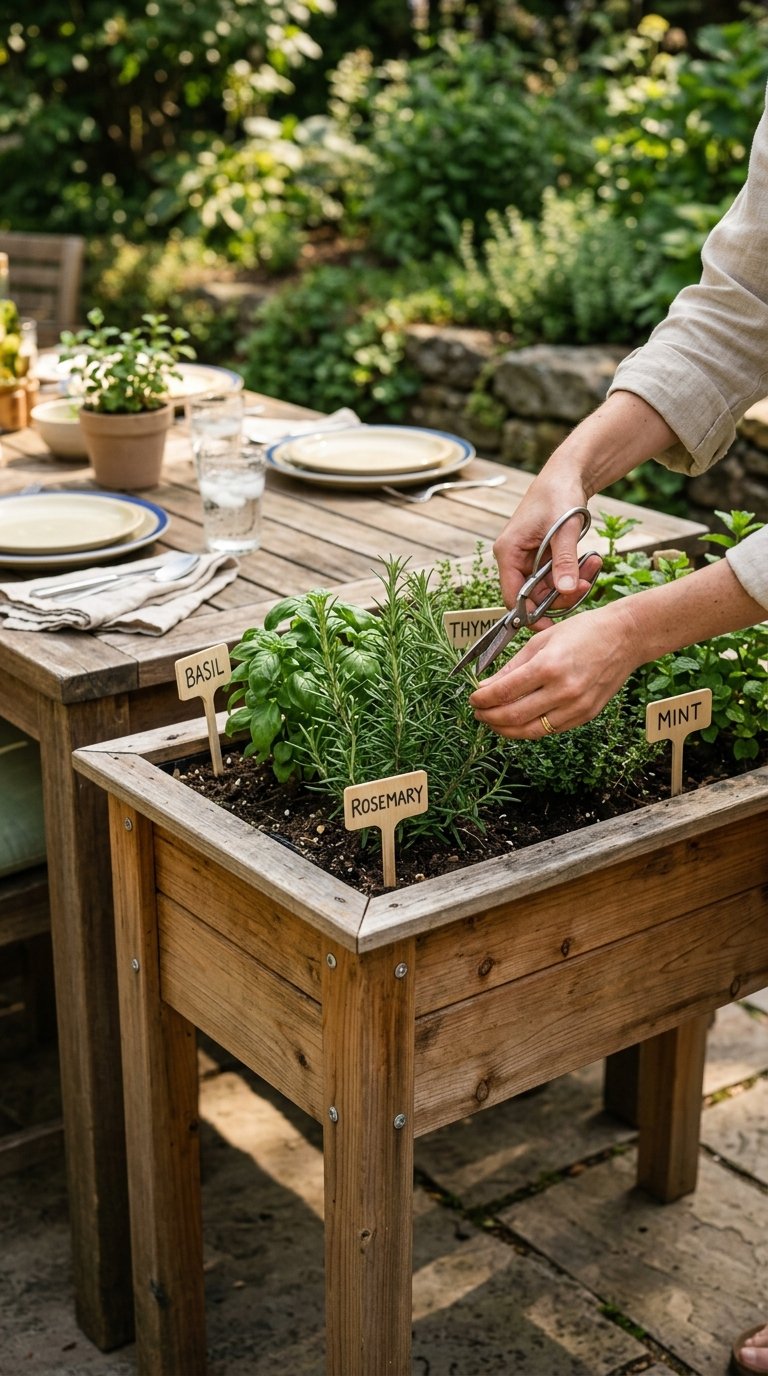
Fresh herbs pulled directly from a nearby planter and added to food at the table is the kind of detail that people remember about a meal. A raised herb planter positioned within arm’s reach of the dining table keeps basil, rosemary, mint, and thyme accessible during cooking and dining simultaneously.
A 24-inch raised planter on legs at table height costs $40 to $80 and holds six to eight herb plants. Snipping fresh herbs directly at the table while serving food becomes one of those small rituals that make outdoor dining feel completely different from eating inside.
20. Screen the Dining Area With an Outdoor Curtain
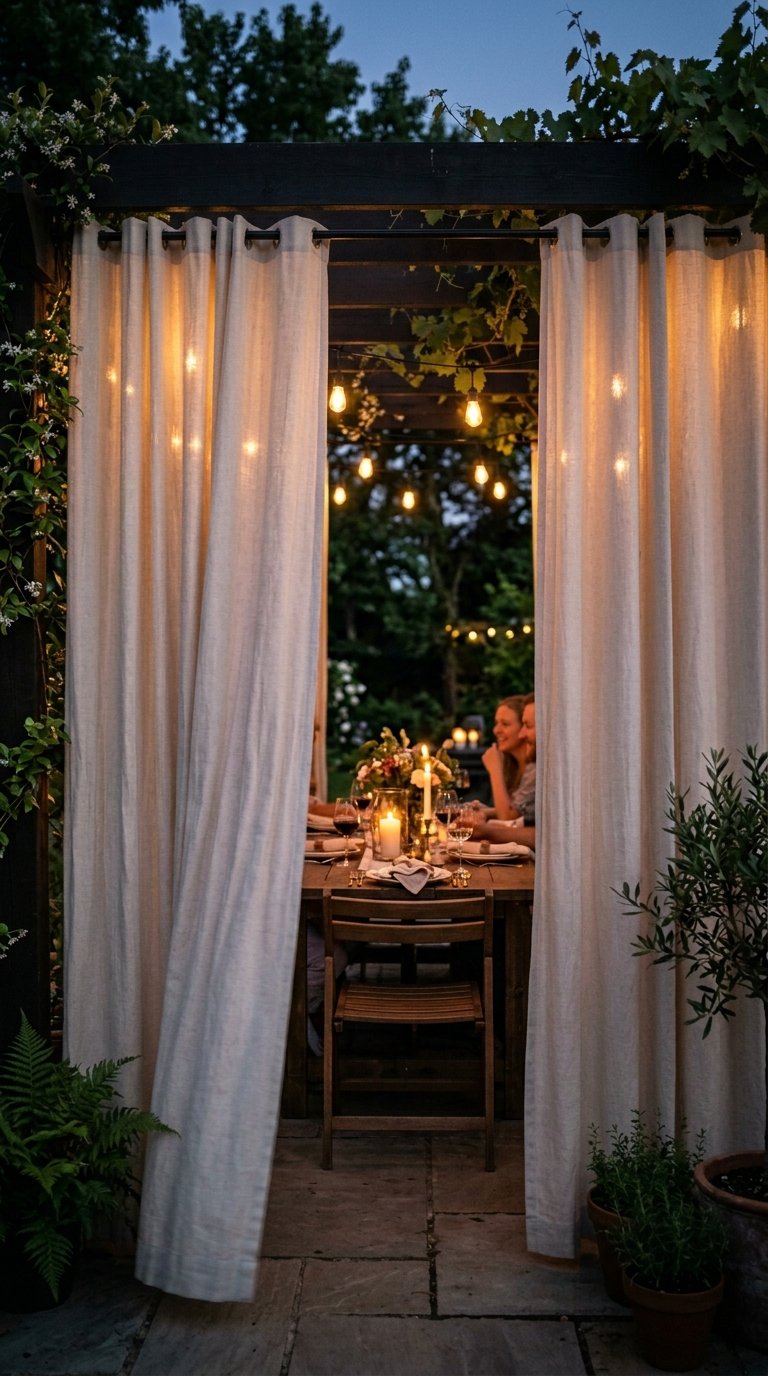
Outdoor curtains on a pergola or tension rod system add privacy, wind protection, and visual softness that hard structures never provide. Weather-resistant outdoor curtain panels on three sides of a pergola transform an open patio into an enclosed outdoor dining room that feels warm and protected even on breezy evenings.
Sunbrella or solution-dyed polyester outdoor curtains cost $40 to $80 per panel and hang on standard curtain rod hardware. Pull them open for airflow and full sun during the day. Close them for privacy and wind protection during evening dining. It’s the most versatile enclosure solution for an outdoor dining area on this entire list.
21. Add Heating for Year-Round Use
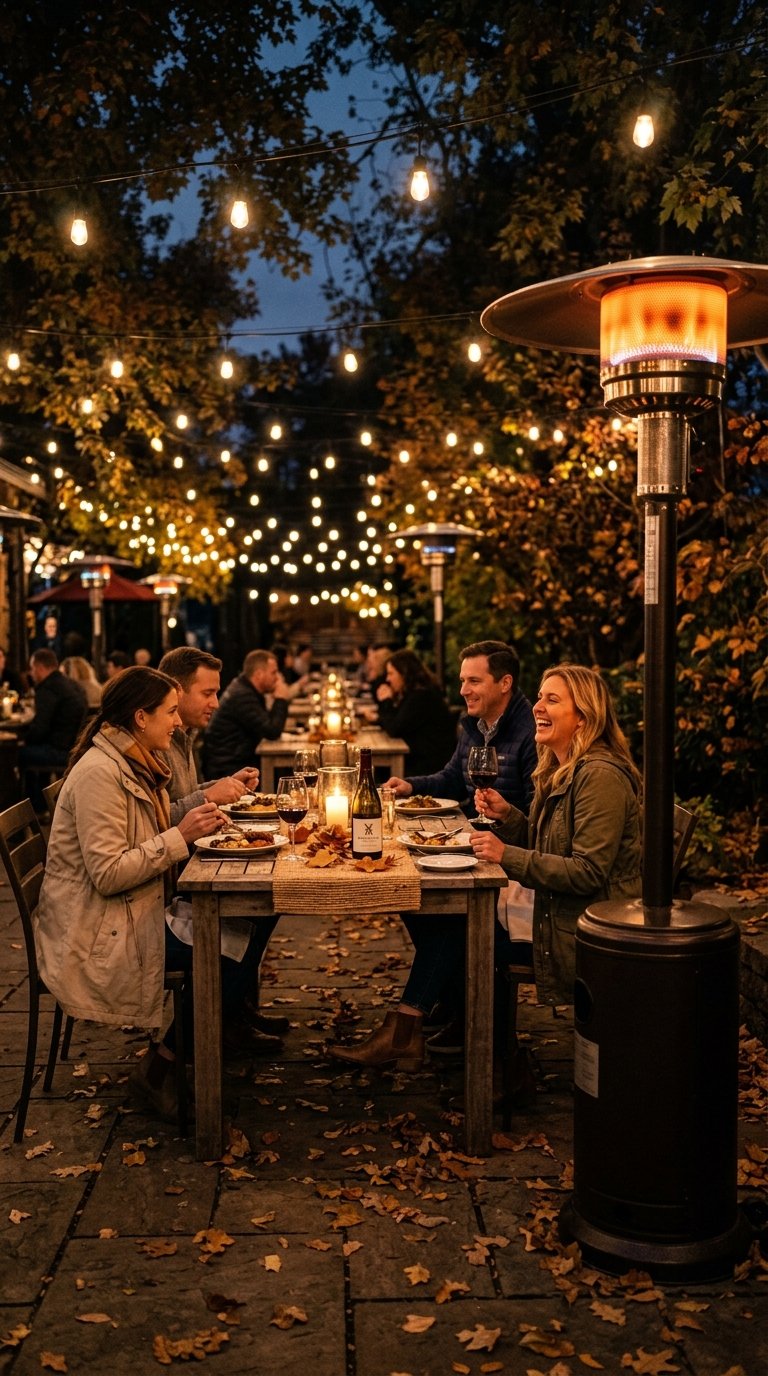
The number one reason outdoor dining areas go unused from October through April is temperature. A freestanding patio heater or wall-mounted infrared heater extends your outdoor dining season by three to four months in most climates, turning a seasonal space into a year-round destination.
Outdoor Heater Comparison
- Propane freestanding heater: 40,000 BTU, heats a 20-foot radius, $100 to $200, portable
- Natural gas built-in heater: permanent installation, lower operating cost, $300 to $600
- Electric infrared wall-mounted heater: instant heat, no fuel, mounts overhead, $150 to $400
- Tabletop propane heater: compact, $50 to $100, works for two to four people
FYI, infrared heaters heat people directly rather than warming the air around them, which means they work effectively even in breezy conditions where propane heaters struggle.
Final Thoughts
A great outdoor dining area doesn’t require a complete backyard renovation or a professional landscaper. It requires the right table, adequate shade, proper lighting, and enough comfort that guests want to stay seated long after the food is gone. Every idea on this list addresses a specific problem that keeps people from using their outdoor dining space as much as they should.
Start with the foundation: a solid table, a shade solution, and evening lighting. Nail those three and everything else on this list becomes an upgrade rather than a necessity. Your outdoor dining area should work as hard as your indoor dining room, and with the right setup, it works harder because the setting does half the work for you.