21 Outdoor Kitchen Ideas to Create the Ultimate Backyard
Every time you carry food from your indoor kitchen through the house to your backyard, you lose heat, momentum, and at least one utensil somewhere between the counter and the patio door. I spent three summers doing exactly that before I built a proper outdoor kitchen setup and realized the whole relay race was completely unnecessary. An outdoor kitchen keeps the cooking, the hosting, and the eating in the same space, which changes the entire dynamic of backyard entertaining. These 21 outdoor kitchen ideas cover every budget from a $200 grill cart setup to a full built-in installation that adds serious property value.
1. Start With a Quality Built-In Gas Grill
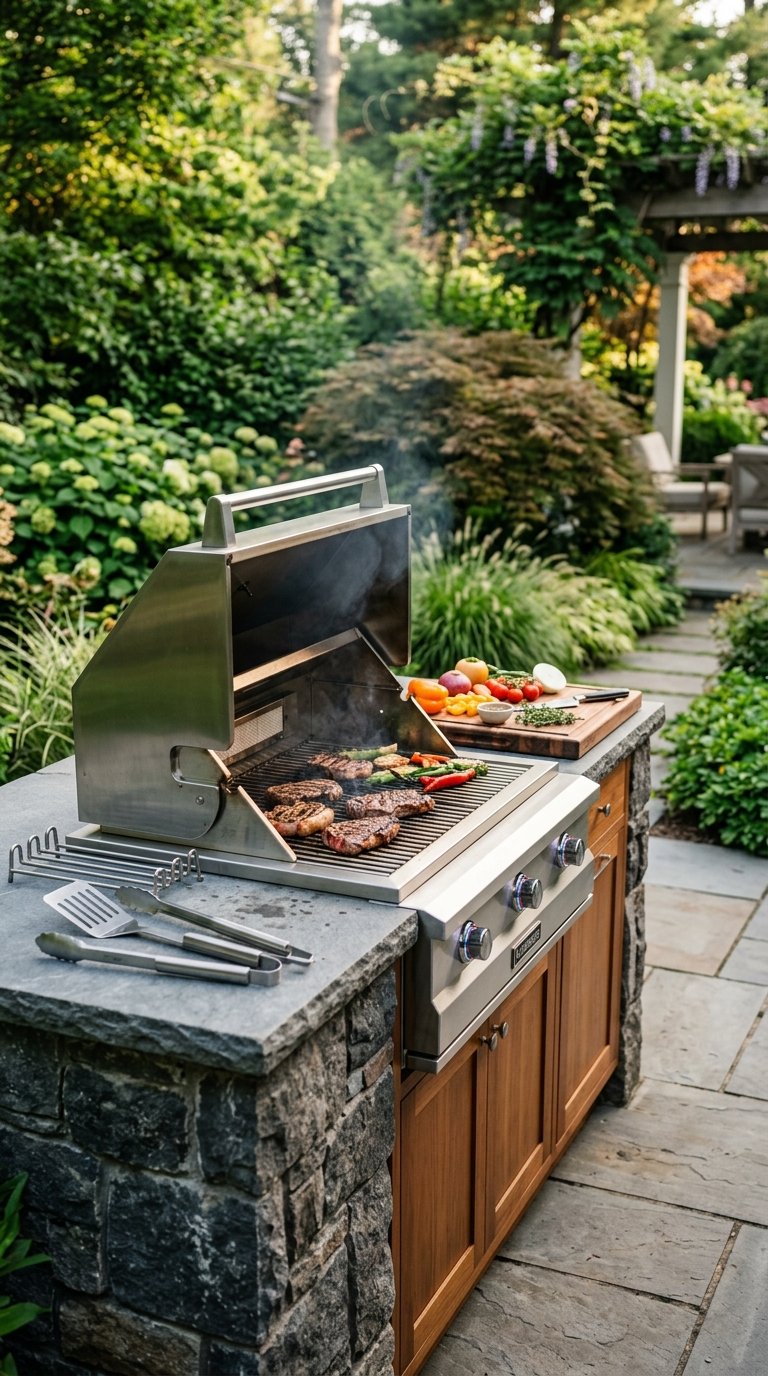
Every outdoor kitchen begins with the grill. A built-in gas grill set into a stone or stainless steel surround becomes the anchor of the entire outdoor kitchen layout and establishes the cooking capacity everything else supports. Unlike a freestanding grill you wheel around, a built-in installation signals permanence and commits to a proper outdoor cooking setup.
Built-In Gas Grill Size Guide
- 27-inch grill: suits two to four person households, two to three burners
- 36-inch grill: the most popular size, handles six to eight person gatherings comfortably
- 48-inch grill: serious outdoor cooking setup, four to six burners, side burner included
- 54-inch and above: commercial-scale, for dedicated outdoor cooking enthusiasts
Brands like Weber, Napoleon, and Lynx make excellent built-in gas grills from $600 to $4,000. A 36-inch Napoleon Prestige sits at the sweet spot of quality and cost at around $1,200 built-in. That investment pays back every season you use it.
2. Add a Stainless Steel Prep Counter

A grill without a prep surface forces you to use the patio table or a wobbly side cart that holds exactly one cutting board and a bottle of sauce. A stainless steel prep counter with 24 to 36 inches of surface space beside the grill gives you a proper workspace that handles raw food prep, plating, and tool staging simultaneously.
Stainless steel is the right material for outdoor counter surfaces because it resists heat, moisture, and UV damage without sealing or annual maintenance. It wipes clean in seconds and looks professional regardless of how messy the cooking gets. Outdoor-rated stainless counter sections cost $200 to $600 depending on size and cabinet configuration below.
3. Build a Stone or Concrete Outdoor Kitchen Surround
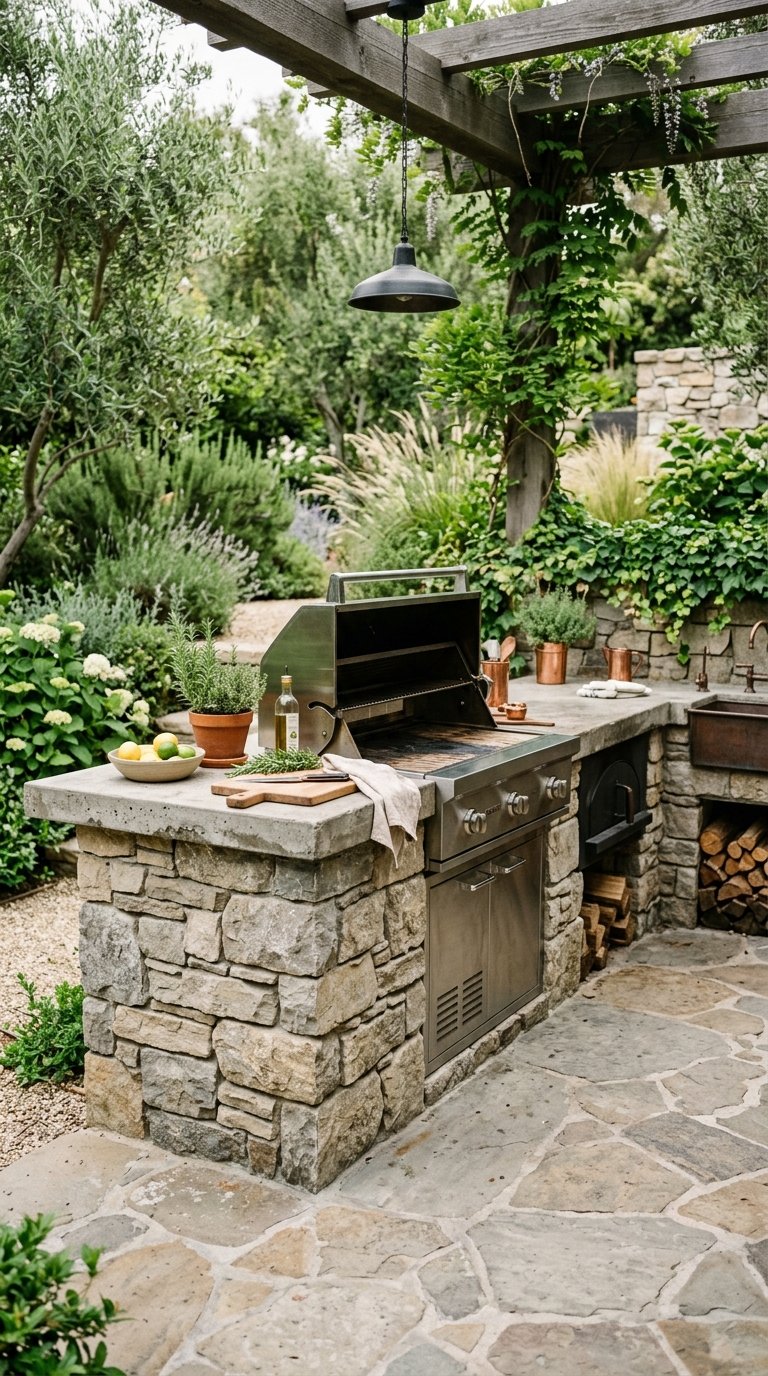
A stone or concrete surround transforms a collection of outdoor appliances into an outdoor kitchen. Concrete block construction covered in stone veneer, stucco, or tile creates a permanent outdoor kitchen structure that weatherproofs the appliances, provides storage below, and looks like a designed architectural feature.
Popular Outdoor Kitchen Surround Materials
- Natural stone veneer: most premium look, highly durable, $15 to $30 per square foot
- Stucco over concrete block: Mediterranean aesthetic, paintable, lower cost option
- Porcelain tile: wide pattern variety, easy to clean, excellent weather resistance
- Concrete board with stone cap: DIY-friendly substrate, accepts any surface finish
A basic L-shaped concrete block outdoor kitchen surrounded with stone veneer costs $1,500 to $4,000 in materials for a DIY build. The structure lasts the lifetime of the property and adds measurable resale value.
4. Install an Outdoor Refrigerator
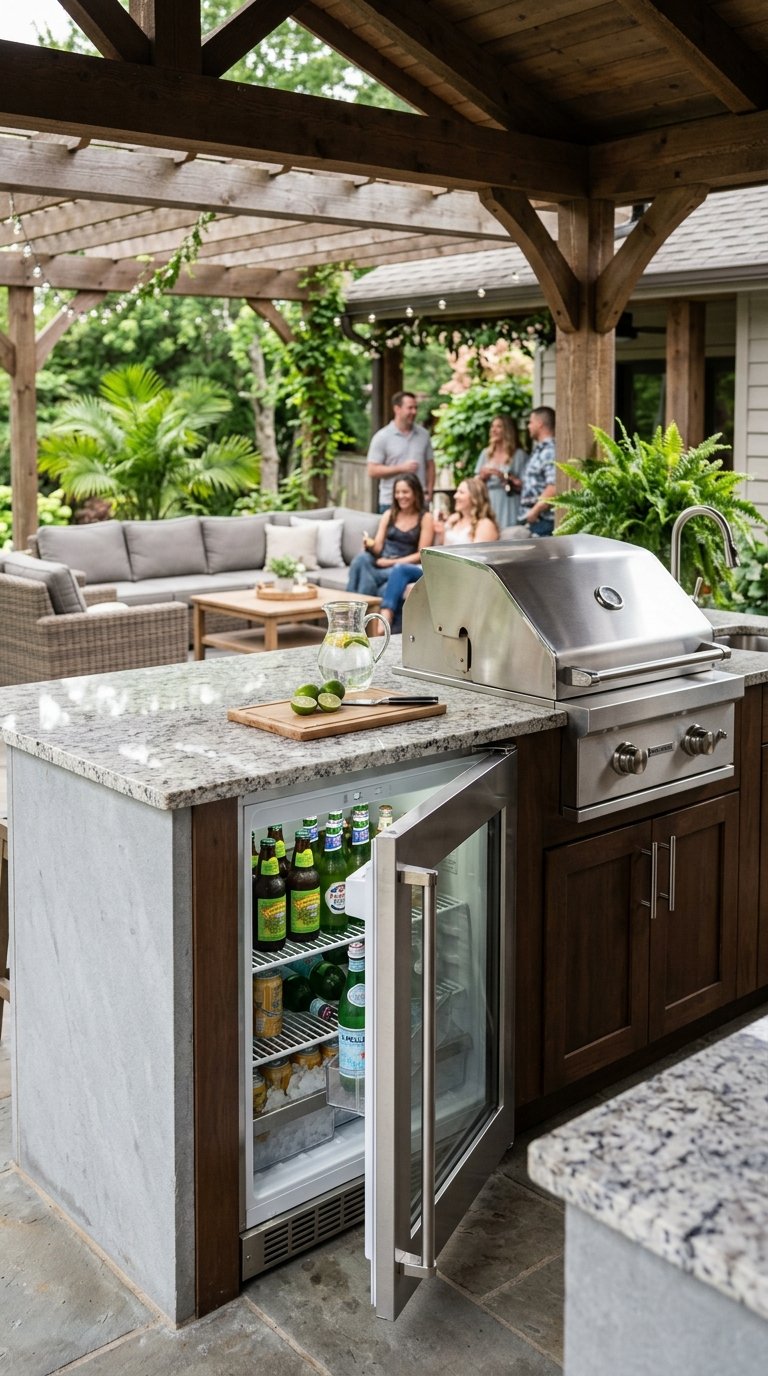
Trips to the indoor kitchen fridge for drinks, marinades, and perishables break the outdoor cooking flow more than anything else. A dedicated outdoor-rated refrigerator built under the kitchen counter keeps everything you need within arm’s reach throughout the entire cooking and entertaining session.
Outdoor refrigerators differ from indoor models in one critical way: they use sealed, UV-resistant components rated for temperature extremes from freezing winters to 110-degree summer afternoons. Never use an indoor refrigerator outdoors. Outdoor-rated undercounter refrigerators from brands like Perlick, Marvel, and True cost $600 to $2,000 and last 15 to 20 years in outdoor conditions.
5. Add a Side Burner for Complete Cooking Capability
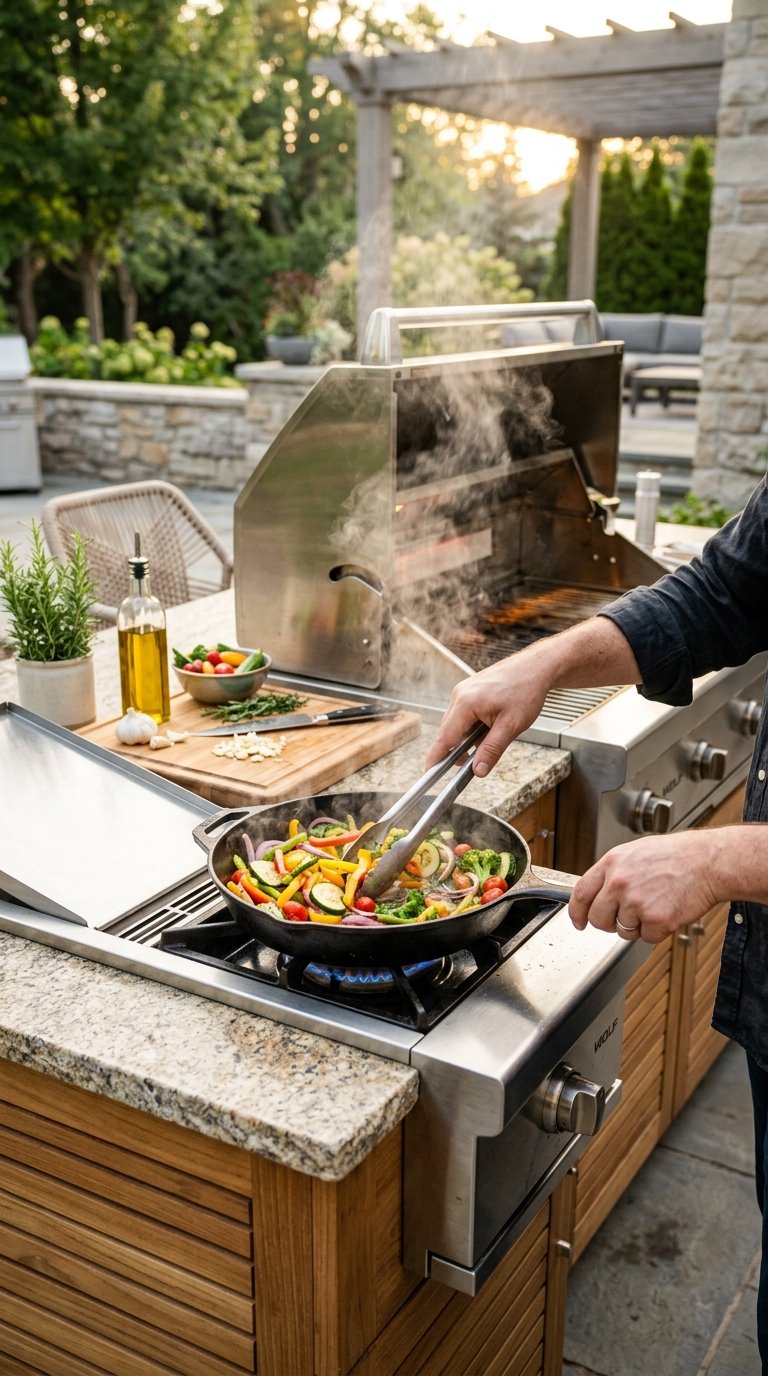
A grill handles everything that benefits from high direct heat. A side burner handles everything else. Sauces, sautéed vegetables, corn on the cob, and boiling pasta all cook better on a side burner than on a grill grate, and having both options available means you prepare complete multi-component meals entirely outdoors.
Most built-in outdoor kitchens include a single 15,000 to 20,000 BTU side burner in the counter run. A double side burner adds $200 to $400 to the kitchen build and essentially gives you a two-burner outdoor stovetop beside the main grill. IMO, the side burner is the most underrated component in any outdoor kitchen setup.
6. Design an Outdoor Bar With Counter Seating
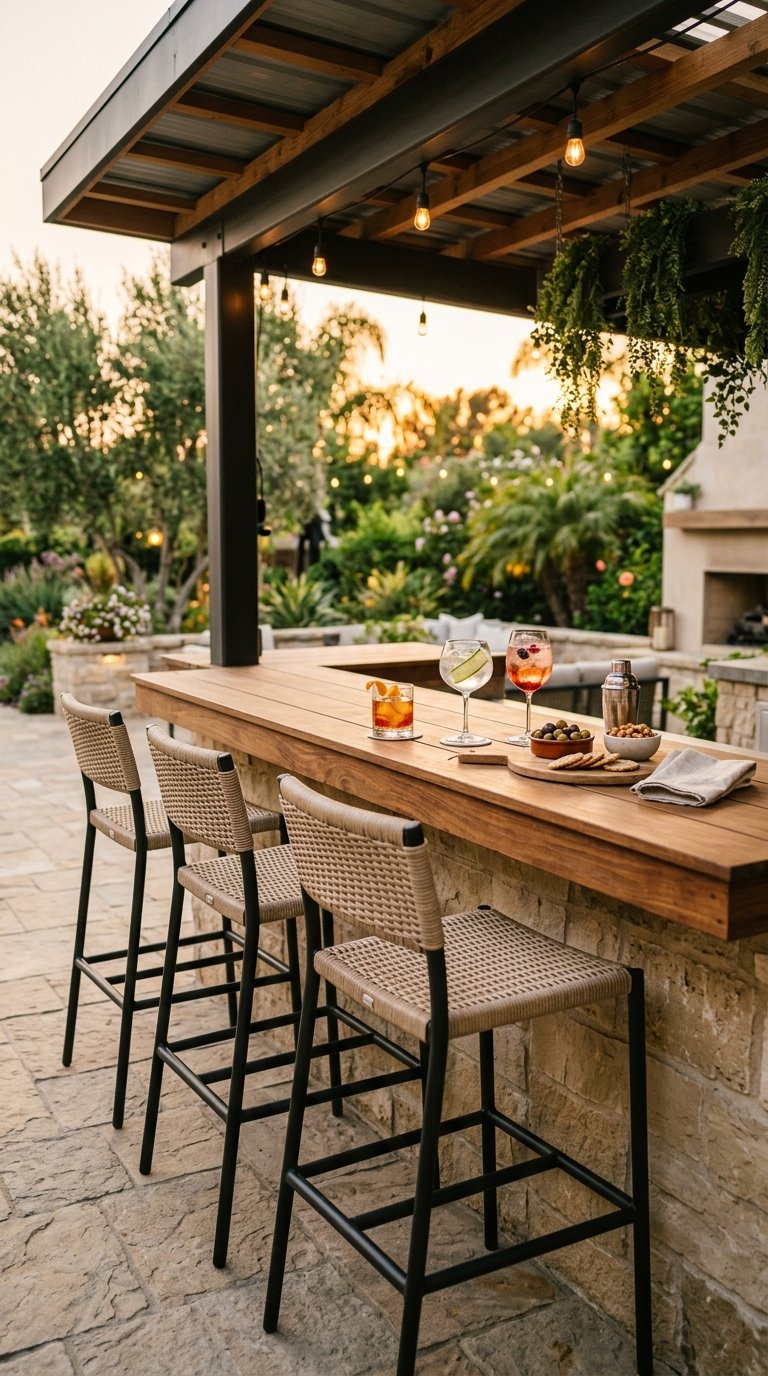
The outdoor kitchen and the outdoor bar belong in the same zone. A bar counter extension at 42-inch height with three to four bar stools on the guest-facing side keeps guests close to the action without crowding the cooking workspace. The cook faces the grill and prep area while guests sit at the bar counter on the opposite side.
Outdoor Bar Counter Setup
- Bar counter height: 42 inches for standard bar stool seating
- Counter overhang: 12 to 14 inches for comfortable knee clearance
- Bar stools: 28 to 30 inch seat height, weather-resistant frame and cushion
- Overhead pendant or string lights directly above the bar counter
This configuration transforms the cook from someone isolated at the grill into the center of the social gathering. Every guest at the bar counter stays engaged in conversation while the meal takes shape in front of them.
7. Include an Outdoor Pizza Oven
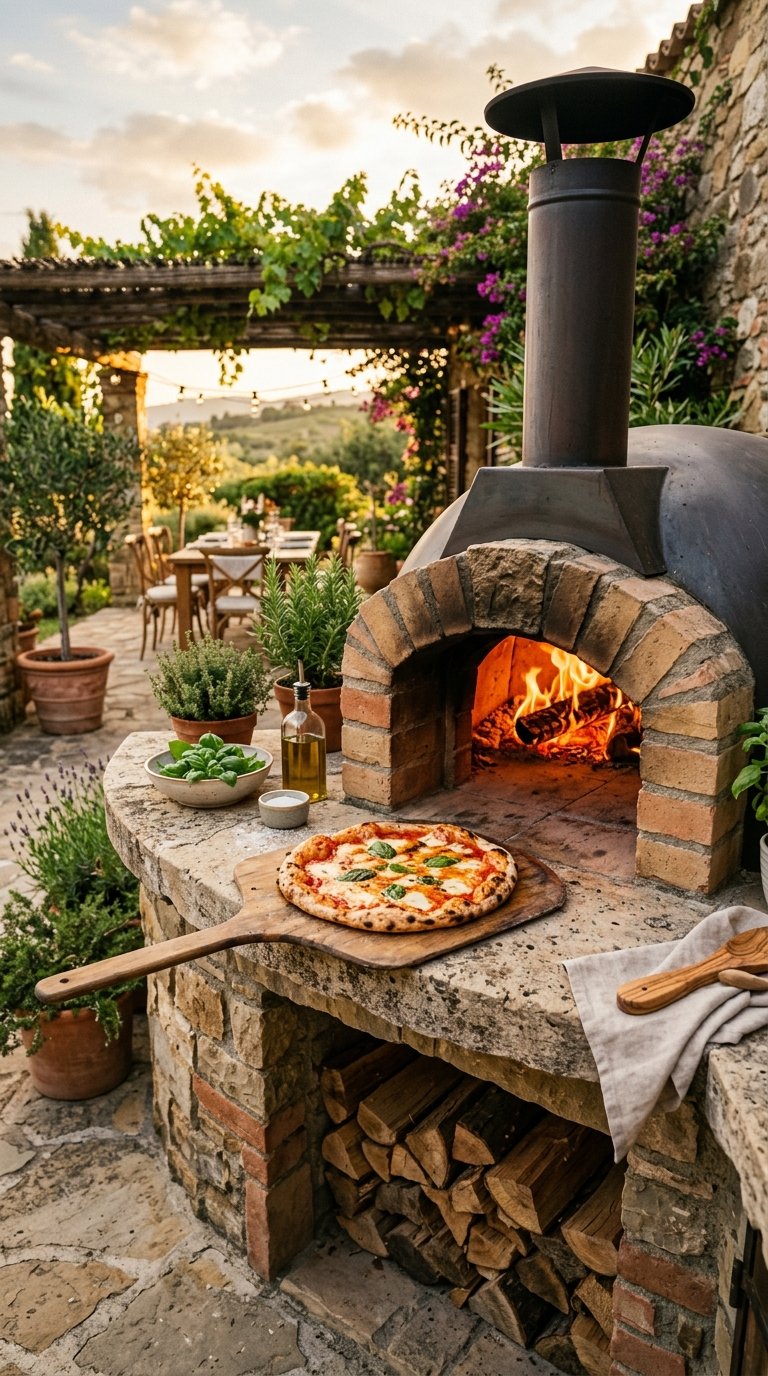
A wood-fired pizza oven attached to or positioned near the outdoor kitchen is the feature that every guest notices first and talks about longest. A 900-degree wood-fired dome oven produces Neapolitan-style pizza in 90 seconds, which no indoor oven or backyard grill comes close to replicating.
Prefabricated pizza oven kits from brands like Ooni, Alfa, and Forno Bravo range from $300 for a portable countertop model to $3,000 for a built-in masonry dome. The Ooni Koda 16 at $600 sits on the outdoor kitchen counter, runs on propane or wood, and reaches full temperature in 20 minutes. A single pizza night with guests justifies the purchase entirely.
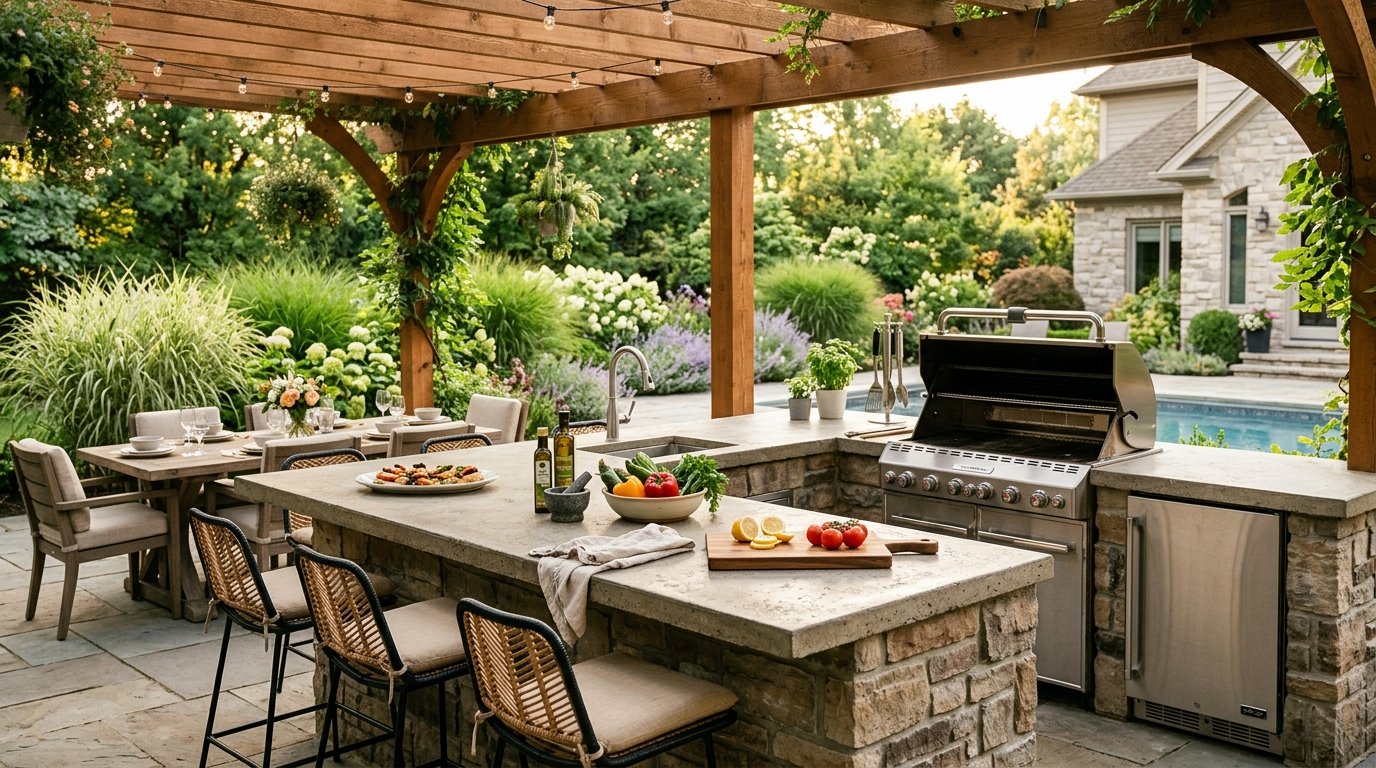
8. Build an Outdoor Kitchen Under a Pergola
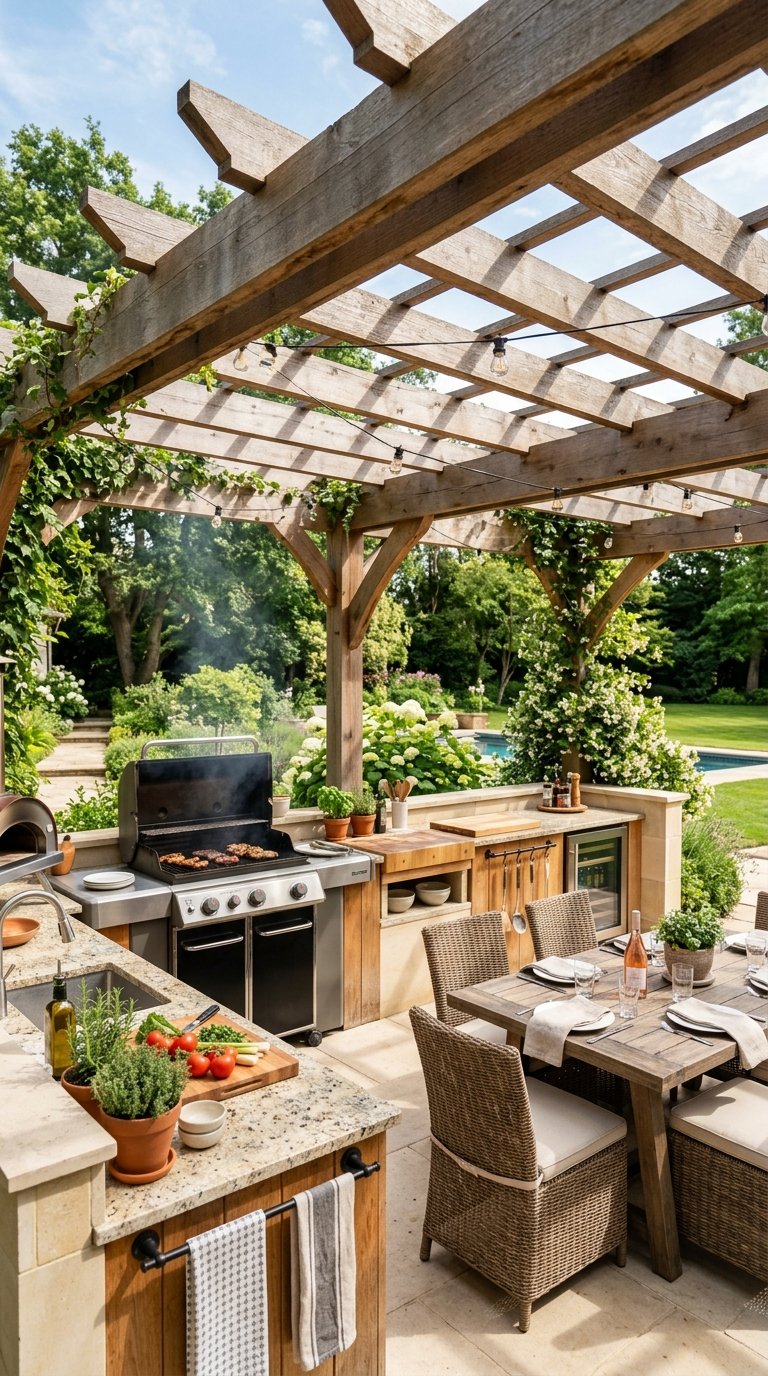
An outdoor kitchen without overhead cover stops working the moment a cloud appears. A pergola built over the outdoor kitchen provides partial weather protection, supports overhead lighting, and creates the visual enclosure that makes the outdoor kitchen feel like a room rather than appliances on a patio.
Keep the pergola ceiling a minimum of 8 feet above the grill surface for adequate smoke clearance. An open-rafter pergola allows smoke to dissipate naturally while blocking light rain. A louvered pergola with adjustable panels gives you weather control from fully open to nearly weatherproof. Add string lights across the rafters and the outdoor kitchen becomes a destination that works from morning coffee to late-night grilling.
9. Install an Outdoor Sink With Running Water
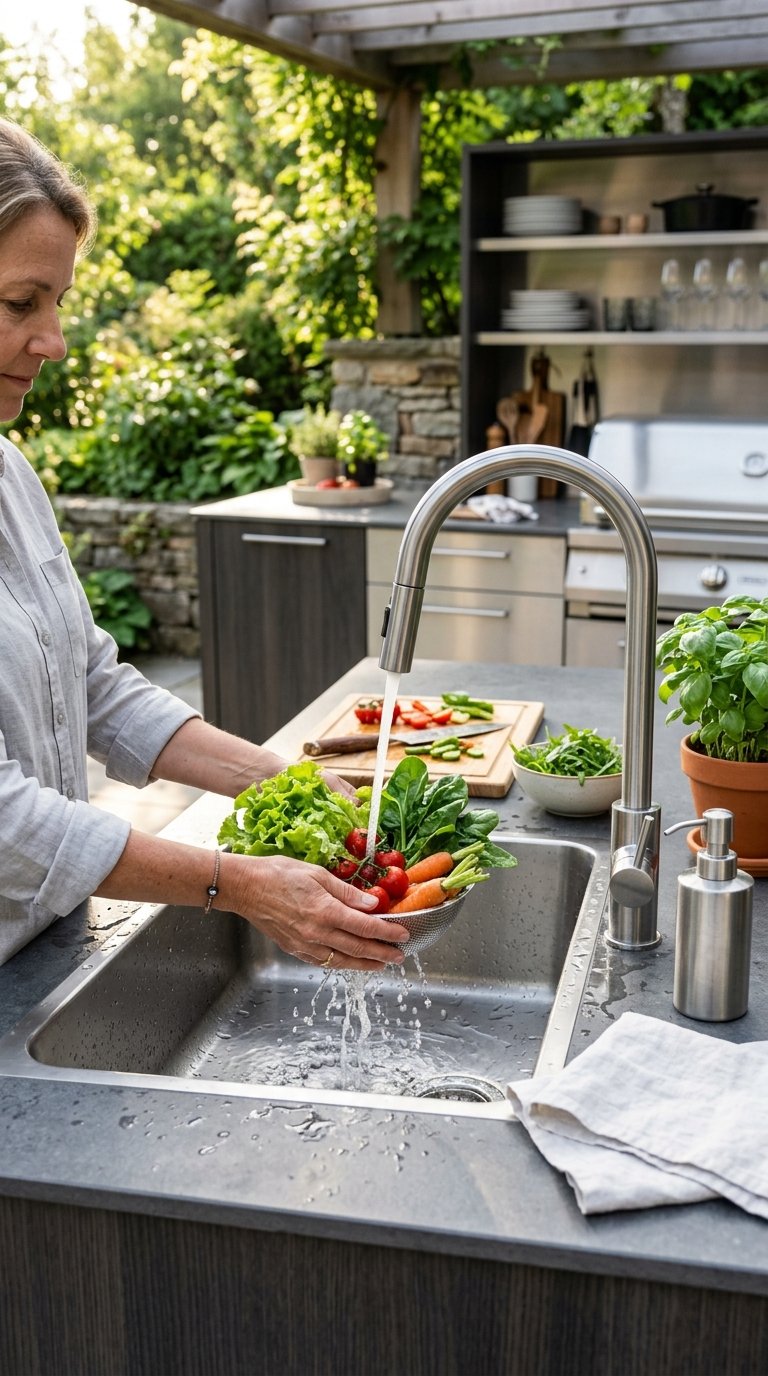
An outdoor sink changes everything. Washing hands, rinsing vegetables, filling pots, and cleaning tools without walking back inside keeps the entire cooking process outdoors where it belongs. Once you cook with an outdoor sink available, cooking without one feels genuinely incomplete.
Connecting an outdoor sink to the house water supply requires either extending an existing outdoor hose bib or running a dedicated plumbing line, which costs $200 to $800 professionally installed. A stainless outdoor sink basin with a single-hole faucet costs $150 to $400. The combined investment of $350 to $1,200 eliminates the most frequent interruption to outdoor kitchen flow.
10. Add Storage Drawers and Cabinets Below the Counter
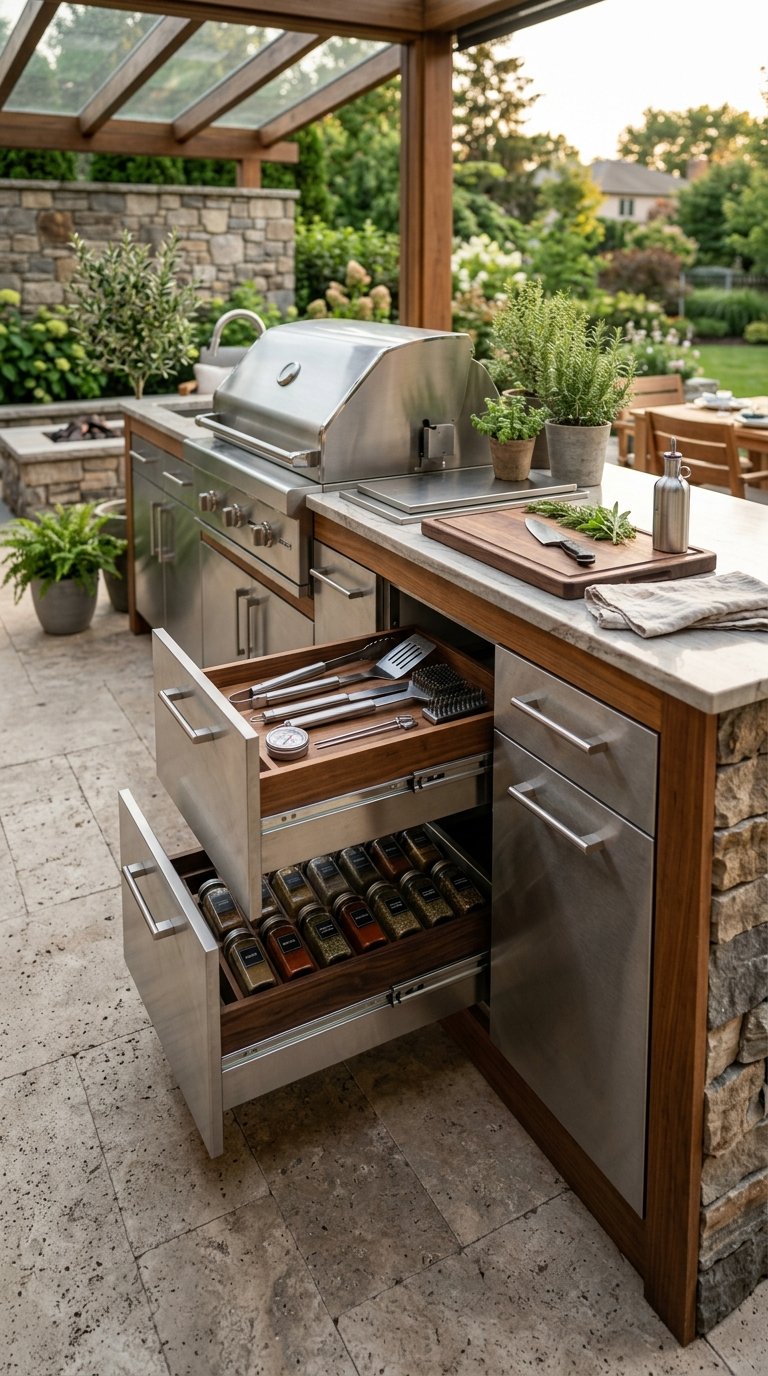
An outdoor kitchen counter without storage below it is just a shelf. Stainless steel access doors and drawer units built into the counter base hold grilling tools, propane tanks, spices, serving ware, and accessories within arm’s reach at the grill rather than scattered across three different outdoor surfaces.
Outdoor Storage Component Options
- Single access door: $80 to $150, for propane tank or large item storage
- Three-drawer unit: $200 to $400, for utensils, tools, and small accessories
- Trash pull-out: $150 to $300, keeps waste contained and concealed
- Towel bar drawer front: $50 to $100, mounts on any drawer face
All outdoor storage components need 304 or 316 stainless steel construction with marine-grade hardware. Aluminum and powder-coated options exist but stainless outperforms everything else in long-term outdoor durability.
11. Design an L-Shaped Outdoor Kitchen Layout
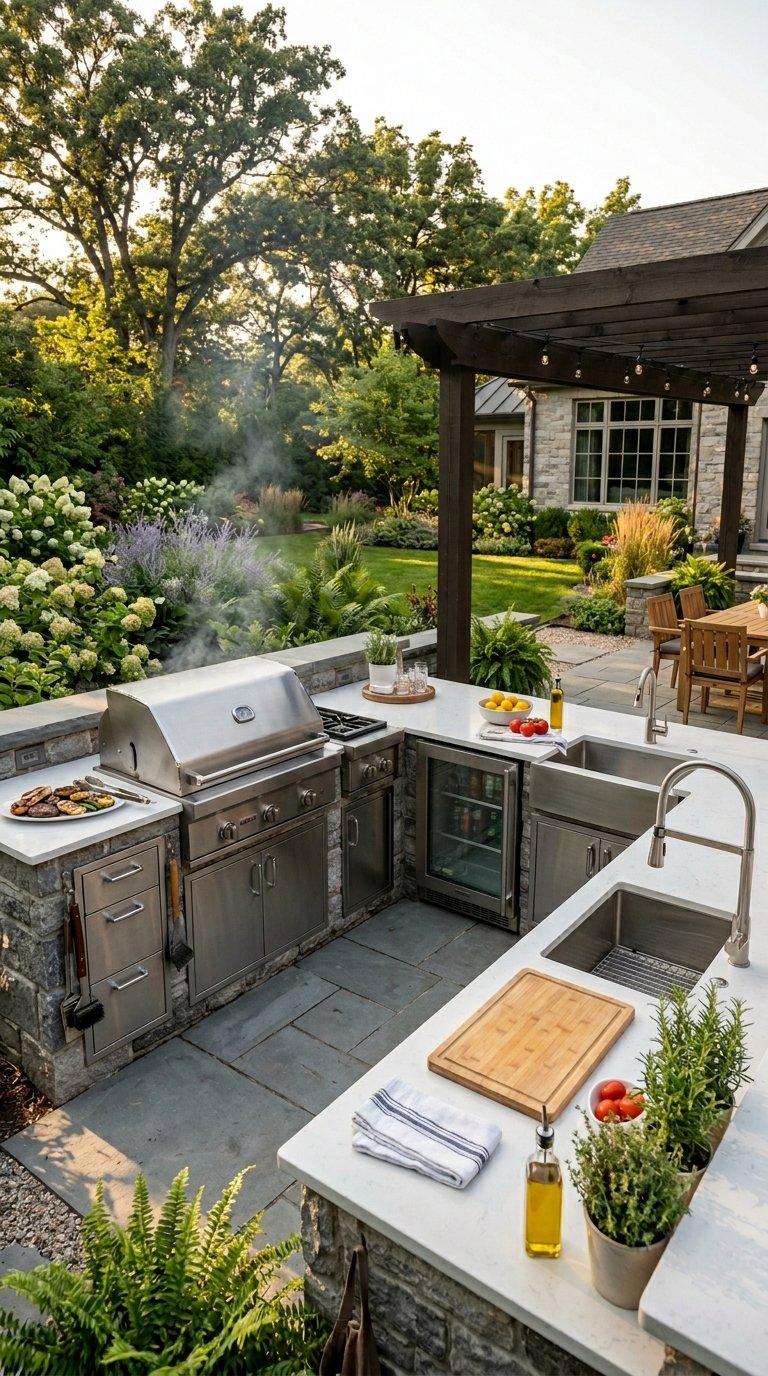
The L-shaped layout is the most functional outdoor kitchen configuration for most backyard sizes. One arm of the L holds the grill and primary cooking zone, the other arm holds the prep counter, sink, and refrigerator, creating a natural workflow that mirrors a well-designed indoor kitchen triangle.
The corner of the L works well for a corner storage cabinet or a built-in ice chest. The open interior of the L faces the dining area so the cook maintains visual contact with guests during meal preparation. A standard L-shaped outdoor kitchen fits comfortably in a 12×10 foot footprint and handles serious entertaining for 10 to 12 guests.
12. Create a Modular Outdoor Kitchen With Freestanding Components
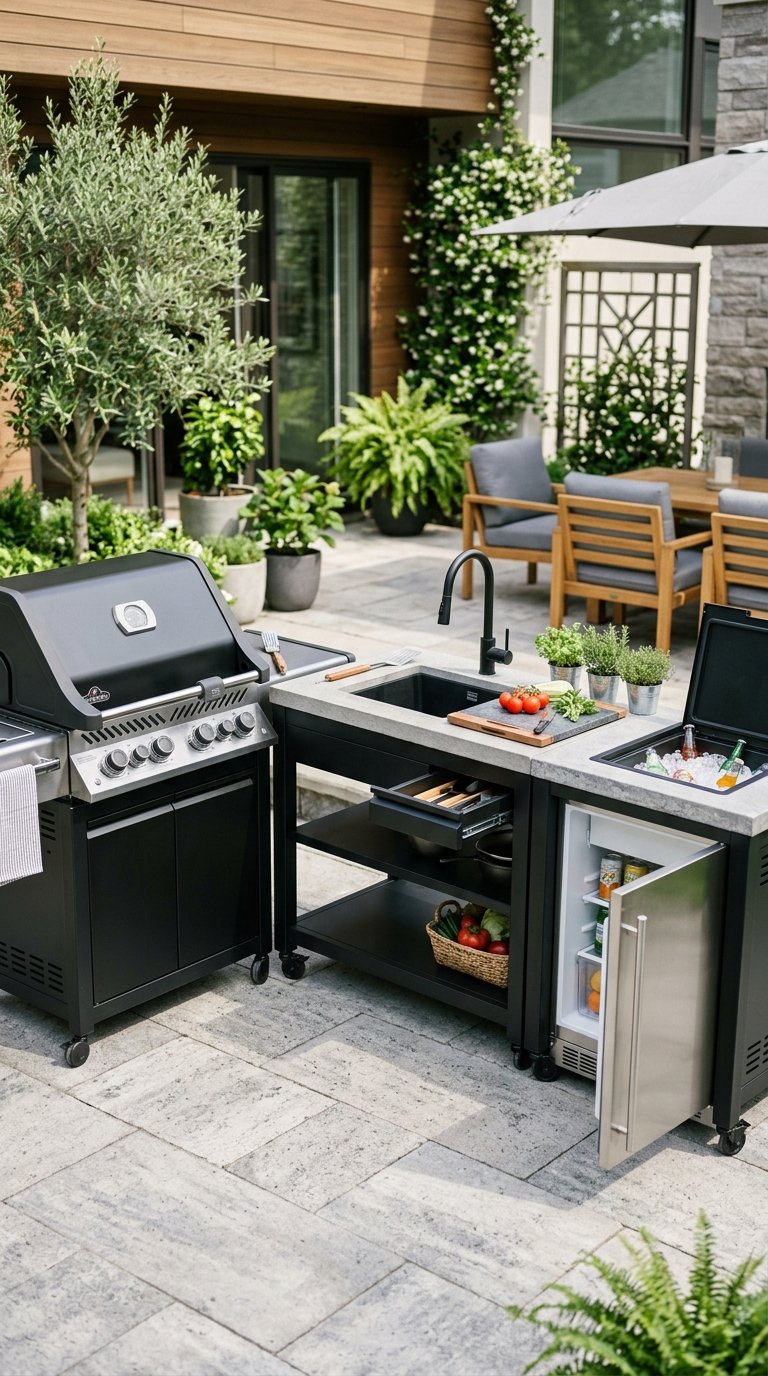
A built-in outdoor kitchen requires commitment to a permanent layout. A modular outdoor kitchen built from freestanding components that connect together gives you the functionality of a built-in setup with the flexibility to reconfigure, expand, or relocate the kitchen as your backyard needs change.
Brands like Coyote, Summerset, and Weber offer modular outdoor kitchen systems where individual component modules bolt together in any configuration. A basic three-module setup (grill module, side burner module, refrigerator module) costs $2,000 to $5,000 and assembles in a day without professional installation. Each module functions independently and connects seamlessly to adjacent units.
13. Add a Smoker for Low-and-Slow Cooking
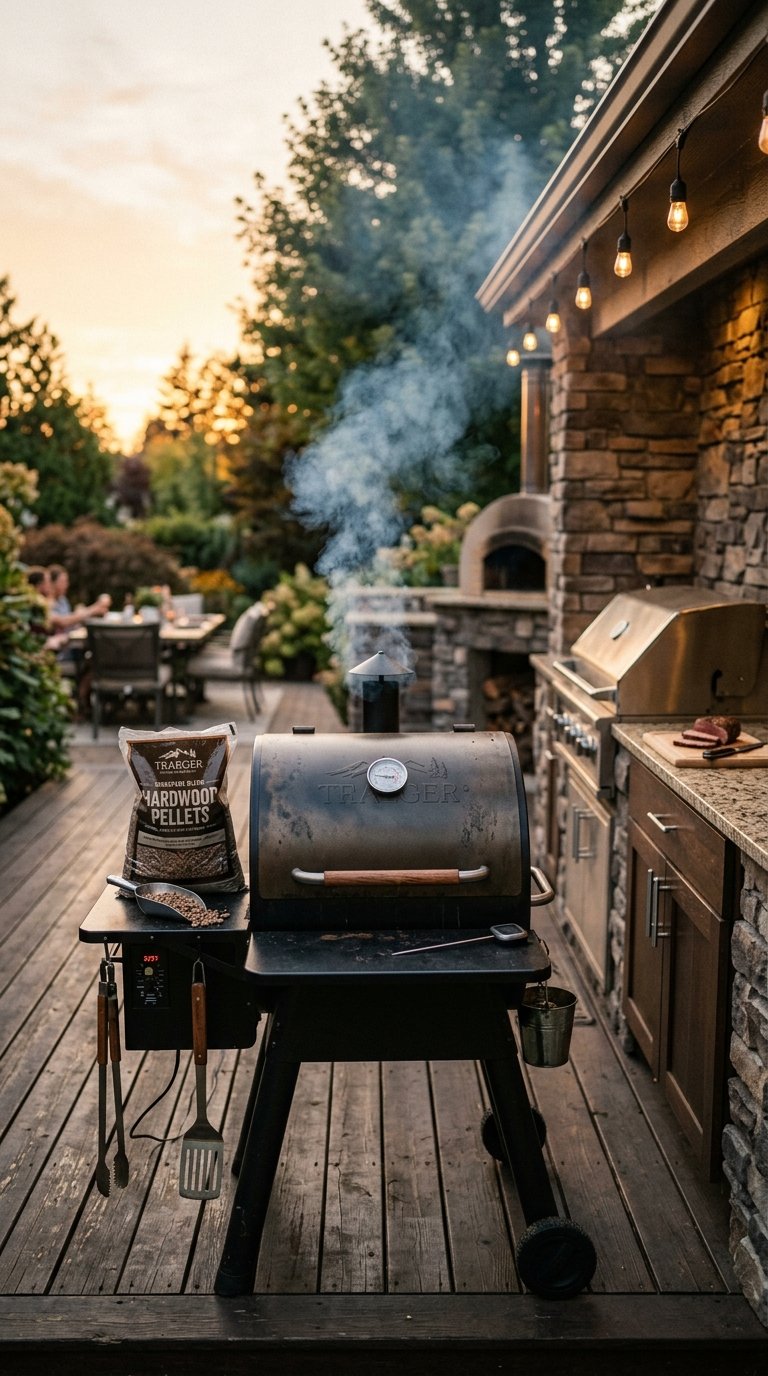
A backyard smoker beside the outdoor kitchen delivers a completely different cooking result than a grill. A dedicated offset smoker or pellet smoker produces bark, smoke rings, and depth of flavor that eight hours of low-and-slow wood smoke creates and nothing else replicates. If you’ve never pulled a brisket from a proper smoker, you’re missing one of the great backyard cooking experiences available.
Pellet smokers from brands like Traeger and Pit Boss cost $400 to $1,500 and automate the temperature management that traditional offset smokers require constant attention to maintain. A pellet smoker set to 225 degrees runs all day without adjustment, producing consistently excellent results with a learning curve measured in hours rather than years.
14. Install Outdoor Lighting for Night Cooking
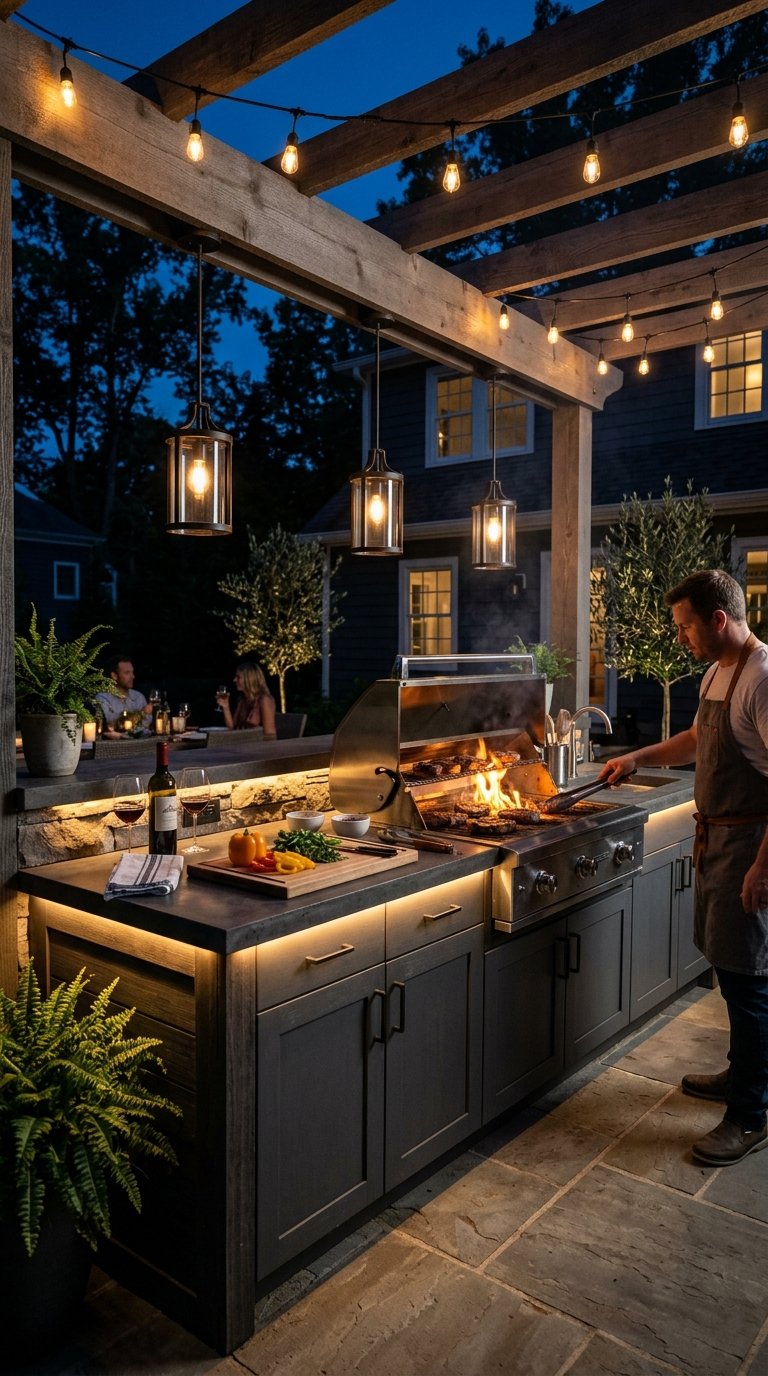
An outdoor kitchen that goes dark at sunset loses half its useful hours every day. Under-counter LED strip lighting, overhead pendants above the prep counter, and task lighting above the grill surface create a three-layer lighting scheme that makes night cooking genuinely functional and the space visually dramatic.
Under-counter LED strips illuminate the workspace below the counter lip. A pendant or two above the prep counter provides direct task light for food preparation. String lights or a ceiling-mounted fixture above the entire kitchen zone handles ambient illumination. All lighting must carry IP65 weatherproof rating or higher for permanent outdoor installation.
15. Build a Tiki Bar Style Outdoor Kitchen
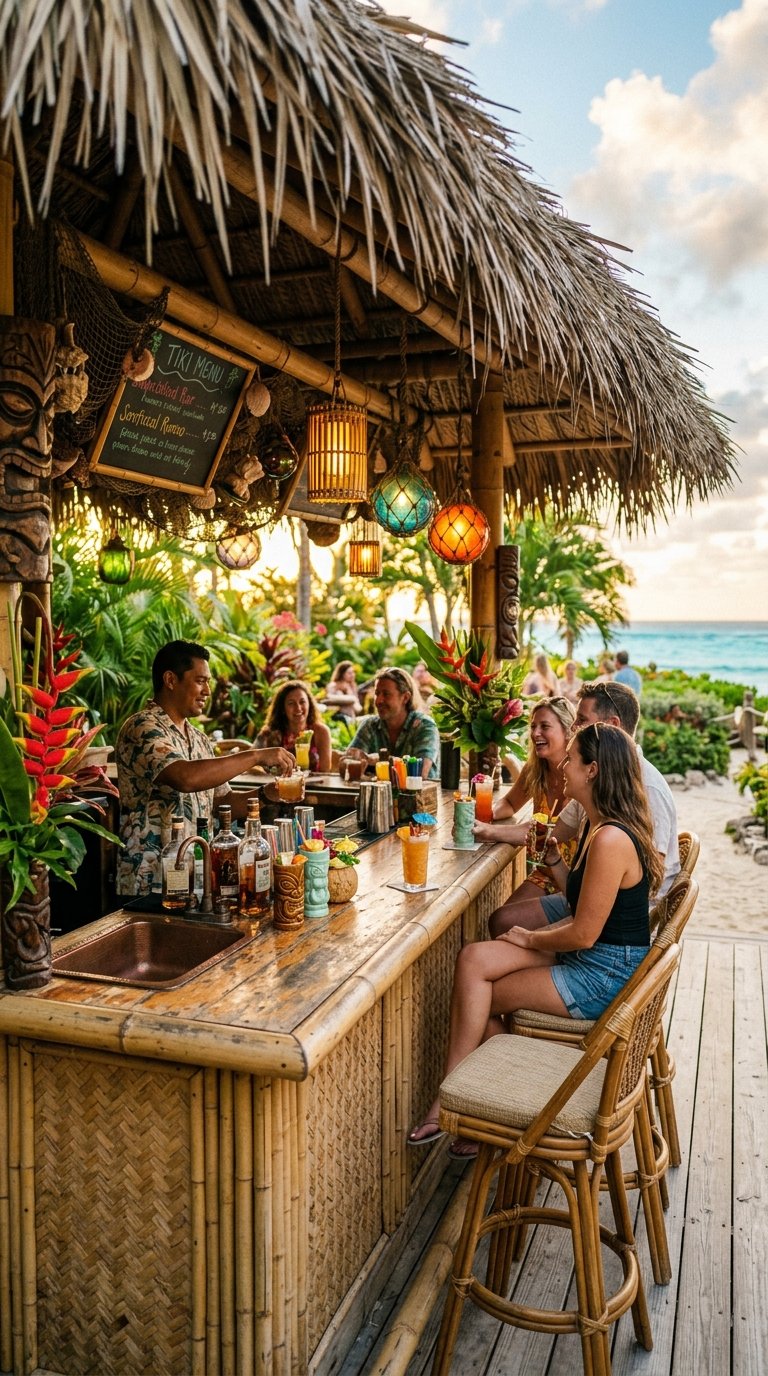
Not every outdoor kitchen needs a serious culinary identity. A tiki bar outdoor kitchen with a bamboo-wrapped counter, palm leaf roof, and tropical planting creates a vacation-destination atmosphere that a standard stone and stainless setup never achieves.
A tiki bar outdoor kitchen centers around a bar counter at 42-inch height with a mini fridge, ice bucket, blender, and drink service rather than a cooking-focused grill lineup. Add a grass skirt valance below the counter, string lights above, and three or four bar stools on the guest side. The tiki bar format works best for homeowners who entertain for drinks and snacks rather than full outdoor cooking sessions.
16. Design an Outdoor Kitchen With a Covered Roof Structure
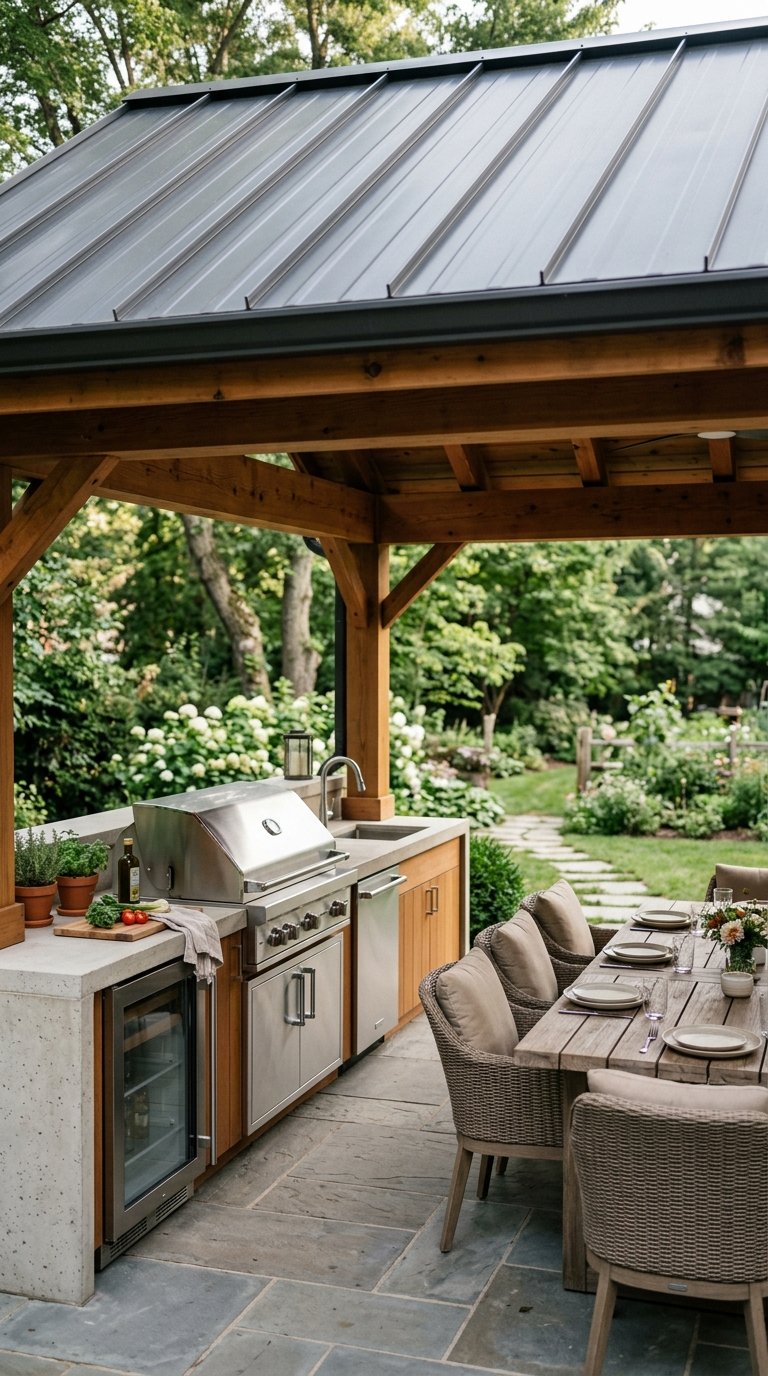
A pergola provides partial weather protection. A proper solid or corrugated metal roof over the outdoor kitchen delivers complete rain protection that makes the kitchen fully functional in any weather condition short of severe storms.
A shed-style roof attached to the house exterior with a single slope away from the building covers the outdoor kitchen zone completely for $800 to $3,000 depending on materials and span. Metal roofing panels handle heat, UV, and rain without maintenance. Polycarbonate roof panels let light through while blocking rain, which keeps the space bright and protected simultaneously.
17. Add a Concrete Countertop for a Custom Look
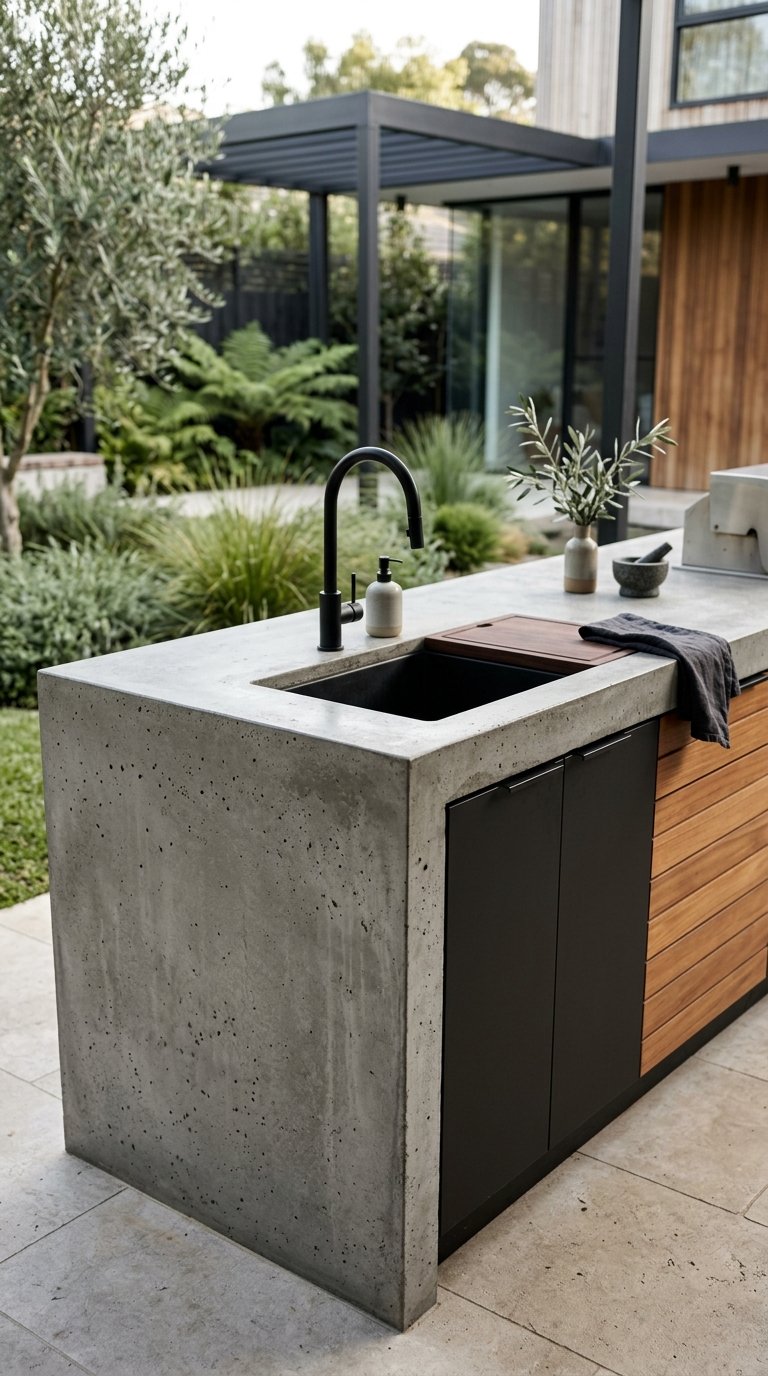
Poured concrete countertops give an outdoor kitchen a completely custom appearance that prefabricated stainless surfaces never achieve. A concrete countertop poured in place or cast in sections accommodates any shape, integrates a sink seamlessly, and accepts integral color or exposed aggregate finishes for a completely unique surface.
Concrete countertops require sealing with a penetrating outdoor sealer every one to two years to maintain stain resistance. They cost $75 to $150 per square foot professionally poured. A DIY concrete countertop pour costs $10 to $25 per square foot in materials and produces an excellent result with careful form building and proper curing time.
18. Install an Outdoor Dishwasher
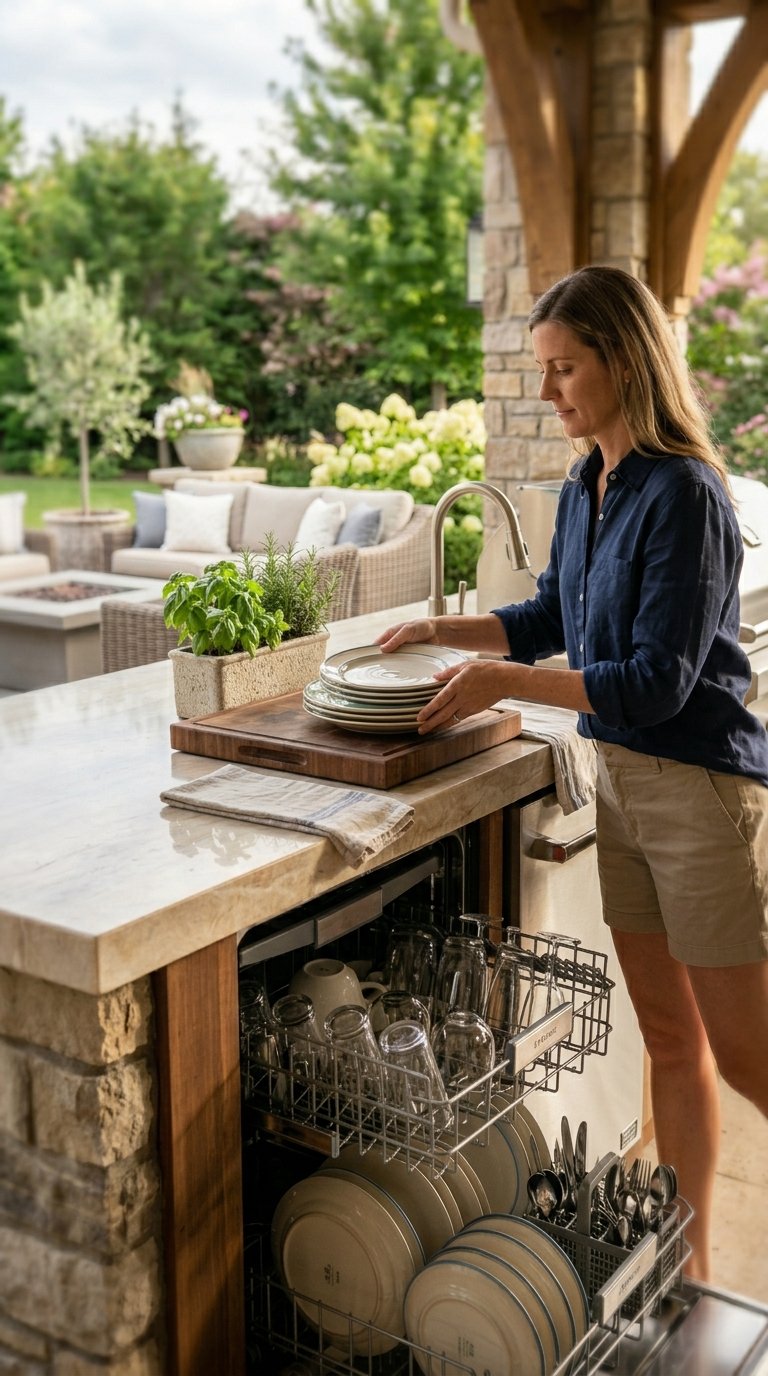
This sounds extravagant until you realize what outdoor cooking cleanup looks like without one. A commercial-style outdoor dishwasher built under the outdoor kitchen counter handles post-party cleanup for 20 people without a single tray of dishes carried through the house.
Outdoor-rated dishwashers from brands like Kalamazoo and Perlick cost $1,500 to $3,000 and require the same plumbing connection as an indoor model. They run through a 90-minute cleaning cycle and handle everything from grill tools to serving platters. FYI, the convenience factor of an outdoor dishwasher after a large gathering is genuinely difficult to overstate once you experience it.
19. Create a Budget Outdoor Kitchen With a Grill Cart Setup

A built-in outdoor kitchen costs $3,000 to $15,000. A grill cart outdoor kitchen costs $300 to $800 and works tonight. A quality freestanding grill, a stainless prep cart, a mini fridge, and a side table create a fully functional outdoor kitchen that handles real cooking without a single cubic foot of masonry.
Budget Outdoor Kitchen Component List
- Freestanding gas grill: Weber Spirit II E-310, $500, three burners, excellent build quality
- Stainless prep cart with wheels: $150 to $250, cutting board top, lower shelf storage
- Compact outdoor mini fridge: $200 to $350, keeps drinks and marinades cold
- Folding side table: $50 to $80, extra surface when needed
Total budget: $900 to $1,200 for a complete functional outdoor kitchen that sets up in an afternoon and delivers everything a built-in installation provides except the permanence.
20. Design an Outdoor Kitchen With a Dining Zone Attached
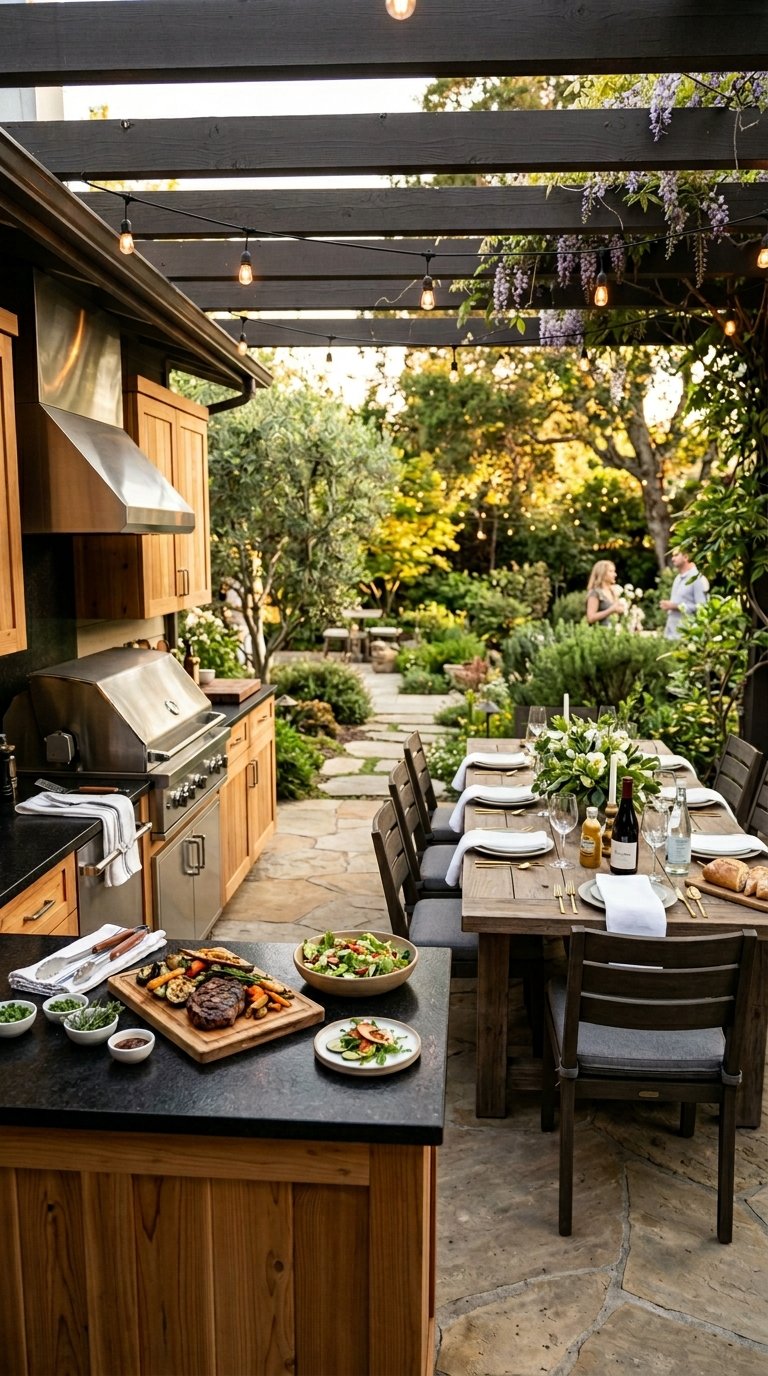
An outdoor kitchen and a dining area that sit in separate zones of the backyard create unnecessary distance between cooking and serving. Designing the dining table directly adjacent to the outdoor kitchen counter puts plated food on the table in five steps rather than thirty and keeps the cook part of the dining conversation throughout the meal.
Position a six to eight person dining table 6 to 8 feet from the cooking counter, perpendicular to the grill station. The cook faces the grill with the dining table in peripheral view. Food moves from grill to plating surface to table in a continuous straight line. This integrated layout is the single design decision that most dramatically improves how an outdoor kitchen functions during a real dinner party.
21. Finish the Outdoor Kitchen With the Right Accessories
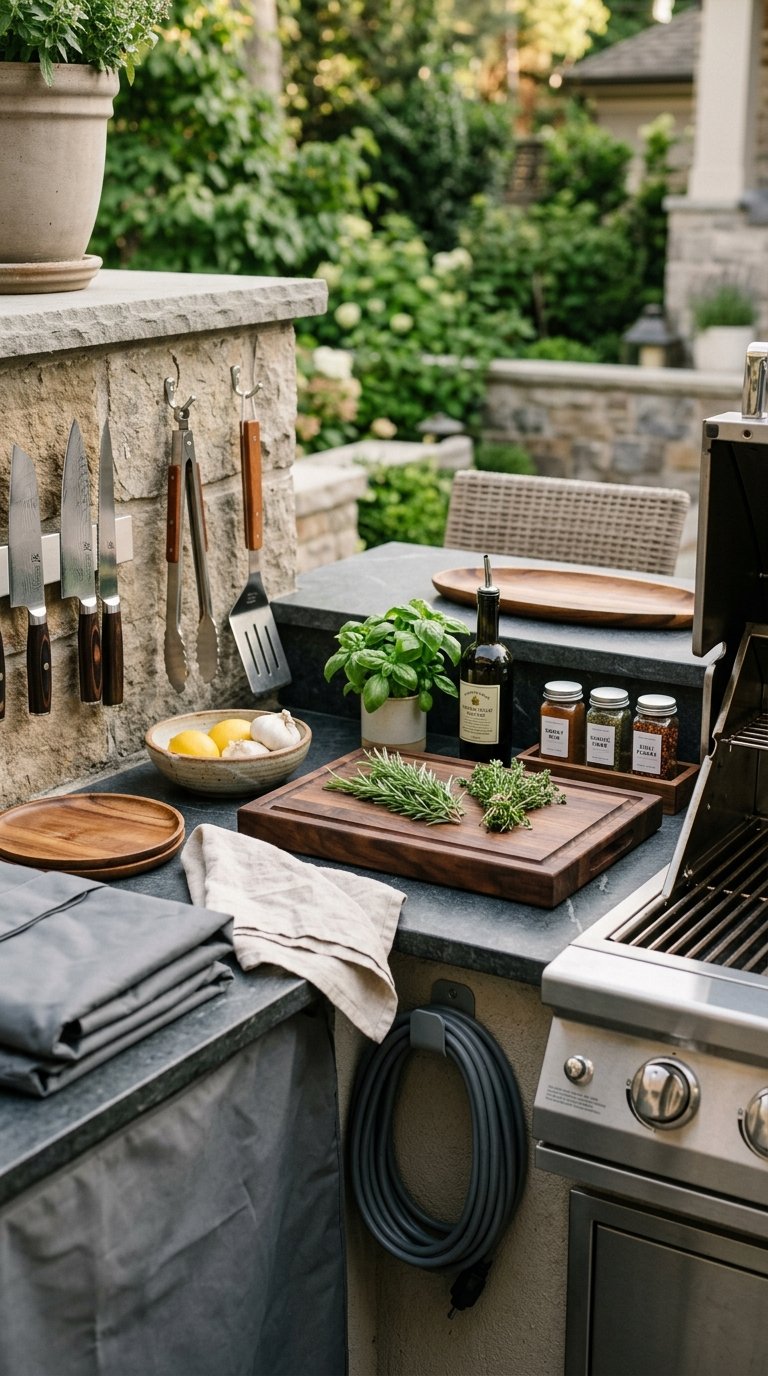
An outdoor kitchen without the right accessories operates at half capacity. The tools, covers, and serving equipment you stock in your outdoor kitchen determine how much of its potential you actually use on a regular cooking night.
Essential Outdoor Kitchen Accessories
- Grill cover: fitted cover for every appliance, protects from UV and rain
- Long-handle grilling tools: tongs (16-inch), spatula (16-inch), basting brush
- Cutting boards: two large boards, one for raw proteins, one for produce
- Instant-read thermometer: Thermapen or similar, non-negotiable for safe cooking
- Outdoor-rated extension cord: 14 AWG, for refrigerators and lighting
- Magnetic knife strip: mounts on the counter side for accessible knife storage
- Serving platters and large bowls: keep dedicated outdoor versions to avoid the indoor trip
The accessories list totals $150 to $400 for a complete setup. Every item on this list solves a specific friction point in the outdoor cooking experience and earns its place in the kitchen.
Final Thoughts
An outdoor kitchen stops being a luxury the moment you cook your first full meal outdoors without walking back inside once. The setup that suits you depends on your budget, your yard, and how seriously you approach outdoor cooking. A $900 grill cart setup and a $15,000 built-in stone installation both solve the same fundamental problem: they keep you, your food, and your guests in the same outdoor space from the first drink to the last plate.
Start with the cooking function you use most. Build or buy the grill setup that handles that function well. Add a prep surface, a refrigerator, and lighting. Everything else is an upgrade you add when the base setup proves how much better outdoor cooking and outdoor entertaining work together. Your backyard has been waiting for this.