21 Nursery Remodel Ideas for a Room Your Child Will Love
You already have a nursery. It was fine for a newborn. Now your child is older, you’re expecting a second baby, or you’re simply looking at the room and realizing it stopped working about eight months ago.
A nursery remodel is different from building one from scratch. You’re working with existing paint, existing furniture, existing decisions that made sense at the time. Some of those decisions hold up. Many don’t. The goal here is targeted improvement, not starting over.
Here are 21 nursery remodel ideas that address real problems in real nursery rooms.
1. Repaint With a Neutral Base That Grows With the Child
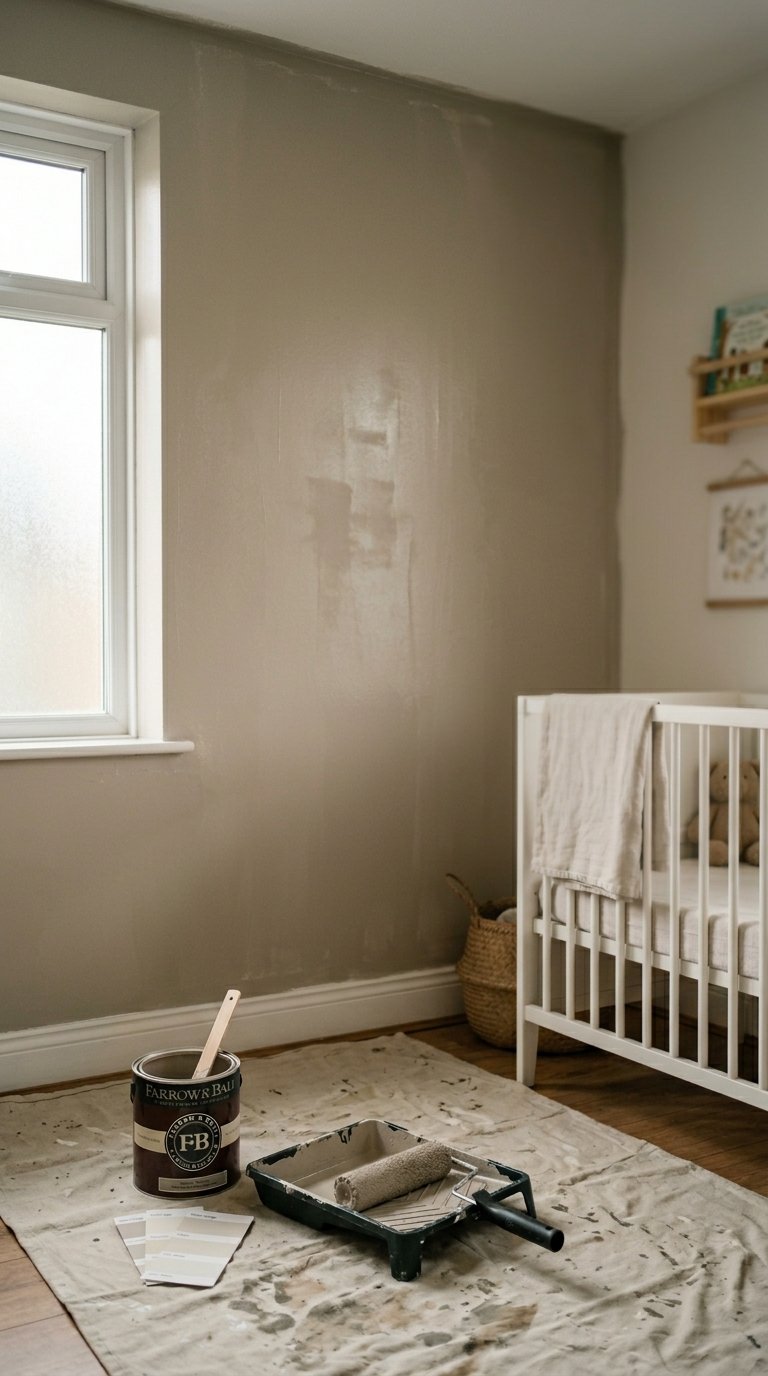
The most common nursery remodel trigger: a themed paint job that your child has aged out of or that you’re simply tired of looking at.
Repainting is the highest-impact, lowest-cost remodel available. A fresh neutral base, warm white, soft sage, pale dusty blue, or warm greige, gives you a room that works at every age from newborn to six years old without requiring another repaint.
Neutral paint colors that hold up across age stages:
- Warm white with a slight cream undertone: works with every theme and every accessory color.
- Soft sage green: calm, gender-neutral, and pairs with natural wood and warm tones.
- Pale dusty blue: classic without being aggressive, works for boys and girls equally.
- Warm greige: a gray-beige blend that accepts any accent color layered onto it.
Paint the walls. Leave the theme for removable elements: art, bedding, rugs, and accessories. These change without a roller and a weekend.
2. Replace the Crib With a Convertible Toddler Bed
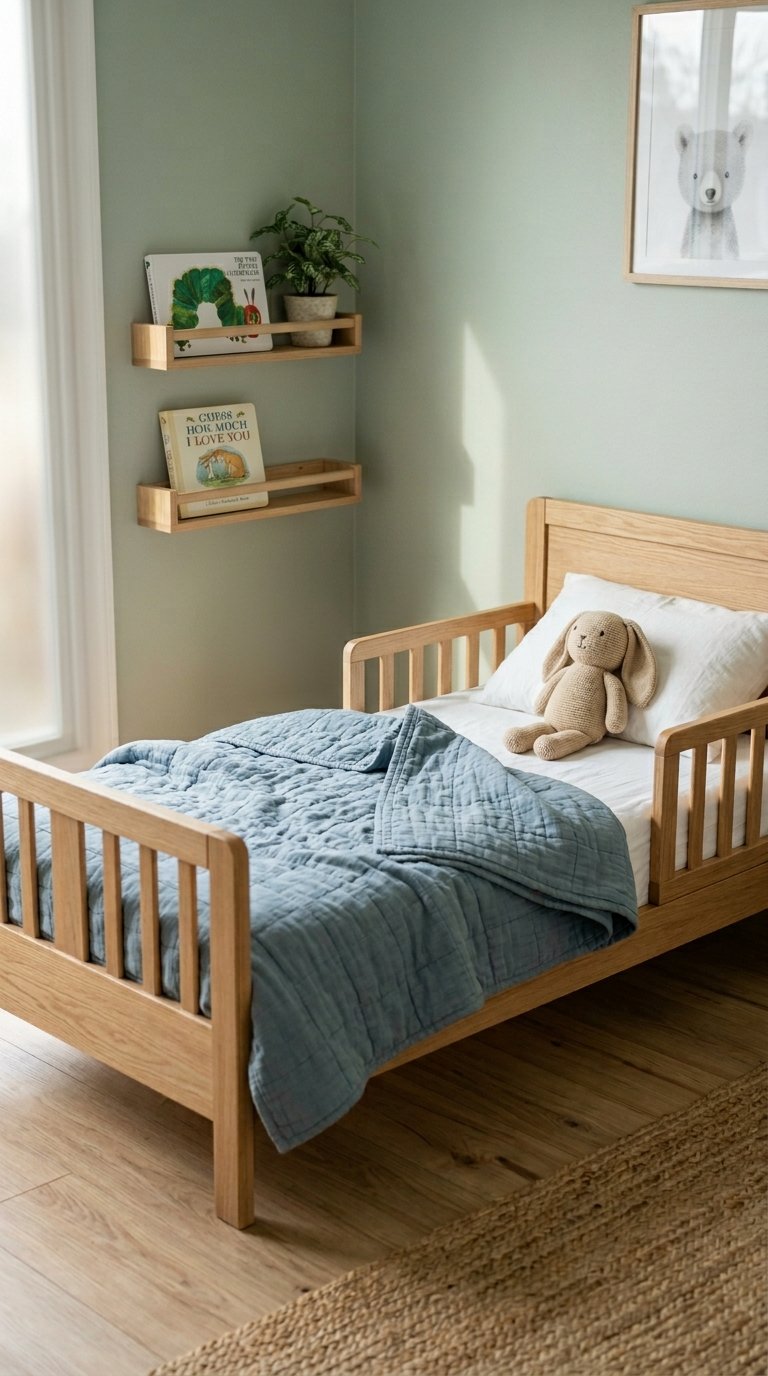
If your child has outgrown the crib, the crib itself becomes the first remodel priority. A standard crib has a finite lifespan. A convertible crib that transitions to a toddler bed and eventually to a full-size bed extends the furniture investment significantly.
If your existing crib converts, check whether the manufacturer still supplies the toddler rail and conversion kit. Many do, even for older models. If it doesn’t convert, prioritize a replacement that does.
What to confirm when selecting a convertible crib replacement:
- The toddler rail and conversion kit availability from the same brand.
- Current safety certification (ASTM F1169 for cribs, ASTM F966 for toddler beds).
- A design simple enough to remain appropriate at the toddler and full-bed stages.
- Standard mattress sizing at each conversion stage.
The transition from crib to toddler bed is a significant developmental moment. A familiar piece of furniture in the same room reduces the disruption of the change.
3. Add Proper Blackout Window Treatments
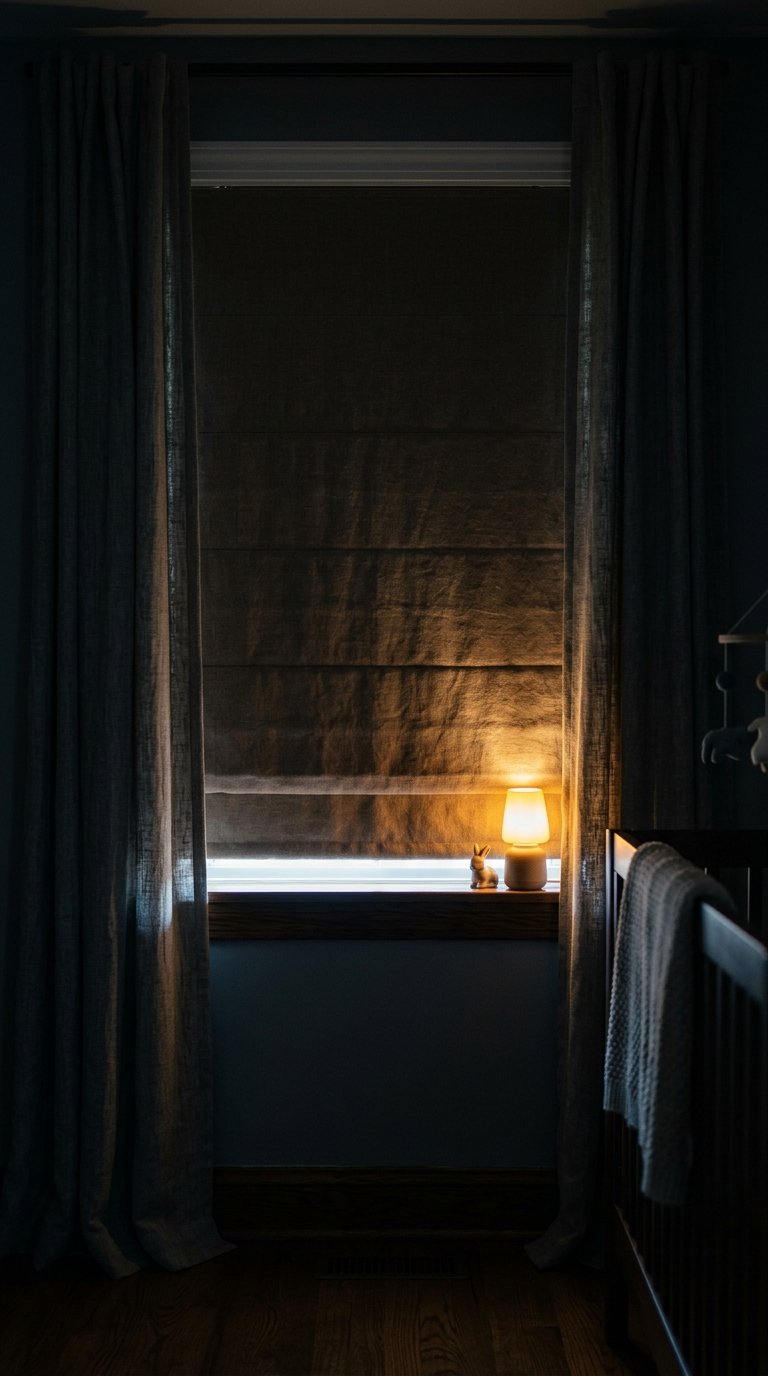
If your existing nursery window treatments don’t block light fully, fix this before anything else.
A nursery without proper blackout capability fights against every sleep effort you make. Babies and toddlers rely on darkness as a sleep cue. Morning light at 5 AM or street light through inadequate curtains disrupts sleep cycles in ways that affect the entire household.
Blackout treatment system that works:
- A fitted blackout roller blind or Roman blind as the primary light-blocking layer.
- A decorative curtain panel over it for softness and visual warmth.
- The curtain rod mounted as close to the ceiling as possible to eliminate top-gap light entry.
- Side returns on the blind or curtain panels extending past the window frame to block side light.
Test the room in full darkness before assuming the treatment works. Stand inside with the door closed at midday. Any light that enters is a sleep problem.
4. Upgrade to a Built-In Wardrobe or Closet System
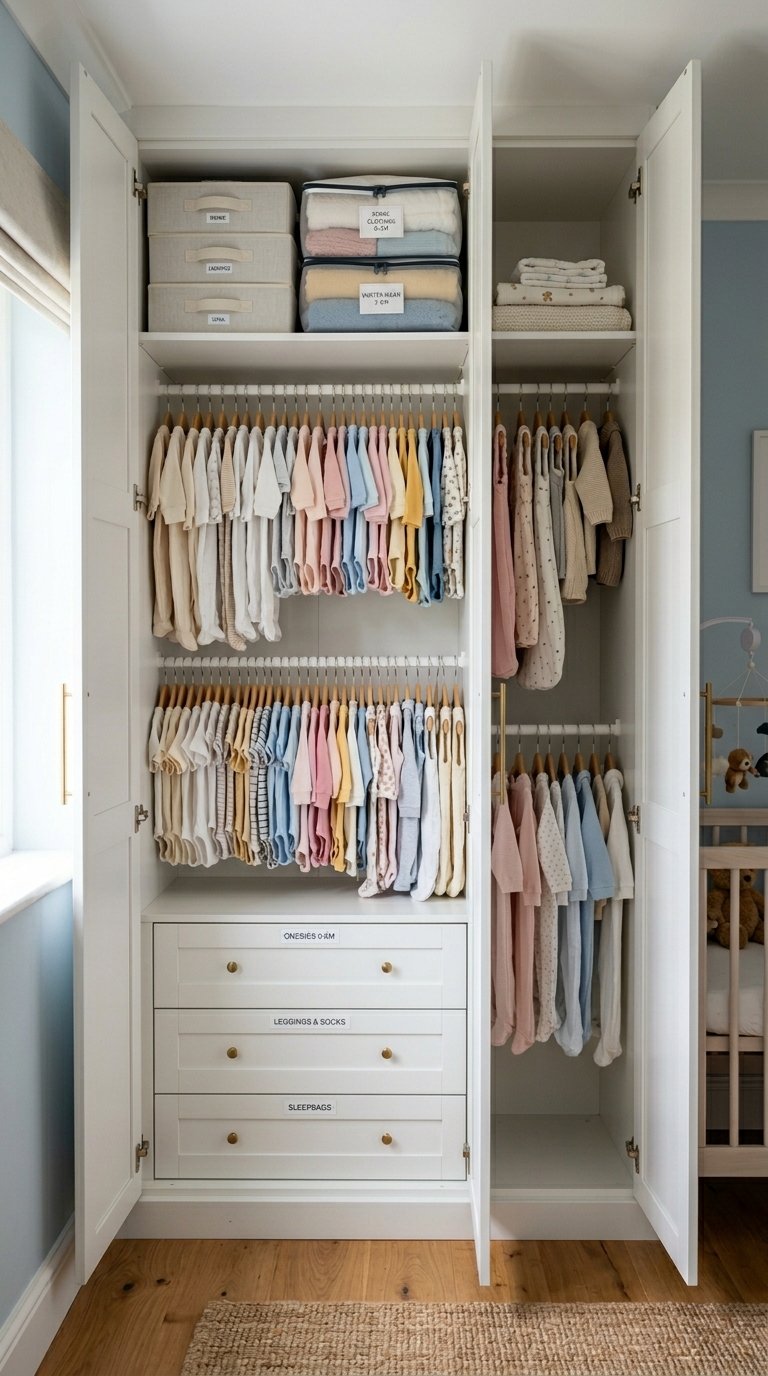
Most nurseries use a freestanding wardrobe or rely on a standard closet with a single hanging rail. Neither option uses the available space efficiently. A nursery generates more clothing categories than almost any other room because sizing changes every few months.
A built-in wardrobe or an upgraded closet system with multiple rails at different heights, shelving, and drawer units handles nursery clothing more efficiently than a standard single-rail setup.
A practical nursery closet system includes:
- A double-hanging section for short items: baby bodysuits, tops, and jackets.
- A single long-hang section for dresses or sleep sacks on hangers.
- Shelving for folded items, sorted by current size and next size up.
- Shallow drawers for small items: socks, bibs, and accessories.
- A high shelf for out-of-season or next-size clothing storage.
Label everything by size. You will retrieve items at 2 AM. Labels are not optional.
5. Install a Dimmer Switch on Every Light Circuit
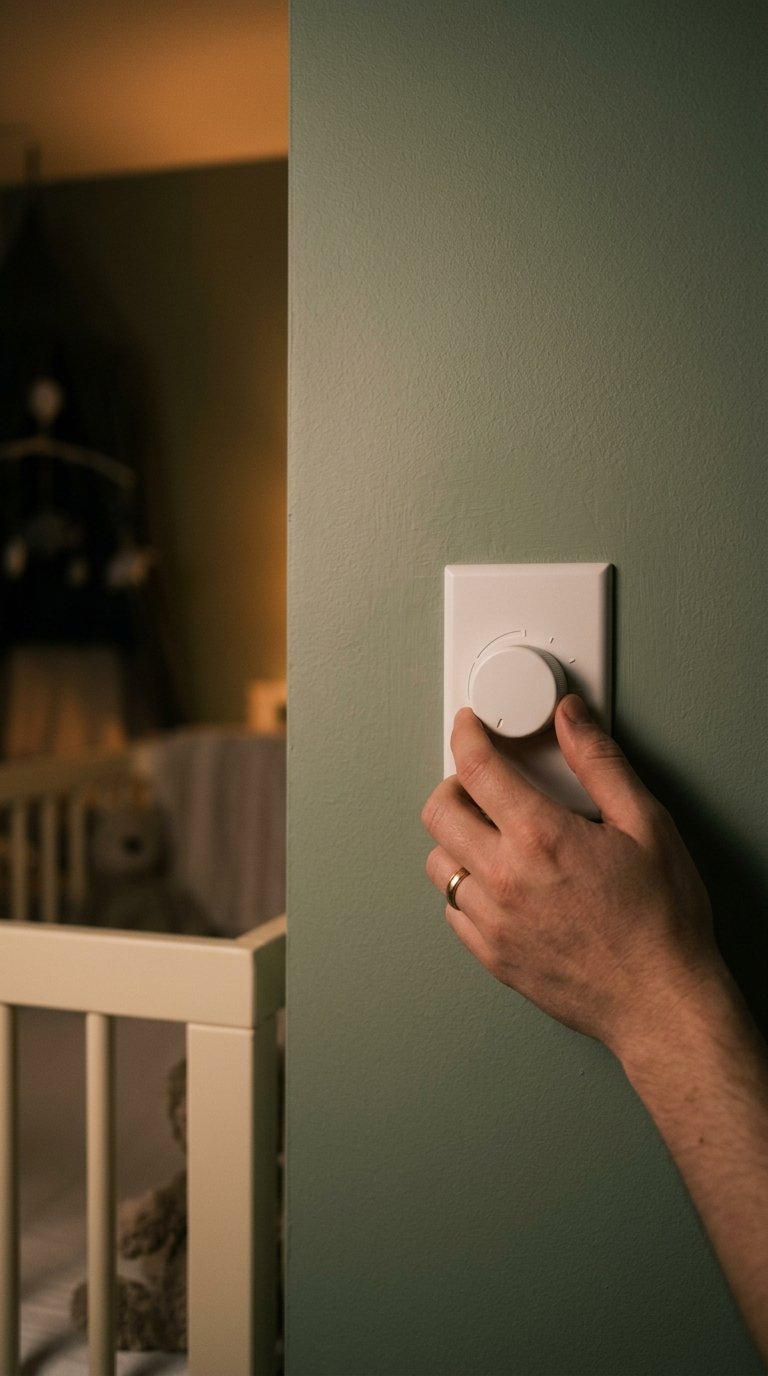
If your nursery light switch doesn’t have a dimmer, add one before any other electrical change. It costs $15 to $25 and takes a licensed electrician under an hour to fit.
A dimmer gives you full brightness for daytime play and nappy changes, mid-level brightness for feeding and settling, and the lowest possible glow for night checks. A room with only two light states, full on and full off, forces you to either stumble in the dark or fully wake your child every time you enter at night.
Dimmer switch specifications for a nursery:
- Compatible with your existing light fitting type (LED dimmers differ from incandescent dimmers).
- A smooth slide or rotary action rather than a click-step dimmer for precise low-level control.
- Rated for the wattage of your existing light fitting.
Install it during the remodel. Retrofitting it later while the room is in active use is inconvenient for everyone.
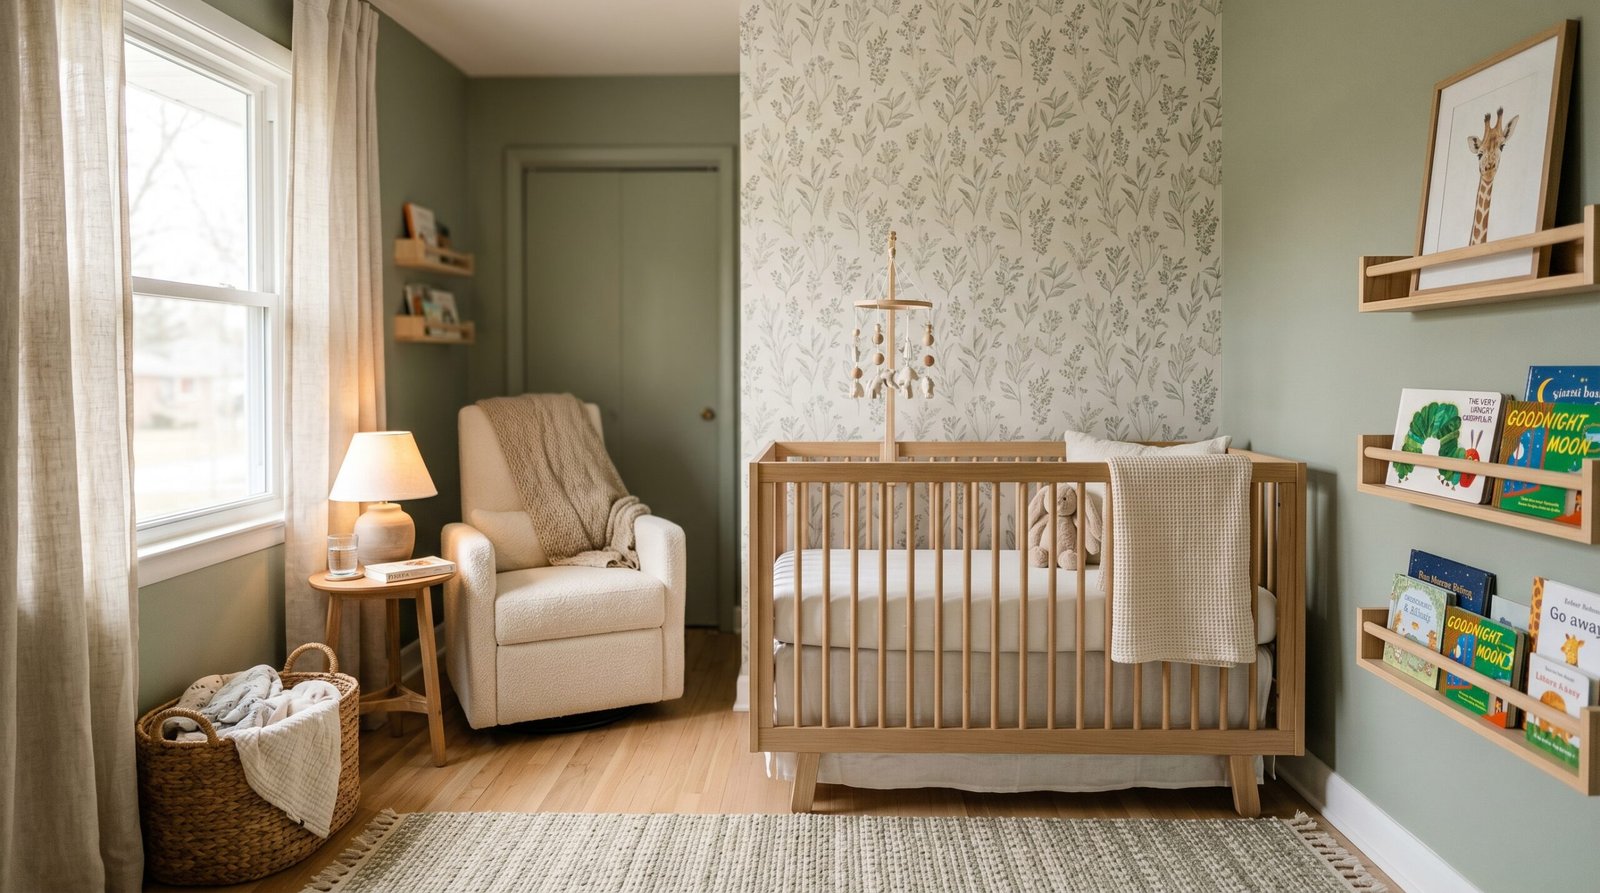
6. Create a Dedicated Reading Corner
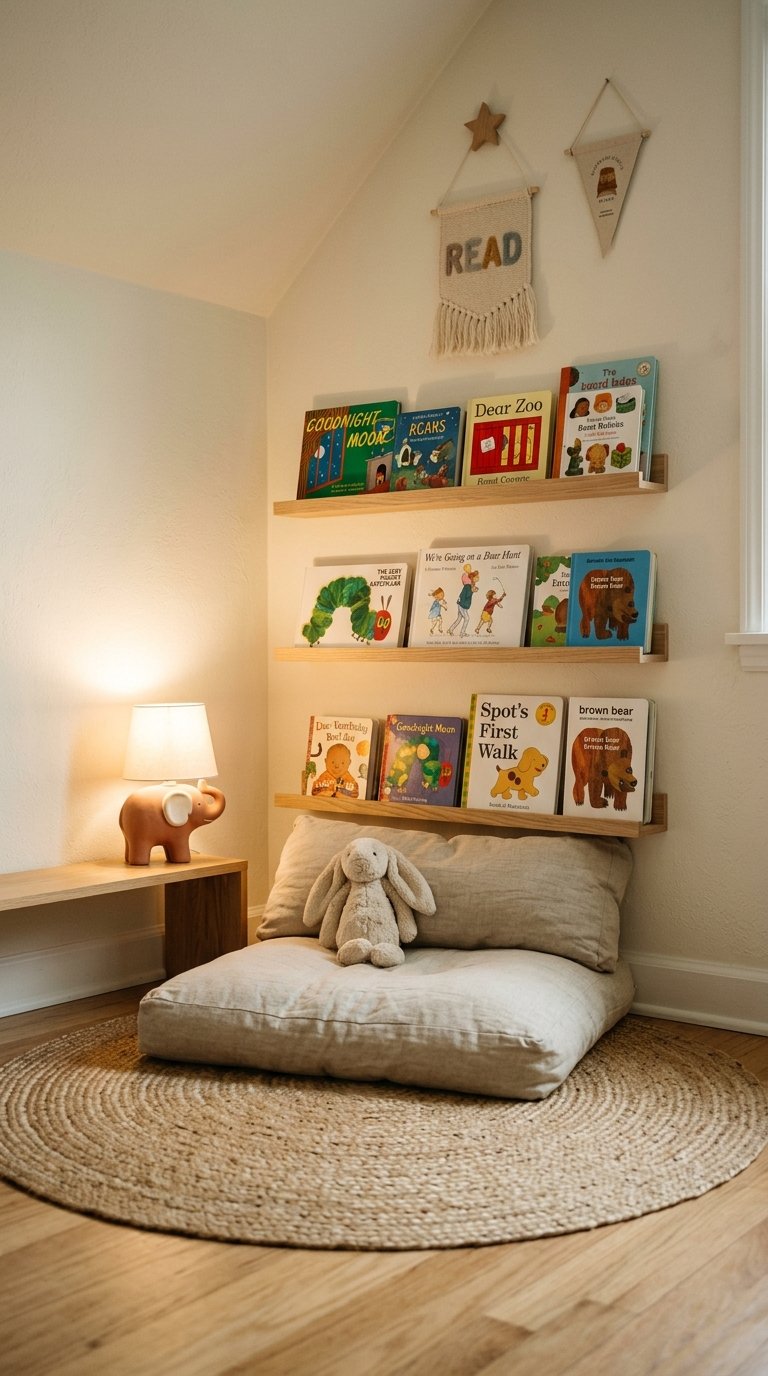
A reading corner in a nursery serves two purposes: it gives your child a defined space for books and quiet activity, and it builds the spatial associations that support independent reading as they grow.
A reading corner needs three things: seating at child height, accessible forward-facing bookshelves, and defined floor space. Everything else is optional.
Reading corner setup:
- A low floor cushion, bean bag, or small child-sized upholstered chair.
- Forward-facing bookshelves at arm’s reach from a seated floor position.
- A small area rug defining the reading zone within the room.
- Soft wall lighting from a wall sconce or small floor lamp nearby.
IMO, a reading corner built during a nursery remodel is one of the highest long-term value additions you make to the room. The habits it supports last well beyond the nursery years.
7. Reconfigure the Changing Station
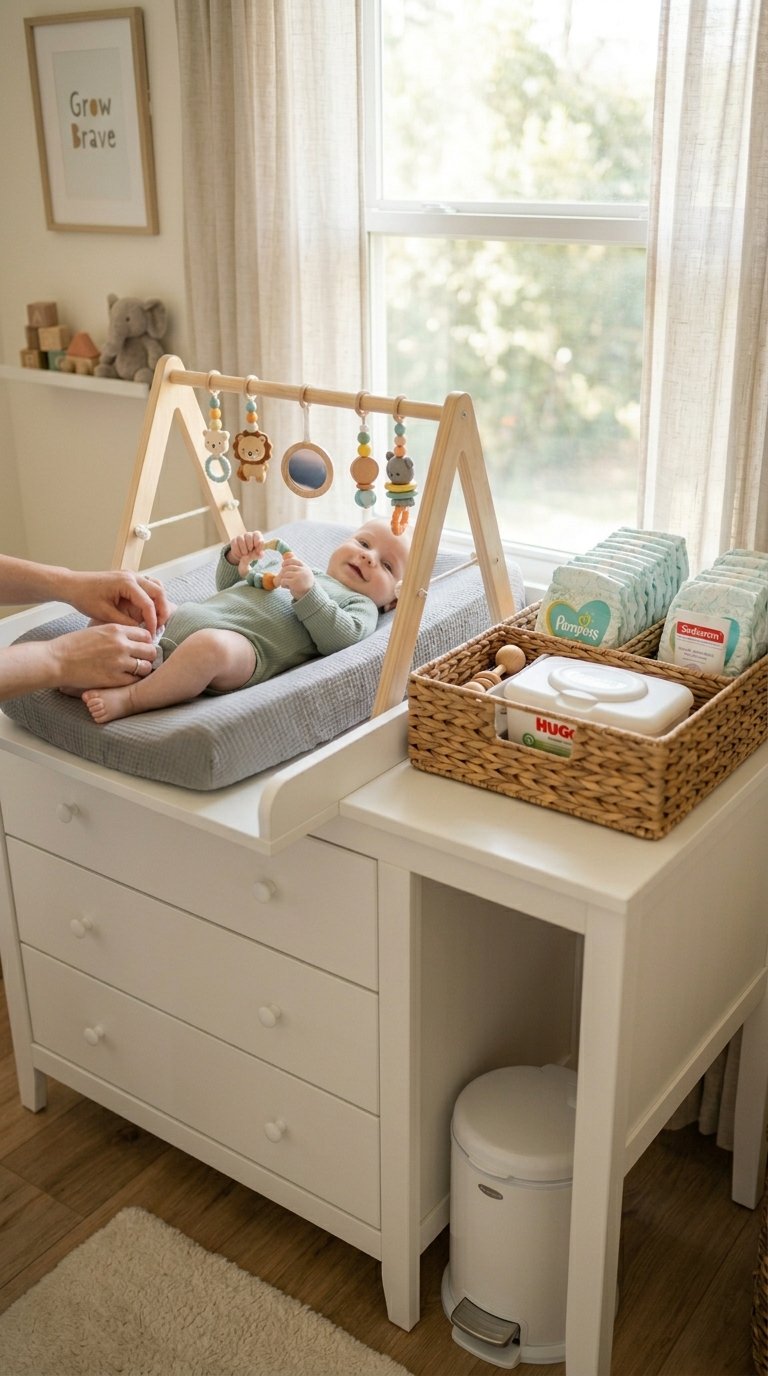
Most changing table setups get installed once and never reconsidered. Six months later, the changing table caddy is in the wrong position, the nappy bin requires a reach across the baby, and the spare outfit basket is two steps away when you need it in one.
A nursery remodel is the opportunity to reconfigure the changing station properly based on how you actually use it.
An optimized changing station layout:
- Everything needed for one nappy change within arm’s reach while the other hand stays on the baby.
- Nappies and wipes in a caddy directly beside the changing surface, not above or below it.
- A bin with a foot-pedal lid within foot reach for immediate disposal.
- A distraction mobile or toy attached above the changing surface for the wriggling phase.
- A small basket of the most-used clothing sizes on the shelf below or beside the changing surface.
Reassess the height of the changing surface too. Most standard heights work for average adults, but they’re not universal. An uncomfortable changing height creates back strain across thousands of changes.
8. Add a Feature Wall With Peel-and-Stick Wallpaper
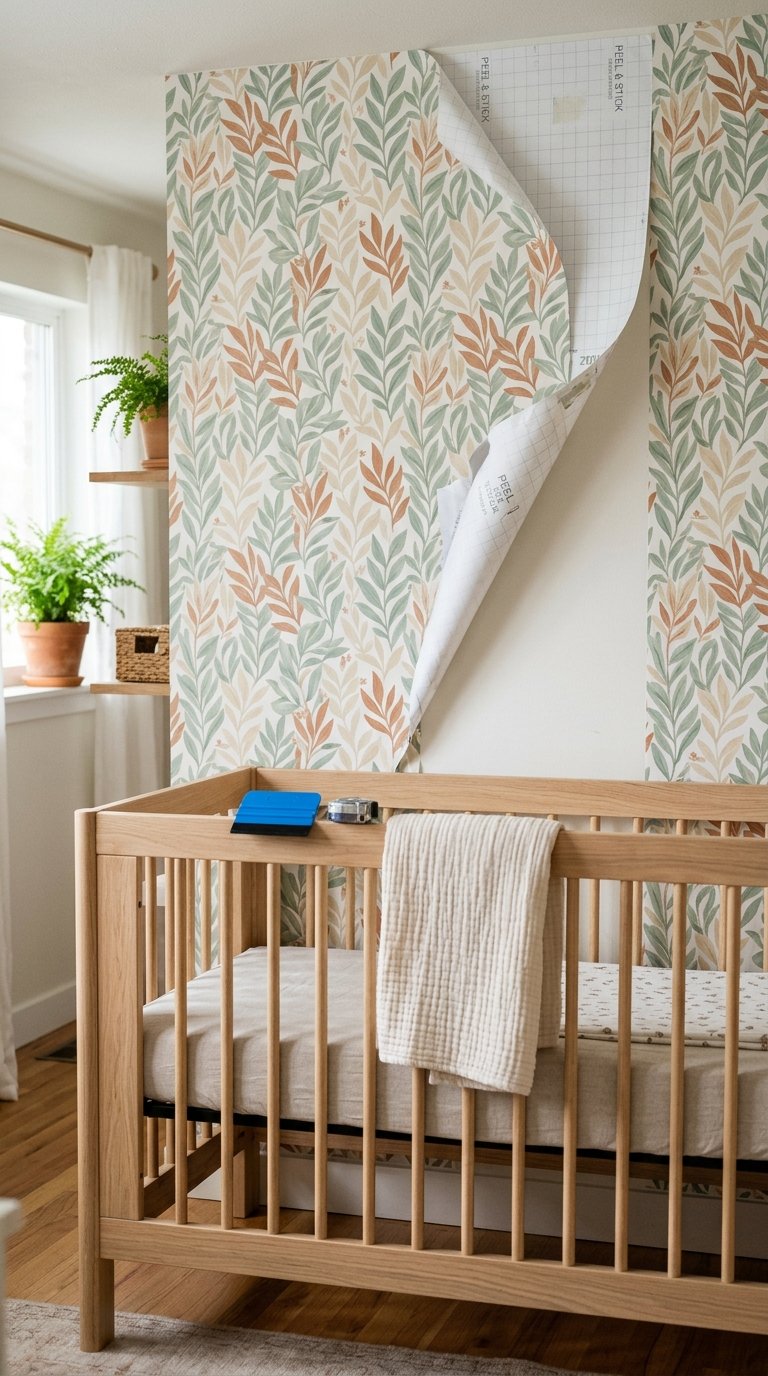
A feature wall behind the crib is the most viewed surface in the nursery. It deserves more than a coat of the same paint as every other wall.
Peel-and-stick wallpaper applies in one afternoon, removes cleanly when the child’s tastes change, and costs a fraction of traditional wallpaper. The pattern options cover every nursery style: geometric, botanical, illustrated animals, abstract, celestial, and more.
Peel-and-stick wallpaper application for best results:
- Apply to a clean, smooth, fully cured painted wall (wait at least 30 days after painting).
- Use a squeegee or credit card to smooth each panel from center to edges.
- Trim edges with a sharp craft knife rather than scissors for clean lines.
- Start from a plumb vertical line, not the wall corner, for accurate alignment.
Test one panel before committing to the full wall. Some surfaces hold adhesive better than others.
9. Replace Standard Lighting With a Warm Nightlight System

A nursery needs two distinct lighting modes: daytime functional light and nighttime ambient light. Most nurseries manage the daytime light adequately. The nighttime system is where most setups fail.
Warm amber light in the 1800K to 2200K range minimizes melatonin suppression and keeps night feeds and checks from fully waking your child. Cool white or blue-toned light does the opposite.
Nightlight options by type:
- Portable rechargeable nightlights (Hatch, Lumi, VAVA): dimmable, color-adjustable, and app-controlled from outside the room.
- Plug-in nightlights with amber bulbs: simple, fixed, and reliable.
- Smart bulbs in existing lamps: app-controlled warm dimming without additional fixtures.
- Star projectors: ceiling entertainment combined with a warm ambient glow.
The Hatch Rest is worth the premium for parents who want app control without entering the room. Adjusting light from outside the room without opening the door is a genuinely useful feature at 3 AM.
10. Improve the Storage System With Labeled Baskets

Nursery storage typically starts organized and deteriorates within two months. The problem is usually not the quantity of storage but the lack of category definition within it.
Woven baskets with clear labels on open shelving handle the majority of nursery loose-item storage: blankets, soft toys, books, nappy accessories, and small clothing items. The label removes the decision about where something goes, which is what makes the system sustainable when you’re operating on limited sleep.
Basket storage categories for a nursery:
- Current-size clothing overflow.
- Spare blankets and swaddles.
- Bath and skincare products.
- Soft toys and comfort objects.
- Books sorted by size: board books separate from picture books.
Buy baskets in one style and one material. A consistent basket type across all shelves reads as organized. Mixed basket styles read as accumulated clutter regardless of what’s inside them. 🙂
11. Install Wall-Mounted Shelving for Books and Display
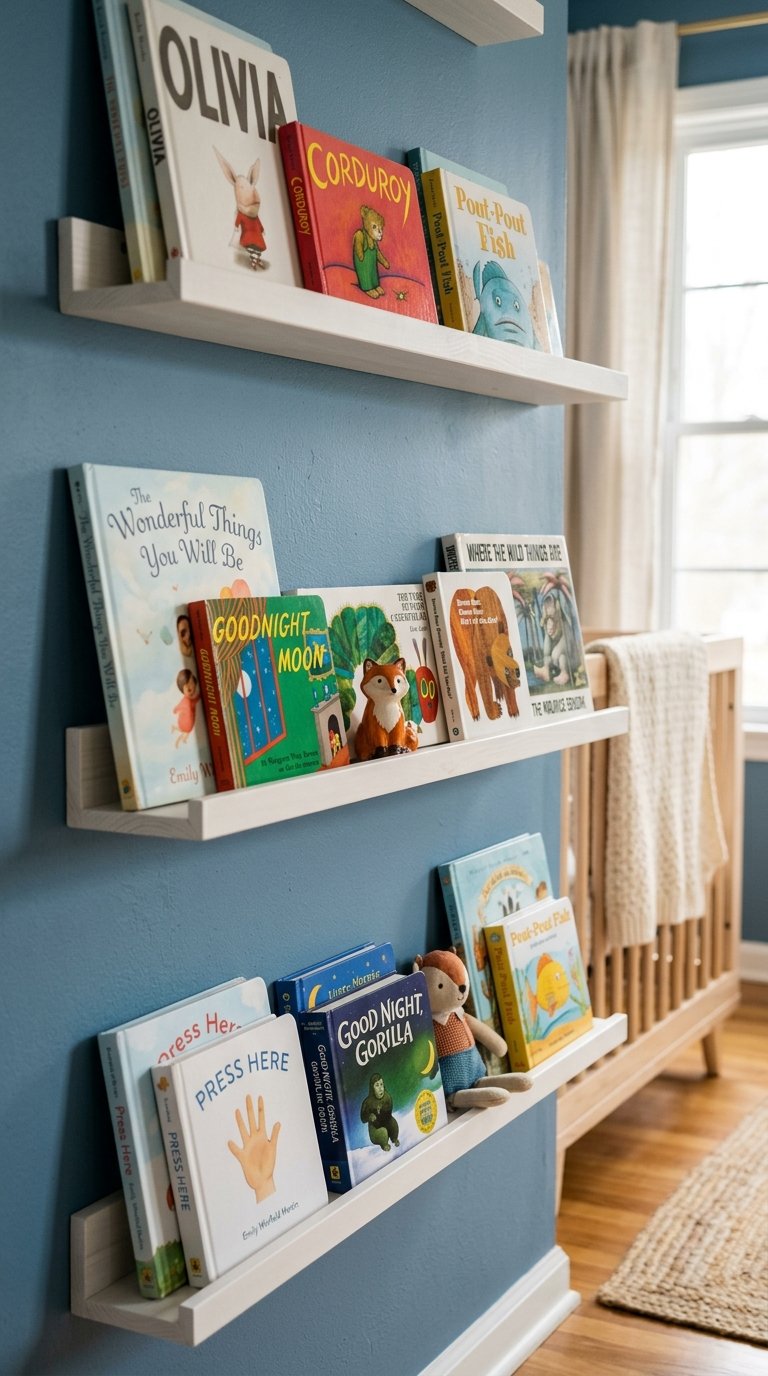
Freestanding bookshelves take up floor space. Wall-mounted shelving and picture ledges hold the same books and display objects while leaving the floor completely free.
Picture ledges, narrow wall-mounted shelves that display book covers face-forward, are particularly effective in a nursery remodel. They hold more books per linear foot than a standard shelf while making the covers visible and accessible to the child.
Wall-mounted shelving options for a nursery:
- Picture ledges for forward-facing book display at child height.
- Floating shelves for display objects, plants, and storage baskets.
- Corner shelves for making use of unused corner wall space.
- Ladder shelves leaning against the wall for flexibility without wall fixings.
Mount lower shelves at a height your child can reach from a standing position. Upper shelves hold display objects and items you access, not the child.
12. Add a Gallery Wall Above the Crib
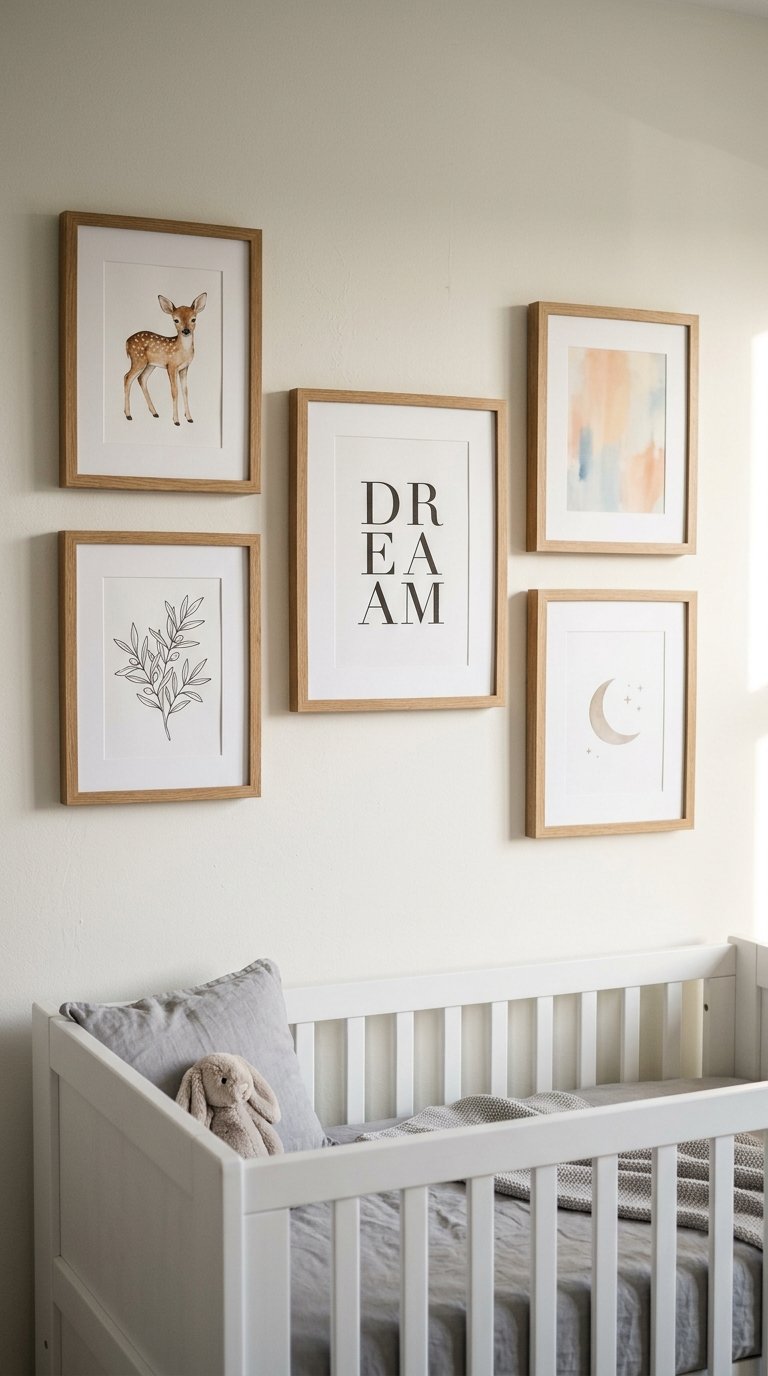
A gallery wall of three to five framed prints above the crib gives the nursery personality and visual focus without requiring a theme throughout the entire room.
The prints don’t need to be expensive. A consistent frame finish, all natural wood, all white, or all black, makes a collection of simple affordable prints look considered and deliberate.
Gallery wall guidelines for above a crib:
- Center the grouping above the crib horizontally.
- Hang the lowest frame at least 12 inches above the crib rail for safety.
- Use lightweight frames and acrylic rather than glass for anything directly above the sleep area.
- Use removable picture-hanging strips rather than nails for easier repositioning.
A gallery wall changes the entire feel of the crib zone and takes one afternoon to install. It’s one of the highest-impact, lowest-cost remodel moves available in a nursery.
13. Upgrade the Nursing or Feeding Chair
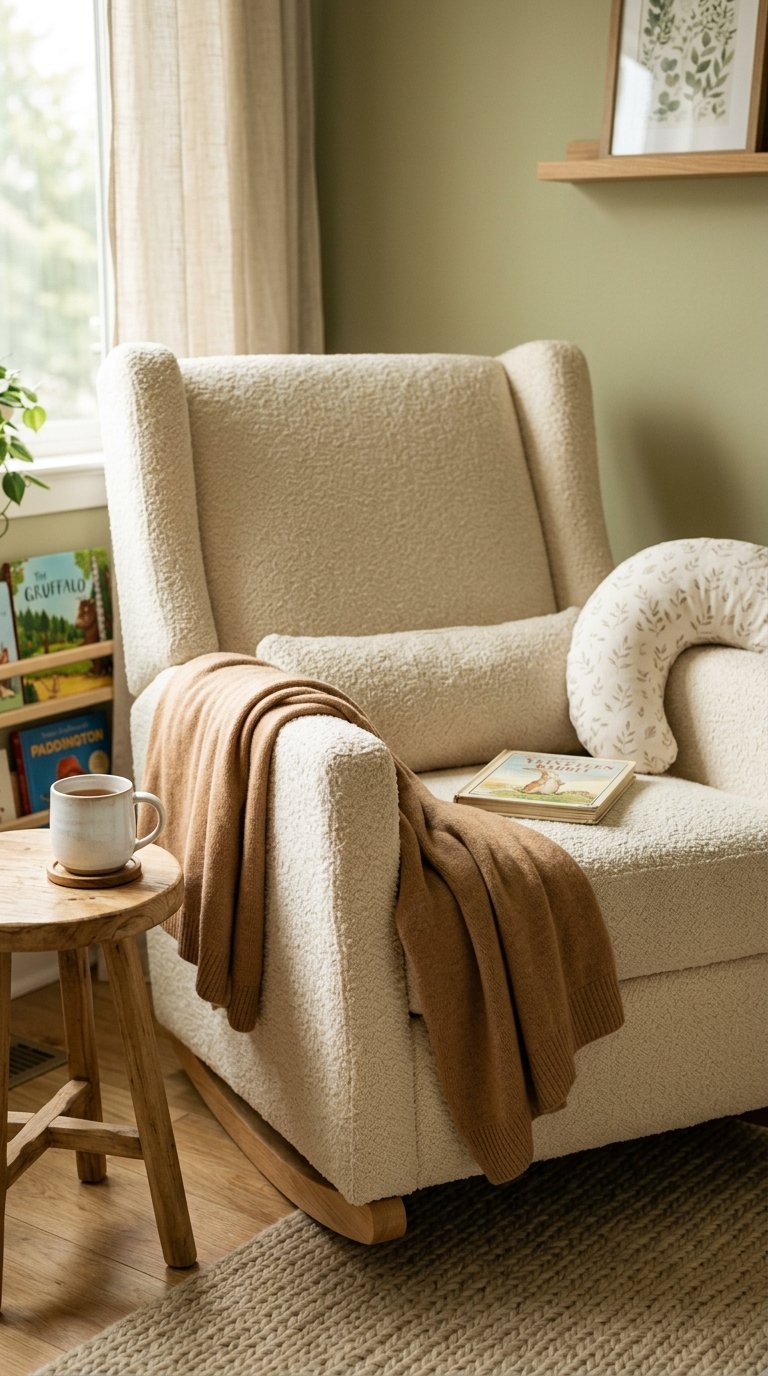
The nursing chair gets daily use for months or years. An uncomfortable one makes every feed feel longer than it is. A good one makes the quiet hours at night something other than an ordeal.
If your existing chair lacks proper lumbar support, has arms at the wrong height, or doesn’t recline or glide smoothly, replace it during the remodel. A quality nursing chair is an investment that repays itself across every feed for the duration of your nursing or bottle-feeding period.
What to look for in a nursing chair upgrade:
- Smooth gliding motion with no resistance or noise.
- Wide, padded arms at a height that supports your forearms during feeding.
- A tall enough back to rest your head against during night feeds.
- Washable or removable upholstery cover for cleaning.
- A recline function for those feeds where the baby falls asleep and you don’t want to move.
Sit in the chair before purchasing if at all possible. Photographs tell you nothing about lumbar support.
14. Create a Sensory Corner With Soft Play Elements
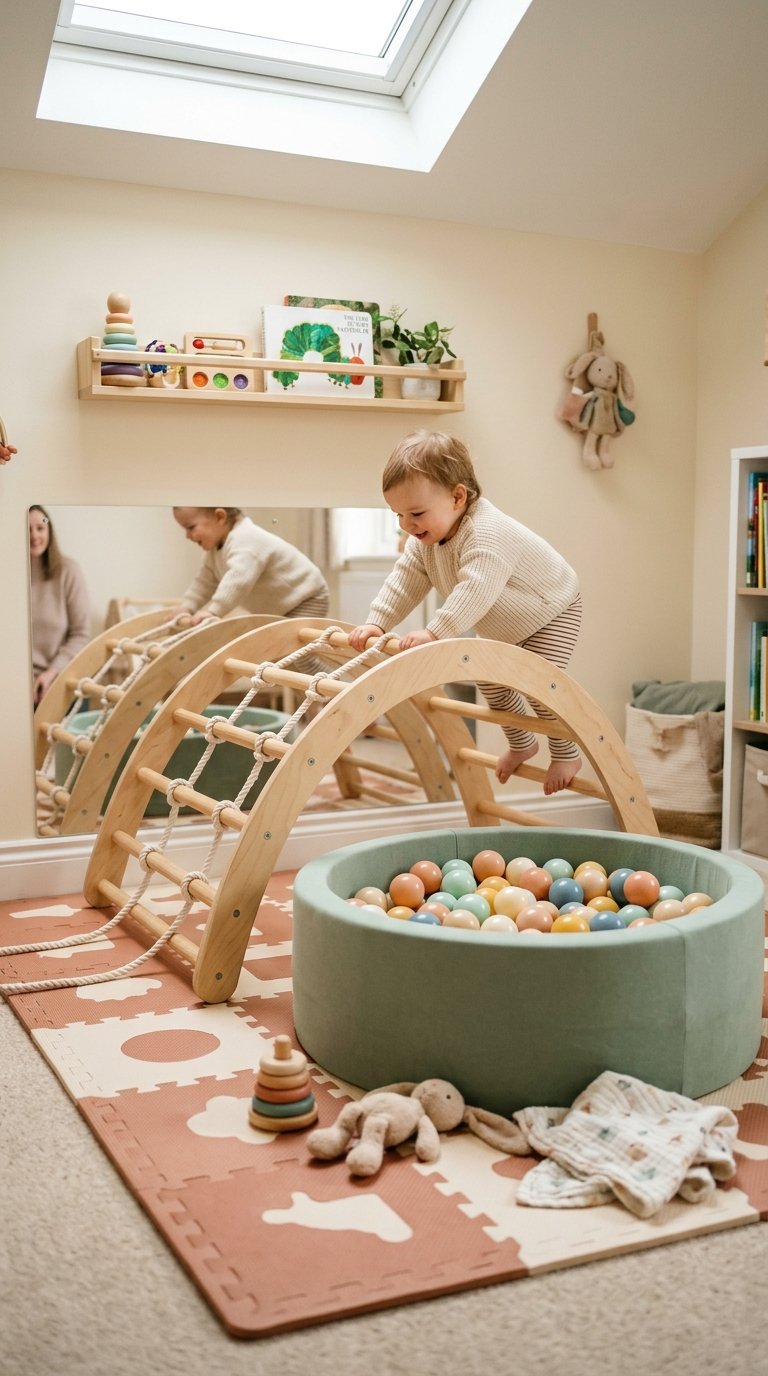
As your child moves from newborn to active toddler, a dedicated sensory and play zone within the nursery serves their developmental needs and keeps the chaos contained to one defined area.
A sensory corner uses soft floor mats, a small ball pit or soft cube structure, textured wall panels, and a mirror at child height. These elements cost relatively little individually and create a zone that actively engages your child independently.
Sensory corner elements by age:
- Newborn to 6 months: high-contrast black and white cards at eye level, a soft play mat, and a hanging mobile.
- 6 to 12 months: a floor mirror, soft stacking toys, and a textured play mat.
- 12 to 24 months: a small climbing structure, a ball pit, and soft building blocks.
- 24 months and beyond: a small craft table, a chalkboard wall panel, and independent book access.
The sensory corner evolves with the child. Plan the space to allow for reconfiguration rather than fixed furniture.
15. Improve Ventilation and Air Quality
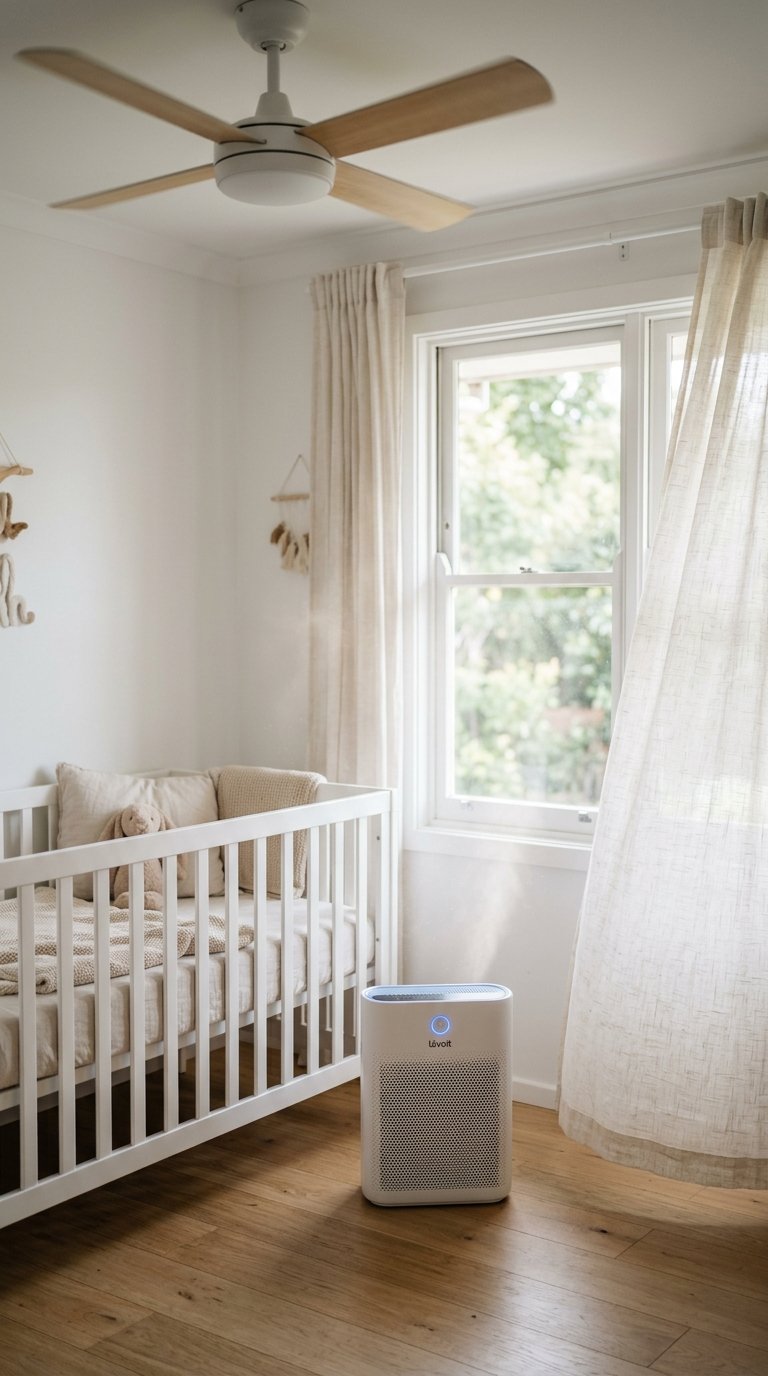
Nursery air quality matters more than most remodels address. Young children spend more hours per day in the nursery than in any other room. The air they breathe in that room directly affects their health.
If the nursery has poor ventilation, add a HEPA air purifier sized to the room volume. If the room retains heat, add a ceiling fan with a nursery-safe reversible motor. If the paint or existing flooring off-gasses VOCs, address this during the remodel.
Air quality improvements for a nursery remodel:
- Use a low-VOC or zero-VOC paint for all repainting.
- Install a HEPA air purifier with a filter rated for the room’s square footage.
- Add a ceiling fan with a remote for air circulation without a floor fan that poses a tipping risk.
- Introduce humidity control via a cool mist humidifier if the room runs dry in winter.
These improvements are invisible in photographs but their effect on your child’s health and sleep quality is tangible and real.
16. Install a Sound Machine or White Noise System
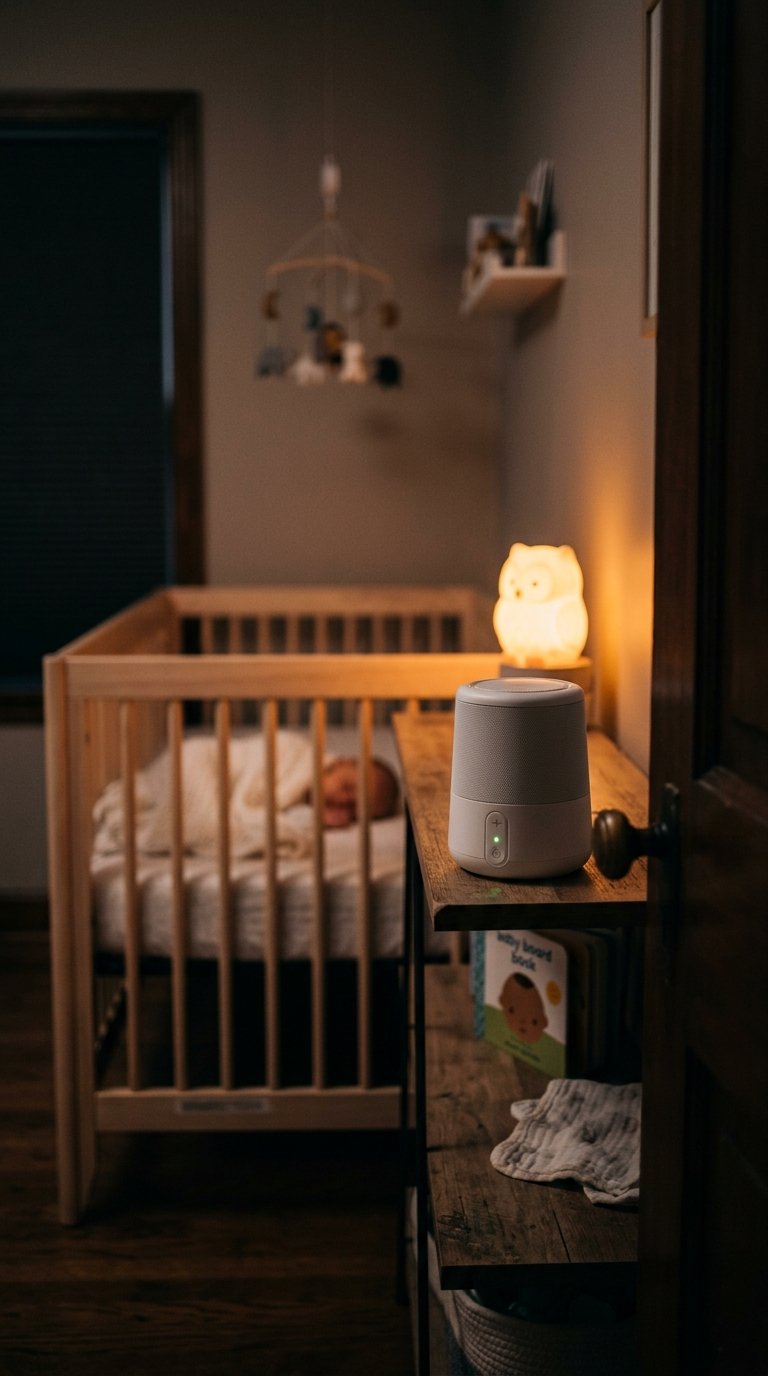
A portable sound machine sitting on a shelf handles basic white noise adequately. A built-in speaker system or a wall-mounted unit handles it better and with more control.
White noise masks household sounds that disrupt nursery sleep: older siblings, kitchen noise, street traffic, and door sounds. The consistency of the sound signal matters as much as the volume. A machine that cuts out or varies in volume creates the interruption it’s meant to prevent.
Sound machine options for a nursery remodel:
- Dedicated white noise machines (Lectrofan, Big Red Rooster): reliable, consistent, purpose-built.
- Smart speakers with white noise apps: flexible but dependent on wifi reliability.
- Built-in ceiling speaker systems: highest quality, most integrated, highest cost.
- Hatch Rest: combines white noise, nightlight, and app control in one unit.
Place the sound machine between the door and the crib, not directly beside the crib. This positions the sound to mask incoming sounds from the door rather than directing them at the child.
17. Add a Chalkboard or Magnetic Paint Panel
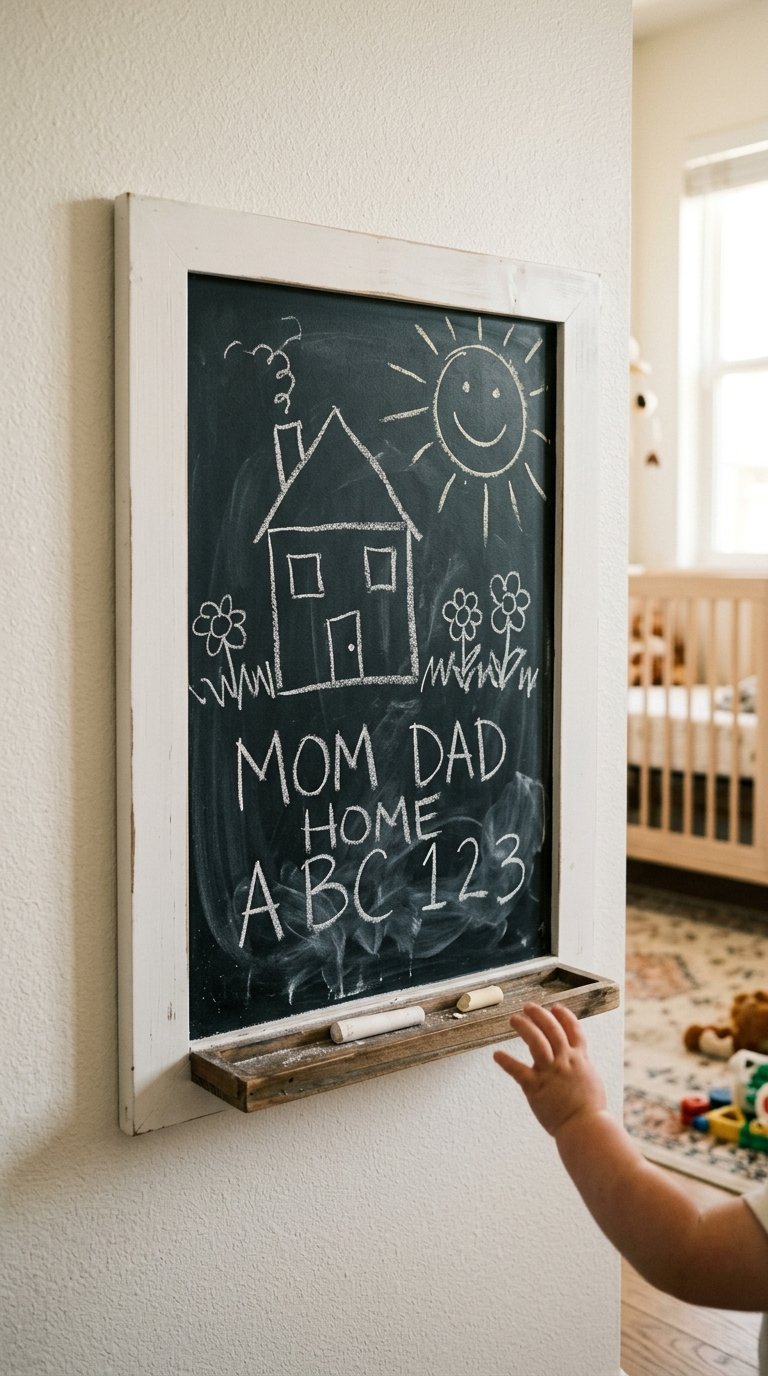
A chalkboard or magnetic wall panel in a nursery serves the child’s creative and developmental needs from about 18 months onward. It provides a dedicated drawing surface that doesn’t involve your walls and a display surface for artwork, photos, and notes.
A chalkboard panel in a frame on the wall looks more considered than a full chalkboard wall. A magnetic panel behind a thin layer of chalk paint combines both functions in one surface.
Chalkboard and magnetic panel options:
- Framed chalkboard hung at child height.
- Chalkboard paint applied to one wall section within a painted border.
- Magnetic primer under any wall paint color, turning the entire wall into a magnetic surface.
- A prefabricated magnetic chalkboard panel in a size suitable for the wall space.
Position the panel at child height, not adult height. The child uses it. The height should suit them.
18. Introduce a Teepee or Canopy as a Play Zone

A teepee or canopy above the reading corner or play zone creates a defined, enclosed space within the room that children gravitate toward independently. The psychological effect of a small, contained space within a larger room provides a sense of ownership and security.
Teepees in natural canvas, wood frame styles, or macrame-hung canopies all serve the same function. They define a zone without walls and give the child a space they consider distinctly theirs.
Teepee and canopy considerations:
- Choose a size appropriate to the room: a large teepee in a small nursery dominates the floor plan.
- Natural canvas or cotton materials breathe better than synthetic alternatives.
- Floor cushions inside the teepee complete the zone as a usable space.
- A small string light inside the canopy adds warmth and defines it as a special area.
The teepee transitions from a play zone in the nursery to a reading nook in the toddler room without any changes required.
19. Replace Generic Hardware With Considered Fixtures
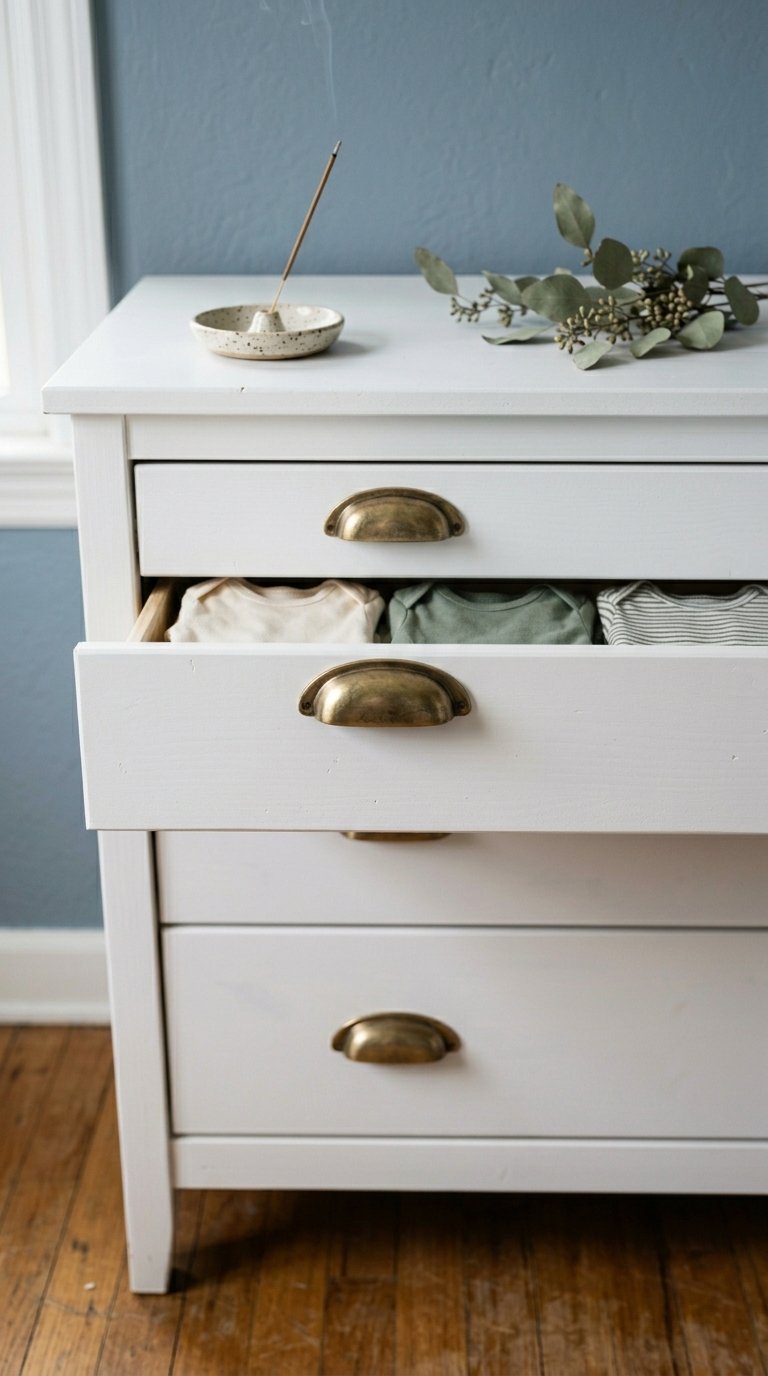
Cabinet hardware, door handles, wardrobe pulls, and curtain rod finials are all small details in a nursery remodel that collectively determine whether the room feels considered or assembled.
Replacing the standard gold or chrome hardware on a dresser or wardrobe with brushed brass, matte black, or ceramic knobs in a style that suits the nursery theme takes an hour and costs very little per piece.
Hardware upgrades that make a visible difference:
- The dresser and wardrobe drawer pulls in a consistent finish.
- A curtain rod and finials that match the hardware finish.
- A towel bar or hook rail behind the door in a coordinating finish.
- A name hook or letter hook by the door for bags, coats, and hats.
Match all hardware to one finish throughout the room. Mixed finishes in a nursery look unresolved and accidental.
20. Add a Mural or Large-Scale Wall Art
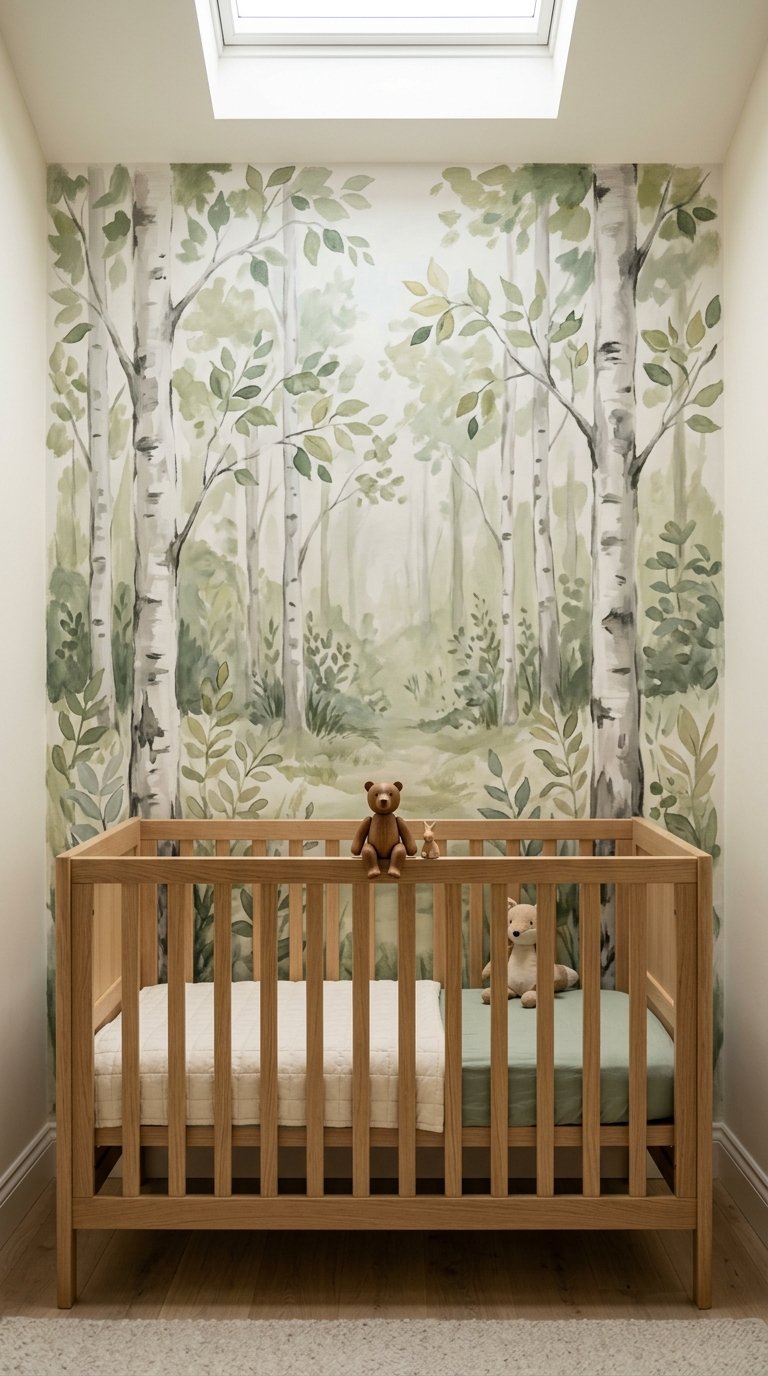
A professional wall mural or a large-scale DIY mural transforms the nursery feature wall from a surface into a destination. Children engage with murals differently from framed art. They sit with them, reference them, and build imaginative play around them in ways that make the room actively stimulating.
Painted murals require a skilled hand or a professional artist. Peel-and-stick mural panels offer the same visual impact with full reversibility at a lower cost.
Mural approaches by budget:
- Peel-and-stick mural panels: full wall coverage, removable, no painting skill required.
- DIY painted mural: low material cost, high time investment, requires painting confidence.
- Professional mural artist: highest cost, highest quality, fully custom to your brief.
- Large-scale framed print: museum-quality print in a large format frame, no wall commitment required.
A mural works best on the wall the child faces most, either from the crib or from the play area. Position it where it receives the most daily viewing time.
21. Design the Room to Transition Beyond the Nursery Stage
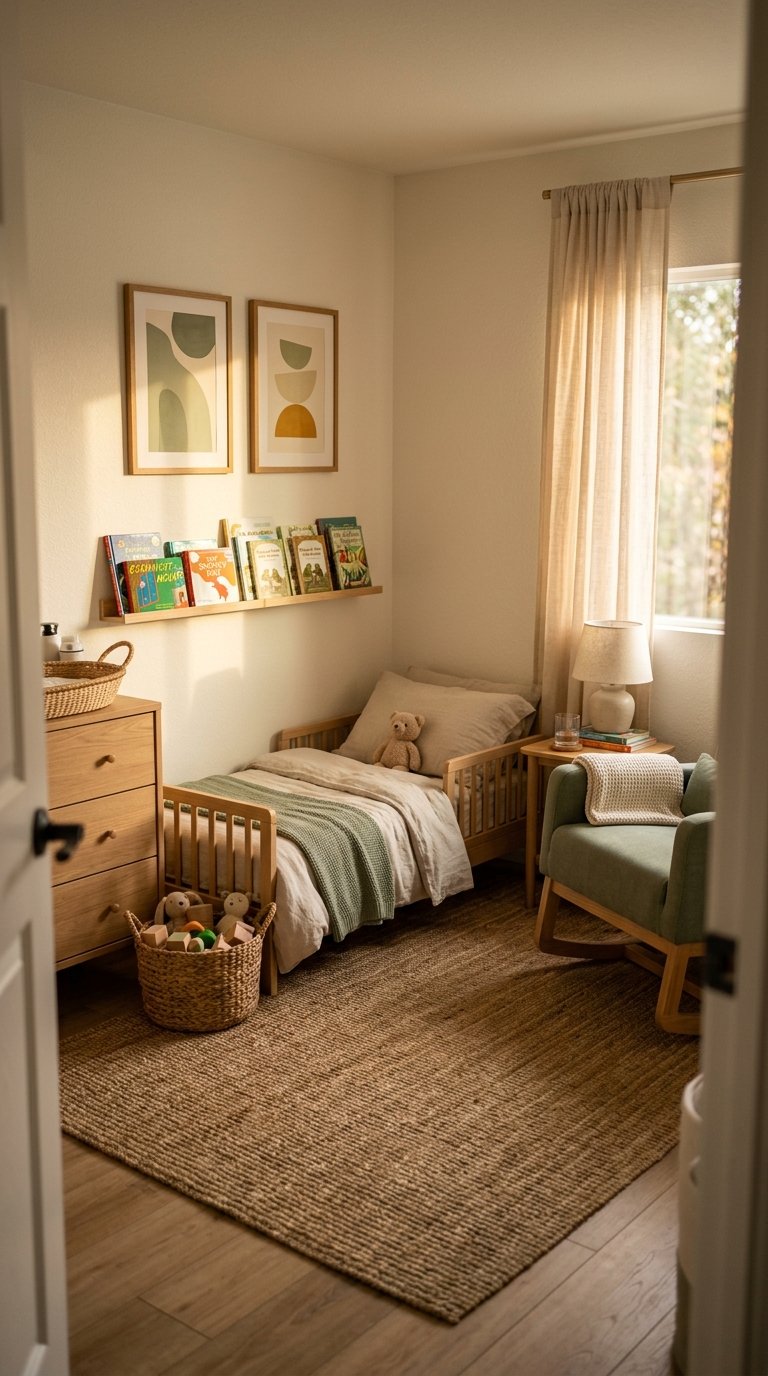
The most strategic nursery remodel idea is also the most forward-looking: design the remodeled room to work beyond the nursery years without requiring another full renovation.
A room built entirely around infant needs will need a significant overhaul at 18 months, again at 3 years, and again at 5. A room built on a neutral foundation with flexible furniture, scalable storage, and interchangeable decorative elements evolves with the child at minimal ongoing cost.
Designing for longevity in a nursery remodel:
- Choose a convertible crib that becomes a toddler bed and eventually a full bed.
- Install wall-mounted shelving that holds baby books now and chapter books later.
- Use a neutral paint base with themed accessories rather than themed paint.
- Select a nursing chair that functions as a reading chair at the toddler and school stages.
- Build storage that scales: drawer units and wardrobe systems that work at every age.
FYI, the nursery that needs the least future work is the one that was built for the child at age five, not for the newborn. Plan ahead and the room serves you longer than you expect.
Final Thoughts
A nursery remodel works best when it addresses specific failures in the existing room rather than restarting from scratch. Identify what’s not working: the light control, the storage organization, the chair, the feature wall, the sleep environment. Fix those things first.
The ideas above range from a $15 dimmer switch to a full professional mural. Most fall somewhere between, requiring a weekend and a modest budget to implement well.
A nursery that works harder saves you daily friction, supports your child’s sleep and development, and doesn’t need another full renovation in twelve months. That is the standard worth building toward.