23 Kitchen Design Ideas That Make Your Home Look Expensive
Your kitchen is the most used room in your house and, for most people, the least resolved. The cabinets are fine. The layout works. But something about the room never quite comes together the way you want it to. These 23 kitchen design ideas fix that with specific materials, real product names, accurate price ranges, and honest reasons each idea works better than what most people are doing right now.
No mood boards. No vague inspiration. Just design decisions that solve real kitchen problems in real homes.
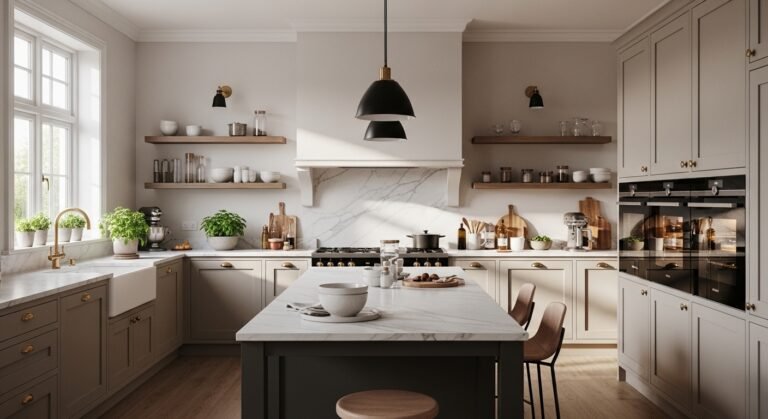
1. Two-Tone Cabinet Color With Uppers in White and Lowers in a Deep Tone
Two-tone kitchen cabinets with white uppers and a deep color on the lower base cabinets create visual contrast that makes a kitchen feel designed rather than default. The white uppers keep the room bright and open while the dark lowers ground the space and hide the scuffs and marks that base cabinets accumulate in daily use.
Benjamin Moore’s Hale Navy HC-154 on lower cabinets with Simply White OC-17 on uppers is the most proven two-tone combination in current kitchen design. The color shift at countertop height draws the eye horizontally across the room, which makes narrow kitchens read as wider. Repaint existing cabinets with Benjamin Moore’s Advance alkyd paint at $70 per gallon for a factory-smooth finish without a full cabinet replacement.
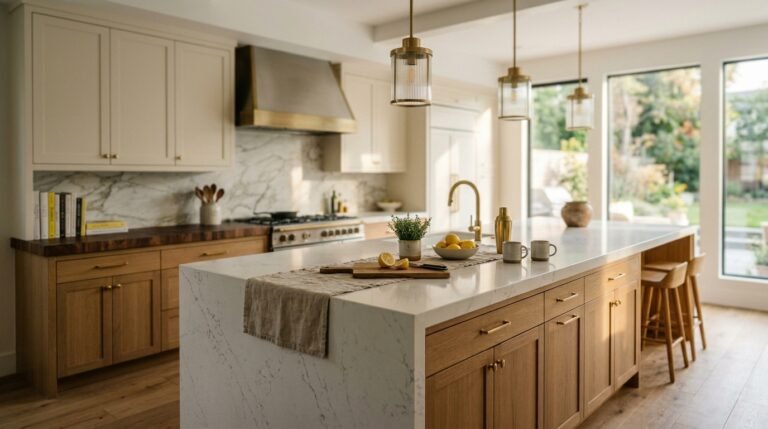
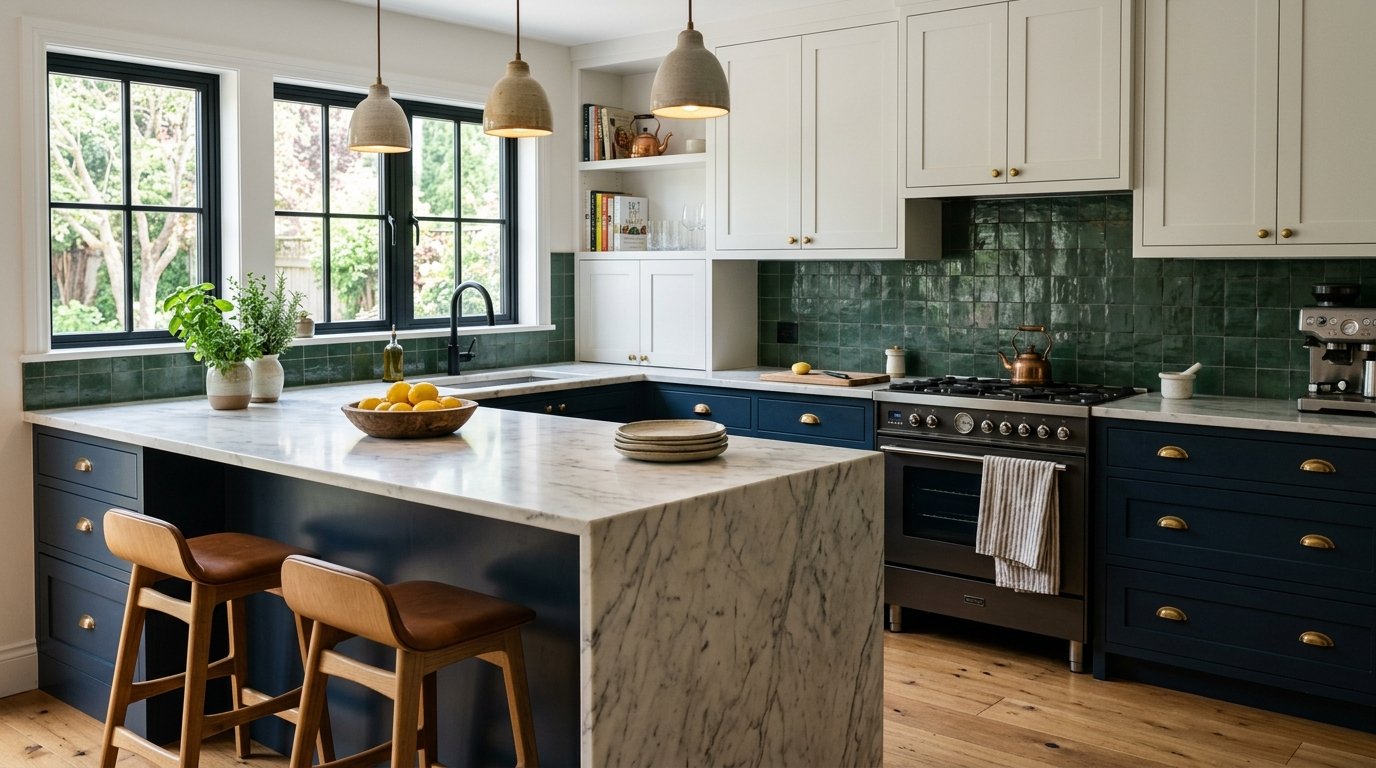
2. Waterfall Countertop on the Kitchen Island
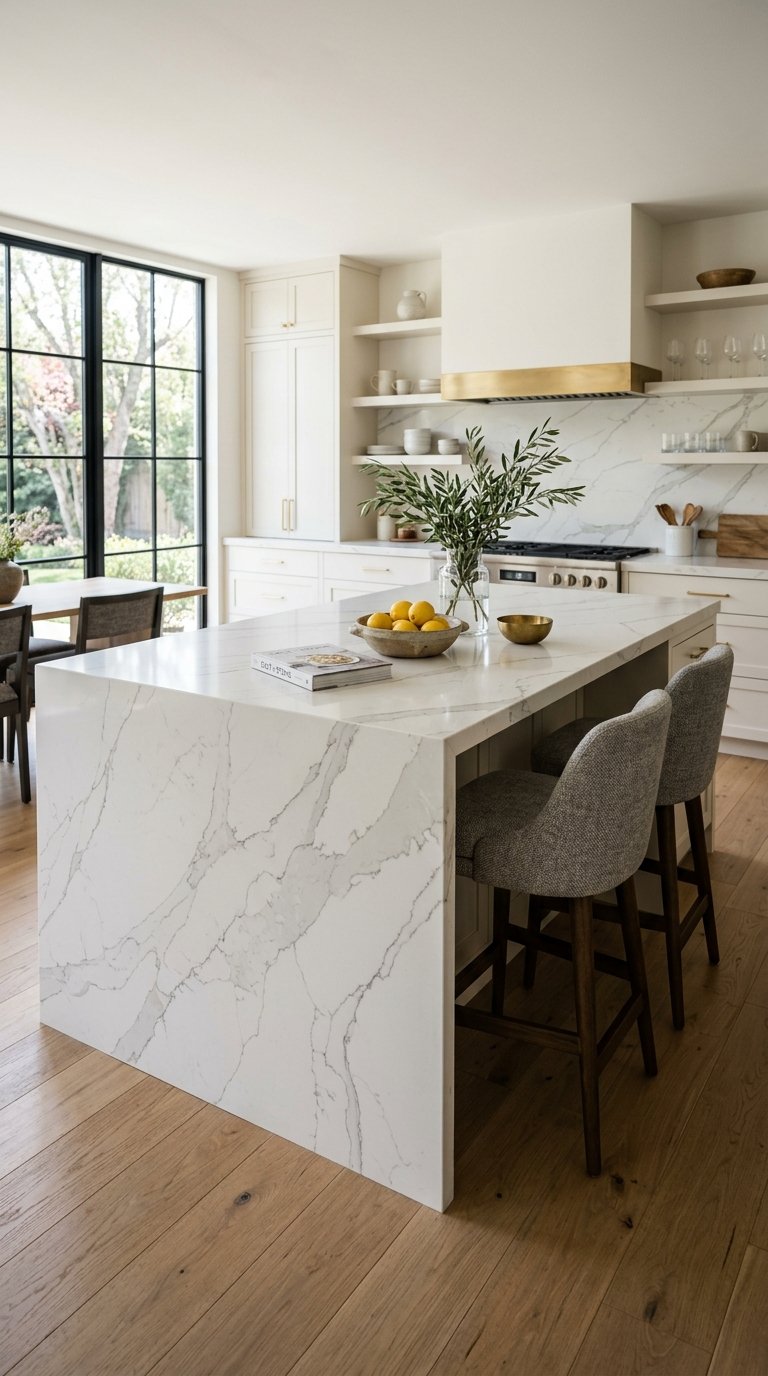
A waterfall countertop extends the island surface material down both sides to the floor, turning the island into a sculptural furniture piece rather than a standard cabinet box with a top. The continuous vertical face of the countertop material eliminates the base cabinet visual entirely and reads as a single solid slab.
Calacatta quartz from Caesarstone in a waterfall configuration costs $150 to $250 per square foot installed, including the two vertical side panels. Silestone’s Eternal Calacatta Gold delivers a similar vein pattern at $90 to $140 per square foot installed. Either option transforms a standard island into the visual anchor of the entire kitchen without changing the cabinet configuration beneath it.
3. Open Shelving in Place of Upper Cabinets on One Wall
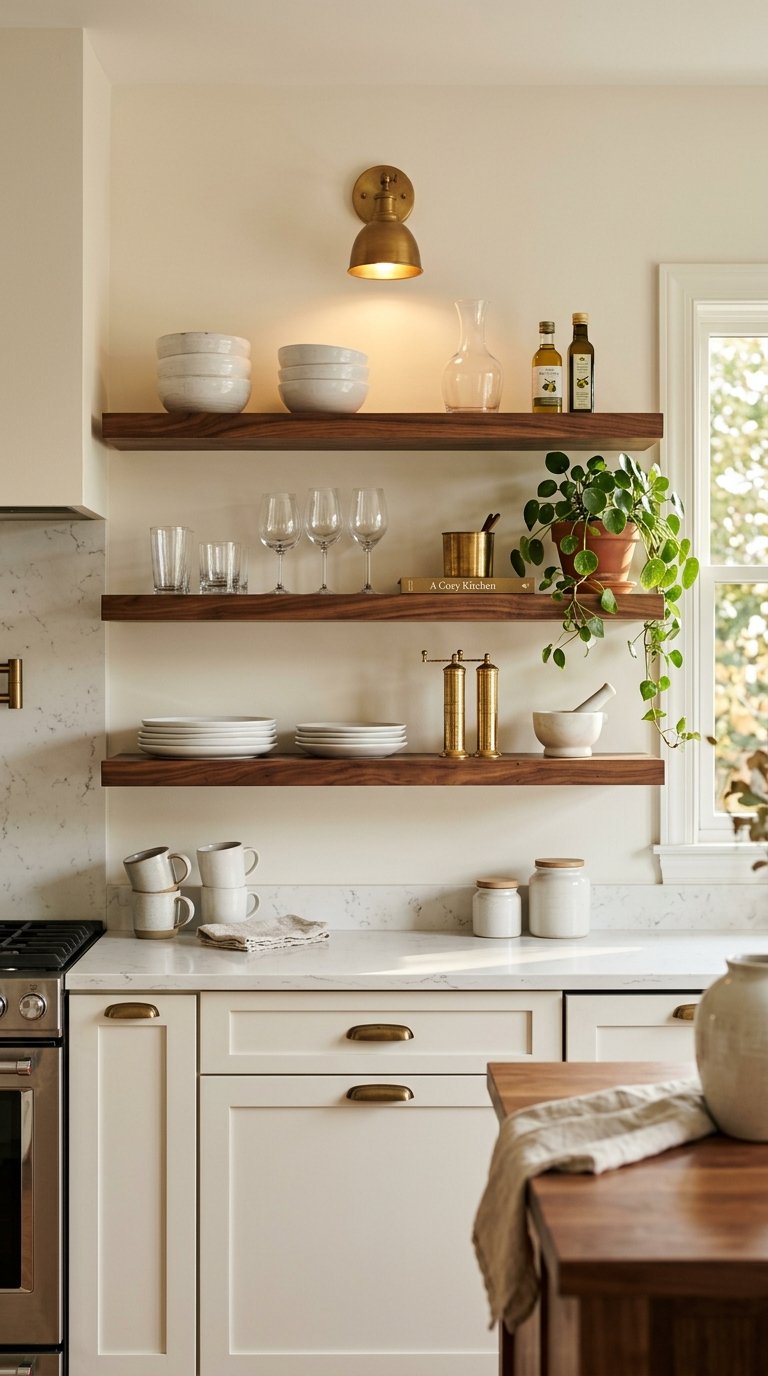
Replacing upper cabinets on a single kitchen wall with open shelves opens the room visually and forces a curated approach to what goes on display. Kitchens with open shelving on one wall feel 20 to 30 percent larger than the same room with full upper cabinet coverage on all walls, because the eye reads the open wall as space rather than storage.
Use 2-inch thick solid walnut floating shelves from a local lumber mill or from Etsy sellers for $80 to $160 per shelf at 36 inches wide. Mount them on heavy-duty floating shelf brackets from Kona Shelf Hardware at $18 to $25 per bracket pair. Style them with a mix of functional items, uniform white ceramics, glassware, and one or two small plants, to keep the display purposeful rather than cluttered.
4. Integrated Appliances Behind Cabinet Panel Fronts
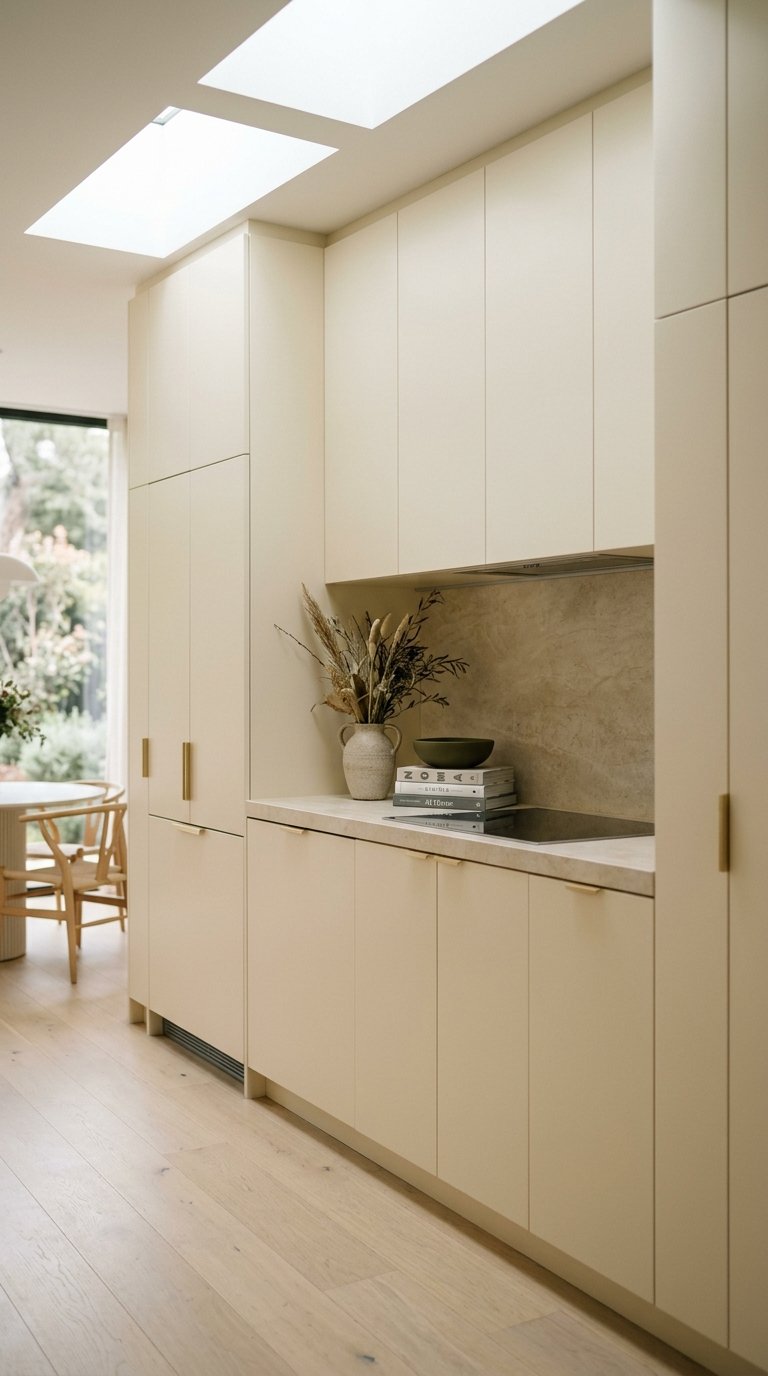
Integrated appliances with cabinet panel fronts on the refrigerator, dishwasher, and range hood create a seamless kitchen wall where the appliances disappear into the cabinetry. The result reads as a furniture wall rather than a kitchen, which is the design goal of every high-end kitchen renovation.
IKEA’s SEKTION cabinet system accepts panel-ready appliance fronts from Bosch, Fisher and Paykel, and Miele. A Bosch panel-ready dishwasher costs $1,200 to $1,500 and accepts a custom cabinet front cut from the same material as your kitchen doors. The panel front adds $80 to $200 in materials but eliminates the visual break that a standard appliance face creates in an otherwise continuous cabinet wall.
5. Statement Range Hood as the Kitchen Focal Point
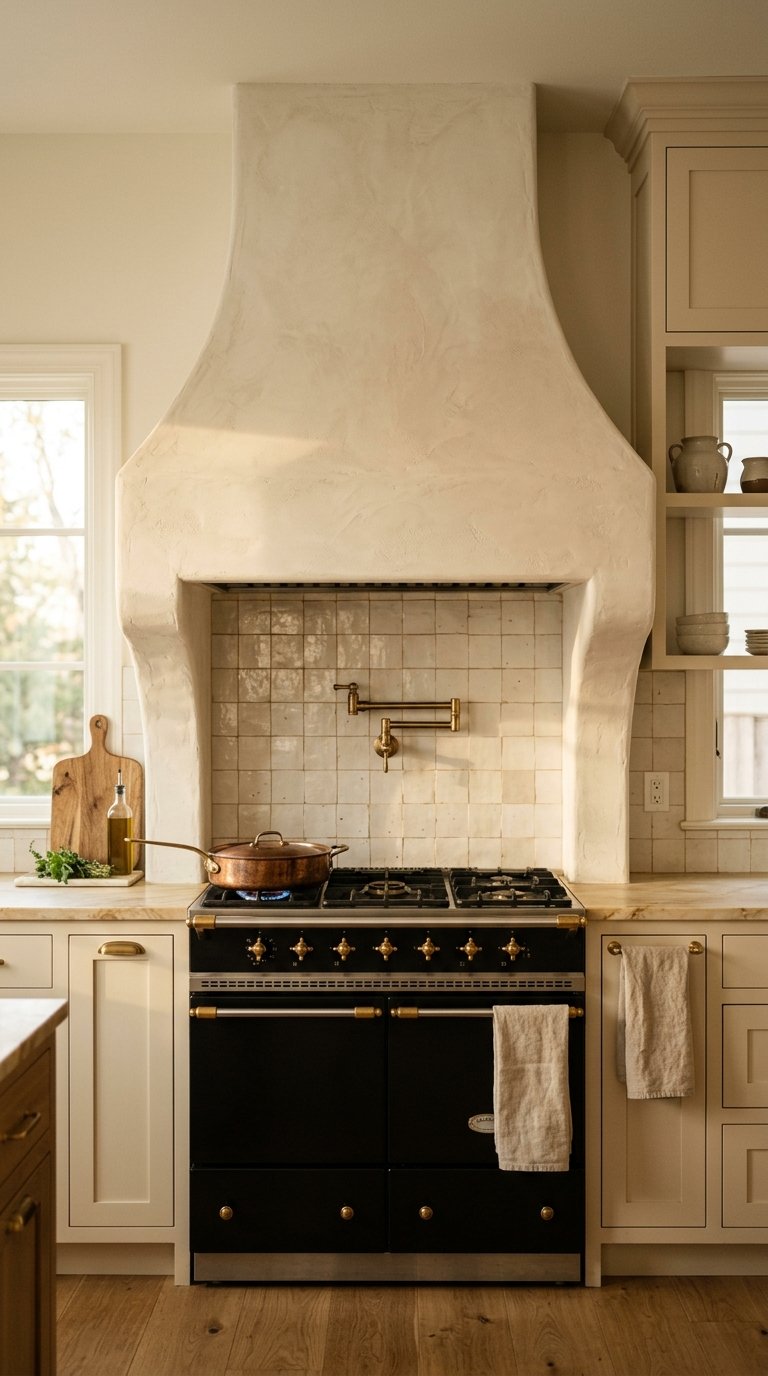
A statement range hood above the range or cooktop serves as the architectural focal point of the kitchen in the same way a fireplace mantel serves a living room. Without a focal point, a kitchen reads as a collection of appliances and cabinets rather than a designed room.
Plaster range hoods from a custom fabricator cost $800 to $2,500 installed and suit Mediterranean, transitional, and modern farmhouse kitchens. Shiplap wood range hoods built from primed pine cost $200 to $500 in materials for a DIY build. Copper range hoods from Copper Range Hoods Inc. start at $1,200 and develop a natural patina over time that no painted surface replicates.
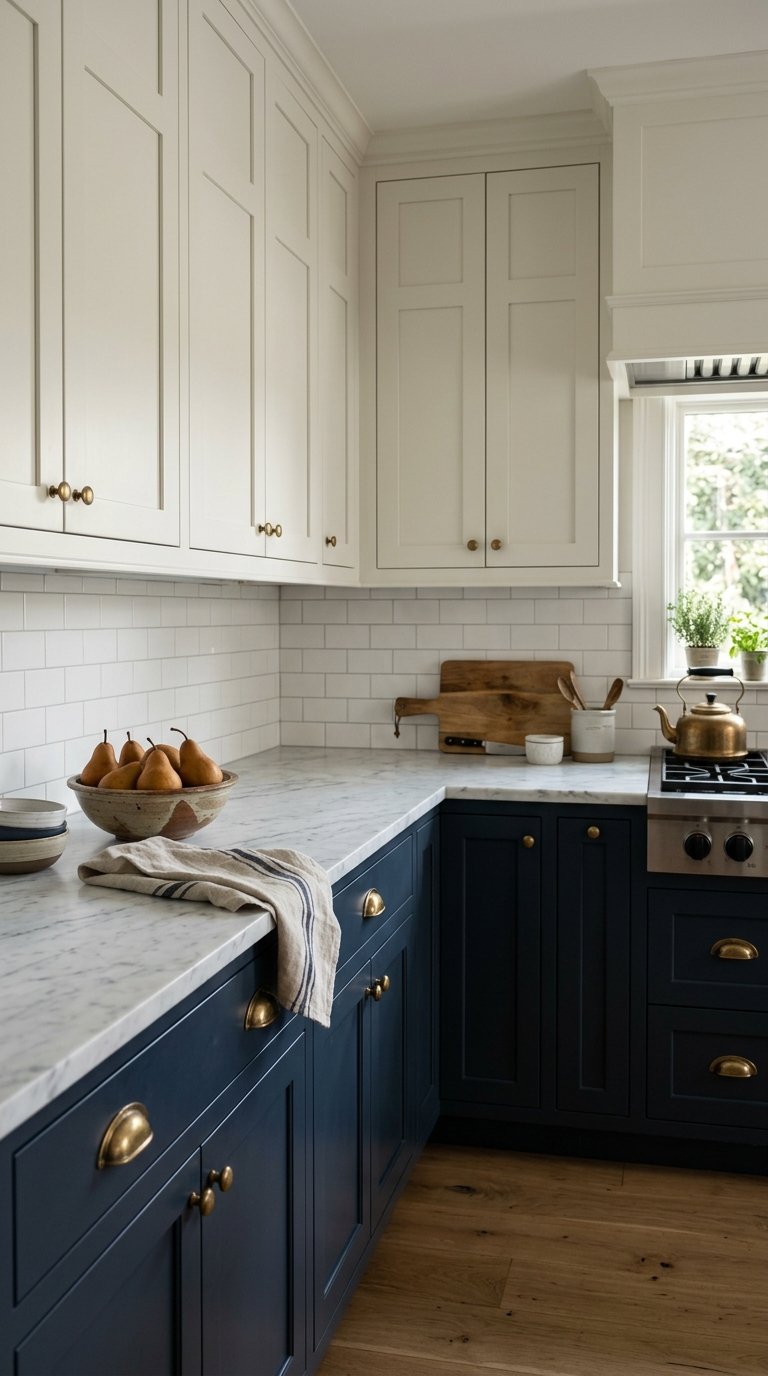
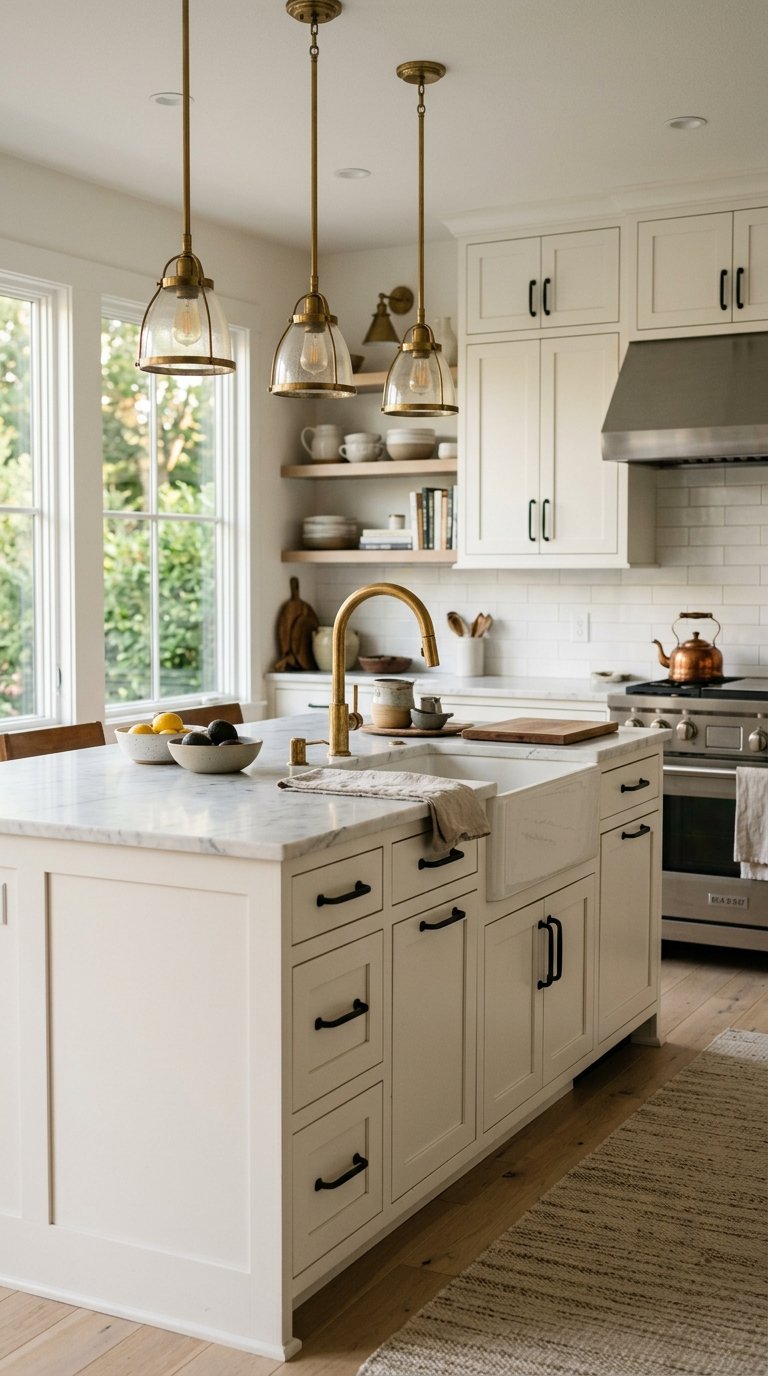
6. Unlacquered Brass Hardware Throughout
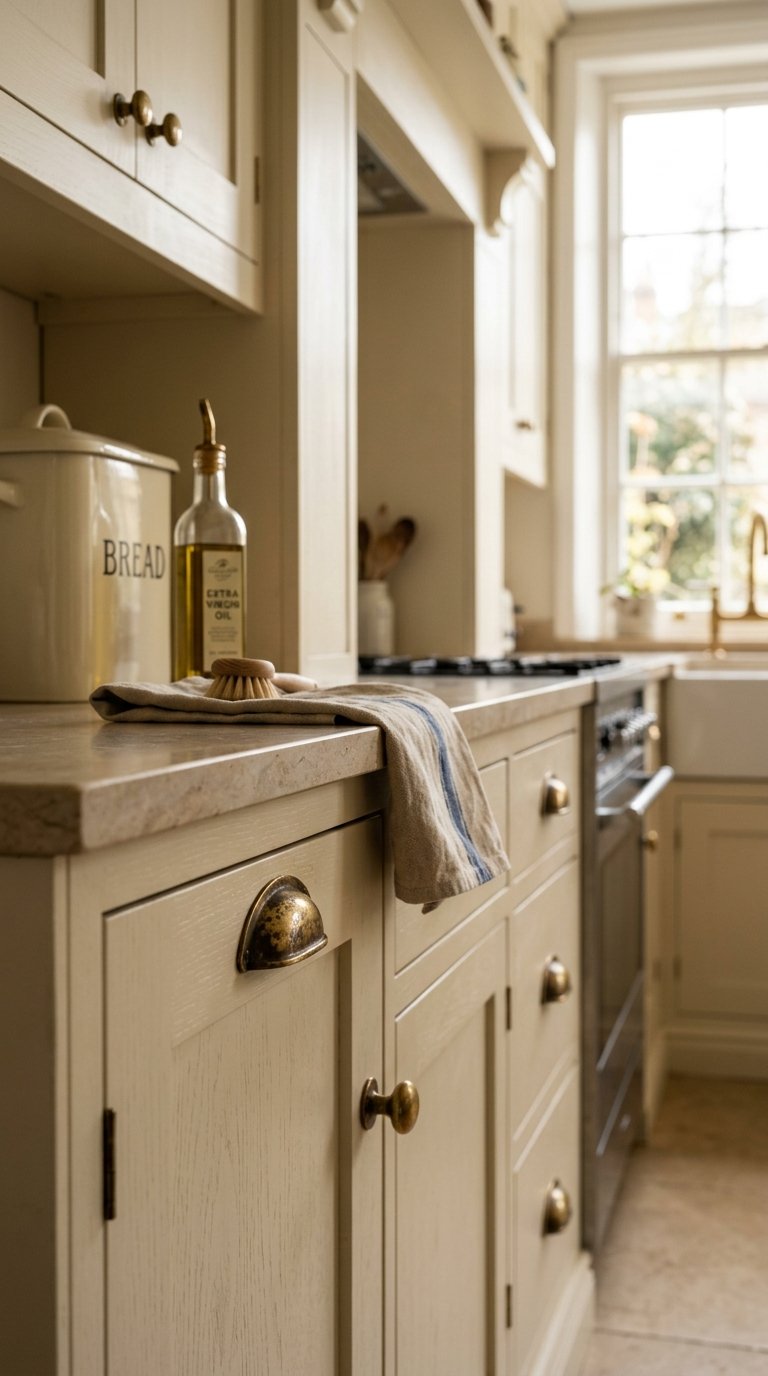
Unlacquered brass hardware on kitchen cabinets develops a natural patina over time that ages with the kitchen rather than looking permanently new. The living finish of unlacquered brass means the hardware looks better at five years than at installation, which is the opposite of chrome and polished nickel finishes that show every fingerprint and scratch.
Rejuvenation’s unlacquered brass cup pulls and knobs run $8 to $22 per piece. For a kitchen with 40 pieces of hardware, the total hardware investment runs $320 to $880. Pair unlacquered brass with white or cream cabinets, warm wood countertops, or deep green painted cabinets for combinations that have proven staying power across multiple design cycles. FYI, unlacquered brass is the one hardware finish that interior designers consistently choose for their own homes.
7. Zellige or Hand-Made Ceramic Tile Backsplash

A zellige or hand-made ceramic tile backsplash introduces surface variation, irregular glaze, and light-catching texture that no factory tile replicates. The imperfect surface reads as artisan and expensive even at moderate price points because the variation signals hand production.
Clé Tile’s zellige in Blanc or Sage costs $22 to $28 per square foot. A standard backsplash of 30 square feet runs $660 to $840 in tile materials. Walker Zanger and Fireclay Tile both offer hand-made ceramic alternatives starting at $14 per square foot with similar surface variation at a lower price point. Either option transforms a flat backsplash wall into the most visually interesting surface in the room.
8. Black Kitchen Faucet as a Contrast Anchor
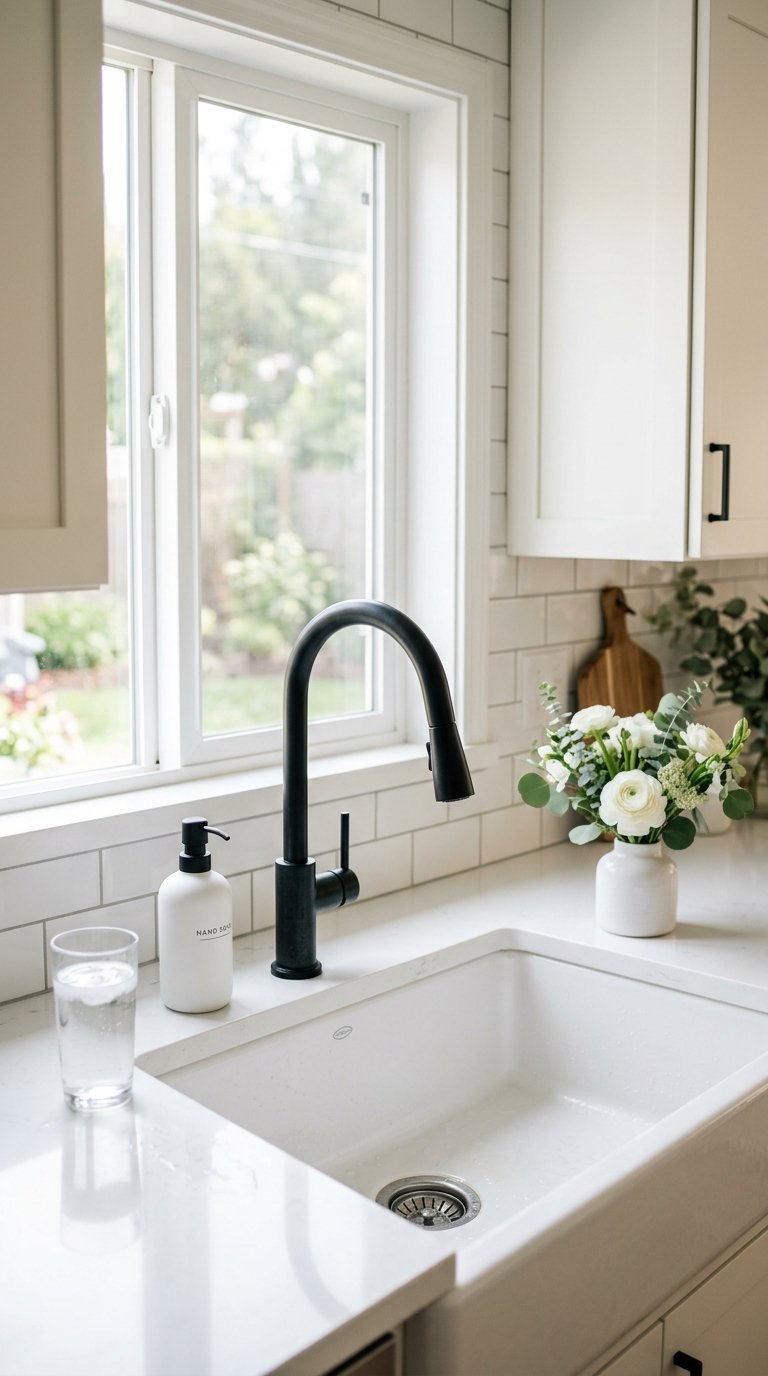
A matte black kitchen faucet on a white or light countertop creates the strongest single-fixture contrast point in a kitchen at the lowest cost relative to visual impact. The black fixture draws the eye to the sink zone and prevents the countertop from reading as a flat, undifferentiated surface.
Moen’s Align matte black pull-down faucet costs $280 at Home Depot and delivers commercial-grade water pressure with a minimalist silhouette. Kohler’s Artifacts matte black faucet at $340 suits a more traditional kitchen with its curved spout and cross handles. Either option costs less than one cabinet door replacement and delivers a more immediate visual result than any other single fixture swap in a kitchen.
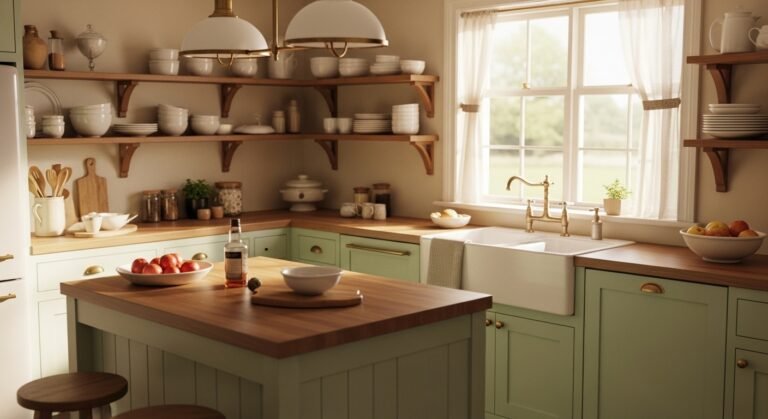
9. Sage Green Cabinets With Warm White Walls
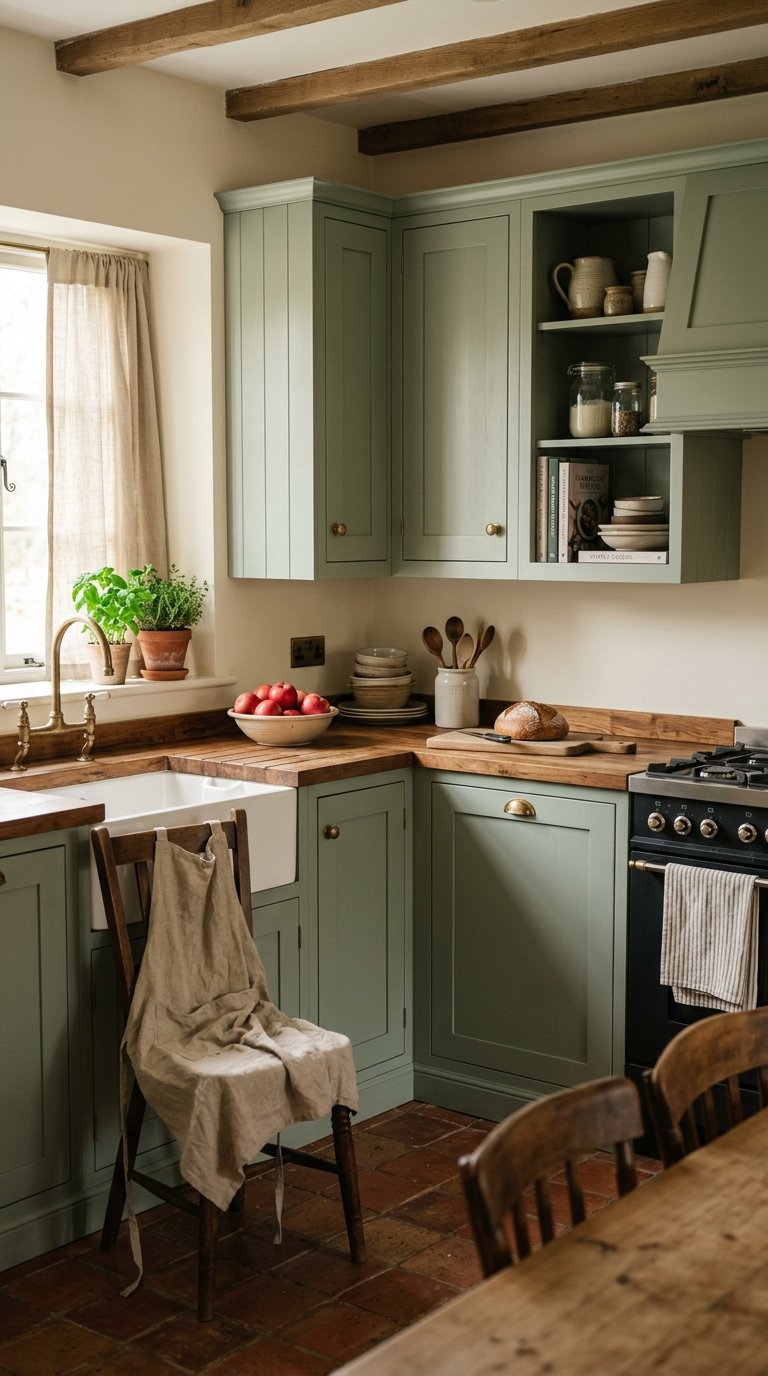
Sage green kitchen cabinets against warm white walls create the most balanced color combination in current kitchen design because the muted earthy green neither dominates the room nor disappears into it. The combination works across farmhouse, transitional, and modern kitchen styles without requiring a full design commitment to any single aesthetic.
Sherwin-Williams’ Pewter Green SW 6208 is the most widely used sage green for kitchen cabinets and costs $70 per gallon in Emerald Urethane enamel. Benjamin Moore’s Tranquil Green 458 reads slightly warmer and suits kitchens with more natural wood tones. Paint the walls in Benjamin Moore’s White Dove OC-17 for a warm white that prevents the green cabinets from looking cold or clinical.
10. Under-Cabinet LED Lighting Strip
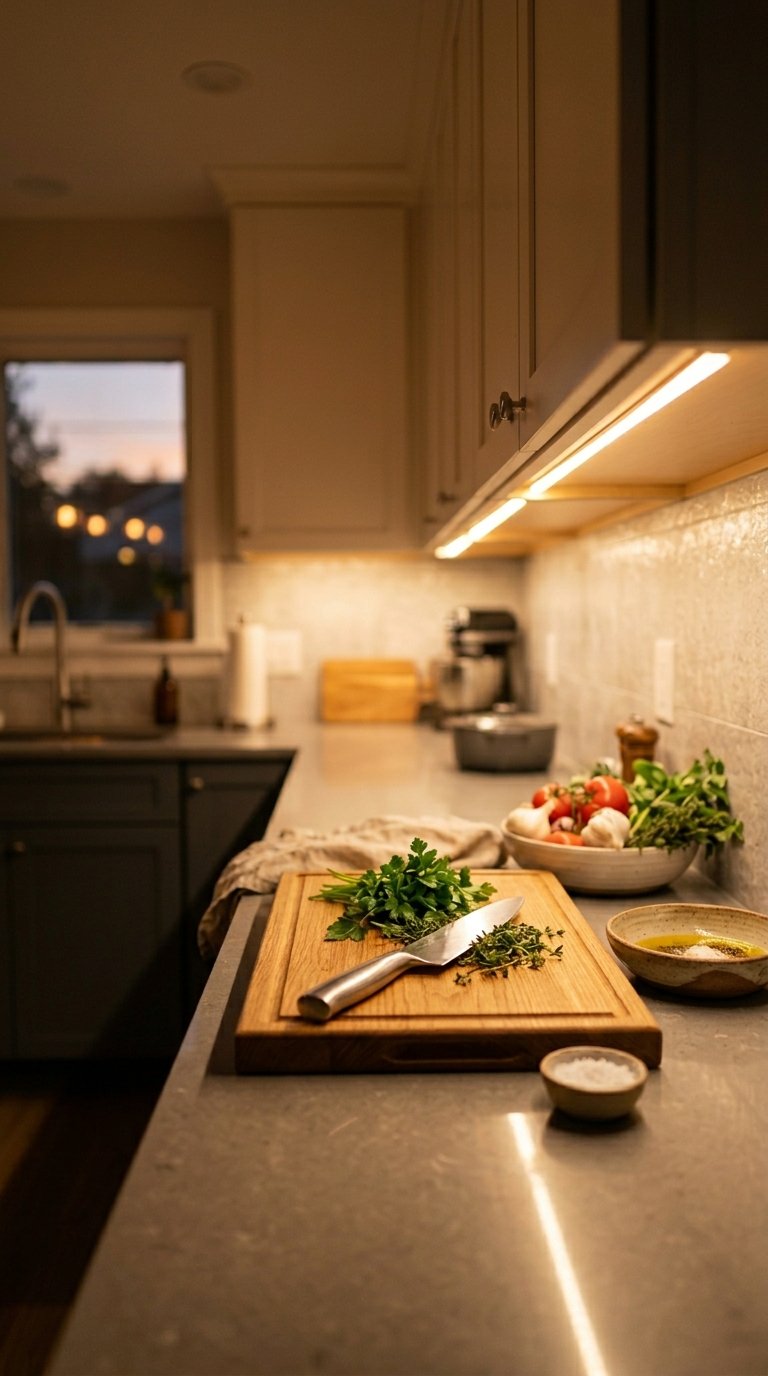
Under-cabinet LED lighting illuminates the countertop work surface and adds a layer of ambient light that overhead fixtures never reach. Kitchens without under-cabinet lighting have dark countertop shadows directly below the upper cabinets, which is where most food preparation happens.
Govee’s RGBIC LED strip lights cost $35 to $65 for a complete kitchen run and install with peel-and-stick adhesive in under an hour without an electrician. For a hardwired permanent solution, WAC Lighting’s InvisiLED strips cost $18 to $28 per linear foot installed. Set the color temperature to 2700K for warm white light that suits wood and stone countertops, or 3000K for a brighter, cleaner light that suits white and gray surfaces.
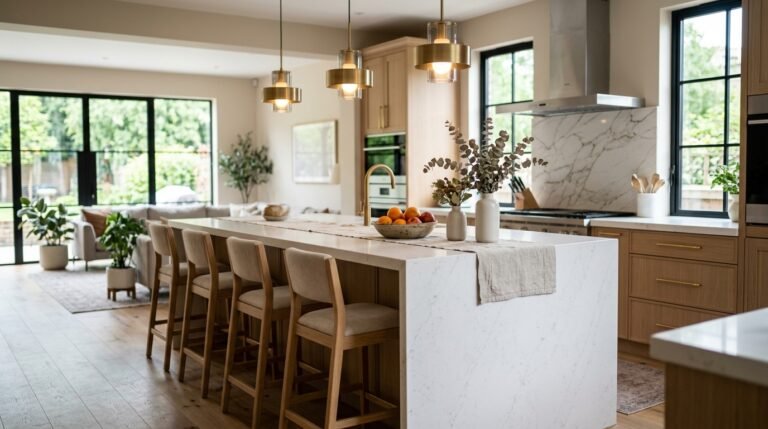
11. Kitchen Island With a Contrasting Color and Seating Overhang
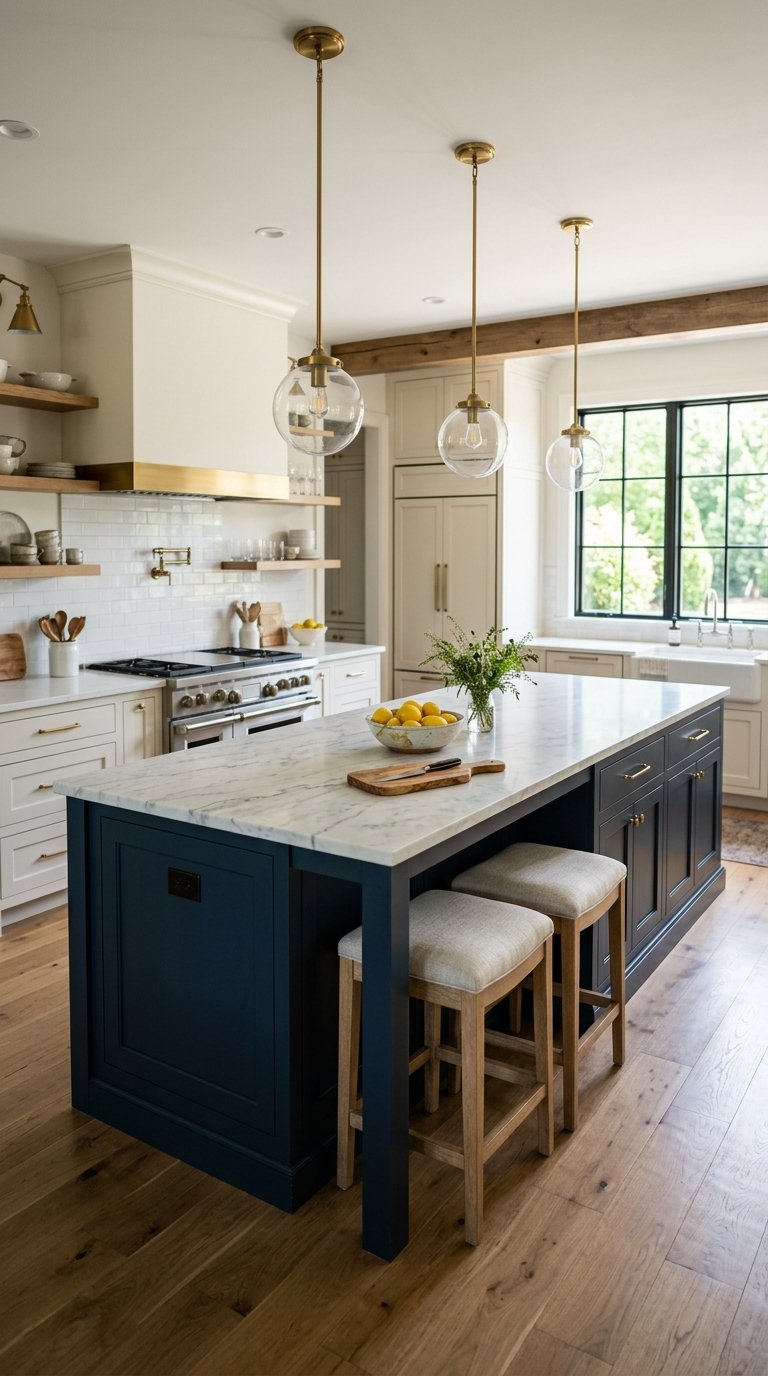
A kitchen island in a contrasting color to the perimeter cabinets with a seating overhang on one side creates a natural gathering point that a plain island never achieves. The color contrast signals that the island is a separate piece of furniture, and the seating overhang invites people to sit rather than stand around it.
The seating overhang needs a minimum 12-inch depth and 15 inches of knee clearance below the countertop surface for comfortable seating. A 15-inch overhang on a 36-inch countertop requires corbel support brackets from Osborne Wood Products at $25 to $40 each to prevent countertop flex. Paint the island in Benjamin Moore’s Newburyport Blue HC-157 or Knoll Green HC-131 for a contrast that reads as deliberate against white or cream perimeter cabinets.
12. Shaker Cabinets Painted in a Dark Tone
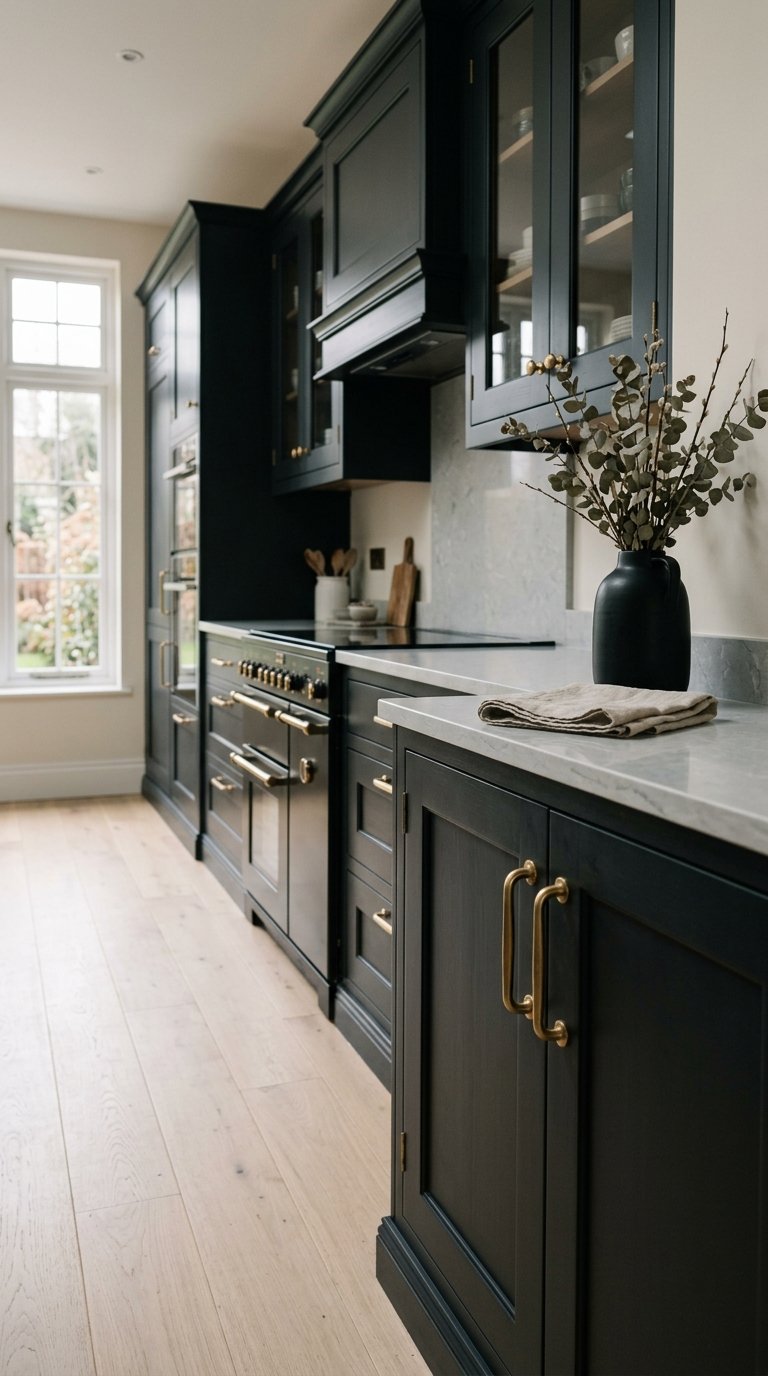
Shaker cabinets in a dark paint color, deep charcoal, navy, forest green, or black, deliver a high-contrast kitchen with a serious, considered aesthetic that white and light gray kitchens never achieve. The dark tone makes the cabinet frames read as furniture rather than fitted joinery.
Benjamin Moore’s Onyx 2133-10 on shaker cabinets creates a warm black that photographs better in natural light than a cool true black. Farrow and Ball’s Railings No.31 delivers a dark navy-black tone that suits both traditional and contemporary kitchens equally well. Apply two coats of Benjamin Moore’s Advance alkyd paint with a fine-nap roller for a smooth, hard-wearing finish that resists kitchen grease and moisture.
13. Floating Kitchen Shelves in a Warm Wood Tone
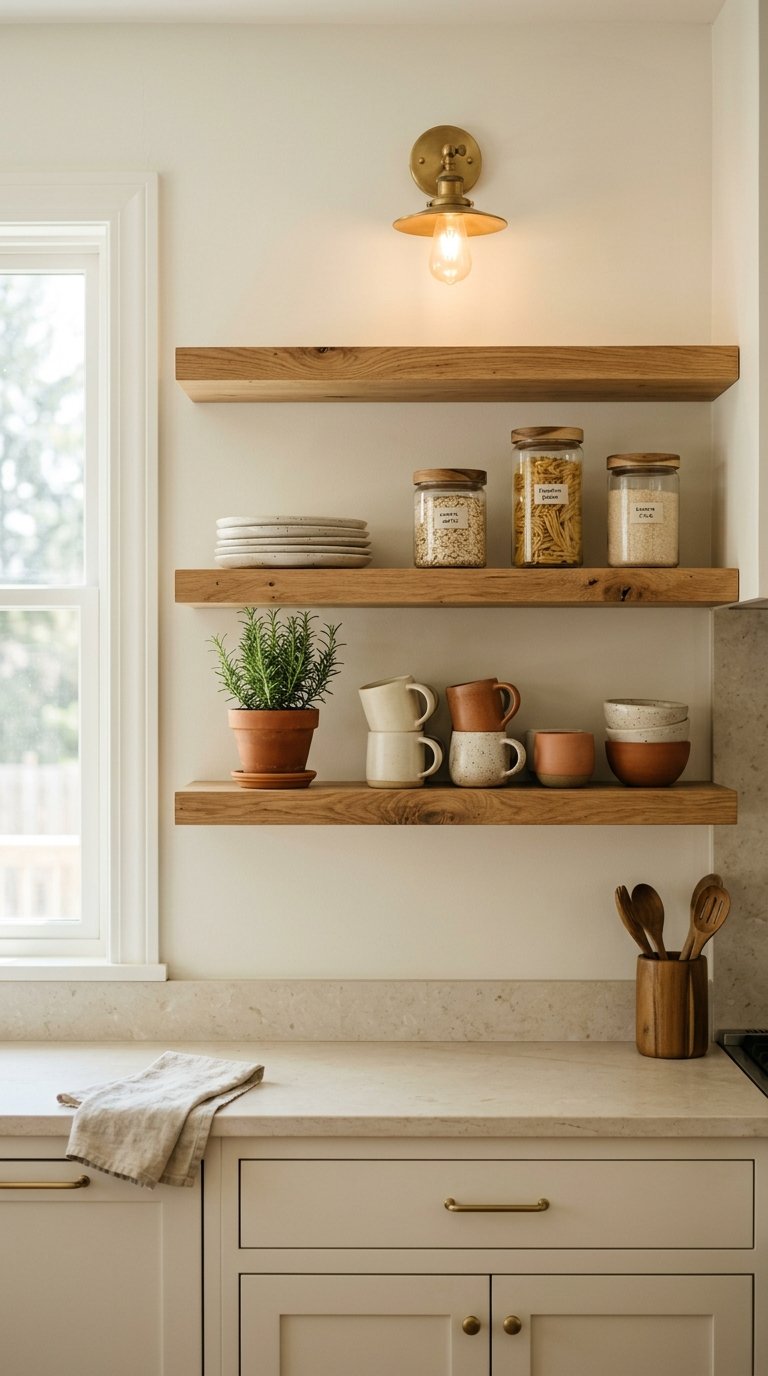
Floating kitchen shelves in a warm walnut or white oak tone add natural material contrast to an all-painted kitchen in a way no cabinet material replicates. The wood grain introduces warmth, organic variation, and material depth that painted surfaces lack entirely.
Shelf Express makes custom white oak floating shelves to any length and depth for $60 to $120 per shelf. Mount them on Kona Shelf floating shelf hardware at $18 to $25 per bracket pair, which hides the bracket inside the shelf for a clean cantilevered appearance. Style the shelves with a deliberate mix of functional items and ceramics rather than purely decorative objects to prevent the shelves from reading as impractical in a working kitchen.
14. Concrete or Stone Countertops in a Honed Finish
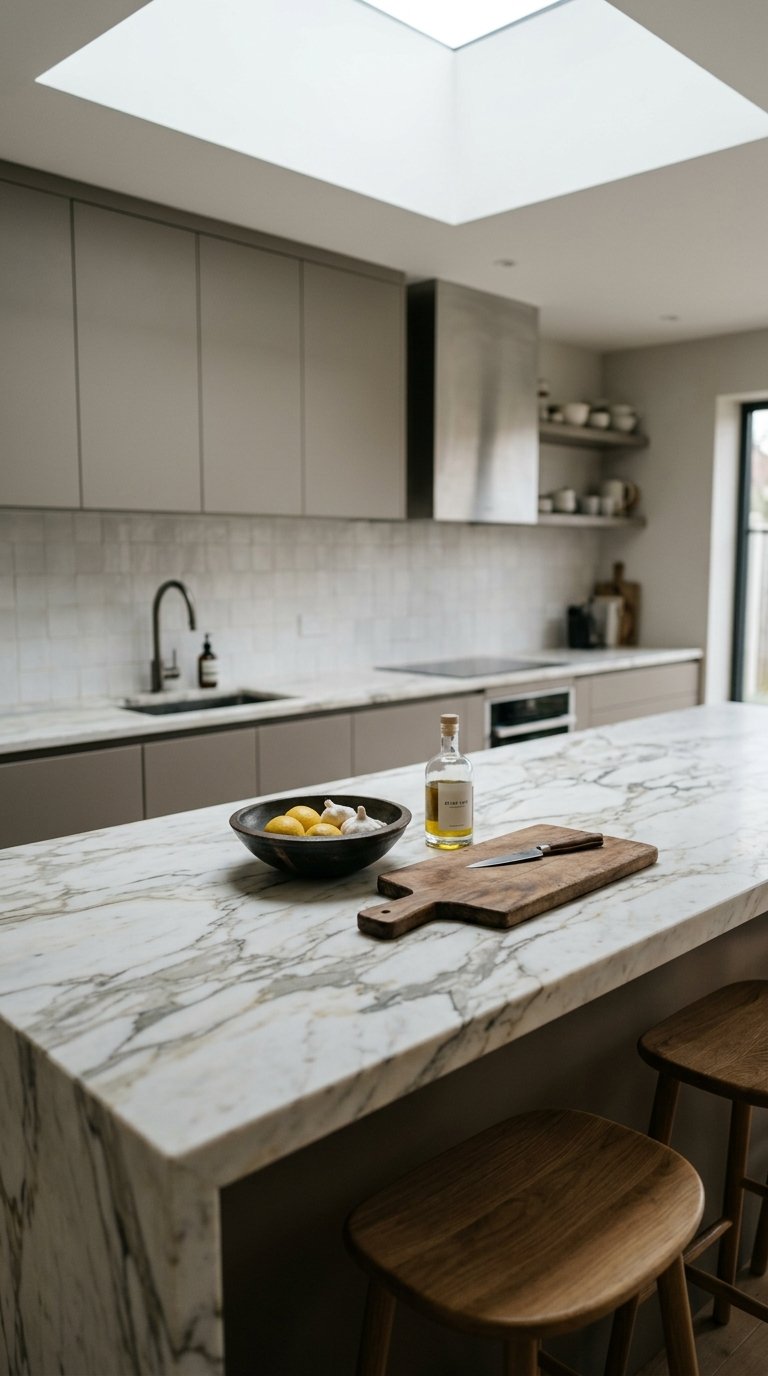
Honed concrete or natural stone countertops deliver a matte, non-reflective surface that hides daily wear better than polished surfaces and reads as more casual and approachable in a kitchen used for serious cooking. A polished countertop shows every water spot and fingerprint. A honed surface absorbs those marks visually without showing them.
Honed Calacatta marble from Stone Center Online costs $80 to $140 per square foot installed. Honed concrete from a local fabricator runs $65 to $135 per square foot installed. Seal either surface with a penetrating impregnating sealer from Miracle Sealants Company before use and reapply annually in a kitchen that sees daily cooking.
15. Apron Front Sink in Fireclay White
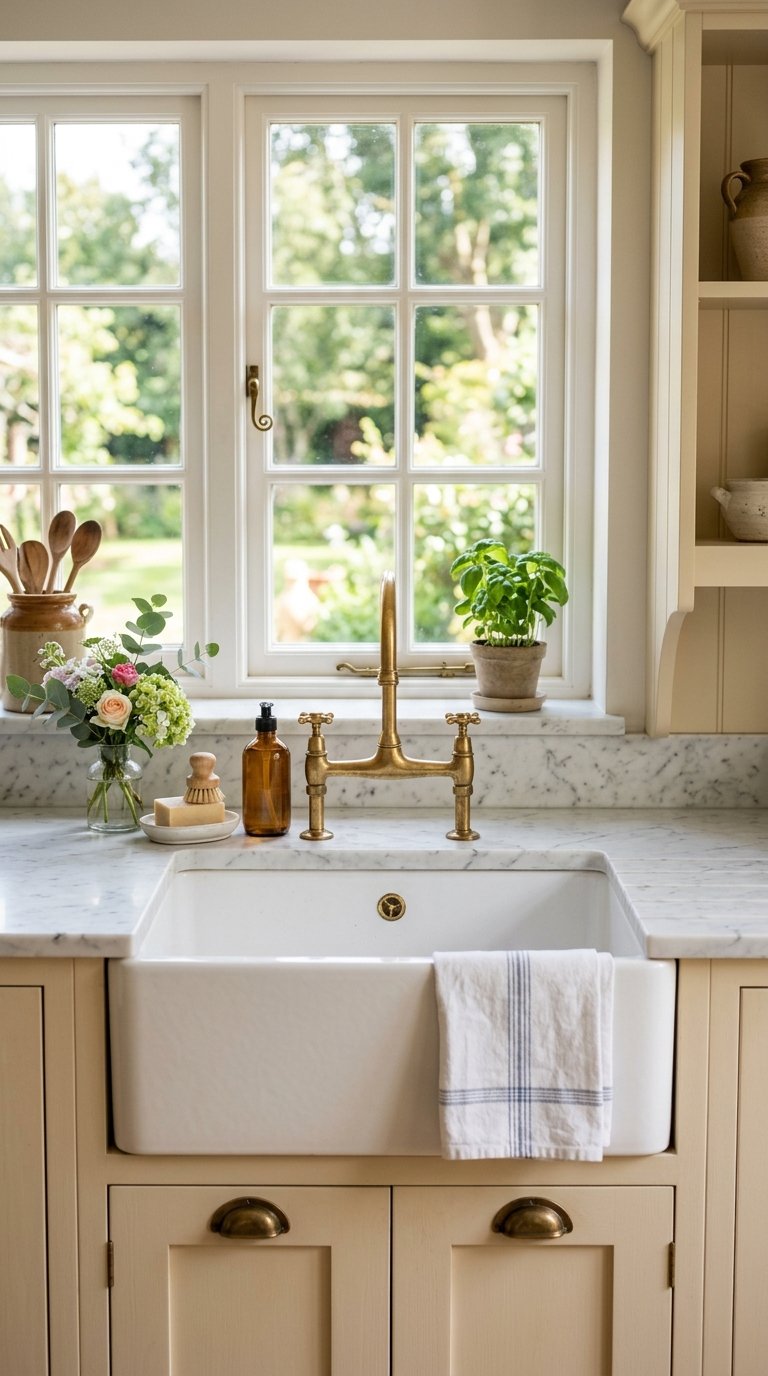
An apron front fireclay sink is the single fixture upgrade that changes the character of a kitchen more than any other element at a comparable price point. The exposed front face of the sink adds an architectural detail to the cabinet run that a drop-in or undermount sink never provides.
Kraus’s Turino 33-inch fireclay farmhouse sink costs $500 to $700 and fits a standard 36-inch base cabinet with minor modification to the cabinet face frame. KOHLER’s Whitehaven apron front sink at $900 to $1,200 delivers a deeper basin and a more refined silhouette for a higher-end kitchen. Pair either option with an unlacquered brass or matte black faucet to complete the contrast at the sink zone.
16. Vertical Shiplap or Paneling on the Kitchen Island Base
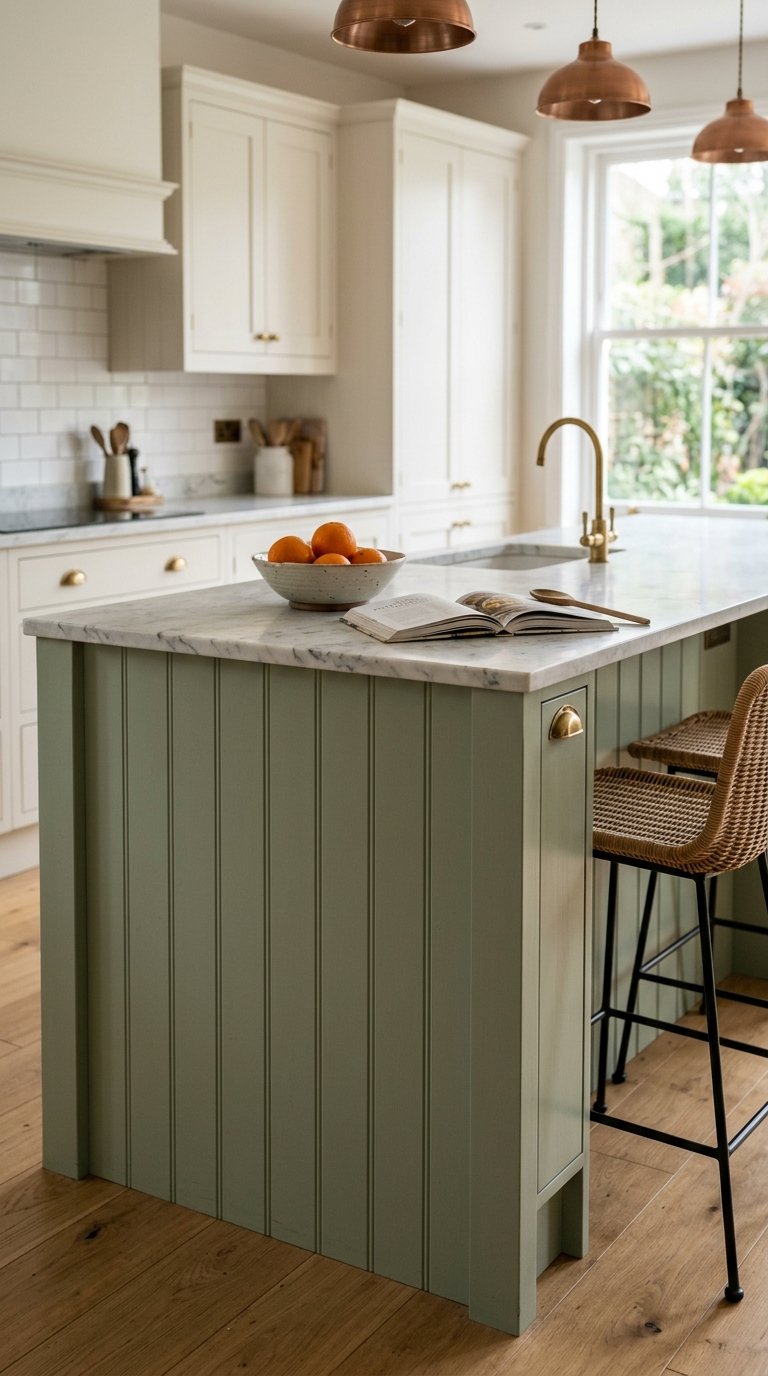
Vertical shiplap or raised panel detail on the kitchen island base transforms a plain cabinet box into a piece of furniture with architectural character. Horizontal shiplap on an island reads as farmhouse. Vertical paneling reads as more formal and suits transitional and traditional kitchens.
Primed MDF bead board from Home Depot costs $1.20 to $1.80 per linear foot and applies directly to an existing island base with construction adhesive and finish nails. A full island base treatment in vertical paneling uses roughly 50 linear feet of board, putting the material cost under $90. Paint in Benjamin Moore’s Advance in the same tone as the island base for a seamless result.
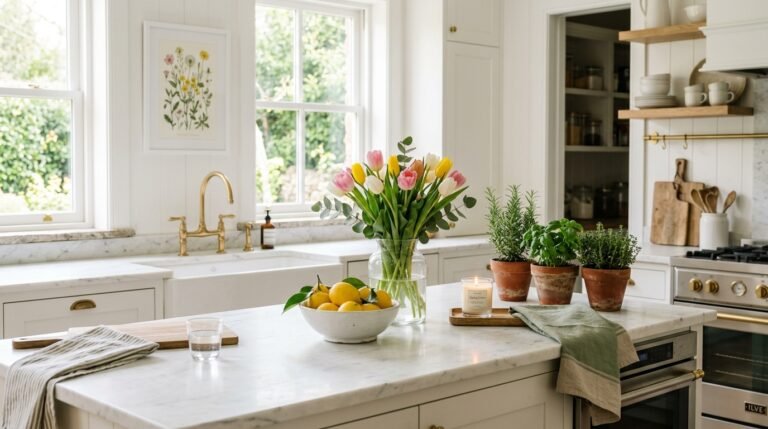
17. Kitchen Window Extended to the Countertop Level
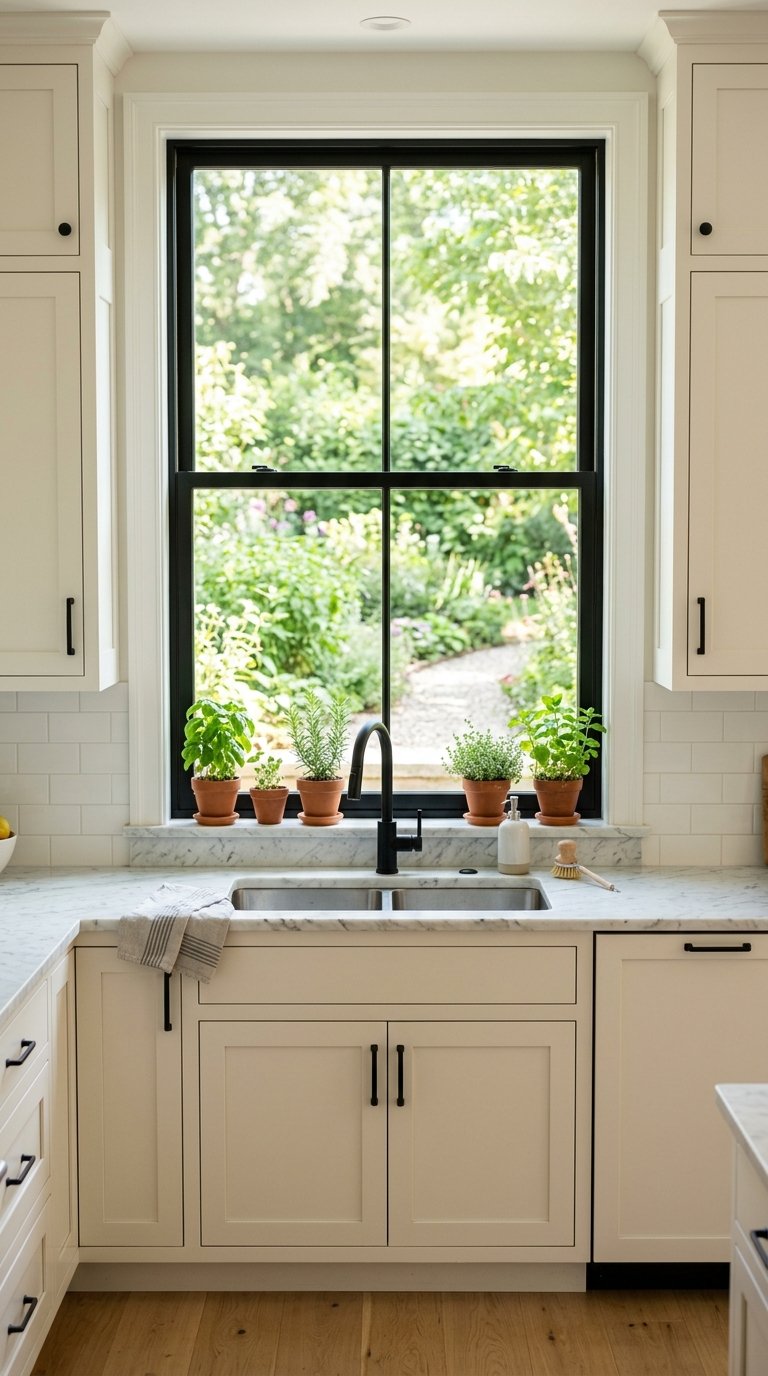
Extending a kitchen window down to the countertop level or replacing a standard window with a wider one directly above the sink creates a natural light zone that changes the entire character of the room. Kitchens with a window at countertop level feel connected to the exterior in a way no interior lighting replicates.
A standard window enlargement by a general contractor costs $800 to $2,500 depending on structural involvement. If the window sits in a non-load-bearing wall, the cost stays at the lower end and involves only framing, new trim, and a replacement window unit. Install a Marvin Elevate double-hung window in a wider size starting at $600 for the unit alone for a clean, durable result.
18. Open Kitchen Layout With a Peninsula Instead of a Full Island
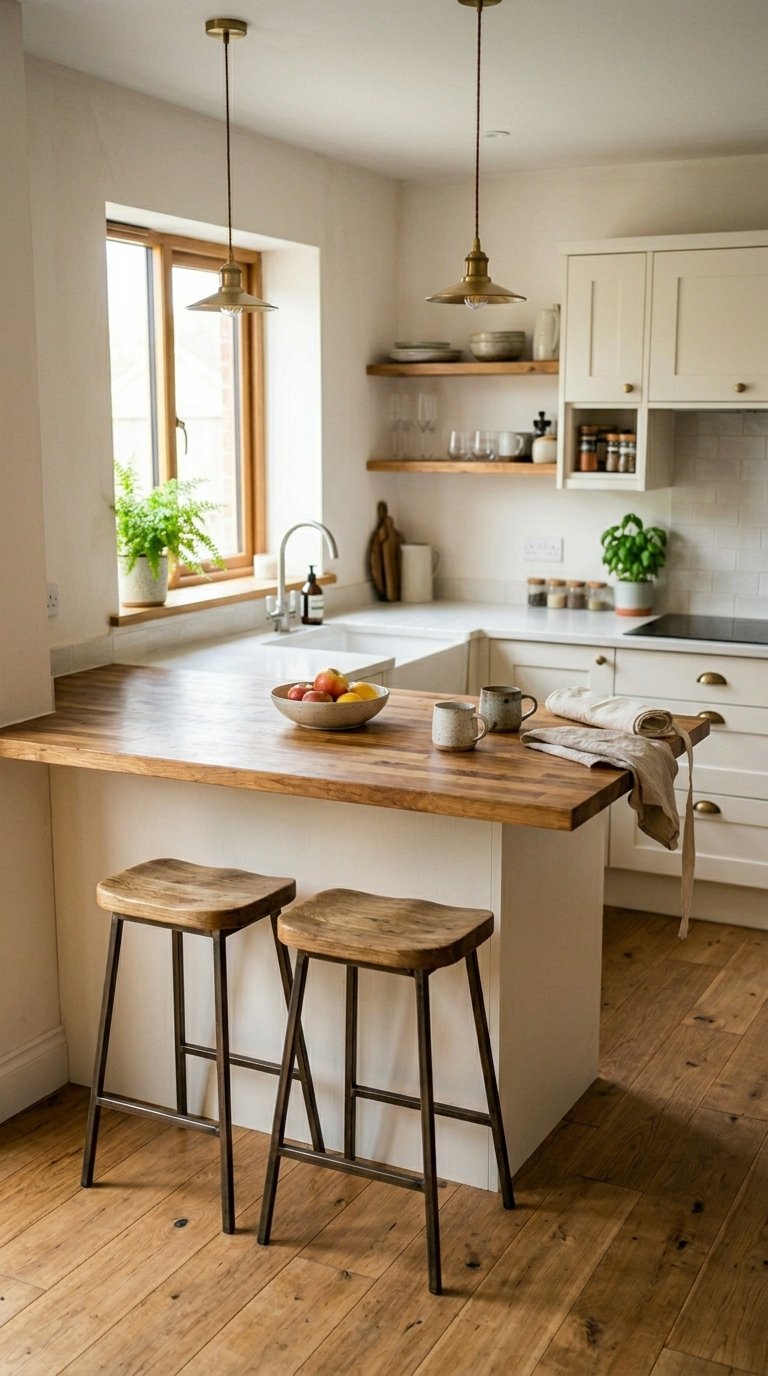
A peninsula attached to a wall or cabinet run on one end gives a small or medium kitchen the benefits of an island, prep surface, seating, and storage, without requiring the floor clearance that a freestanding island demands. The National Kitchen and Bath Association recommends a minimum 42-inch clearance on all working sides of a kitchen island. A peninsula only requires that clearance on three sides instead of four.
Build a peninsula using stock cabinets from IKEA’s SEKTION line starting at $150 for a base cabinet unit. Top it with a butcher block from IKEA’s SKOGSTA line at $229 for a 74×36-inch surface. The total peninsula build costs $400 to $900 depending on the number of cabinet units and the countertop material chosen.
19. Patterned Tile Floor as the Kitchen’s Design Statement
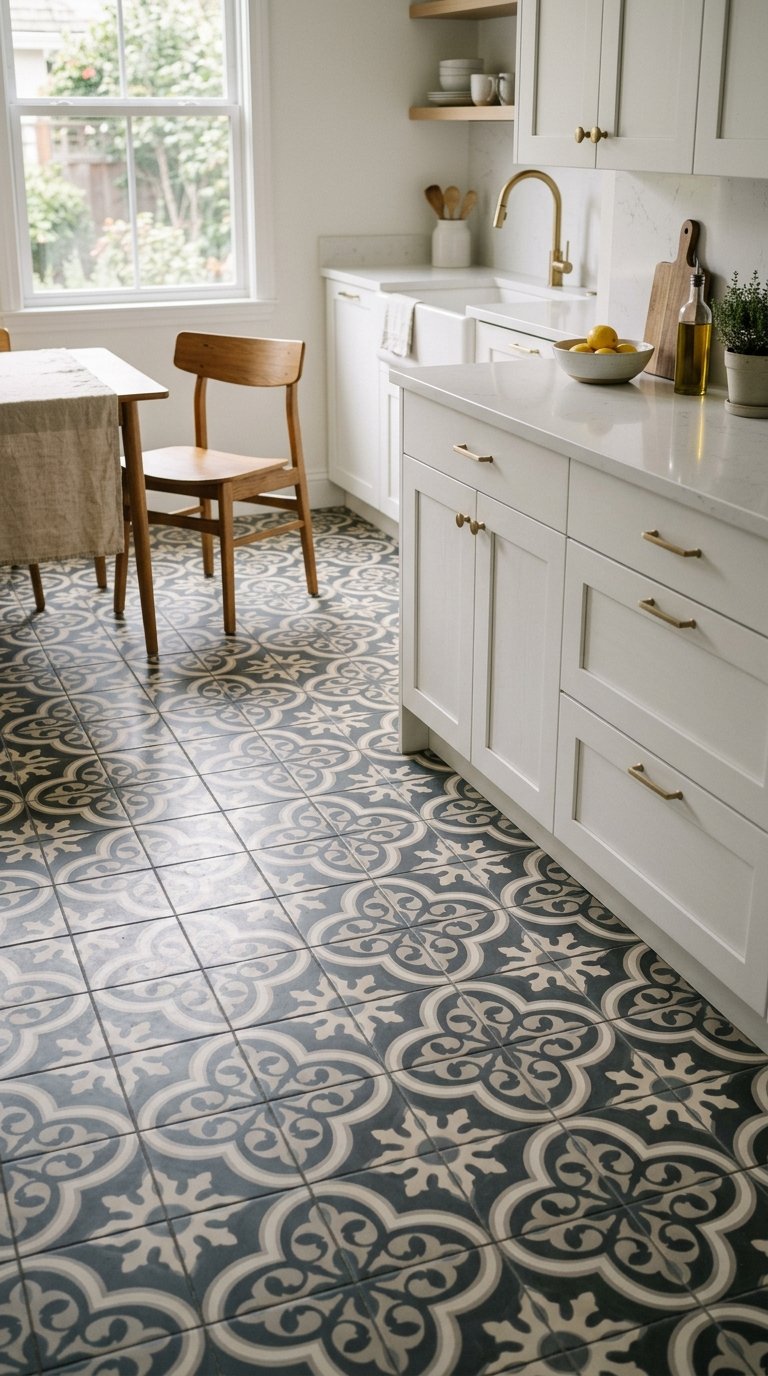
A patterned tile floor in a kitchen that uses neutral cabinets and countertops creates a design statement at the lowest possible surface, which grounds the room without overwhelming it from eye level. IMO, a bold floor in a neutral kitchen outperforms a bold backsplash in a neutral kitchen every time because the floor covers more visual territory.
Encaustic cement tile in a geometric pattern from Cement Tile Shop costs $12 to $18 per square foot. A 120-square-foot kitchen floor runs $1,440 to $2,160 in tile materials. Use it under white or cream cabinets with a simple white countertop to let the floor carry the full design weight of the room without competition from other surfaces.
20. Mixed Metal Hardware and Fixtures
Mixing two metal finishes in a kitchen, such as matte black hardware with unlacquered brass faucet, or brushed nickel pulls with a copper range hood, creates a layered, collected look that a single-metal kitchen never achieves. The key is limiting the mix to two metals maximum and distributing them evenly rather than concentrating one metal in a single zone.
Use the dominant metal on cabinet hardware, which appears most frequently, and the secondary metal on fixtures such as faucets, light switches, and pendant lights. Schoolhouse Electric sells both matte black and unlacquered brass pendant lights starting at $120 each for a coordinated mixed-metal lighting solution. The mixed metal approach reads as intentional when the two metals appear in roughly equal visual weight across the room.
21. Kitchen Banquette Seating Built Into a Corner
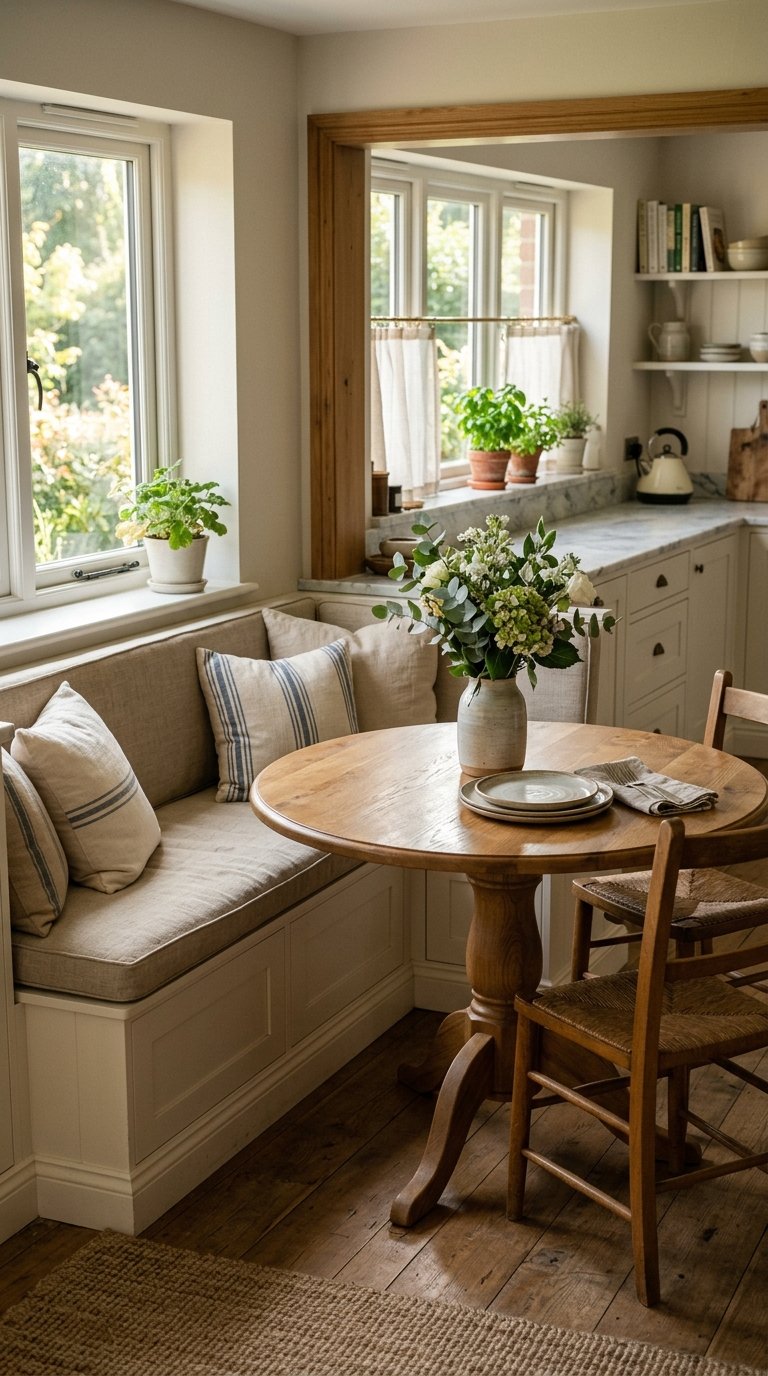
A built-in banquette in a kitchen corner creates a dining zone with more seating capacity per square foot than any freestanding table and chair combination. A corner banquette measuring 6×6 feet seats six to eight people comfortably in a footprint that a standard four-person table and four chairs requires at minimum.
Build the banquette frame from 3/4-inch plywood with a hinged seat lid for storage inside the base at a material cost of $150 to $300. Add a custom foam seat cushion from FoamByMail at $60 to $120 depending on size. Upholster in a Sunbrella indoor-outdoor fabric at $20 to $35 per yard for a surface that resists kitchen spills and wipes clean with a damp cloth.
22. Kitchen Ceiling Painted in a Contrasting Color
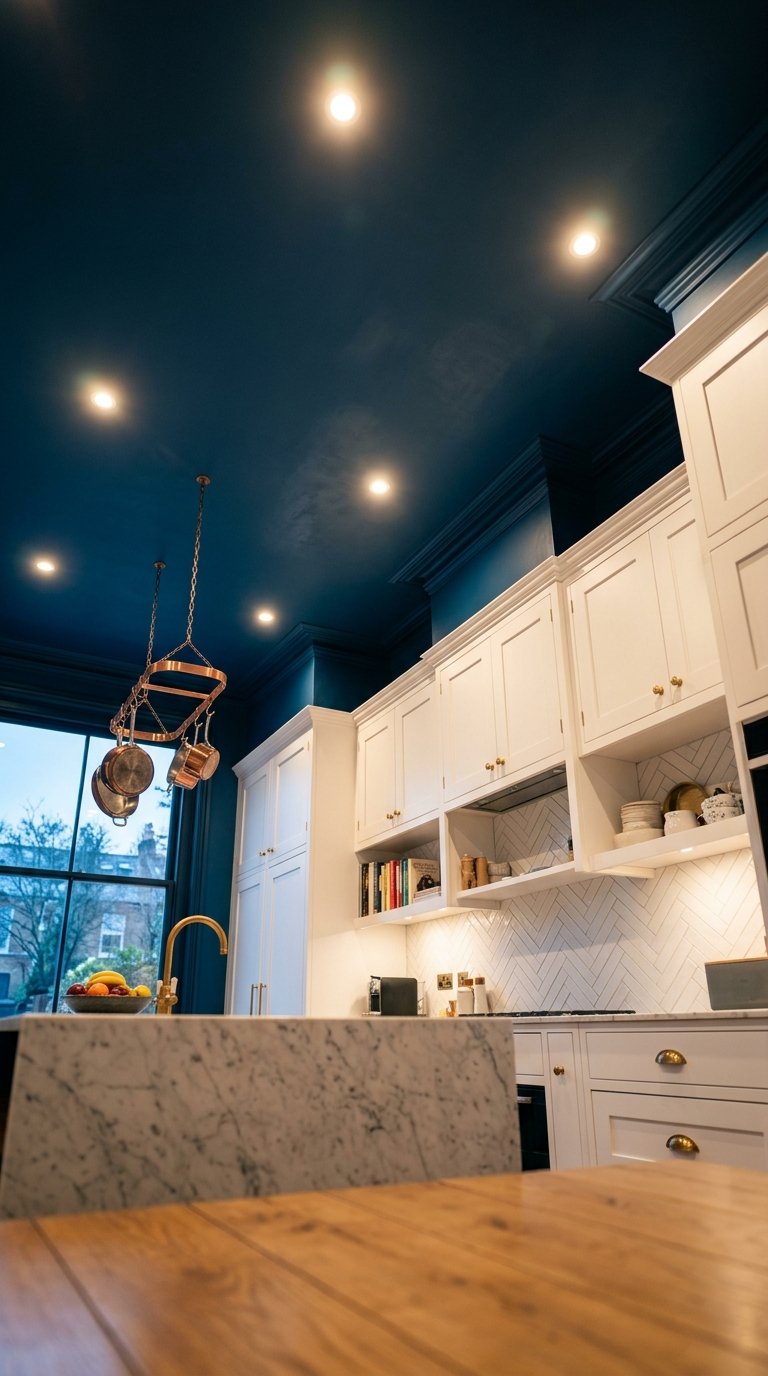
Painting the kitchen ceiling in a color other than white pulls the room together as a designed space and prevents the ceiling from reading as an unfinished afterthought. A ceiling painted in the same color as the lower cabinets creates an enveloping, immersive effect that feels intentional rather than accidental.
Paint the ceiling in Farrow and Ball’s Hague Blue No.30 above a kitchen with white cabinets and warm wood floors for a bold, considered result. Alternatively, paint it in a tinted ceiling paint two shades lighter than the wall color for a subtle tonal variation that adds depth without drama. Benjamin Moore’s Waterborne Ceiling Paint in a custom tint costs $55 per gallon and covers a standard kitchen ceiling in one coat.
23. Task Lighting, Ambient Lighting, and Accent Lighting in Three Separate Layers
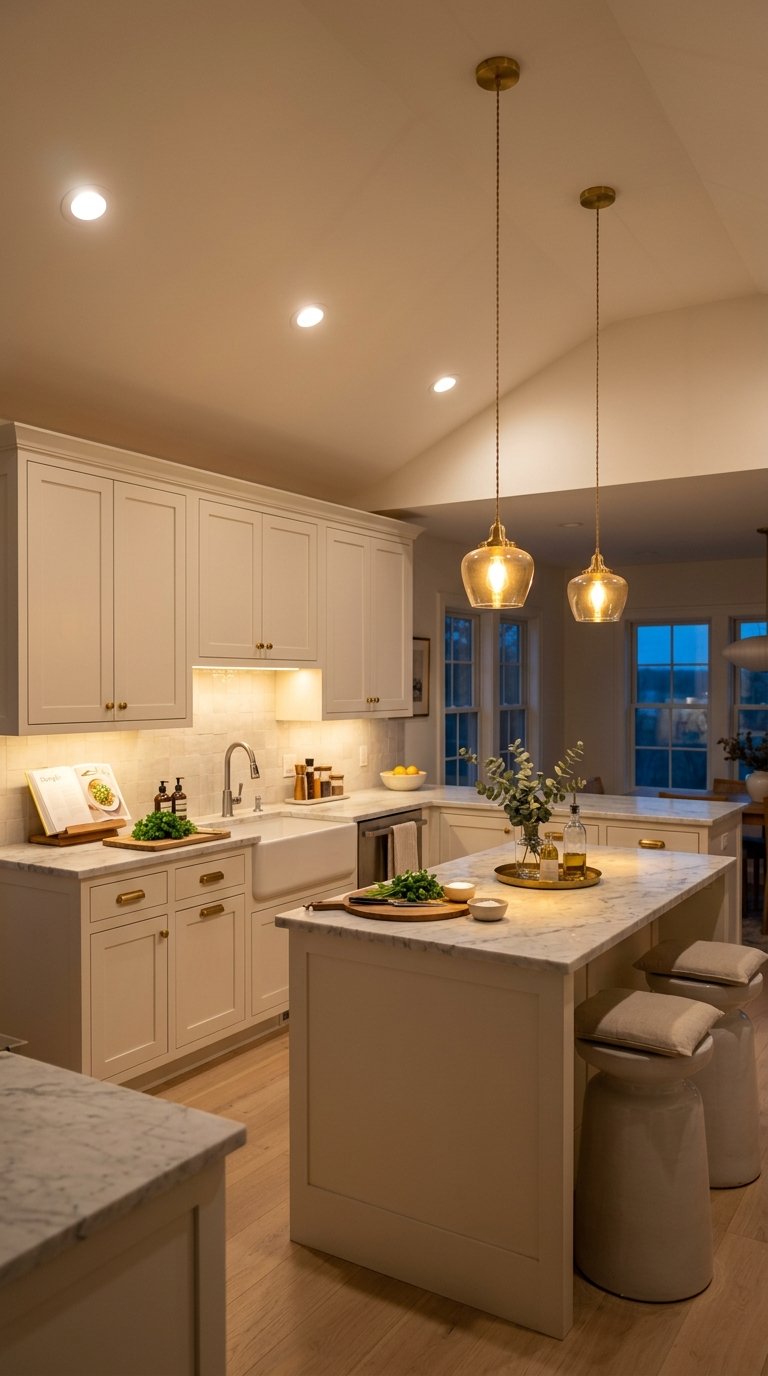
A kitchen with three distinct lighting layers, task, ambient, and accent, performs better as a functional and atmospheric space than a kitchen lit by a single overhead fixture. Task lighting illuminates the work surface. Ambient lighting fills the room. Accent lighting highlights architectural details and creates evening atmosphere.
Install recessed 4-inch LED downlights on a dimmer for ambient lighting at $8 to $15 per fixture from Halo or Cree. Add under-cabinet LED strips for task lighting at $35 to $65 for the full run. Finish with a statement pendant over the island from Visual Comfort at $200 to $400 for the accent layer. The three-layer system costs $300 to $600 in materials and transforms how the kitchen reads at every time of day and every level of activity.
Final Thoughts
Your kitchen design problem is almost always a decision problem, not a budget problem. Most kitchens fail visually because no single element was chosen to do the heavy lifting. The 23 ideas above each solve a specific visual or functional weakness, from a dark ceiling that makes the room feel considered to a waterfall countertop that turns the island into the room’s anchor.
Pick the idea that fixes your kitchen’s most obvious weakness first. Fix one thing well, and the rest of the room follows. Every idea on this list includes a real product, a real price, and a real reason it works. You have everything you need to make the decision right now.