16 DIY Dorm Headboard Ideas That Look Expensive and Cost Under $60
Your Dorm Bed Deserves Better Than a Blank Wall
You walk into your dorm room for the first time and the wall behind your bed is bare, cold, and doing absolutely nothing for you. The standard dorm bed comes with a twin XL wooden frame, a mattress of questionable origin, and zero headboard. That blank wall is not just an aesthetic problem. It makes your bed feel unfinished, your pillows slide everywhere overnight, and your room looks like nobody actually lives there. A headboard fixes all three problems in one move.
The good news is that you do not need to spend $150 on a pre-made velvet headboard from a dorm retailer. Every idea in this list costs between $0 and $60, works with a twin XL bed frame, and attaches to your wall without drilling holes. Most dorms prohibit permanent wall fixtures, so every build here uses Command strips, foam adhesive, or a wedge-between-mattress-and-frame method that your RA cannot complain about. Pick one, build it over a weekend, and your bed becomes the focal point of the room it was always meant to be. 🙂
1. The Plywood and Fabric Upholstered Headboard
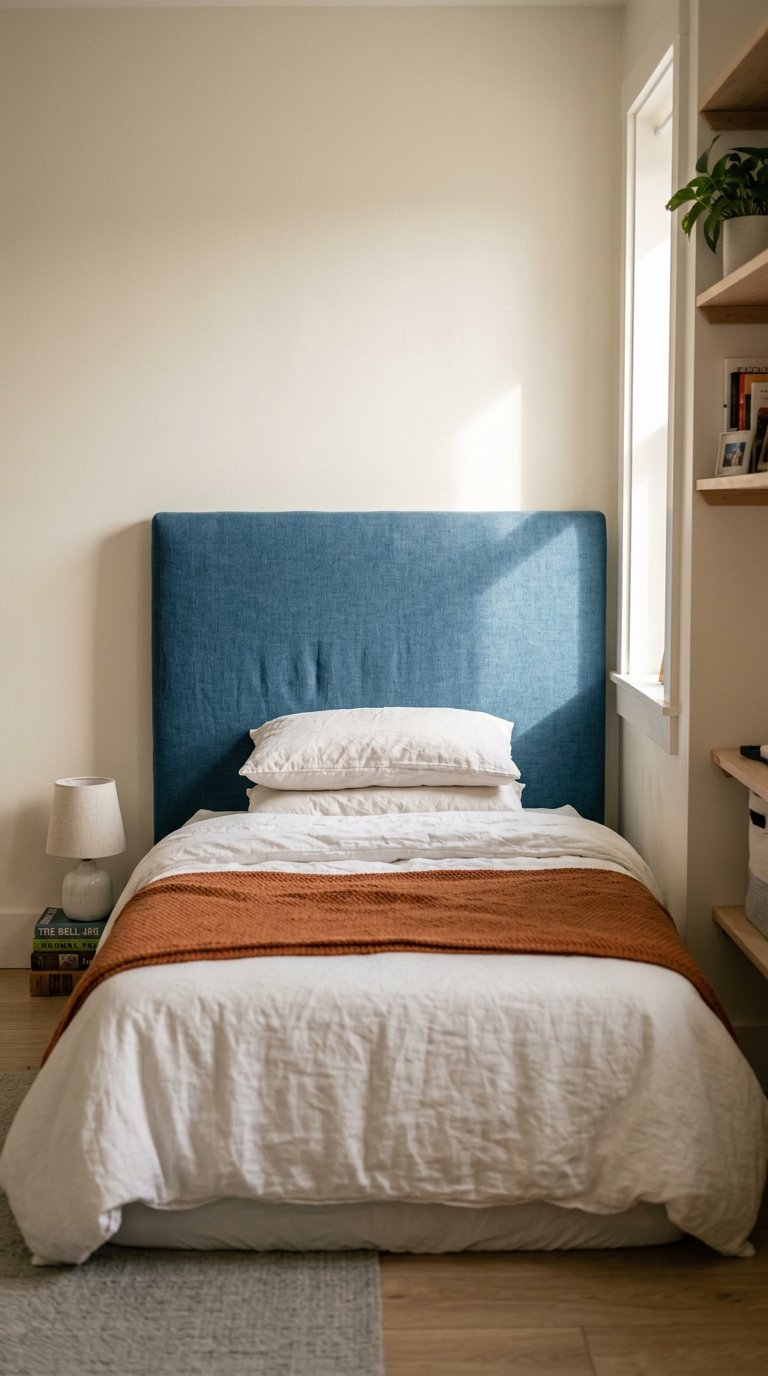
This is the most satisfying DIY on this list because the finished product looks like something you paid $200 for, and the total materials cost around $40 to $50. You need a 4×4 sheet of plywood cut to 33×40 inches at the hardware store (they do the cutting for free), upholstery foam, a double layer of batting, your chosen fabric, and a staple gun. Layer the foam, then the batting, then the fabric over the plywood and staple everything tight to the back. That is the entire build.
The key trick that makes this work in a dorm setting is sizing. Cut your headboard slightly taller than standard so it wedges snugly between the wall, the bed posts, and the mattress, requiring zero hardware or adhesive to stay in place. One parent who built this for her daughter’s freshman dorm reported it held firm through an entire academic year without shifting once. If you go with fabric, choose a solid color or a busy pattern over stripes. Stripes require precise alignment that first-time builders almost always get wrong.
2. The Pool Noodle Tufted Headboard
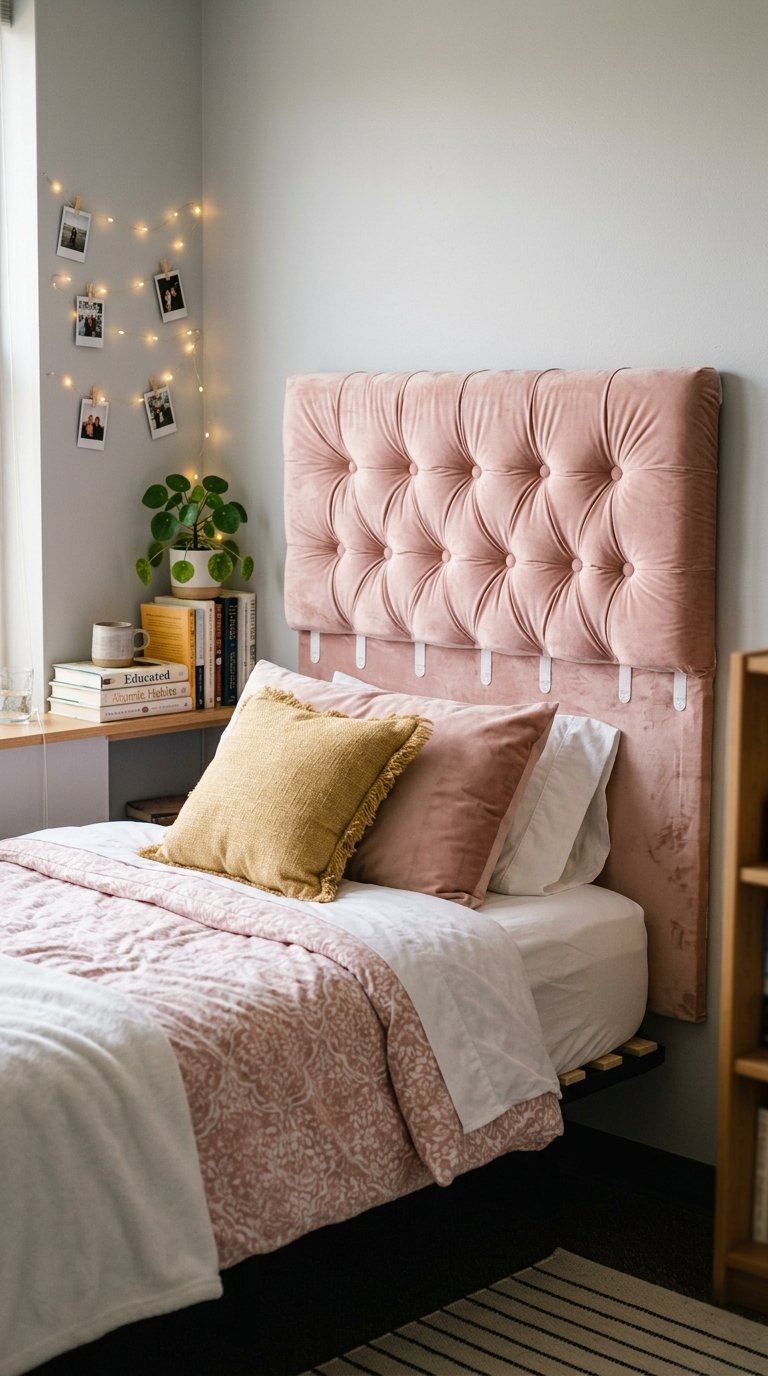
This one sounds ridiculous until you see the finished result, and then you wonder why you ever doubted it. A college student at SUNY Oneonta built a tufted headboard using pool noodles, a plywood board, a hot glue gun, and fabric, and completed the entire project for under $60. You slice each pool noodle in half lengthwise to create a flat surface, glue the flat sides onto the board in tight rows, drape fabric over the entire surface, and staple it to the back. The noodle rows create the raised tufted effect that normally costs hundreds of dollars on an upholstered headboard.
The build requires roughly 18 noodles for a twin headboard. Trim your fabric to 10 inches beyond each border of the board before you start stapling, or you will run short at the corners and have to start over. Attach the finished headboard to your wall using Command strips rated to the weight of your board, press firmly for 30 seconds, and the headboard stays put. Nobody will guess the secret material inside unless you tell them, and when you do, it becomes the most talked-about piece of furniture on your floor.
3. The Bench Cushion Headboard
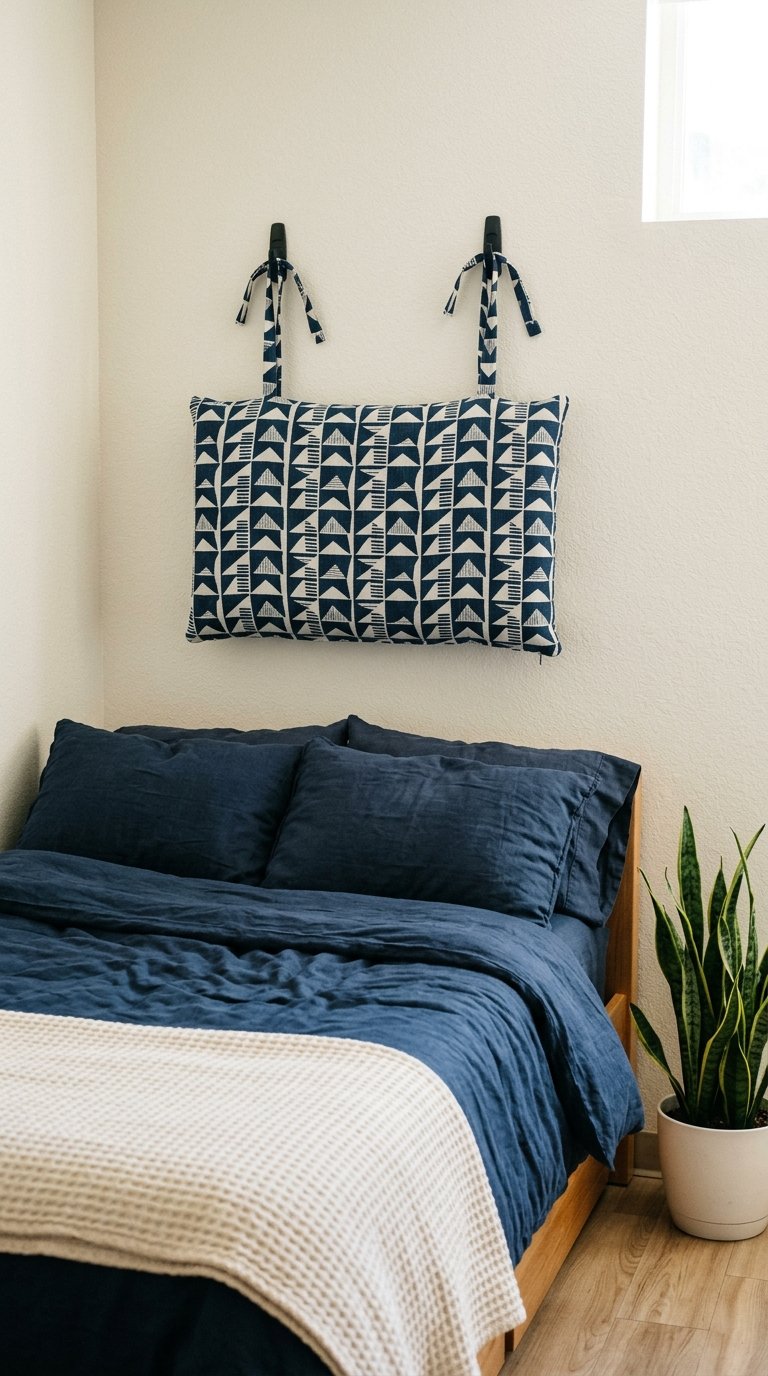
This build takes under 20 minutes and requires almost no tools. You buy an upholstered bench cushion, ideally one that already has fabric ties attached, and hang it from two Command hooks on the wall behind your bed. The cushion sits at the right height to function as a backrest when you sit up in bed, adds softness and color to the wall, and removes in seconds when you move out. If the cushion does not have ties, you sew or glue two short fabric loops to the back top edge before hanging.
The total cost runs between $20 and $45 depending on the cushion you choose. Bench cushions come in hundreds of fabric patterns from most home stores, so matching your bedding is straightforward. This is the single fastest headboard build on this list and the best option if you are moving into your dorm the same day you want the room to look finished. No staple gun, no plywood, no mess.
4. The Tapestry Headboard
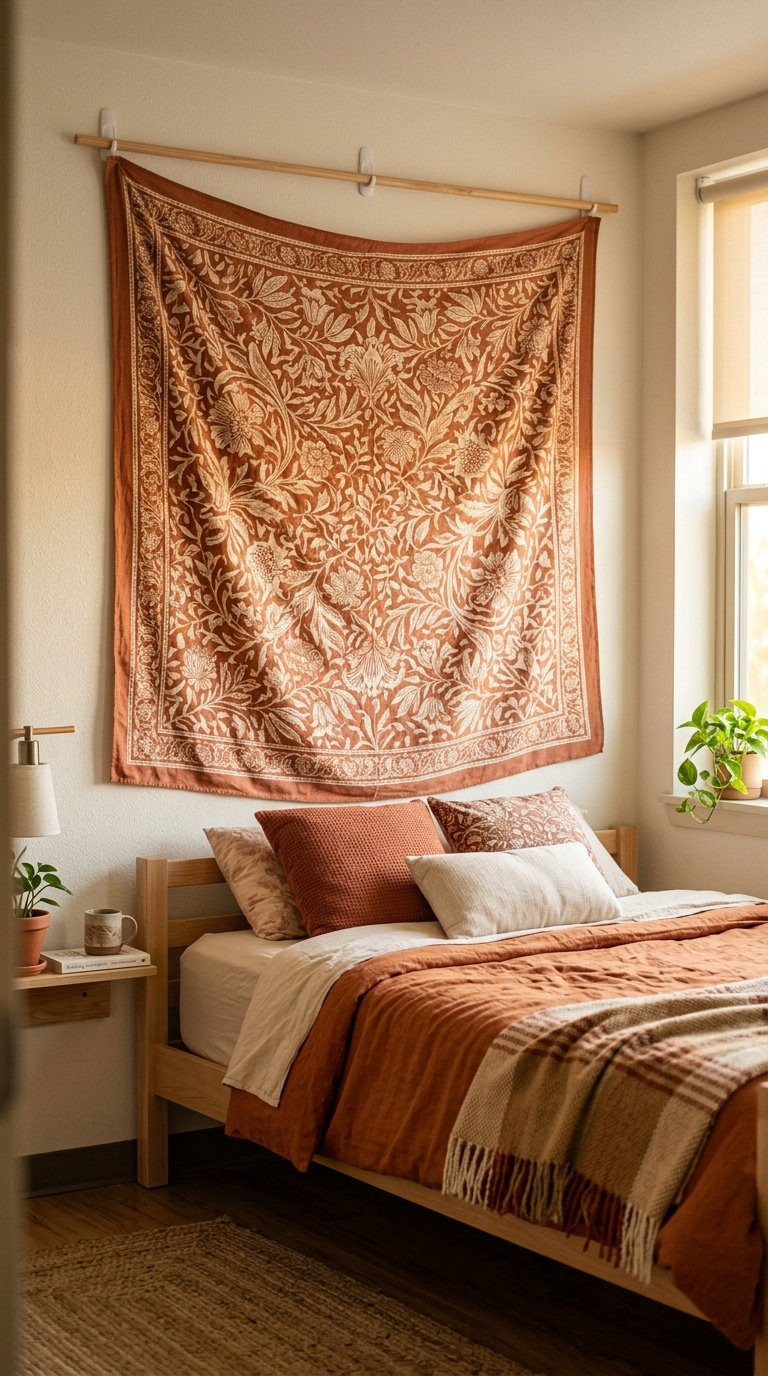
A fabric tapestry hung behind your bed functions as a headboard, an accent wall, and a statement piece in one. You attach it to the wall using Command strips or a tapestry display rod that hooks over the wall without drilling, and the visual effect is immediate. Tapestries for twin beds start at around $15 on most marketplaces, and the range of patterns covers everything from geometric prints to botanical designs to vintage maps.
The boho-chic aesthetic is a dominant dorm decor trend right now, and a woven or printed tapestry is the fastest way to achieve it without buying a single piece of furniture. If you want to go further, print a custom tapestry at a local copy shop using your own photography or artwork. A 40×60 inch print at most copy shops costs between $20 and $35 and gives you a headboard that nobody else in your building owns. Hang it with two large Command picture-hanging strips rated for 16 lbs and it stays secure all semester.
5. The Peel-and-Stick Wood Plank Headboard
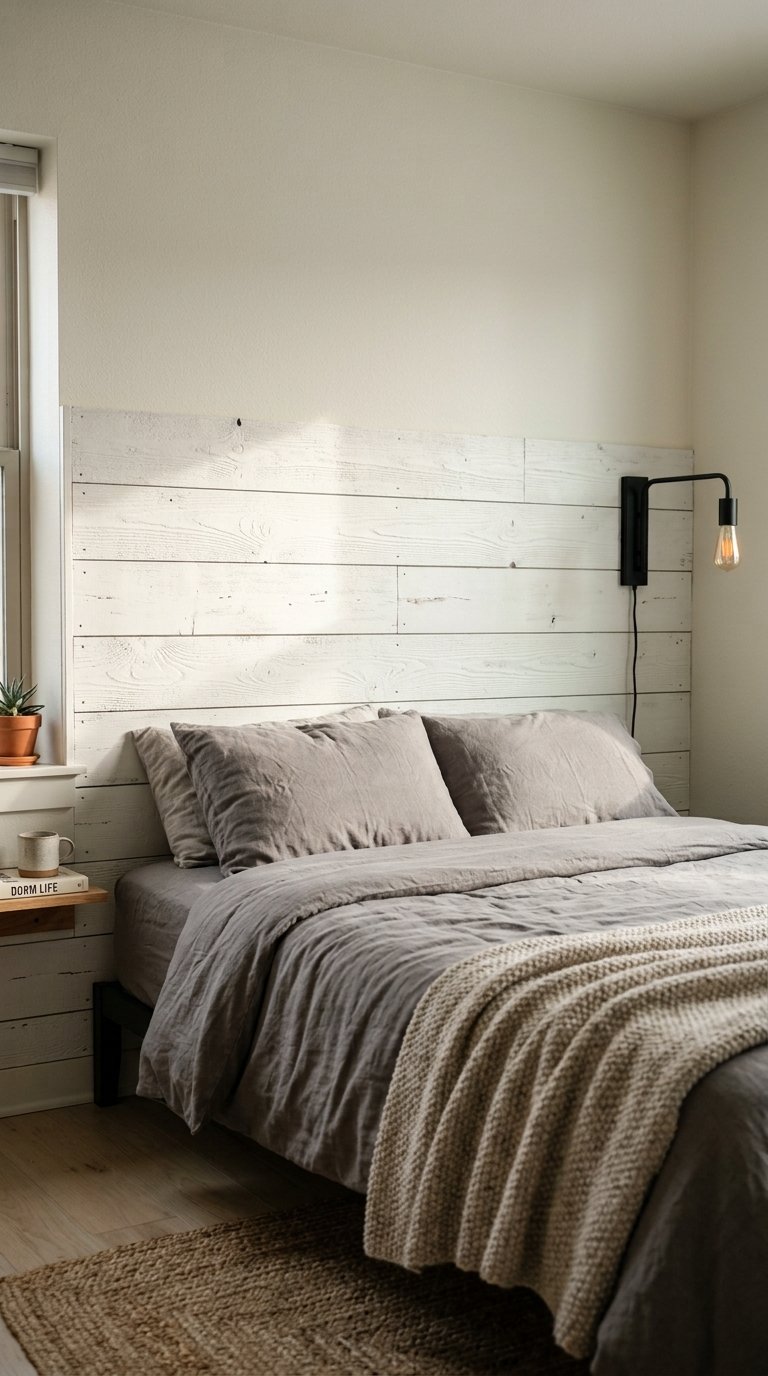
Peel-and-stick wood planks give you the look of a real shiplap accent wall behind your bed without a saw, screws, or any permanent installation. You cut the planks to size using a utility knife, peel the backing, and stick them directly to your wall in a horizontal pattern above your bed frame. White distressed planks create a farmhouse effect. Natural wood-tone planks create a warm, Scandinavian look. Either version transforms a blank dorm wall into a genuine design feature.
A standard twin XL headboard wall takes roughly 3 to 4 packs of planks, costing between $30 and $50 total. The planks remove cleanly at the end of the year without damaging the paint, which matters enormously in a dorm where wall damage deposits are real. This build takes about two hours from opening the box to finishing the last row, and the result photographs better than almost any other headboard idea on this list. If you post it on Pinterest or Instagram, expect questions about how you did it.
6. The Bookshelf Headboard
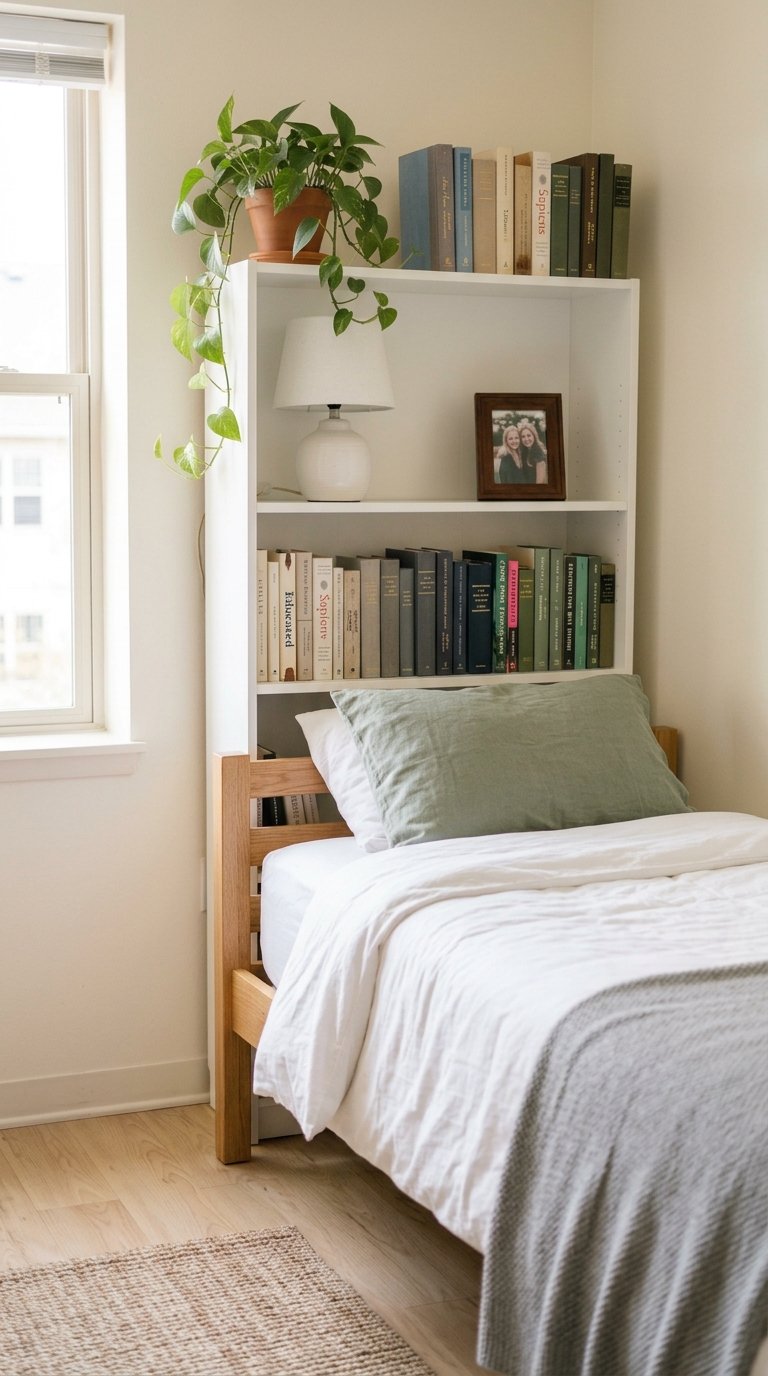
This idea requires zero building and zero wall installation. You position a bookcase or freestanding shelf unit directly behind your bed so it sits flush against the wall and your mattress pushes up against it. The shelf becomes your headboard, your bedside table, and your storage solution simultaneously. A narrow bookcase roughly 40 inches wide and 48 inches tall fits perfectly behind a twin XL bed and holds enough to clear a significant amount of floor clutter.
IKEA BILLY bookcases in the narrow 15.75-inch depth version cost around $69 and fit the footprint precisely. Fill the lower shelves with books, your phone charger, a lamp, and a small plant. Use the upper shelves for decorative objects and photos. The bookshelf headboard solves three dorm problems at once: the blank wall, the lack of bedside storage, and the absence of a real shelf unit in a room that has almost no furniture. IMO, this is the smartest functional build on the entire list.
7. The Fabric Panel Canvas Headboard
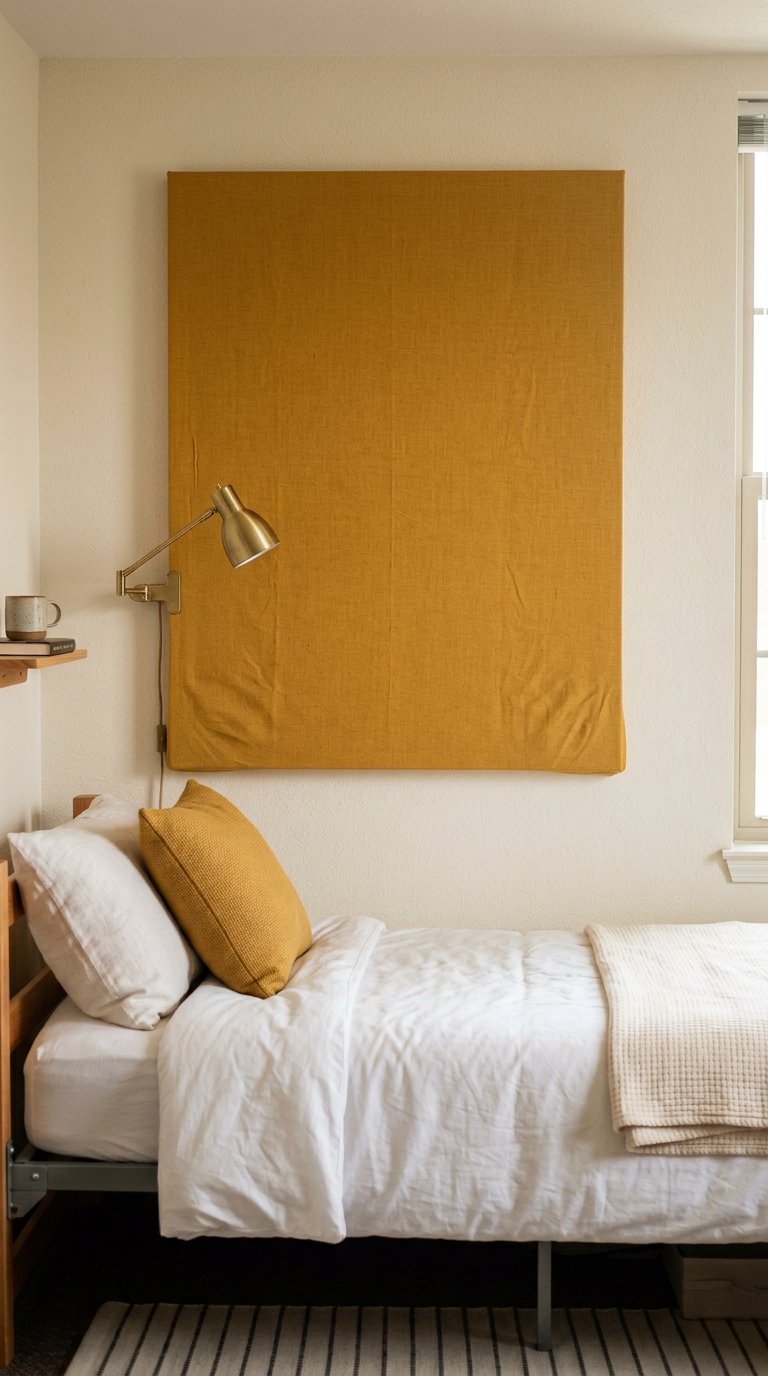
You stretch your chosen fabric tightly over a large artist canvas, staple or tape it to the back, and hang it on the wall behind your bed using Command picture-hanging strips. A canvas sized 36×48 inches covers the visual headboard zone perfectly for a twin XL bed. The fabric choice drives the entire look: a linen texture reads as minimal and calm, a bold geometric print reads as graphic and energetic, and a velvet-feel fabric reads as luxurious.
This build costs between $15 and $35 depending on the canvas size and fabric choice. Artist canvases in large sizes are available at most craft stores and frequently go on sale for 40 to 50 percent off. The build takes 30 minutes. If your style changes mid-semester, you remove the fabric, stretch a new piece over the same canvas, and your headboard transforms for the cost of a yard of fabric. No other build on this list gives you that level of flexibility for that price.
8. The Rug Headboard
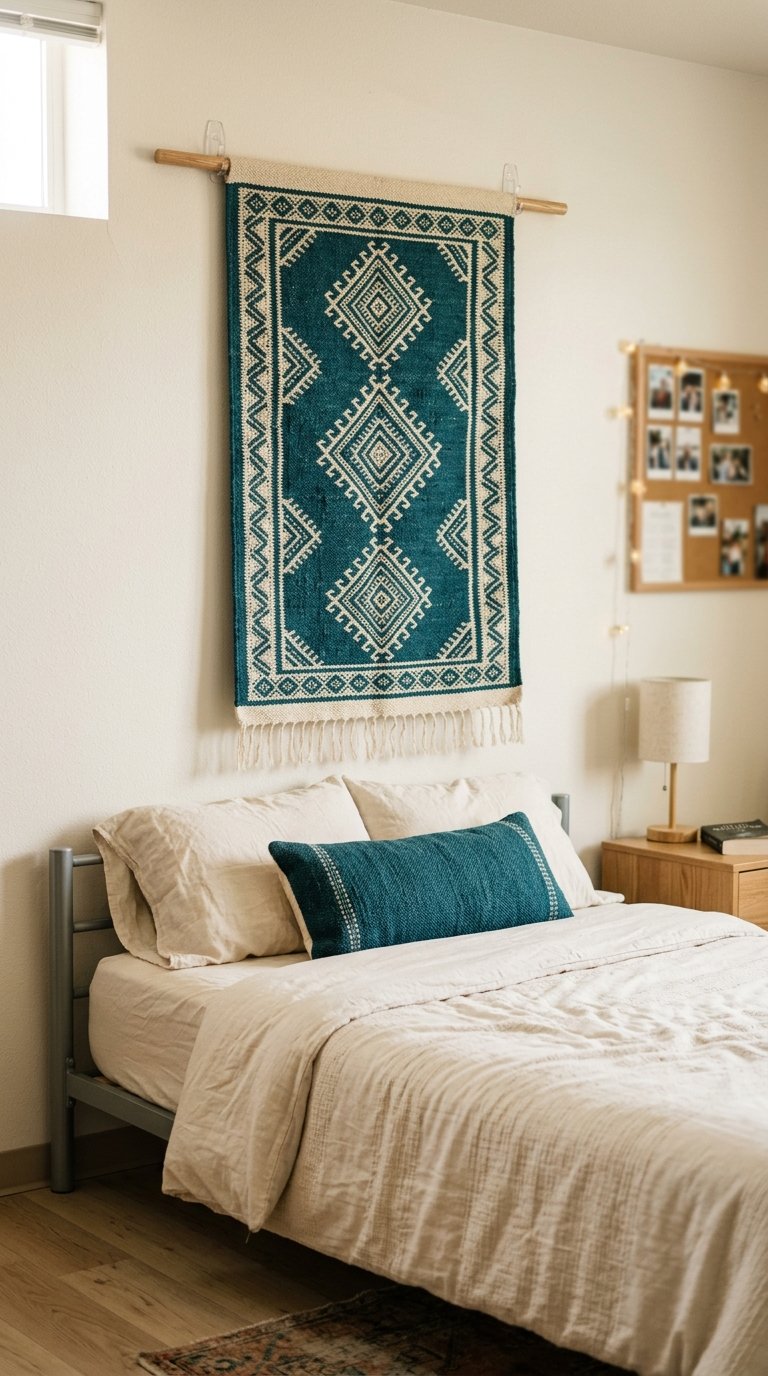
Hanging a rug on the wall behind your bed is one of the most underrated dorm headboard moves, and it solves a problem most other ideas do not: sound absorption. Dorm walls are thin, and a fabric rug hung behind your head absorbs noise from the hallway and neighboring rooms better than any hard-surface headboard. A woven or flatweave rug in a 3×5 or 4×6 size hangs from a rug display rod or heavy-duty Command hooks and sits at exactly the right height above the mattress.
Budget rug options at most home retailers start at $20 for a 3×5 size. The visual effect reads as intentional and bohemian, and the texture adds warmth to a dorm wall in a way that flat art prints cannot match. Choose a rug with a pattern that anchors your color palette, and every other decorating decision in the room becomes easier because the headboard wall already tells the viewer what the room is about. This is a dual-purpose solution that earns its place in the tightest dorm budgets.
9. The String Lights Headboard
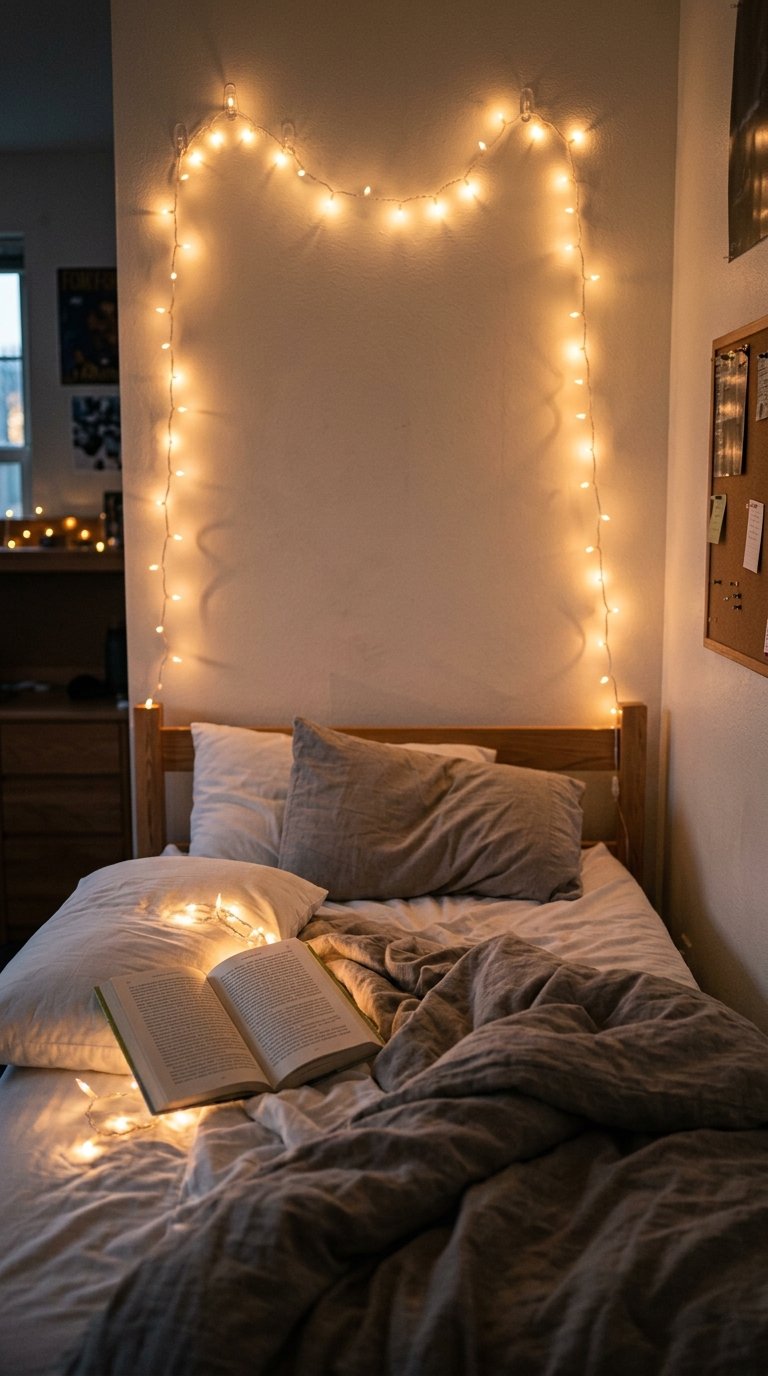
Two vertical strips of warm white string lights hung from Command hooks on either side of your bed create a glowing headboard effect that doubles as your primary ambient lighting. Dorm overhead lighting is notoriously harsh and unflattering. A pair of LED string lights mounted behind your bed provides warm, directional light that makes the space feel intentional and cozy without wiring anything into the ceiling.
A set of two 10-foot LED string light strands costs under $15 at most retailers. Pin them to the wall in a loose arch above your pillow line, let them drape slightly, and the effect is immediate. This works especially well in rooms with no window near the bed, where the light from the strands also compensates for the absence of natural light at the head of the bed. It is the cheapest build on this list and one of the highest-impact ones in terms of how it changes the feel of the room after dark.
10. The Vinyl Wall Decal Headboard
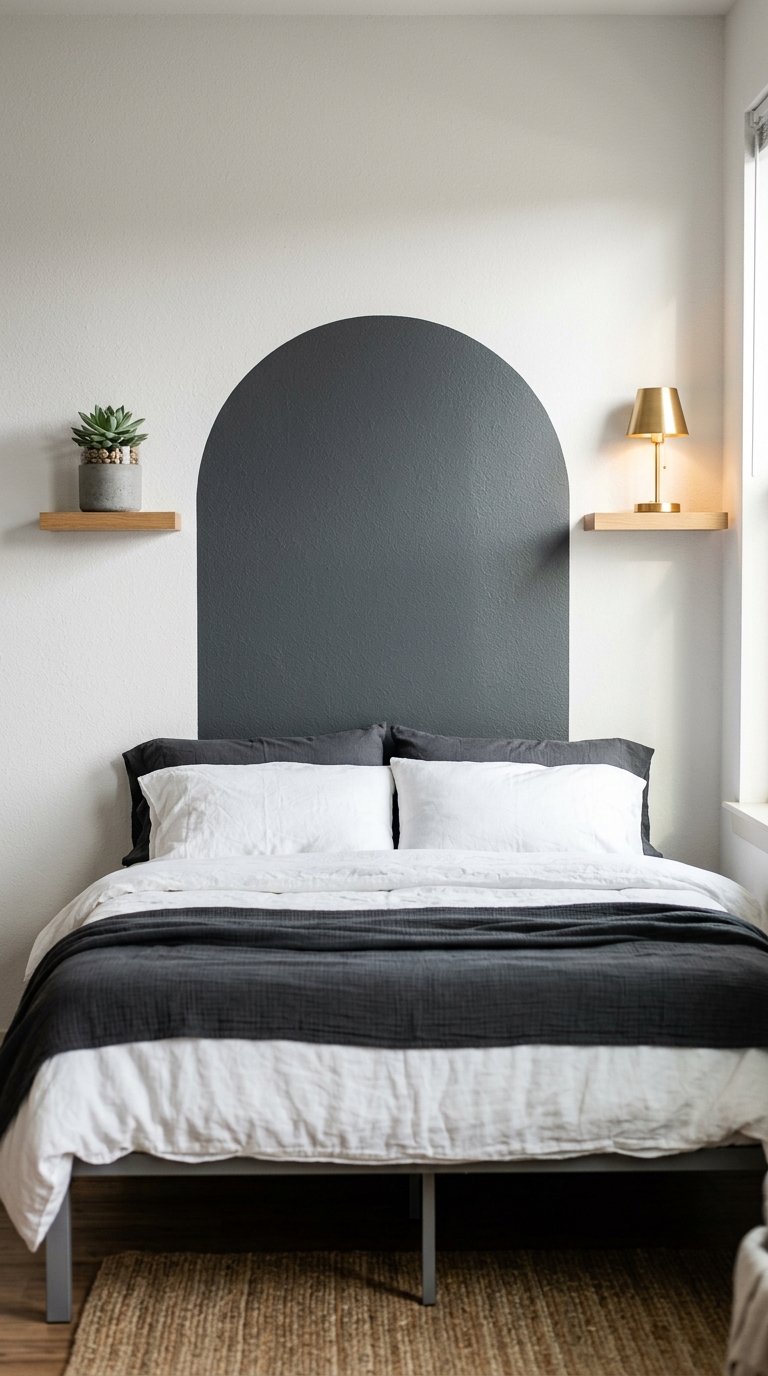
Vinyl wall decals designed to mimic the shape of a headboard apply directly to the wall in under 10 minutes, cost between $15 and $30, and peel off completely at the end of the year without leaving residue. You position the decal centered above your mattress, smooth it onto the wall from the center outward to remove air bubbles, and the room immediately looks like it has a built-in headboard. Decals come in arched, rectangular, scalloped, and ornate headboard shapes.
This is the right choice if you want zero setup time, zero tools, and zero mess. The limitation is that decals are two-dimensional, so the effect reads as flat compared to upholstered or textured options. Compensate by layering it with a large mirror or some floating shelves on either side of the decal to add dimension to the wall. The decal anchors the composition and the surrounding elements give it depth. Total cost for decal plus two small shelves stays under $50.
11. The Scrapbook Paper Headboard
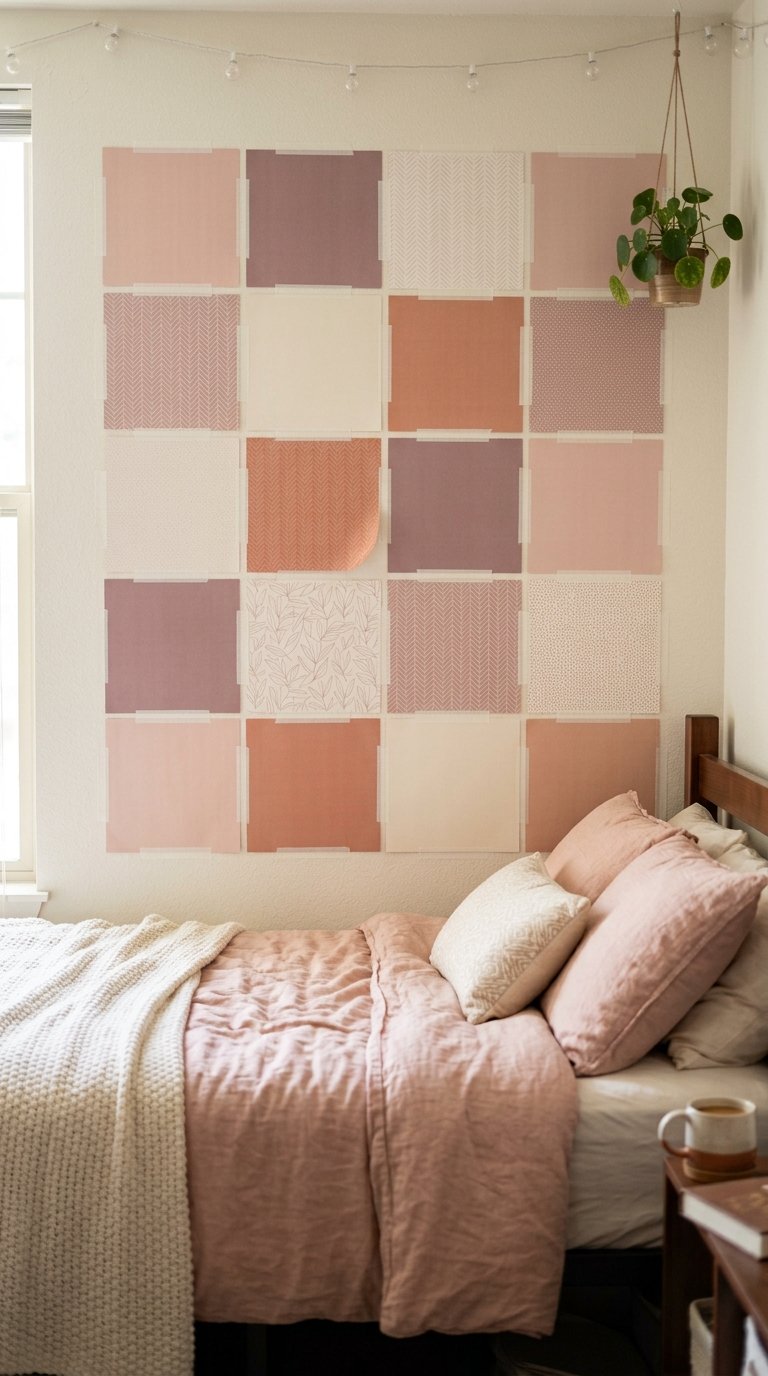
Tape a grid of scrapbook paper sheets directly to the wall behind your bed in a pattern that covers the headboard zone. A 4×5 grid of 12×12 inch sheets covers roughly 48×60 inches, which frames a twin XL bed beautifully. Choose papers in a coordinated color palette, alternate patterns and solids, and secure each sheet with removable washi tape along the edges. The result looks like custom wallpaper and costs around $10 to $15 in materials.
This is the most frequently updated headboard idea on the list because swapping papers takes five minutes. Change the palette for a new semester, a new mood, or a new roommate situation without spending more than a few dollars. Scrapbook paper comes in thousands of patterns at craft stores, and you pick a 12×12 sheet pack in your chosen theme for under $10. Nobody walking into your room guesses the material. They see a styled accent wall. The gap between what it looks like and what it cost is the entire point.
12. The Wood Pallet Headboard
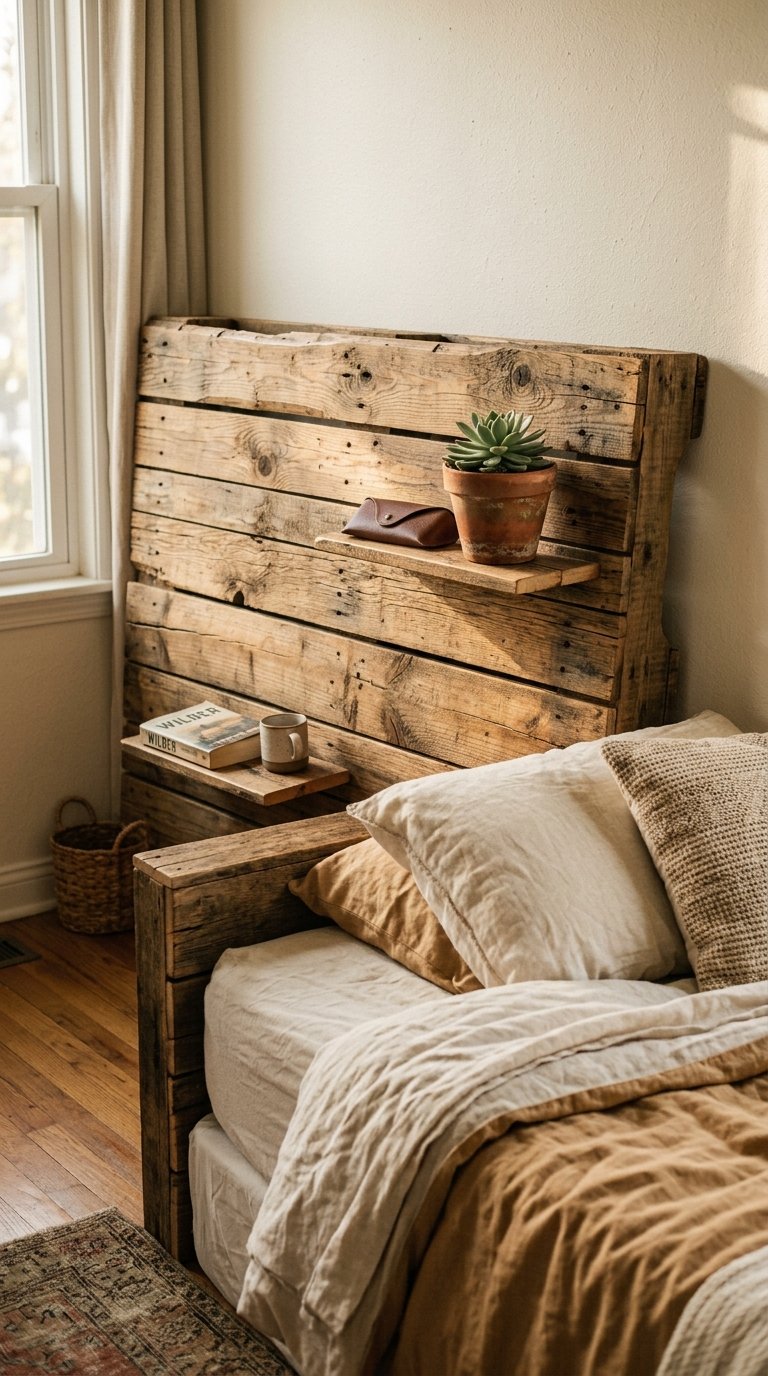
Free wood pallets from local businesses, grocery stores, or home improvement stores give you the raw material for a rustic, textured headboard that costs nothing but time. Sand the pallet smooth, apply a wood stain or paint in your chosen tone, and either wedge the finished pallet between your mattress and the wall or hang it using heavy-duty picture rail hardware. The natural wood grain creates a warm, organic backdrop that no other material on this list replicates.
The build takes a full weekend including drying time, which makes it the most time-intensive option here. The payoff is a headboard with genuine material presence that looks like a $300 piece from a furniture boutique. Seal the wood with a clear matte polyurethane coat so no splinters transfer to your bedding. If you want to go further, attach small wooden ledges to the pallet face for a headboard that also holds your phone, a small plant, and a reading light.
13. The Curtain Headboard
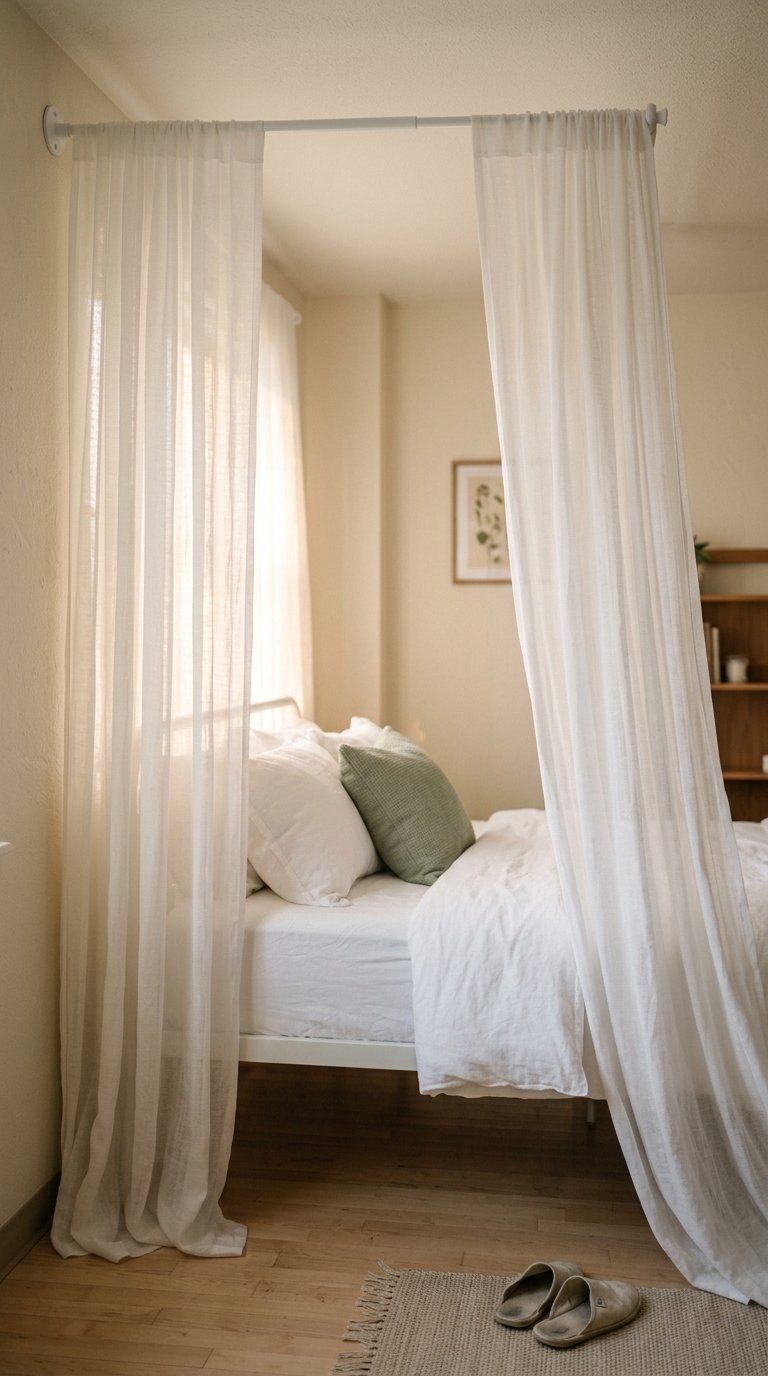
Floor-length curtain panels hung from a tension rod or a ceiling-mounted Command rod create a dramatic headboard effect that works especially well in rooms with higher ceilings. You mount the rod above the bed, hang two panels so they frame the head of the bed on either side, and let them fall to the floor. The curtains create a canopy-like structure that encloses the bed visually and makes a narrow dorm room feel more defined and intentional.
Curtain panels at most budget retailers start at $12 per panel for a 63-inch length. Sheer white panels create an airy, soft effect. Bold patterned panels create a graphic statement. The tension rod version requires no wall installation at all if your dorm walls are close enough together, though most students use a single Command hook at the top center of the wall to keep the rod in position. This build transforms the entire character of the room, not just the headboard wall.
14. The Map Decoupage Headboard
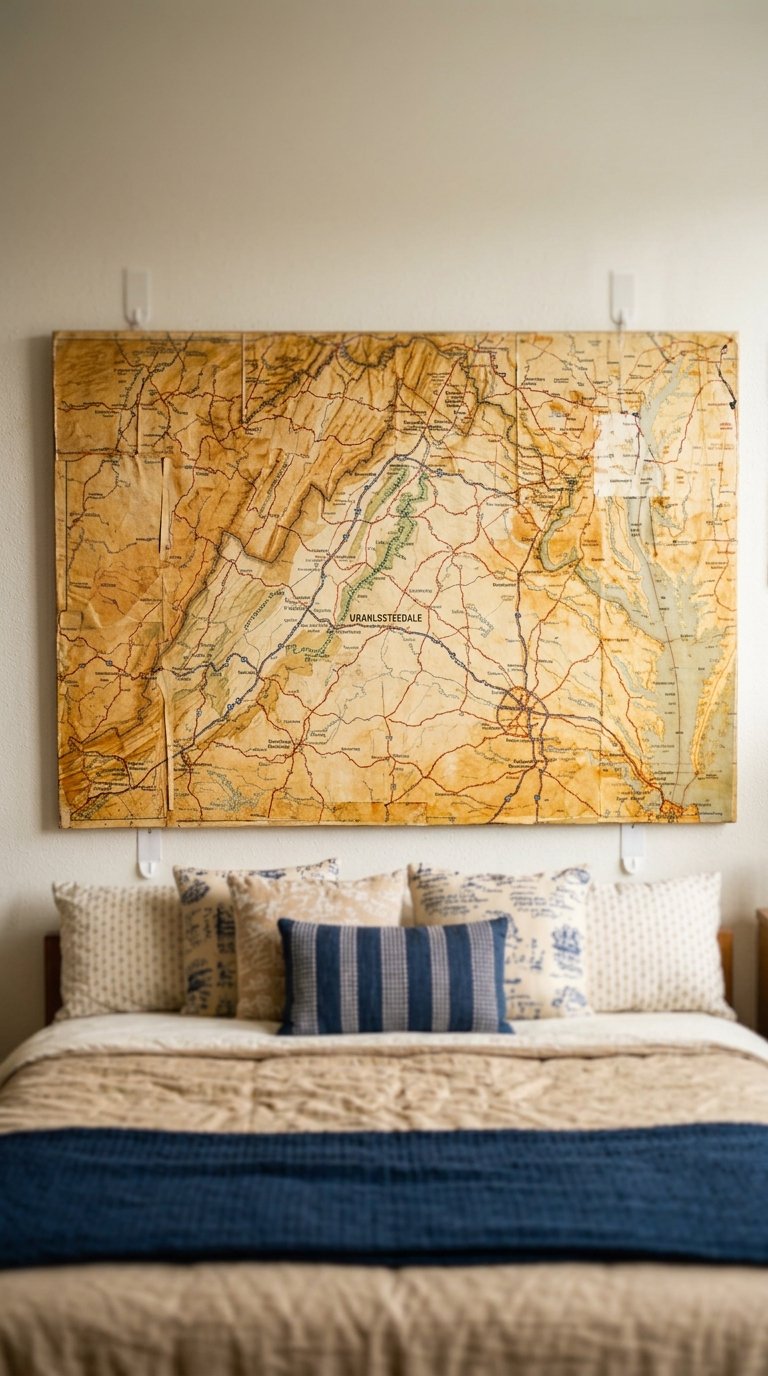
Paper road maps or printed vintage maps adhere to a plywood board or directly to the wall using decoupage medium, creating a one-of-a-kind headboard with a travel theme that works in any color scheme. Apply the decoupage medium to the surface, lay the map sections down in your chosen arrangement, smooth out air bubbles, and seal the entire surface with a final coat of decoupage medium. The finished surface is hard, flat, and durable.
This build costs between $15 and $25 depending on whether you use a plywood base or apply directly to the wall with a removable decoupage formula. Free road maps are available at most visitor centers, AAA offices, and online via public domain archives. If you choose a specific country, city, or region that means something to you personally, the headboard tells a story every person who walks into your room will ask about. That conversation value is worth more than the $20 the whole project costs.
15. The Rainbow Foam Headboard
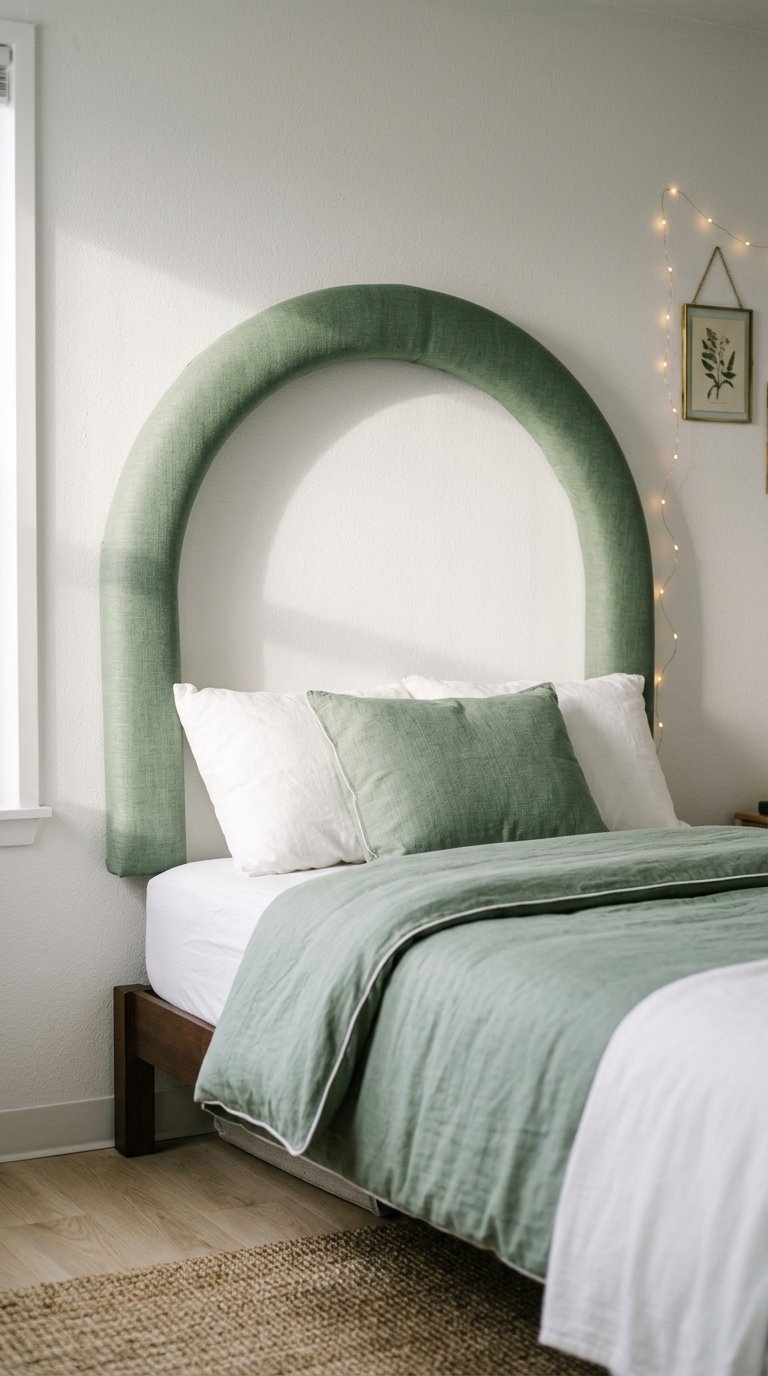
HGTV published a tutorial for a padded rainbow-shaped headboard using fabric, pipe insulation foam, and foam board that weighs almost nothing and hangs from adhesive strips without drilling. You shape the foam board into an arch or rainbow profile, wrap pipe insulation foam along the curved edges to create a padded border, cover the entire form with your chosen fabric, and hang it centered above your pillow line. The result is a sculptural, three-dimensional headboard that no pre-made product replicates.
Total materials cost runs between $25 and $40. The lightweight construction means standard Command strips rated for 5 lbs hold it without issue. This build suits anyone who wants a headboard with a distinctive silhouette rather than a rectangular panel. The curved top edge softens the hard angles of a typical dorm room and photographs extremely well for room reveal posts. Choose a fabric in a solid bold color so the shape reads clearly against the wall rather than getting lost in a busy pattern.
16. The Macrame Wall Hanging Headboard
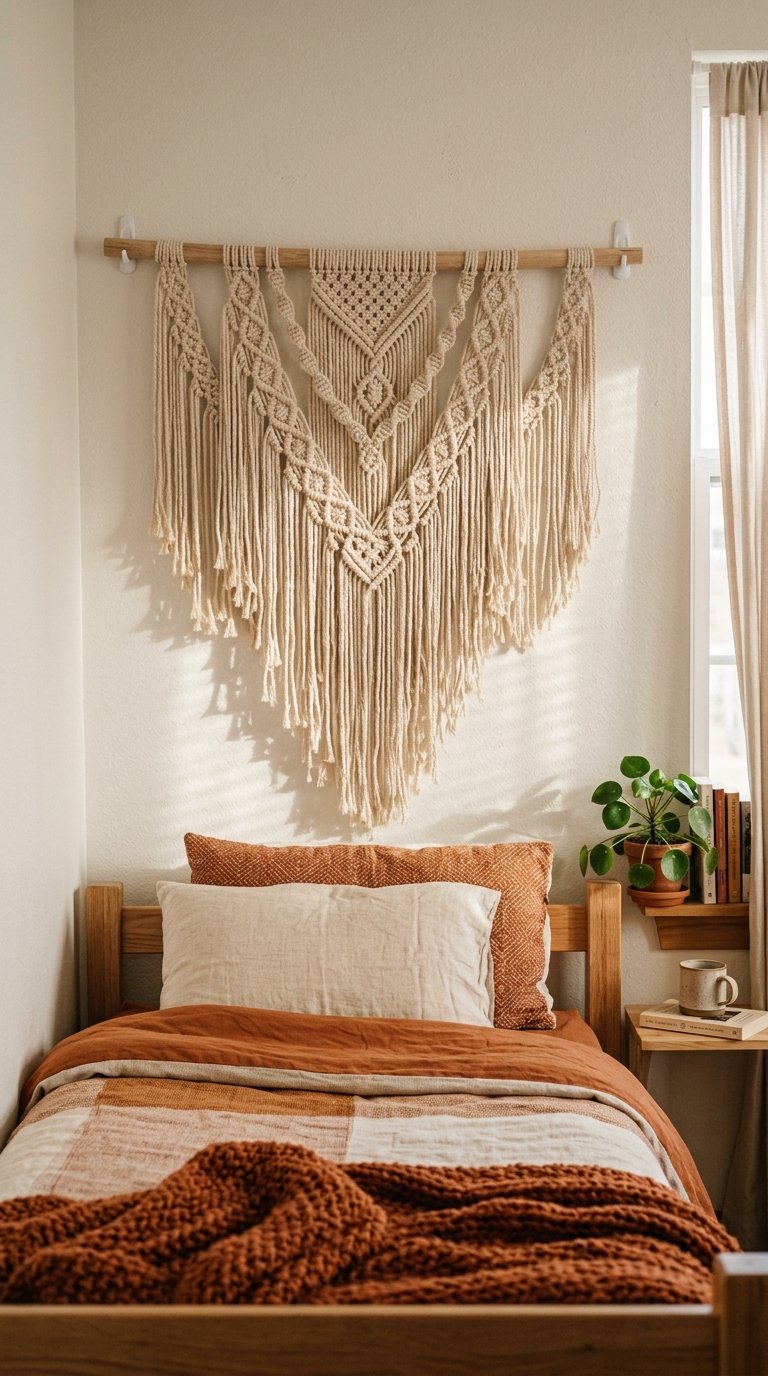
A large macrame wall hanging mounted above your bed functions as a textural, handmade headboard that adds dimension and warmth to a plain wall. You make your own using macrame cord and a wooden dowel rod following any basic square knot tutorial, or you buy a pre-made piece sized 36 to 48 inches wide starting at around $25 from most online marketplaces. The natural cotton rope texture adds a tactile quality that no flat headboard replicates.
The DIY version takes four to six hours for a beginner and costs around $15 in macrame cord and a $3 dowel rod from the hardware store. Hang the dowel from two Command hooks rated for 7 lbs each. A macrame headboard pairs well with warm wood tones, terracotta accents, and linen bedding, which together create the boho aesthetic that dominated dorm decor in 2024 and shows no sign of fading in 2025. Of all 16 builds on this list, this one feels the most handmade in the best possible way, because it is.
Final Thoughts
Your dorm bed is the largest piece of furniture in the room and the first thing every visitor sees. Leaving the wall behind it blank is a missed opportunity that costs you nothing to fix and takes a single weekend to address. Every build on this list works within dorm rules, stays within a $60 budget, and removes cleanly at the end of the year without wall damage. Start with the build that matches your skill level and the tools you already own. The plywood upholstered headboard delivers the most polished result. The string lights deliver the fastest setup. The bookshelf headboard solves the most problems in one move. Pick one this week and stop waking up to a blank wall. :/